Home Donate New Search Gallery How-To Books Links Workshops About Contact
The LEICAMETER
© 2010 KenRockwell.com. This page best with Corporate S regular and bold activated.
Intro LEICAMETER 2 M MC MR MR-4 Usage Recommendations

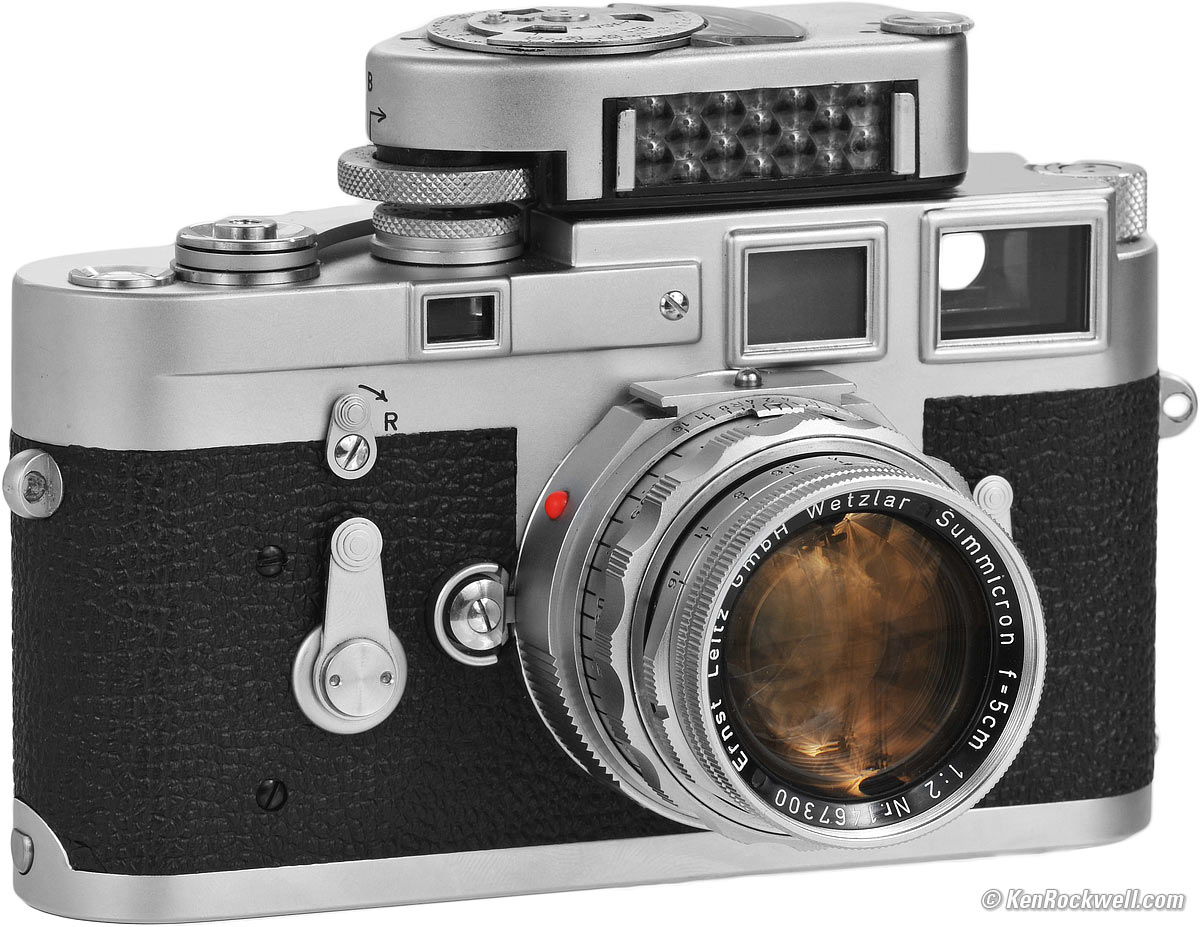
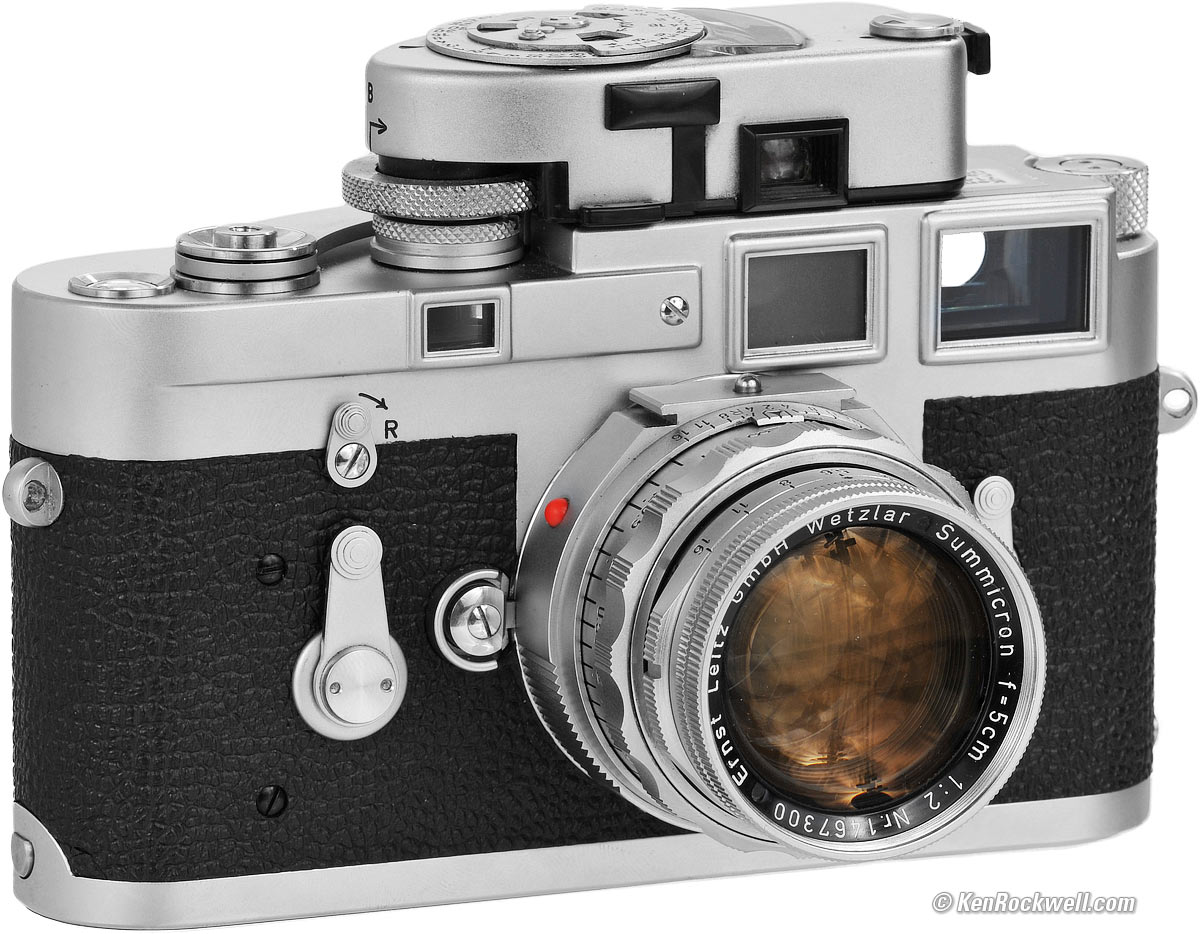
LEICAMETER MC atop a 1963 LEICA M3 with LEICA SUMMICRON 50mm f/2 with near-focusing range. enlarge. This free website's biggest source of support is when you use any of these links, especially this direct link to the M3 at eBay (see How to Win at eBay), and you also can get them from Adorama and OC Camera. It helps me keep reviewing these oldies when you get yours through these links, thanks! Ken.
November 2010, December 2022 LEICA M3 Review More LEICA Reviews LEICA Lens Reviews
LEICAMETER Sample Images: Route 66, February 2010
Introduction top
Intro LEICAMETER 2 M MC MR MR-4 Usage Recommendations
Leica has been selling LEICA-branded LEICAMETER light meters for use with its cameras since it first announced them in LEICA Photographie magazine in the Spring of 1951.
These have been made by Metrawatt A.G. of Nürnberg for LEICA.
Universal LEICAMETERs
The first LEICAMETER and LEICAMETER 2 have simple, universal feet that slide into any camera's accessory shoe.
THey have no connection to any camera settigns. You read them and have to transfer both aperture and shutter speed settings to the camera.
Back in the day we called these "uncoupled" meters.
LEICAMETERs for the LEICA M series
The LEICAMETER M, MC, MR and MR-4 are dedicated to couple to the shutter-speed dials of the LEICA M3, LEICA M2, LEICA M1, LEICA M4, LEICA M4-2 and LEICA M4-P. These are "coupled" meters that are connected to the camera's shutter speed dial and therefore save you any need to transfer shutter speeds form meter reading to camera; it's already done.
Any of these four meters is interchangeable among any of these six cameras. It's easy to identify a LEICA M worthy of the LEICAMETER: it has a small circle cut out of the center of its shutter dial, and a small slot cut next to the 1/2 setting to couple with the LEICAMETER's two pins.
It doesn't matter if your camera and LEICAMETER use a different shutter speed scale (scientific or geometric), because the knobs of the LEICAMETERs rotate continuously, and LEICA is smart enough to put speeds on both camera and meter dials at their correct logarithmic positions. Therefore, any of the M meters works perfectly on any of the M cameras to which it will mount, even if the camera's clicks correspond to different places than the numbers on the meter.
Shutter Speed Markings
The dials of all LEICAMETERs rotate freely and without clicks. They are quite analog and do not work in steps.
The shutter speed markings on all LEICAMETERs are purely cosmetic. These are analog meters which measure and can be set continuously to any fractional ISO, aperture or shutter speed in-between any clicks or markings.
It doesn't matter if it's calibrated for 1, 2, 5, 10, 25..., or 1, 2, 4, 8, 15, 30... shutter speed sequences. If the camera and meter use different sequences, the meter still reads and couples perfectly because it's purely analog and meters without steps, however the camera's shutter-dial clicks will click in-between markings if you use a coupled meter on a camera with different speeds. Exposure is still completely accurate.
For instance, if a coupled meter reads 10, 25, 50, 100, 200 and you use it on a newer camera with clicks at 15, 30, 60, 125, 250, with the camera at its 125 click the meter will indicate a third of a stop away from 100 (where 125 should be) — and the meter reading will be dead-on.
The dial of a coupled LEICAMETER that's not attached to a camera rotates freely. The internal electronic analog computer is analog and computes continuously without steps for the exact positions of the shutter speed dials. In fact, it works even between clicks, and if your camera offers variable shutter speeds between clicks (check your original manual; many mechanical LEICAs offer accurate variable speeds in-between many marked clicks), it’s all accurate.
Even if the markings don’t match your camera, it’s all accurate. Simply read in-between the meter's markings and you're golden.
All LEICA lenses may be set to any intermediate aperture. You don't have to stop at the clicks.
Which is best?
For the LEICA M, either of the LEICAMETER MR or MR-4 are superb. They read an optimum and well-defined angle, they hold their readings, and work over a very wide light range with no need for boosters.
Get either the LEICAMETER MR or LEICAMETER MR-4 for a LEICA M3, LEICA M2 or LEICA M1. Get only the LEICAMETER MR-4 for the LEICA M4, LEICA M4-2 or LEICA M4-P because its reading button is designed to stay clear of these camera's rewind crank.
The LEICAMETERs top
Intro LEICAMETER 2 M MC MR MR-4 Usage Recommendations
The LEICAMETER (1951-) top
The first LEICAMETER came out in 1951.
It was an uncoupled meter; you had to transfer both aperture and shutter speed readings from the meter to your camera.
The LEICAMETER 2 top
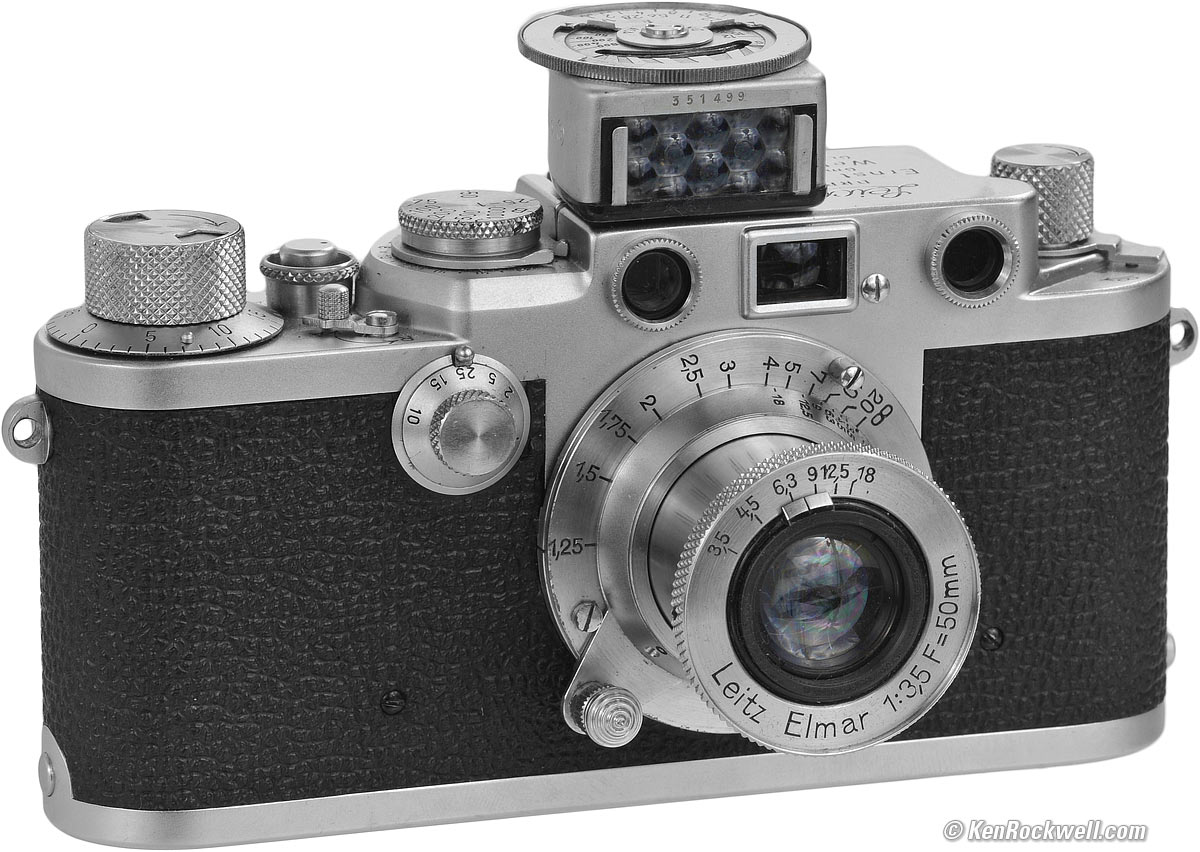
LEICAMETER 2 atop a LEICA IIIf with 50mm f/3.5 ELMAR. enlarge.
LEICAMETER 2 atop a LEICA IIIf with 50mm f/3.5 ELMAR. enlarge.
The second LEICAMETER is called the LEICAMETER 2.
It is a tiny, shoe-mounted selenium meter weighing but 1.015 oz. (28.8g), complete with its mounting foot.
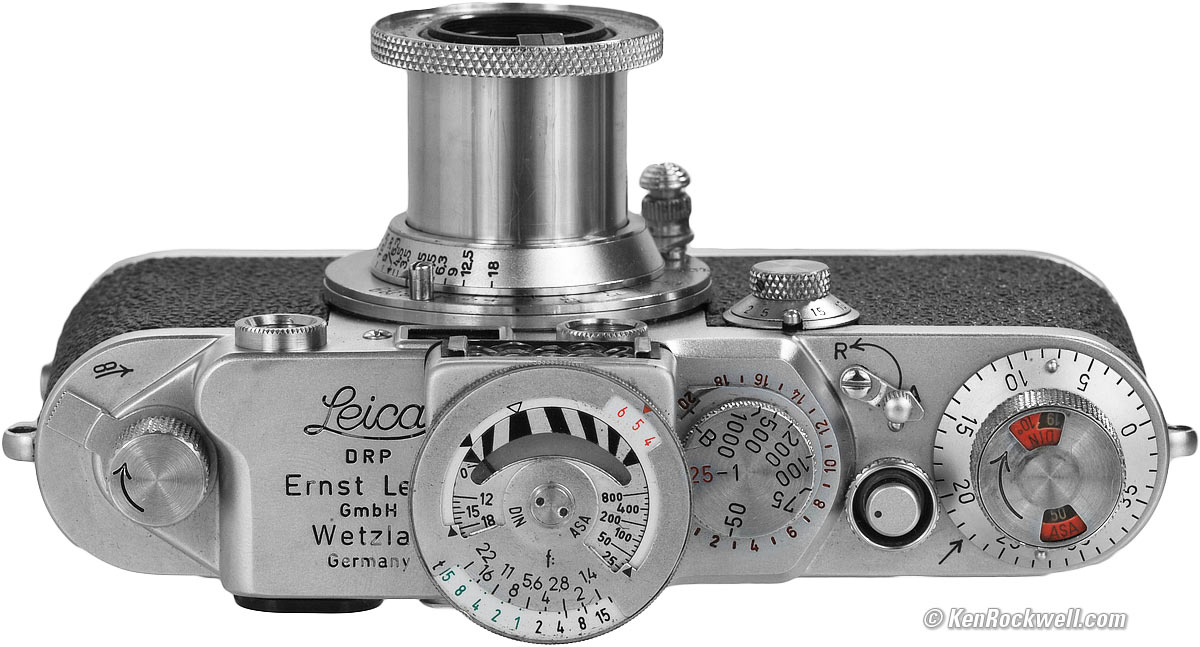
There are three sets of mounting holes on its foot. Have your technician install the foot in either of its center, left or right positions to place your LEICAMETER 2 so that it does not hide any of your LEICA's controls. For instance, in the example above, the LEICAMETER 2's foot is attached to the LEICAMETER 2 through the right set of holes (as seen upside-down), so the LEICAMETER 2 is offset to the left, allowing us to read and set the shutter dial, which otherwise would be covered.
It is entirely self-powered, never needing any batteries.
Its measuring range is LV 6 - 18. Its calculator dial reads from two minutes (120s) to 1/1,000.
A booster cell was available for low light, which slipped over the LEICAMETER 2's own smaller cell. With the booster, its measuring range is LV 3 - 15.
You had to transfer both aperture and shutter speed readings from the meter to your camera.
The LEICAMETER M (1954-) top
This first meter dedicated to the LEICA M series uses a flip-up door in front of its selenium cell to activate its low range. This meter generates its own electricity, and never needs any batteries.
There is also low-light booster available.
Its shutter speeds read in the scientific scale (1 - 2 - 5 - 10 - 25 - 50 - 100 - 250 - 500 - 1000), correlating with the first LEICA M3s. Regardless of its scale numbers, it works perfectly with all of the six LEICA models on which it fits.
The LEICAMETER MC (-1965) top
LEICAMETER MC atop a 1963 LEICA M3 with LEICA SUMMICRON 50mm f/2 with near-focusing range. enlarge.
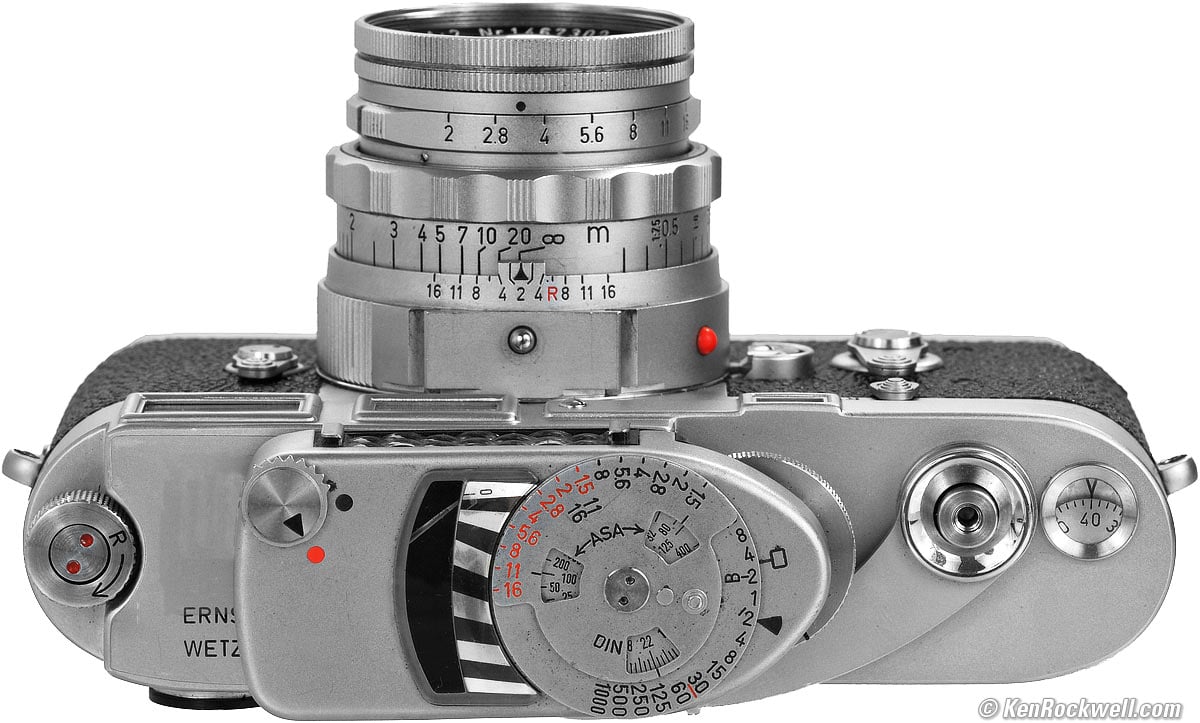
Top view, LEICAMETER MC atop a 1963 LEICA M3 with LEICA SUMMICRON 50mm f/2 with near-focusing range. enlarge.
This second selenium-cell meter for the LEICA M uses an electronic switch to select between high and low ranges. Gone is the flipping door. It also runs forever without batteries.
Apertures read to f/1.5, as those were the fastest lenses in its day. Shutter speeds read from two minutes (120s) to 1/1,000.
High range reads from LV 11 - 20.
Low range reads from LV 5 - 14.
The dedicated low-light booster reads from LV 2 - 11.
With the weird choice of ranges, you're always in the Low range except in the brightest direct sunlight.
The LEICAMETER MC weighs 2.665 oz. (75.55g).
The LEICAMETER MR (1965-1967) top
LEICAMETER MR atop a 1963 LEICA M3 with LEICA SUMMICRON 50mm f/2 with near-focusing range. enlarge.
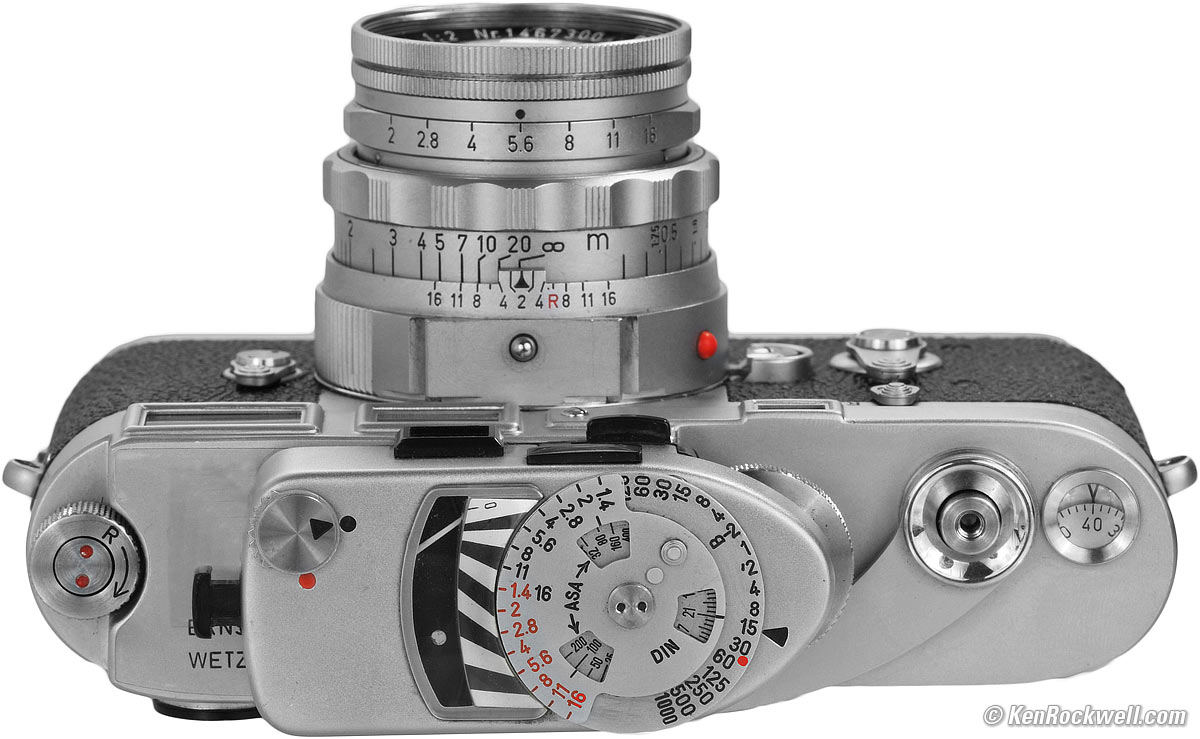
Top view, LEICAMETER MR atop a 1963 LEICA M3 with LEICA SUMMICRON 50mm f/2 with near-focusing range. enlarge.
Announced in issue 5, 1963, Leica Photographie, the new LEICAMETER MR uses an ultra-sensitive CdS cell to detect light, and drives the needle with a Wein EPX-625 cell.
The CdS cell is hidden behind the small lens on front, so it sees an angle-of-view similar to a 90mm lens.
This LEICAMETER MR has a long T-shaped button on the left. Press in this button to take a meter reading, and when released, the needle is locked to make it easy to read in any position. The earlier LECAMETERS let their needles float around unlocked.
This locking reading is extremely helpful: hold the button for a second or two while framing your photo, release the button, read the meter at your convenience, set the f/stop on the lens, and shoot. With earlier meters, you had to try to hold the camera as close to taking position as possible while reading the live needle.
Since the LEICAMETER MR only uses the battery as the button is pressed, it lasts a long time. Leica's manual claimed about "two years," but I've bought decades-old meters with original mercury batteries in them that still work perfectly.
Leica rated the mercury PX-13 cell to last 2 years, however I've unearthed LEICAMETER MRs with decades-old PX-13 cells that are still working! The LEICAMETER only draws current for the moment you'r pressing the button, so there is very little drain.
Today, the Wein EPX-625 cell lasts about a year before losing interest.
The apertures now read to f/1.4, and the shutter speeds read from two minutes (120s) to 1/1,000.
High range reads from LV 9 - 18.
Low range reads from LV 2 - 10.
It weighs 2.665 oz. (75.5g), with a Wein EPX-625 cell.
The LEICAMETER MR-4 (1967-1987) top

LEICAMETER MR-4 atop a 1963 LEICA M3 with LEICA SUMMICRON 50mm f/2 with near-focusing range. enlarge.
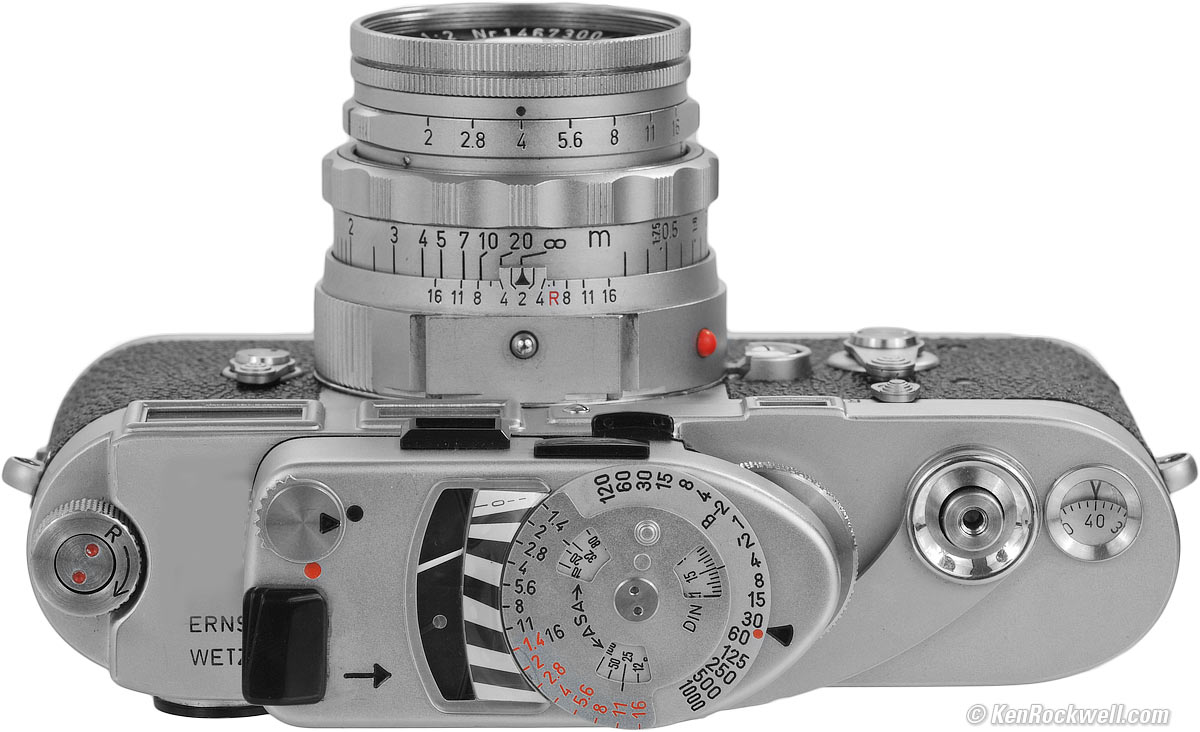
Top view, LEICAMETER MR-4 atop a 1963 LEICA M3 with LEICA SUMMICRON 50mm f/2 with near-focusing range. enlarge.
The LEICAMETER MR-4 came out in 1967 with the LEICA M4.
The LEICAMETER MR-4 is the same as the LEICAMETER MR, except that its button is relocated to the top to avoid the LEICA M4's rewind crank.
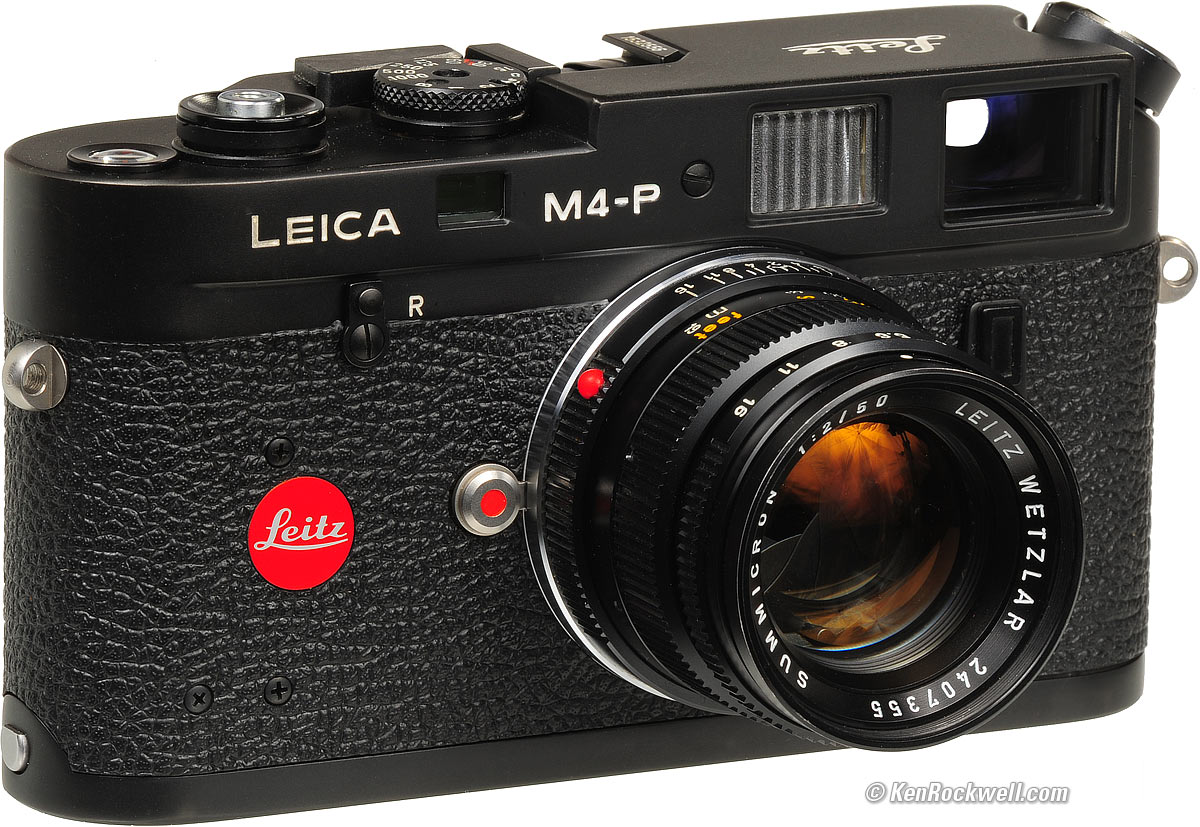
The LEICAMETER MR-4 was changed from chrome to black in 1980 to go with the black LEICA M4-P.
The aperture scale reads f/1.4 to f/16, and the shutter speeds read from two minutes (120s) to 1/1,000.
High range reads from LV 9 - 18.
Low range reads from LV 2 - 10.
The LEICAMETER MR-4 weighs 2.690 oz. (76.2g), with a Wein EPX-625 cell.
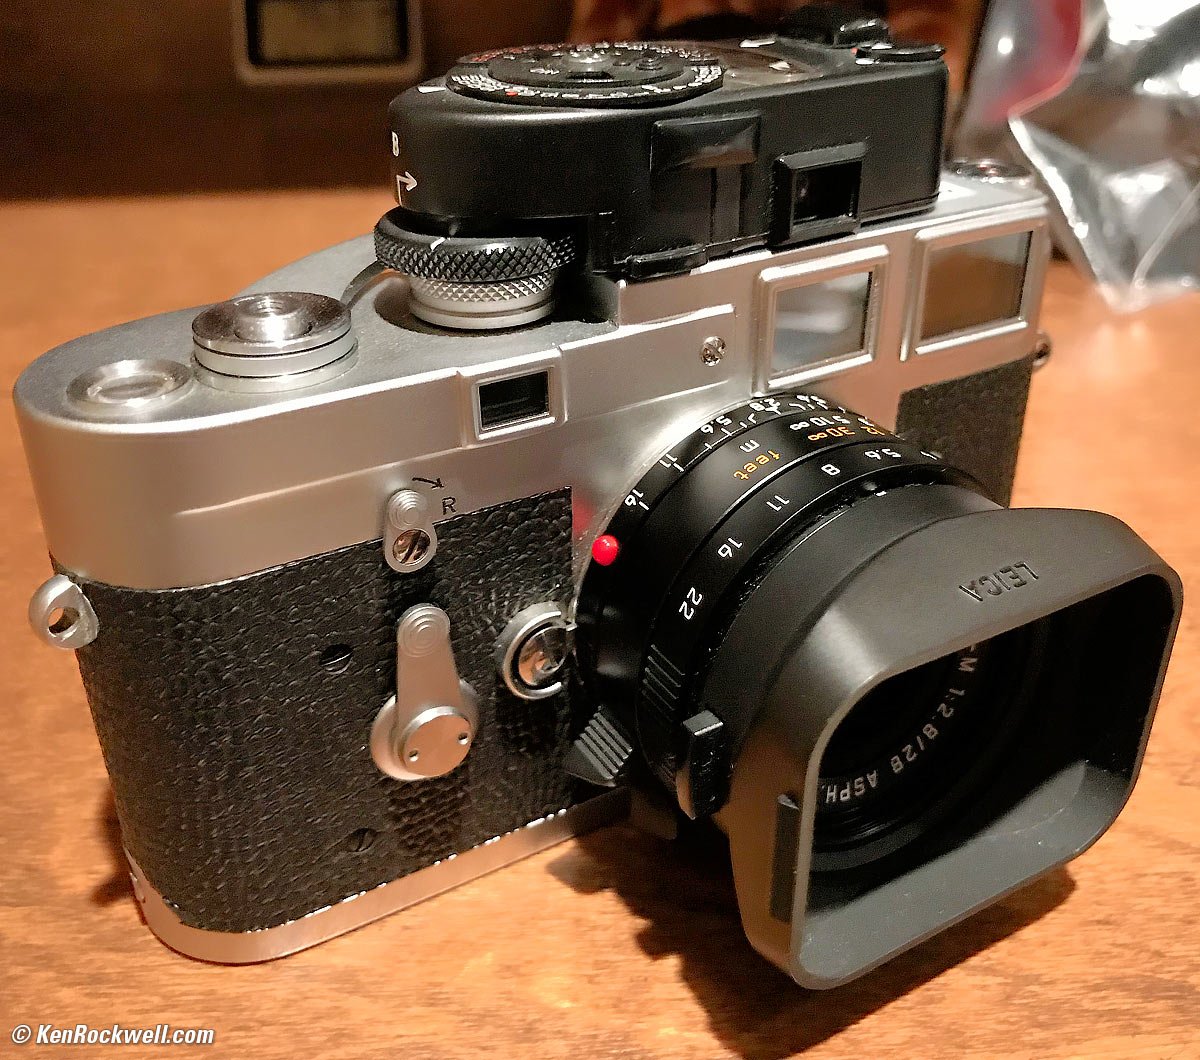
LEICA 28mm f/2.8 ASPH on LEICA M3 mit LEICAMETER MR-4. bigger.
Usage top
Intro LEICAMETER 2 M MC MR MR-4 Usage Recommendations
Batteries Meter installation Shooting
Most of these meters need no batteries; their selenium cells are self-powered.
The LEICAMETER MR and LEICAMETER MR-4 each use a common mercury PX-625 cell.
If you can't get the real mercury cells, the Wein EPX-625 cells work just as well.
Don't use alkaline (625A) cells, as their slightly different voltage can lead to slight underexposure. Honestly though, if you use an older 625A cell which has lost some of its initial voltage, I've had one running for over two years in one of my LEICAMETERs, and it works perfectly.
Battery Installation usage top
To install a cell in a LEICAMETER MR or LEICAMETER MR-4,
1.) Remove the LEICAMETER from the LEICA.
2.) Look at the bottom, follow the directions on the sticker, and slide the battery cover carefully to the right.
3.) Pop in a new cell.
4.) Close the cover even more carefully, pressing it down as well as to the left. It is riding on a very thin groove that holds it down.
With a LEICAMETER MR or LEICAMETER MR-4, slide the switch on the front of the meter away from the shutter dial. The needle should rest in the dot.
If it reads below, your cell is weak or dead.
If it reads above, you've used a new 625A alkaline cell instead of the proper mercury 625 or Wein EPX-625.
Installation on a LEICA M usage top
The meter slides in and out of the shoe from behind, and the LEICAMETER's large knob that couples to the shutter-speed dial lifts up to clear, and then comes down to couple to the camera's dial.
The catch is that the LEICAMETER's knob only lifts if the LEICAMETER is set to BULB or slower.
Therefore, to attach the LEICAMETER: usage top
1.) Set your LEICA M to BULB.
2.) Set your LEICAMETER to BULB, lift the shutter knob towards you as you look down at the LEICAMETER's face, and continue to rotate the dial counter-clockwise to slower speeds (like 15 seconds) so that the knob stays retracted (pulled-up).
3.) Slide the LEICAMETER on to the LEICA's accessory shoe.
4.) Rotate the LEICAMETER's knob back towards BULB, at which point the LEICAMETER's knob will drop, and its pins will engage with your LEICA's speed dial.
5.) Rotate the LEICAMETER's knob to the other speeds, and you will feel the detents from the camera's dial. You will also see the camera's dial turning with the LEICAMETER's knob.
To Remove the LEICAMETER: usage top
1.) Set the LEICAMETER to BULB, which of course sets the LEICA to BULB as well.
2.) Lift the LEICAMETER's knob, and continue to rotate it towards the slowest speeds, like 15 seconds. This will decouple the LEICAMETER's knob up and away from your LEICA's speed dial.
3.) Slide the LEICAMETER off your LEICA, towards the rear.
If you store your LEICAMETER set to the very slow speeds, it will be ready to install the next time, as soon as you set your LEICA to BULB.
Intro LEICAMETER 2 M MC MR MR-4 Usage Recommendations
The LEICAMETER and LEICAMETER 2 work like any other stand-alone meter: set your ASA, match the pointer to the corresponding position of the needle, chose an f/stop and shutter speed, set them on your camera, and go.
The LEICAMETER M and LEICAMETER MC work the same way, except that because they are coupled directly to your shutter dial, all you need to do while shooting is to read the f/stop, and set it on your lens. The only bit of caution is to be sure to have the meter pointing properly as you read the live needle.
The LEICAMETER MR and LEICAMETER MR-4 are wonderful: point the camera at your desired subject, press the button for a second or two and release. The LEICAMETER MR or LEICAMETER MR-4 holds the reading, so you can read it in any position, transfer it to your lens, and shoot. You can't make a bad exposure!
It's easy to predict what range to use: with the CdS meters, use HIGH for outdoors, and LOW for indoors or at night. With the selenium meters, the LOW range is usually right for everything except direct sunlight.
I try to leave my LEICAMETERS set to HIGH when I'm done so that I don't needlessly peg the needles of my selenium meters, or blind the CdS cells.
Unlike a Luna-Pro, LEICAMETERs don't automatically change their f/stop scales as you change ranges. Be sure to use the correct color or booster index. It's not much of a pitfall, as usually only the correct scale is showing if you're at an appropriate shutter speed.
When used with filters, be sure to adjust the ASA downwards to take the filter factor into account.
Recommendations top
Intro LEICAMETER 2 M MC MR MR-4 Usage Recommendations
Any of these meters is accurate enough for careful work with color slides, like Fuji Velvia 50. Black-and-white film needs no meter; exposure meters were invented precisely because of the tight exposure requirements of color transparencies. Back in the 1950s, color film cost the equivalent of $20 a shot, discouraging bracketing.
The hard part is buying one that works. I buy these on eBay and take my chances. Gus Lazzari can do amazing things if one of these can be repaired or calibrated.
I greatly prefer either of the CdS models, the LEICAMETER MR or LEICAMETER MR-4 for foolproof semiautomatic exposure setting. They read precise angles-of-view, and their needle locks make them a joy to use.
I find the Wein EPX-625 cells last about a year.
Help me help you top
I support my growing family through this website, as crazy as it might seem.
The biggest help is when you use any of these links to Adorama, Amazon, eBay, Ritz, Calumet and J&R and when you get anything. It costs you nothing, and is this site's, and thus my family's, biggest source of support. eBay is always a gamble, but all the other places always have the best prices and service, which is why I've used them since before this website existed. I recommend them all personally.
If you find this page as helpful as a book you might have had to buy or a workshop you may have had to take, feel free to help me continue helping everyone.
If you've gotten your gear through one of my links or helped otherwise, you're family. It's great people like you who allow me to keep adding to this site full-time. Thanks!
If you haven't helped yet, please do, and consider helping me with a gift of $5.00.
As this page is copyrighted and formally registered, it is unlawful to make copies, especially in the form of printouts for personal use. If you wish to make a printout for personal use, you are granted one-time permission only if you PayPal me $5.00 per printout or part thereof. Thank you!
Thanks for reading!
Mr. & Mrs. Ken Rockwell, Ryan and Katie.
Home Donate New Search Gallery How-To Books Links Workshops About Contact