
October 2017's News
< < back to Today's News

Canon: 1DX II 5DS/R 5D Mk IV 6D II 7D II 80D 77D T6 SL2 Lenses
Sony: A9 A7R3 A7RII A7SII A7II A7 A6500 A6300 A6000 RX10 IV RX10III RX100V Lenses
Nikon: D5 D850 D810 D750 D610 D500 D7500 D5600 D3400 Lenses
All Reviews: Apple Fuji LEICA Zeiss Hasselblad Contax Olympus Pentax
Recommended Cameras Best Cameras Gifts How to Take Better Pictures random
Links: Adorama Amazon B&H Crutchfield eBay Tutorial Videos Infrared Facebook Twitter
Adorama's Daily Deals Amazon's Deals-of-the-Day B&H Deal of the Day Crutchfield's Sales


|


30 October 2017, Monday

Backlit trees at El Capitan Meadow, Yosemite Valley. Nikon D850 HDR Mode hand-held, Nikon 28-300mm VR at 40mm at f/8 at 1/60 at Auto ISO 64. bigger or camera-original © file.
HDR in the D850 doesn't correct for camera motion and works best on a tripod (there's no auto-align feature as Canon has), but hold still with a VR lens and you often can get great results like this.
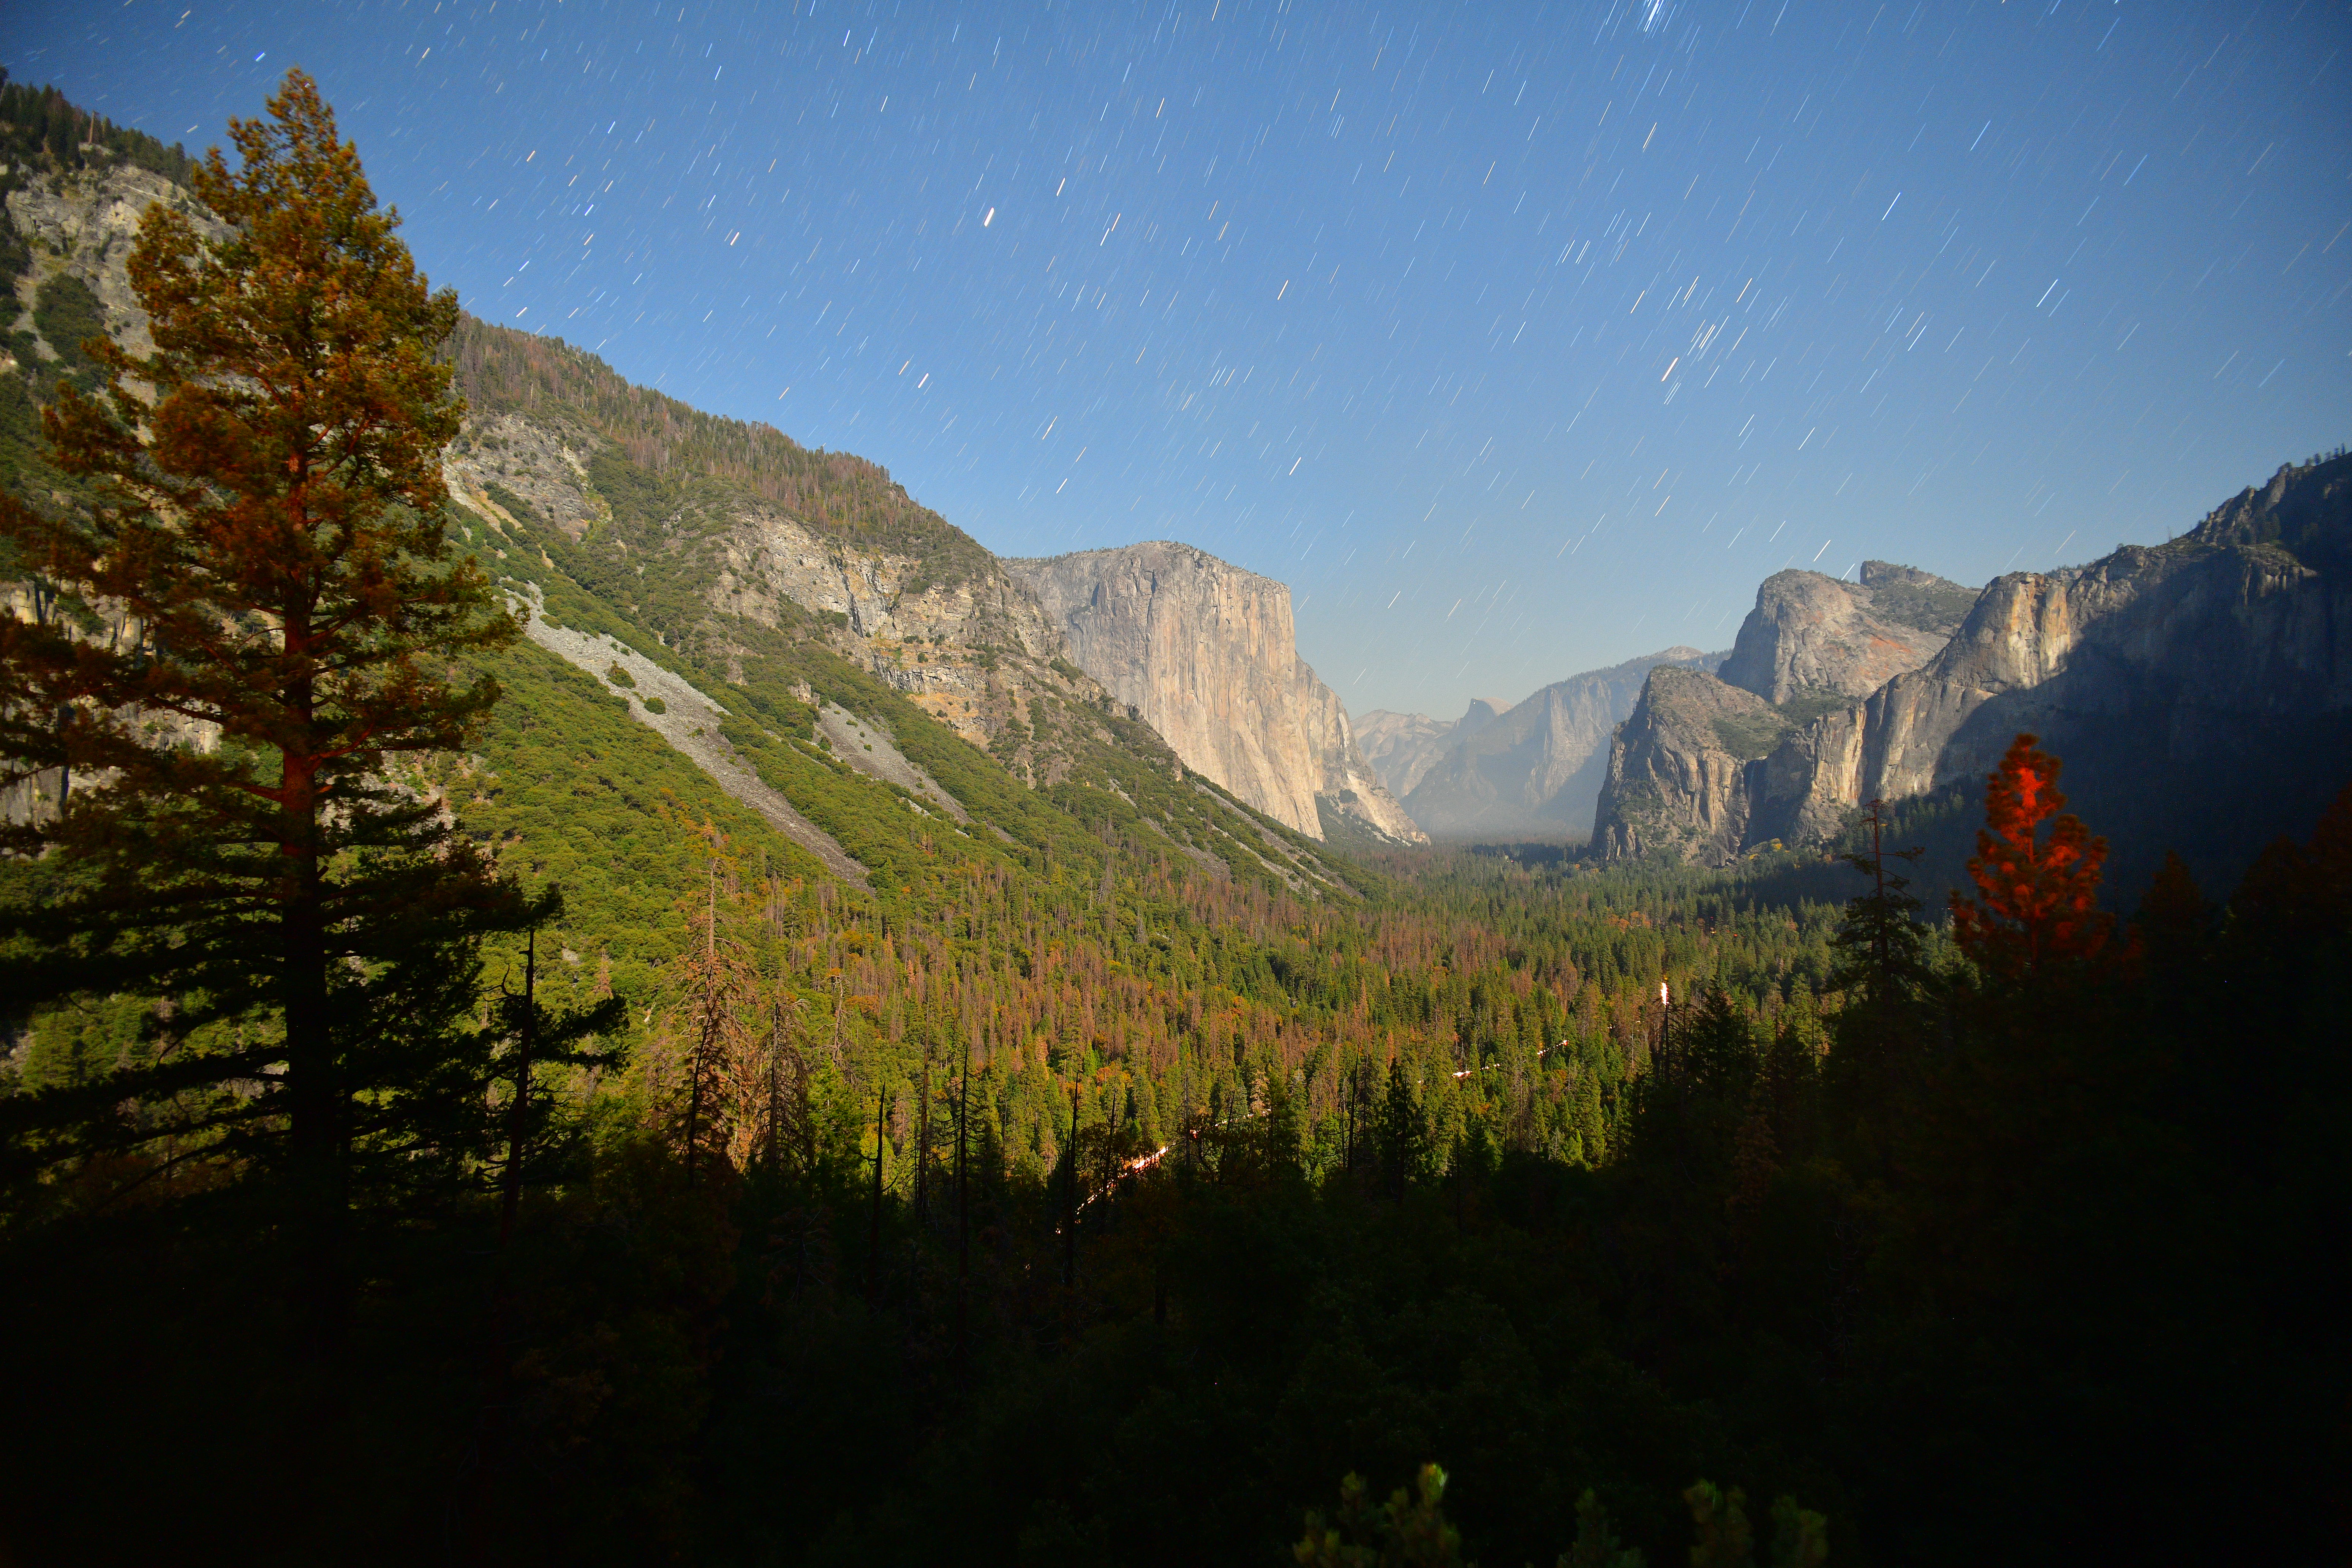
Yosemite Tunnel View at Night. Nikon D850, Nikon 18mm f/2.8 AF-D, f/4 at 4 minutes at ISO 800. bigger or camera-original © file.
The D850 makes time exposures easy: just set the TIME EXPOSURE mode, press the shutter, and press it again whenever you want the exposure to end. No longer do we need to find and attach an expensive remote cord; now we can shoot these any time without vibration or needing mirror lock up. See my D850 User's Guide for how to use the Time Exposure mode.
26 October 2017, Thursday
NEW: Sony A7R Mk III at Adorama.
NEW: Sony 24-105mm f/4 G.
22 October 2017, Sunday
Try again later?
If you see this, just keep hitting RELOAD on your browser till everything comes in.
I have no idea why this is happening again; it's obviously a problem with my hosting company — but they can't see anything wrong.
Sorry about that; I'm an artist, not a computer programmer.
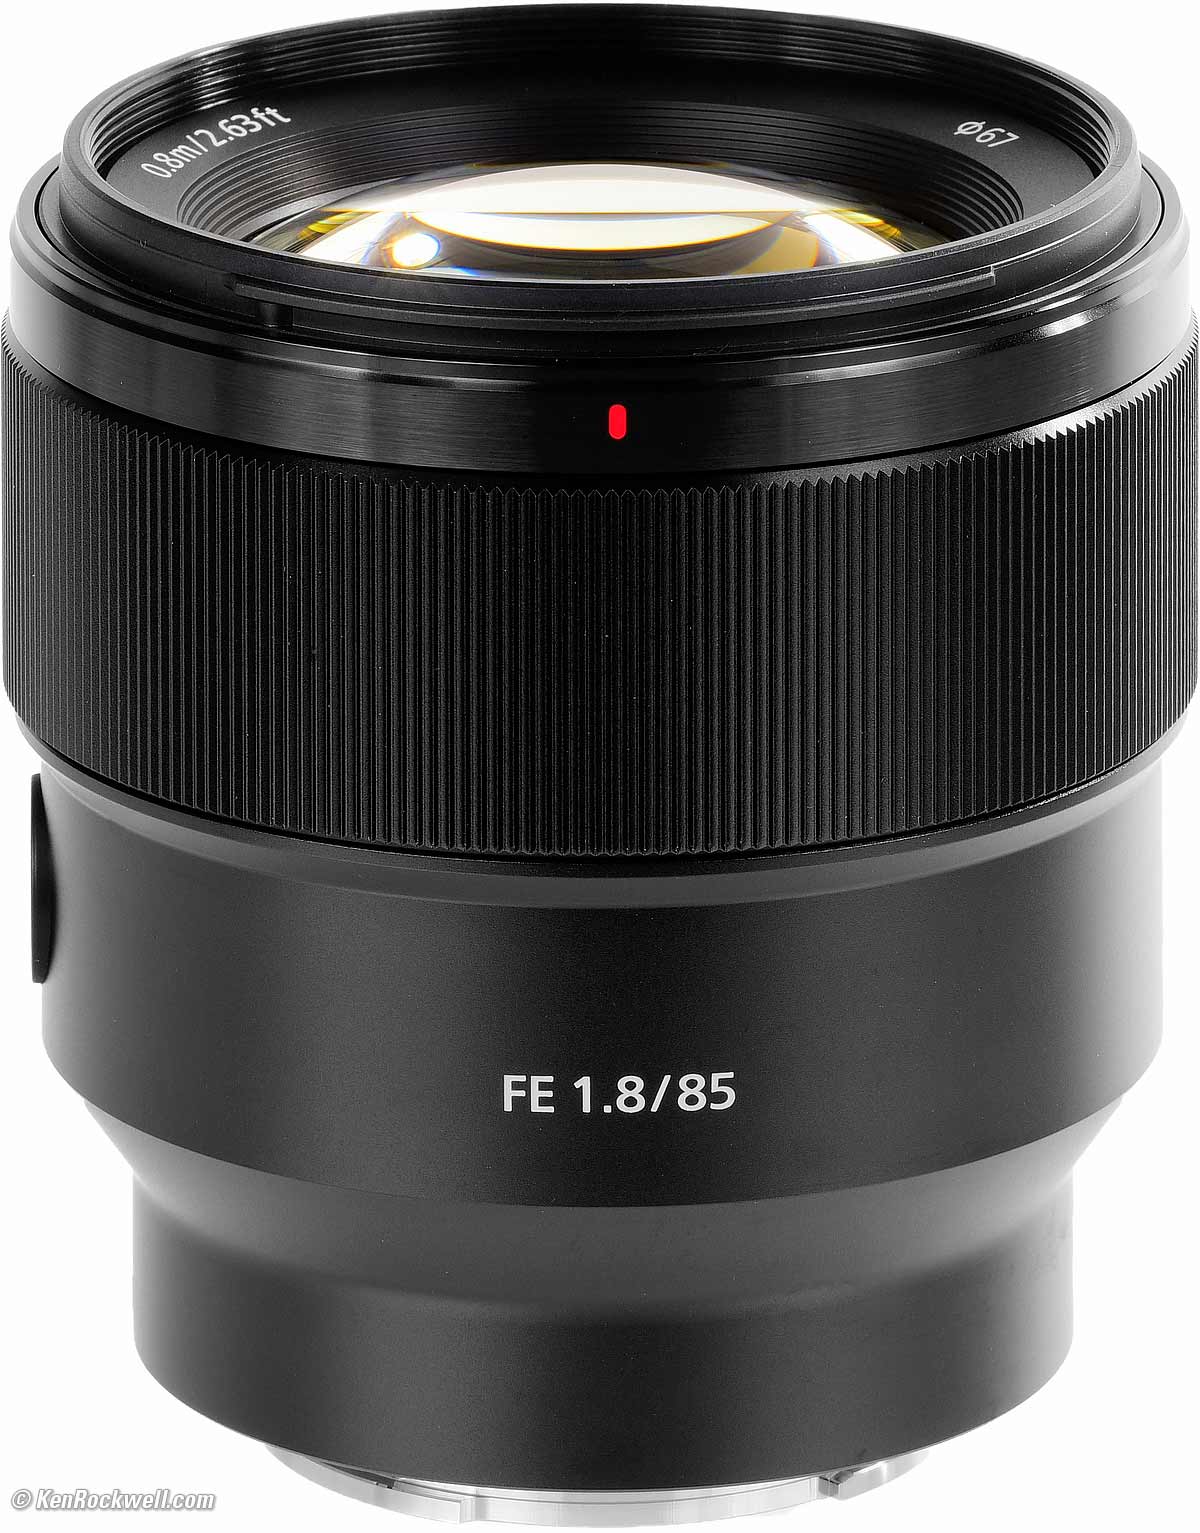
Sony FE 85mm f/1.8.
NEW: Sony FE 85mm f/1.8 Review.
NEW DEALS: Sony Rebates. Sale starts Sunday.
21 October 2017, Saturday

Nikon D850 and 50mm f/1.4G.
NEW: Nikon D850 Review.
NEW: Nikon D850 User's Guide.
20 October 2017, Friday
Weekend Deals
Most with free shiping:
FRIDAY ONLY (NYC Time): Sirui 77mm Slim Circular Polarizer: $30.94.
Secret Coupon Code: V-moda Crossfade Wireless Bluetooth Over-Ear 3D Headphones: Save $120: $179 if you use Coupon Code October17 on checkout.
Think Tank Trifecta Backpack: $69.95.
SmallHD 502 5" HDMI/SDI LCD On-Camera Monitor Kit: $400 off: $999.
Westcott 48" Rapid Box Octa XXL for Bowens: $249.90.
Tascam US-16x08 16x8 Channel USB Audio Interface: Save $100: $199.99.
How to Set Your Camera for Sports
A reader asks how to set up everything as the light changes to get sharp pictures in every kind of light.
Easy!
Shoot in Program exposure mode and set your Auto ISO to manage everything for you.
Specifically, set the Minimum Shutter Speed in your Auto ISO menu to the slowest speed at which you get sharp results for whatever sort of action you're shooting, and you'll be set to shoot that sport under everything from daylight to darkness.
Of course set the Maximum ISO under Auto ISO to the highest ISO you dare, which for most cameras is the highest level you can set, or a Push 1 stop option. Yes, I let Auto ISO run up to ISO 25,600 on my D850, for instance.
I usually set 1/500 as my Auto ISO Minimum Shutter Speed for shooting sports, and in Program mode it will typically be shooting at 1/500 at f/5.6 at ISO 64 in daylight, and 1/500 with my lens wide-open at around ISO 10,000 indoors — exactly as I would have set everything manually.
The key is this is 2017, not 1957. Today we pre-program our Auto ISO system with our preferences and let our camera worry about these basics while we focus on what's actually in our picture.
What beginners mess up is being afraid to shoot with the lens wide open in dim light, and being afraid to use the ultra-high ISOs that today's cameras offer. It's not 2001 anymore when ISO 1,600 looked hideous on the Nikon D1; today ISO 25,600 looks fantastic on most full-frame DSLRs, especially the newest Nikon D850.
Here's a snap that's as clear as daylight — shot at ISO 10,000!

Indoor shooting under dim fluorescent light, 18 October 2017. Nikon D850, Nikon 28-300mm VR at 72mm at f/5 at 1/125 at Auto ISO 10,000, Perfectly Clear. bigger or full-resolution file to explore on your computer (mobile devices rarely can display the full resolution files properly).)
In this case, the D850 is astonishing in how it can shoot with a slow lens under dim light at insane ISOs like 10,000, and still give images just about as clean, sharp and colorful as images shot in daylight at ISO 64. Incredible!
What usually happens is that queasy amateurs try to shoot stopped down a stop or two, only shoot at ISO 6,400 or less, and wind up shooting at 1/250 or slower — so people move and they get blurry photos. A grainy but sharp photo is always better than a blurry one, and today, digital SLRs don't even get grainy anymore.
How to Get Your D850
I got mine last month, so I forget that many people forgot to place their orders the first day it was announced. Those people are now waiting for theirs and are missing lots of great shots. This happens every time something really great comes out; there are always some people who hesitate, and they lose.
As always, the way to get anything first is to order it online the moment it's announced, and if you forgot, the way to get anything is to order it online and be patient. Don't waste your time with retail stores; no one has the volume that Adorama, AmazBest low light/action Canon DSLRon or B&H have, so local stores just don't get as much stock.
I explain all this at How to Get It. It's sad when people wait around and miss out.
Updated: The DX Dream Team.
Nikon's latest DX lenses make the Dream Team even better, lighter, faster and less expensive.
In Stock: Sony RX 10 Mk IV.
19 October 2017, Thursday
New manual-focus from Zeiss
Zeiss Milvus 25mm f/1.4 for Nikon
Zeiss Milvus 25mm f/1.4 for Canon
16 October 2017, Monday
New from Canon
LH-DC110 Lens Hood for G1 X Mark III
PSC-6300 Deluxe Soft Case for G1 X Mark III
WP-DC56 Waterproof Case for G1 X Mark III
13 October 1999, Friday
18 years of KenRockwell.com!
Even better than Friday the 13th, it is 18 years ago today that I put KenRockwell.com on the air.
This website is now eligible and registered to vote in al 50 US states, as well as every province in Canada, all 31 states and the D.F. in México, as well as every department in France. Other registrations are rolling is as I write this (most are automatic through ICANN), and this website now can buy alcohol and sign up for military service.
Whoo hoo!
One More Week
Our two awesome High Sierra and Yosemite fall workshops start Monday, 23 October 2017.
Hope to see you there.
More on the Big Screen
A difference between an Apple monitor and using a 4K TV as your monitor is that your keyboard brightness controls no longer do anything - but the TV has an ambient light sensor to adjust the brightness automatically, so it's a wash.
With its ambient light sensor my Samsung TV varies, in my office depending on how I have my lights set and the time of day, between LV 6 to LV 10 in white areas — a 16:1 difference in screen brightness.
Also be sure to increase your mouse tracking speed at System Preferences > Mouse.
10 October 2017, Tuesday
I LOVE the Big Screen!
I finally figured out how to get 4K at 60 FPS with the 55" curved-screen Samsung UN55MU8500 monitor I use with my Mac Pro as I first mentioned a few days ago for an incredible desktop experience.
All you need for 4K at 30 FPS is a 4K TV (4K is the same as UHD; HDR or 3D isn't necessary) and an 18 GHz HDMI cable; I use the Amazon Basics which are great for 4K/60. Plug in the TV via the HDMI jack on your Mac Pro and you're good - but only at 30 FPS and at about 8-bits. With only 8 bits I see some banding in the sky of the desktop image in the Mac High Sierra OS 10.13, and at only 30 FPS the image and mouse response is slower than usual. Here's how to spend under $30 to get to 60 FPS for smooth, live mouse response and smooth 10-bit color:
1.) Get either of these DisplayPort to HDMI active adapters:
1a.) UPTab Mini DisplayPort 1.2 to HDMI 2.0a active adapter or
1b.) Club 3D CAC-1170 Mini DisplayPort to HDMI 2.0 active adapter.
I bought both of these because the first one wouldn't work. It turns out the problem was with the TV settings as I'll explain below; either of these work fine.
They both work as well as the other. The Club 3D CAC-1170 is smaller and costs a little less, while the UPTab has better customer service which lead me to figure out how to fix the problem as I'll explain below. Club 3D never figured it out, but instead led me to install needless software which would have needed to be purchased after a demo period (SwitchResX) and dangerously muck around in Terminal, none of which worked — and which is why I then bought the UPTab adapter as suggested by one of you great readers.
2.) Plug the adapter into a Thunderbolt port on your Mac (not the HDMI port).
3.) Plug your HDMI cable from the adapter and into your 4K TV.
4.) Believe it or not with all this state-of-the-art gee-whiz equipment, Samsung TVs requires you to go into a secret menu to activate what you paid for! Otherwise, the Samsung TVs stay stuck at 8-bit 30 FPS. To activate 60 FPS and full color, you have to:
4a.) Press the House button on the remote that came with the TV.
4b.) Click Settings, then down to General, then right and down to External Device Manager.
4c.) In External Device Manager, click down to HDMI UHD Color.
4d.) Select the HDMI input you use (or select them all if you like), and click it. You'll see the grey dot turn green.
4e.) Click down and click Close.
4f.) Click the House button on the remote and the return (left U-turn) button on the remote to make the TV menus go away, and you're done.
5.) To confirm the resolution and frame rate at which your Samsung monitor is operating, click the center button of your remote. You'll see a gray bar along the top with the information. If it says 3840x2160 / 60p HDMI UHD Color, you're done.
6.) In case you forgot, select the Movie picture mode for best quality:
6a.) Press the House (Home) button on the remote.
6b.) Click left to Settings.
6c.) Click up to Picture Mode.
6d.) Click the center button a few times to Movie. The other modes are brighter, but too blue and oversharpened. The other modes are to make the TV look as bright as it can; the Movie mode makes it look as good as it can.
6e.) Click the house button again to make the menu go away.
6f.) Don't select the GAME or PC modes in other menus, as these often lock-out the Movie mode you want and force you into the too-bright and too-blue "flamethrower" picture modes.
Correct setting.
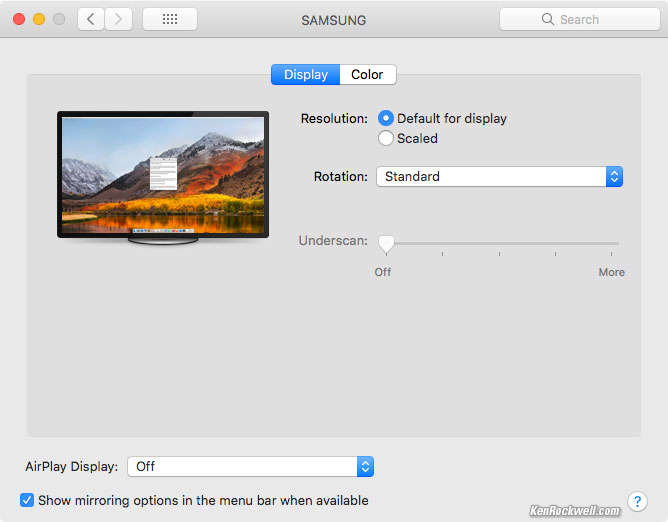
7.) Your Mac ought to set itself automatically, but in case you're not getting 4K/60p, go into your Mac's System Preferences > Displays > Display tab > Resolution: Default for display. Even after I had all this working, somehow my Mac Pro's Resolution had changed itself to Scaled > More space, which dropped the frame rate back to 30p.
8.) If a week later your system reverts to 30p UHD Color from 60p (as mine does), then on my Samsung TV I go to Settings > General > External Device Manager > HDMI UHD Color, select the HDMI input I'm using and uncheck it. Close the TV's menu, then go back into the same TV settings menu and turn on HDMI UHD Color again for that input (Settings > General > External Device Manager > HDMI UHD Color > select your input). You'll see that your Mac's Preferences > Displays have reverted to Scaled. Reset Mac Preferences > Displays again to "Default for display," and voilà!, you're back to 60p.
07 October 2017, Saturday
Great Optical Drive
I have one of these little USB drives I use with my iMac 5K, since I'm always ingesting and reading CDs and DVDs. I rarely burn anything, but I have quite an archive on optical discs and buy music on CDs to ingest to iTunes as I want them encoded (128 or 160 kbps VBR AAC); these formats sound indistinguishable from the original music and let me fill my devices with twice as much music than with 256 or 320 kbps files; I'm a music lover, not a bit collector). Yes, all my backups to CD from 2001 still read just fine, thank you. I usually use Fuji CDRs.
Seeing how neat the one little drive is on my desk with the iMac, I decided to get one to try to replace the huge pair of Lacie 52x CD-R and 24x DVD-R drives that sit on my desk I use with my Mac Pro.
I figured I could invest an extra $57 in the name of science and go whole-hog modern and get this Pioneer Blu-Ray (and DVD and CD) reader-writer. Whoa! While I have yet to bother with any Blu-Ray discs, the Blu-Ray drive works much better and faster than any of my other drives for reading DVDs. I have no idea why, but it slews and gets everything mounted on my desktop faster, and does whatever I need to do faster than my older drives.
Even if you don't care about Blu-Ray, definitely consider this drive if you want a tiny optical drive for use with driveless computers. It needs no separate power supply; just plug into USB 3 and you're done. It's great on a desk as the OPEN button sits on top of the drive; it's top-load.
Making Bigger Better
Some of you asked more about the 55" monitor I use with my Mac Pro I mentioned the other day:
Logistics
Plug the TV in with an HDMI cable to your Mac that has an HDMI port, like the Mac Pro, and the monitor just works and you can configure it under System Preferences > Displays like any other monitor. The OS doesn't care if you plug-in via Thunderbolt or HDMI.
Yes, at only 30 FPS there will be a little lag and this isn't for playing games. I use my Mac Pro for production, not for games. The huge increase in workspace more than makes up for any lag, which I didn't notice after a little while.
I still haven't gotten to 60 FPS. I'm going to try this adapter next.
4K
You have to use a 4K TV for this. A regular HDTV has only half the resolution (1,920 x 1,080 versus 3,840 x 2,160) and doesn't achieve anything over a regular monitor.
Internet connection to the TV?
When setting up the 4K TV, you don't need to connect it to your WiFi network — unless you want to use the TV to watch Netflix while your computer is off doing other things. Ditto for an antenna; no need unless you want to watch free over-the-air HDTV when you're not using the computer.
Versus a 5K iMac?
The resolutions are similar.
A 55"4K TV is twice the size as a 27" 5K iMac, but at half the linear resolution.
The iMac has an ultrasharp Retina display that crams all this resolution into a normal-sized screen.
A 55" 4K TV has the same resolution, but spread out over a huge screen twice the size, but at the same DPI as a normal computer monitor.
I prefer the huge monitor because I'm over 30 years old and everything is more spread out. All my software works perfectly on the 55" monitor. Media Pro still doesn't take advantage of the Retina display, working at only half the Retina Display's resolution, but used with the 55" display, works flawlessly at the higher resolution.
The Retina display works in concert with the Mac OS to render everything at the right size, making the concept of pixels obsolete.
The 55" 4K TV as monitor keeps the pixels and sizes all as on a normal computer monitor, just with four times the display area to get four times as much work done. (OK, a 45" 4K TV is about the same 106 DPI as a computer monitor, the 55" makes everything look about 20% bigger so I don't have to squint at the small stuff.)
I don't mind crazy big. Normal people would probably prefer the 5K iMac as it look much more reasonable siting on a desk — and it's so much more beautiful when turned off.
Color Calibration
While I don't need it, I do plan to get a basic calibrator and run it. With anything other than a CRT, calibrate once and they never drift. I've never seen colors change when I come back and calibrate the same LCD years later.
Audio
Audio is the same as whatever you're already doing. Of course you also can use the stereo speakers built into the TV if you like; configure them in your Mac at System Preferences > Sound.
I just happen to like a nice Hi-Fi system on my desk, and the same gear I'm already using, as well as optical disc drives and card readers all fit great under the middle of the screen since its stands are at the two far ends.
I crossover to my subwoofers at 40 Hz because it sounds much better than crossing over at 80 or 100 Hz in the middle of the music band. Crossovers do nasty things to music, especially if you place the subwoofers anyplace other than in the same place as your main speakers, even if you have a crossover with programmable delays.
The speakers are 18" (50cm) away from my ears; I don't need to send the critical 40~100 Hz band to the subwoofers to get more SPL, but I do need the purest and unadulterated sound across the music band. Crossing over at 40 Hz keeps more of the music on my desk where it sounds best rather than send it to the corners of my office where the subwoofers sit, and also lets me use the subwoofer level control on the crossover as a much more efficient bass and loudness control than if I crossed over at 100 Hz.
No, I'm not bothering with the bass alignment filter (equalizer) for the 805s. I'm trying to keep this simple.
Yes, I am using two pairs of audioengine stands to angle the 805s. Tilted back the 805s sound fantastic, but sitting flat on the desk the tweeters are closer to my ears than the woofers and sound way too bright.
Silence
The monitor is silent. It only draws about 65W from the wall depending on brightness, so I don't hear any fans and it doesn't get hot.
Overall
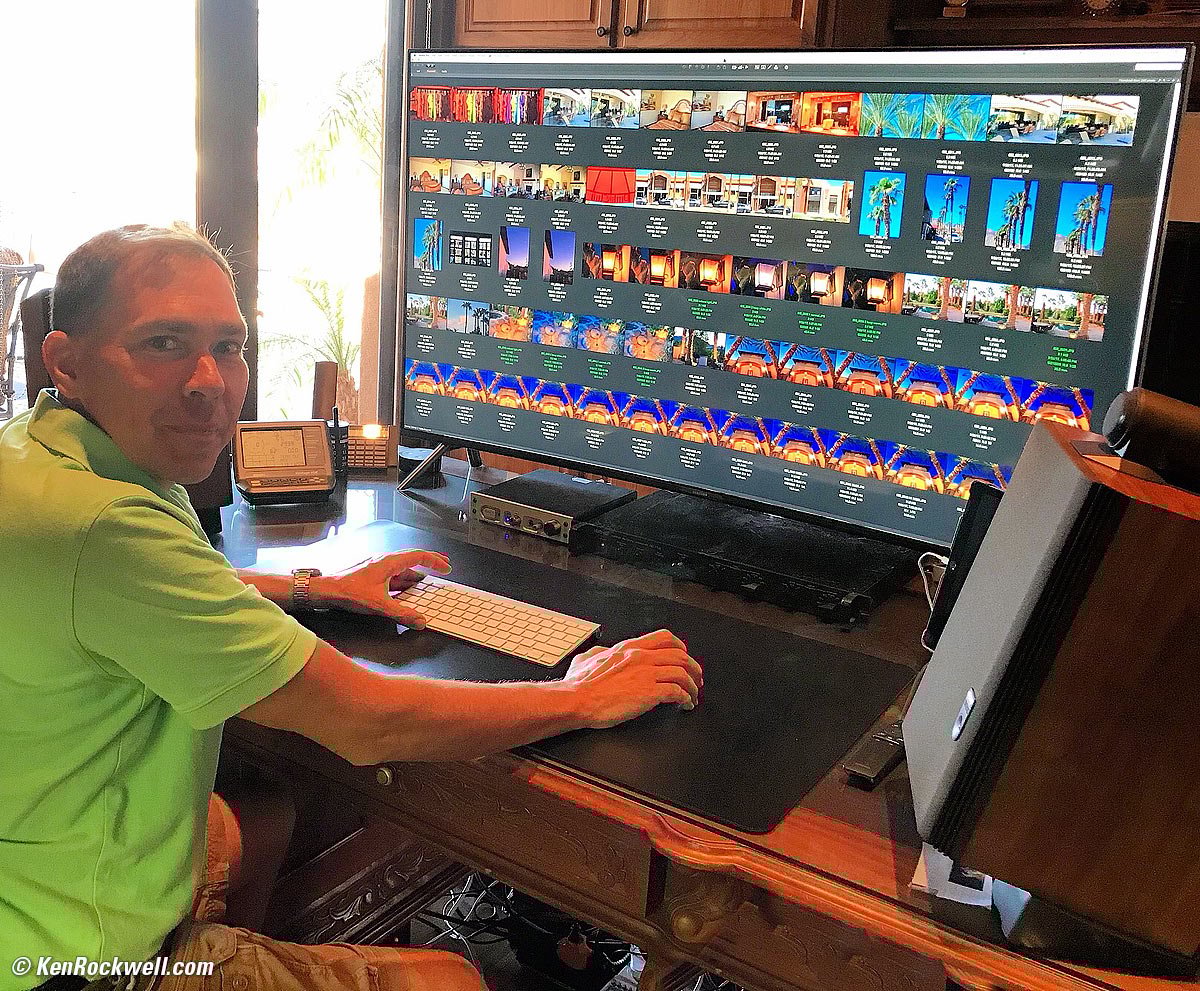
I think this is the best monitor ever. I can see everything I'm doing, and have a load of stuff up at the same time. I can see loads of thumbnails, they are a lot bigger than thumbnails, and they are just as sharp as they are on a smaller monitor.
In Photoshop I rarely have to zoom in or out; I have so much resolution that I can see all the details and dust as I edit, and I can see this even with the complete image on my screen. Marching ants on the PhotoShop CS6 I use look as they always do, there are just a lot more of them on the huge 55" monitor. On the 5K iMac, they are tiny and harder to see because the pixels are half the size on the 5K iMac.
For showing photos, the 55" 4K is the biggest and brightest you've ever seen your photos. The 5K iMac is awesome, but 55" is twice the size (four times the area), and ultra bright.
I measured the 55" (diagonal) TV, and the display area is 27 x 48" — not a bad size to see your photos from arm's length!
Of course you need to be good at hooking up TVs and computer monitors to get this to go. It's a simple hook up, but you do have to plug it in. The funny part is the Mac just does everything automatically, but you have to program the TV in a few places for setup.
05 October 2017, Thursday
Bigger is so much better
Samsung 55" 4K UHD TV as computer monitor. bigger.
It works! Now that 4K UHD TVs are so inexpensive and my Mac Pro has an HDMI output, I finally bought a 55" curved-screen Samsung UN55MU8500, plugged it in and saw what happened.
The more square inches of screen in front of me, the more work I can do. It's like having a big enough table to lay out your work without having to pull things on and off the shelf as you work on them.
I've been using a 30" Apple Cinema HD Display since about 2006, and bought a second one in about 2010 and used them both on my desk. I paid about $3,000 for my first one.
I prefer a curved screen as I'm only siting arm's length from it. This really helps seeing the corners.
It has the same pixel-to-pixel sharpness as other computer displays, but a whole lot more pixels. Things only display about 20% bigger than on a regular monitor; the whole point is so many more pixels and things I can put on this screen at the same time, and still be able to read it all. Of course photos look better than you've ever seen them, with more resolution than anything other than a 4K or 5K iMac.
I prefer this TV model as it is supported by two little stands on left and right; not one big pedestal in the center. This way I have a lot of space for extra drives and card readers and Hi-Fi gear under it. My Mac Pro connects via a mini TOSLINK optical cable (to avoid ground loops) to my Benchmark DAC1 HDR which is connected my Heathkit AD-1702 stereo subwoofer crossover. Above 40 Hz goes to an Apt Power Amplifier One under my desk which feeds the B&W Matrix 805 on top of my desk, and everything below 40Hz feeds a pair of B&W ASW800 subwoofers for proper stereo. I also have an Amazon Echo Dot connected to the Benchmark DAC1 with a 3.5mm to RCA cord which works as a much better radio tuner than anything else off-air for local radio.
Colors are just fine, and I haven't bothered to run any calibration. It's not 1997 anymore; TVs are very well calibrated and of course my Mac recognizes it as a rec. 709 display and uses the appropriate canned profile. HINT: set the MOVIE picture mode and all is good; the TV naturally comes set to a different picture mode which which is too bright, too blue and oversharpened.
Any 4K UHD TV has 50% more horizontal resolution than my 30" displays.
My Mac only drives it via HDMI 1.4 at 3,840 x 2,160 pixels at 30 FPS. I tried this Display Port Thunderbolt adapter that claimed to let me get to 60 FPS, but even with SwitchResX, didn't let me run at 60 Hz. I gave up on 60 Hz (let me know if you know how).
I've seen external 4K computer monitors, but hated them because these wimpy things were too small (like 27" to 35"), so all the menus, cursors and pallets were too darn small, and I couldn't figure out how to get all of them in all my software to look right in the Mac OS.
Running a 45" TV would have everything like menus display the same size as a typical computer LCD display, which is usually about 106 DPI.
My 55" TV is perfect, making everything about 20% bigger, and I sit 20% farther away for less eyestrain.
I could go 65" but then it's a long way to the top of the screen. As-is, my eyes are naturally in the middle of the height of the screen.
My 55" looks just like my Cinema Display, but it has so much more surface area on which to work. It has twice as many pixels, meaning I'm seeing twice as many thumbnails on my screen above in Media Pro as I sort out what I have.
Cheaper TVs have two potential problems for desktop use. The first is that they get dim off-center, so if you're only 2 feet away, the sides and corners will look too dark and you'll have a big hotspot in the middle that you wouldn't see 15 feet away.
Also the cheaper sets oddly have the LCD panel about a quarter inch (6mm) in front of the backlight, and the backlight is the same size as the LCD. No problem at normal TV distances, but when you're looking at the left or right from two feet away, quite a few pixels on left and right can't be seen because the backlight would need to be oversized to cover them from an angle. This would be no problem for TV viewing, but forget about it if it cuts off a scroll bar or similar computer detail.
Of course photos look stunning on this giant, but for production it's great to see twice as much as I'm mucking around with files and photos. It's not that I now have three huge vertical columns instead of two on a 30" monitor; the important thing is I have 2,160 tall vertical pixels to display so much more that I don't have to scroll anywhere near as much to see what I have on a web page or Finder listing. I never liked any monitor as much as my 30" displays because newer displays had the same 2,560 horizontal resolution, but less than the 30" 1,600 pixel vertical resolution. Height is important, in fact, an ideal photo monitor would be square, as that lets us show horizontal and vertical photos with equal sizes.
You can get the Samsung UN55MU8500 at Amazon, at B&H, and at Crutchfield. You'll need an HDMI cable; I use the Amazon Basics which are are rated to 18 GHz for 4K/60.
I mentioned that the cheaper models didn't work well for viewing up close due to backlight design problems. Of course fancier 4K TVs work great, just that I use this monitor for production, not showing my work to clients, so I don't need "better" monitors like OLED. I just need accuracy and lots of room.
03 October 2017, Tuesday
Apple Aperture in Mac OS 10.13 High Sierra
In case you were curious, I just updated my Mac Pro, and my v3.6 copy of Aperture seems to run just fine like everything else. So does Dreamweaver CS5 on which I write this website, Photoshop CS6 and the Perfectly Clear plug-in to optimize and prep my photos, and Media Pro 2.1 which I use for sorting out what I shot.
If anything, Finder runs a zillion times better than it did an hour ago before I updated my OS.
For an even better High Sierra experience, be sure to come on either of our two awesome High Sierra and Yosemite fall workshops coming in October 2017. See. Shoot. WIN!!! ℠
It's never a gamble to update; I use Super Duper to make a bootable copy of my drive, and if I didn't like the new OS or there's a problem, I simply boot from my backup of the original, run Super Duper from this backup drive and copy from the backup drive back to my computer's drive, reboot, and I'm back where I was. It's that simple. I will need Super Duper v3.0 beta 2 for the new file system for my SSD in High Sierra.
Only my ancient Extensis font management program doesn't run, so it's time for me to put my hundreds of fonts where they belong and let the OS handle them. Graphic artists: any suggestions? I presume the OS natively can manage its own fonts today; back in 2003 I had just as many fonts and the computers of that day slowed to a crawl trying to keep all those fonts active at once.
And oh yes — of course Safari runs ultra fast, and Finder runs faster than it ever did.
All my other crazy programs run, like Canon Digital Photo Professional (used for reading Canon EXIFs), AudioLeak Leq for seeing how badly dynamically compressed are most of the high-resolution remasters of classic rock music (my original 1980s CDs are better), Phase One Capture One that I never use for RAW files, and I forget what else.
So far, awesome!
Bravo!
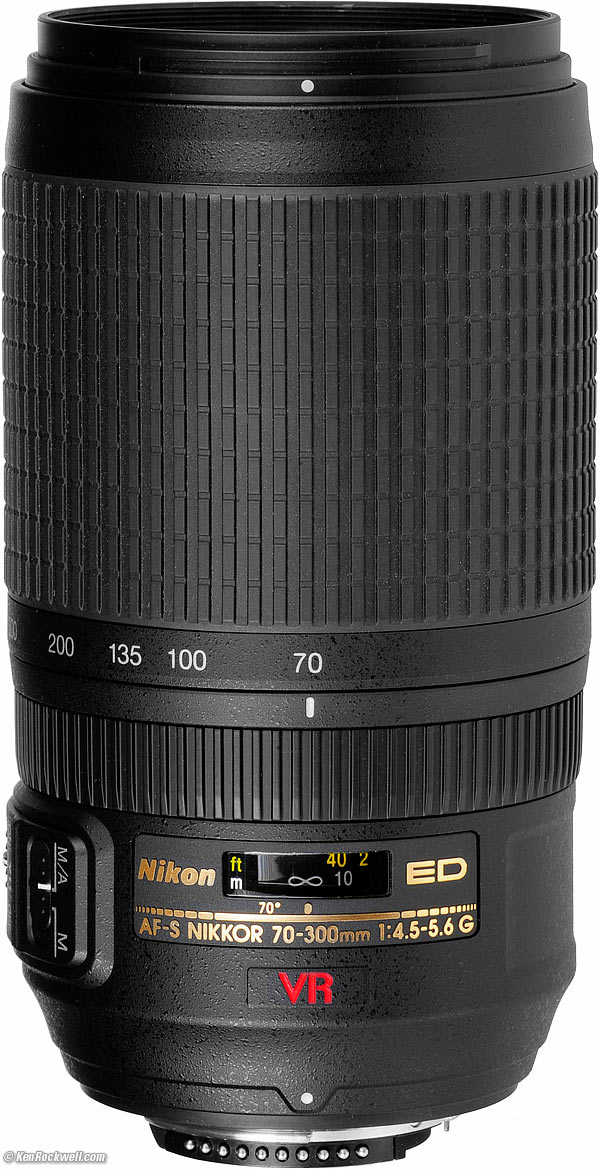
Nikon AF-S 70-300mm f/4.5-5.6 VR.
Updated: Nikon 70-300mm VR.
It came out in 2006 before FX digital; I brought its page up to date.
Updated: Nikon Lens Compatibility.
I added the latest AF-P compatibility in light of the D600 and D610 firmware updates that let them work great with AF-P lenses.
What Was New in:
June, July, August and September 2017: Canon 6D Mk II, Canon SL-2, Canon 85/1.4L, Canon TS-E 50/2.8, 90/2.8 & 135/4, Nikon D850, Nikon 70-300 VR DX AF-P, Nikon 28/1.4E, Metabones Mk V Canon EF -> Sony E-mount adapter.
May 2017: Nikon 10-20mm DX VR, Nikon 8-15mm FX Fisheye, Canon 77D Review, Canon Rebel T7i Review, Canon 18-55mm IS STM Review, Springtime in Yosemite, Irix 15mm f/2.4 Review, Sony 16-35/2.8 GM, Sony 12-24/4 G, Fuji X100F Review, Laowa 12mm Review, Olympus TG-5.
March & April 2017: Nikon D7500, Nikon 19mm PC-E review, Nikon D3400 review, Sony A7 Mk II review, Nikon D5600 review.
February 2017: Canon 77D, Canon Rebel T7i, Canon EOS M6, Sony 24-70/2.8 GM, Sony 85mm f/1.4 GM , Sony 70-200mm f/4 G OSS, Sony FE 100mm f/2.8 STF GM OSS, Sony FE 85mm f/1.8.
January 2017: LEICA M10, Fujifilm GFX 50S, Fujifilm X100F, Nikon D5600.
November & December 2016: Fuji X-A10.
September & October 2016: Nikon 70-200mm f/2.8 FL, Nikon 19mm PC-E, Sony A6500, Sony RX100 Mk V, Sony Alpha 99 II, Canon EOS M5, Canon EF 70-300 IS II USM, Sony 50mm f/2.8 Macro.
July & August 2016: Canon 5D Mk IV, 16-35 IS II, 24-105 IS II, Nikon D3400, Nikon 105mm f/1.4, Fuji XT-2.
Help me help you
I support my growing family through this website, as crazy as it might seem.
If you find this as helpful as a book you might have had to buy or a workshop you may have had to take, feel free to help me continue helping everyone.
If you've gotten your gear through one of my links or helped otherwise, you're family. It's great people like you who allow me to keep adding to this site full-time. Thanks!
If you haven't helped yet, please do, and consider helping me with a gift of $5.00.
The biggest help is when you use any of these links when you get anything, regardless of the country in which you live. It costs you nothing, and is this site's, and thus my family's, biggest source of support. eBay is always a gamble, but all the other places always have the best prices and service, which is why I've used them since before this website existed. I recommend them all personally.
Thanks for reading!
Ken