Home Donate New Search Gallery How-To Books Links Workshops About Contact
Death Valley to Lone Pine,
Sunday,
24
January 2010
© 2010 KenRockwell.com. All rights reserved.
(top 22nd 23rd 24th 25th 26th 27th)
Today the others slept in, so I went for a walk around the Furnace Creek Resort.
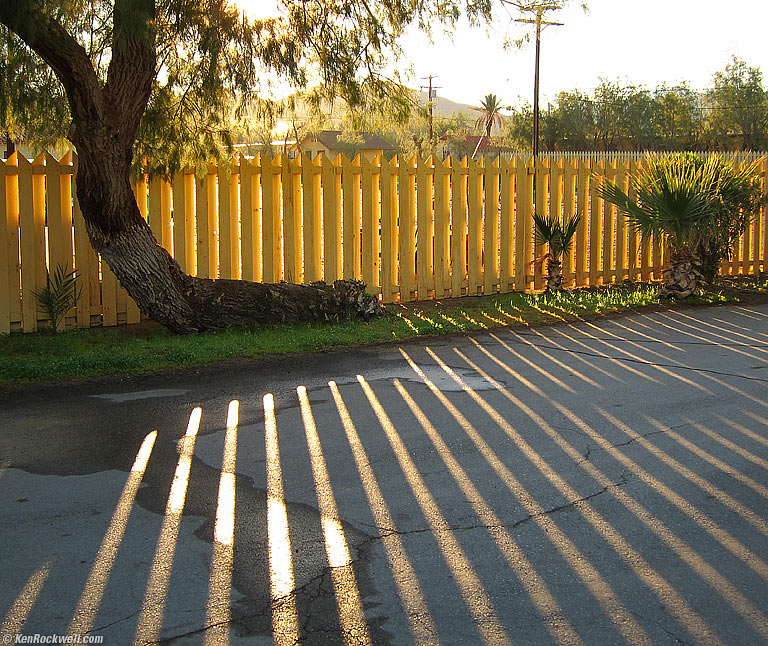
Sunbeams, Furnace Creek Ranch, Death Valley, 7:46 A.M.
Snapped with a 2009 Canon S90, Auto ISO chose ISO 80, Program Auto chose f/4 at 1/200, 9.6mm (45mm equivalent), A3 AWB, -2/3 stops exposure compensation.
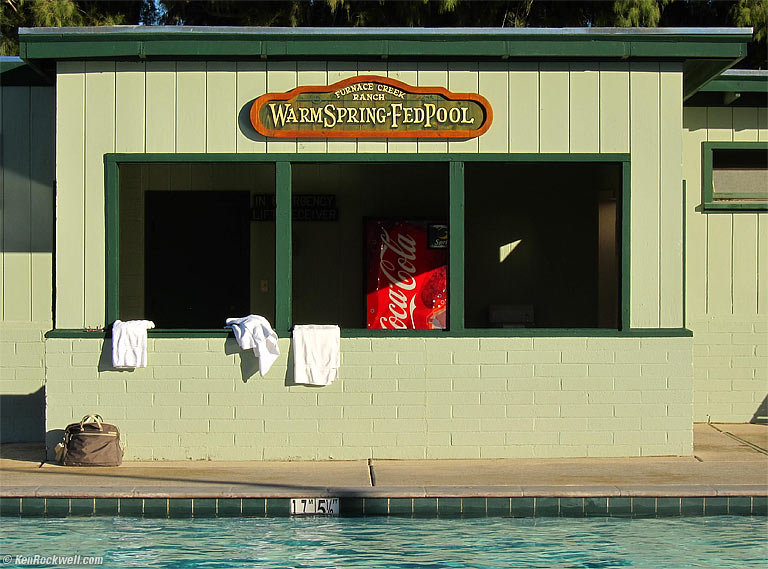
Warm Spring-Fed Pool, Furnace Creek Ranch, Death Valley, 8:34 A.M.
Snapped with a hand-held 2009 Canon S90, Auto ISO chose ISO 80, Program Auto chose f/6.4 at 1/500, 18.2mm (85mm equivalent), A3 AWB, -2/3 stop exposure compensation.
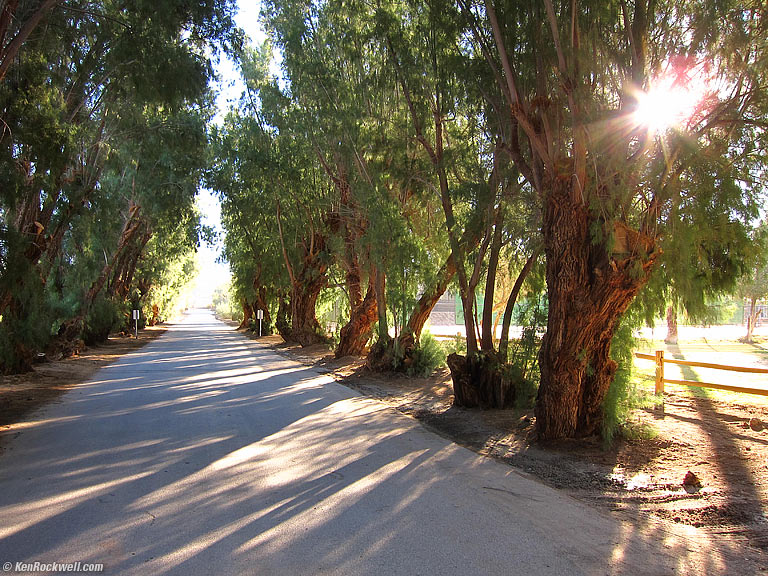
Side Road, Furnace Creek Ranch, Death Valley, 8:36 A.M.
Snapped with a hand-held 2009 Canon S90, Auto ISO chose ISO 80, Program Auto chose f/4 at 1/60, 6mm (28mm equivalent), A3 AWB, -2/3 exposure compensation.
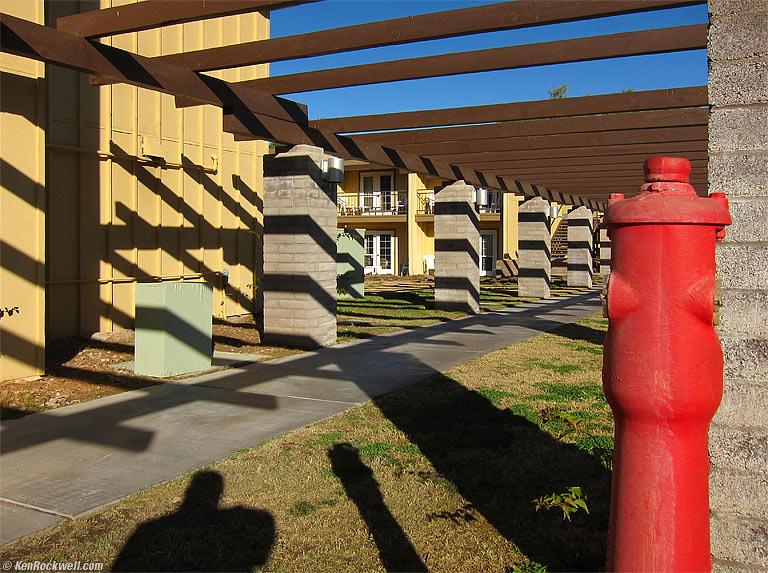
Red Pole, Furnace Creek Ranch, Death Valley, 9:14 A.M.
This shot is about the balance between the red pole on the right and the shadow coming down from the top of the image on the left. It took about a dozen frames to get the camera in exactly the right position, with everything lined-up properly.
Snapped with a hand-held 2009 Canon S90, Auto ISO chose ISO 80, Program Auto chose f/7.1 at 1/500, 6.9mm (32mm equivalent), A3 AWB, -2/3 stop exposure compensation.
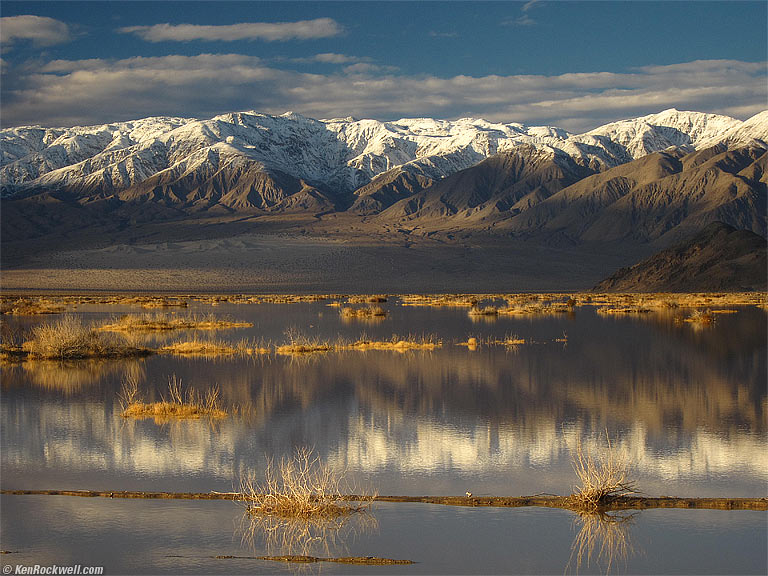
Reflection, California Route 190 between Lone Pine and Death Valley, 4:07 P.M.
The storms left lakes where there are none. I held a polarizer in front of my point-and-shoot to darken the sky, but leave the mountains, clouds and foreground plants brighter.
Snapped with a 2009 Canon S90, Auto ISO chose ISO 80, Program Auto chose f/4.9 at 1/125, 22.5mm (105mm equivalent), A3 AWB, no exposure compensation.
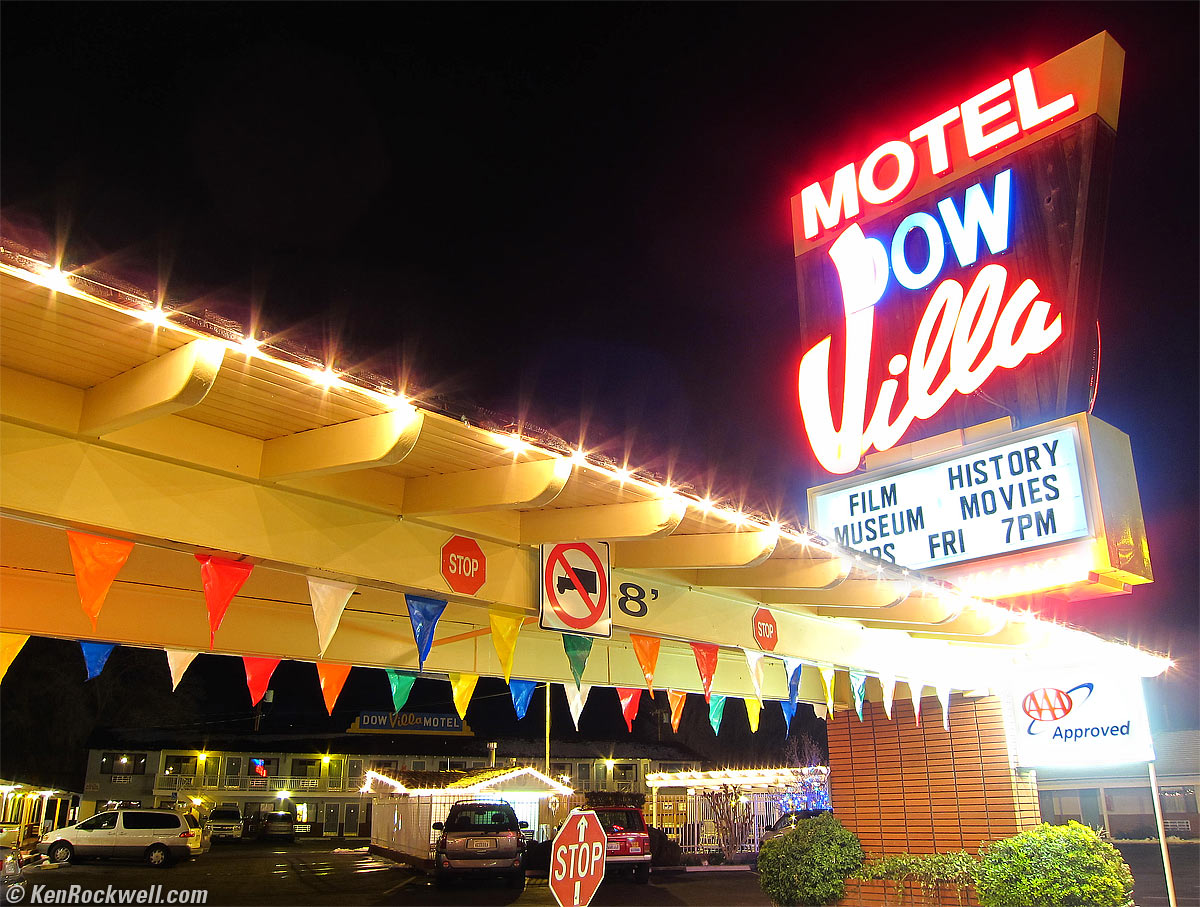
Dow Villa Motel, Lone Pine, California, 9:26 P.M. bigger.
This is a trick shot. Shot straight and hand-held, this shot would look the same, except that the "Film History" and "AAA Approved" signs would be washed-out.
For this shot, I whipped out a tripod in the 20ºF (-5ºC) weather, and made some bracketed snaps in manual mode at ISO 80 and f/4 at a zoom setting of 6mm (28mm equivalent).
I pulled three of these shots as separate layers into Photoshop CS4 so that I could use layer masks to select which exposure applied to which area. (How to Use Photoshop).
To load several shots into Photoshop CS4 as layers, click FILE > SCRIPTS > LOAD FILES INTO STACK. I clicked the auto-align option.
Click Browse, select your files and open them. They open as a stack of layers, one shot per layer.
I arranged the layers so that the darkest are on top.
Add layer masks to all but the bottom, brightest layer.
Fill each mask with black (EDIT > FILL > Black).
Use the Brush tool to paint white onto each layer mask to select that layer to appear for the area in which you're brushing.
It is important not to try to correct too much. If there is any obvious darkening of bright areas, you've failed. Bright areas should be bright, and dark areas should be dark.
My base exposure was 4 seconds. That got great detail everywhere, except in the two backlit signs.
I used 1/8 second for the FILM HISTORY sign, and 1/15th for the AAA sign.
I made a series of manual exposures at each stop (8s, 4s, 2s, 1s, 1/2, 1/4, 1/8, etc.) and picked which I wanted to use later. I certainly didn't try to guess all this as I shot.
The six-pointed stars come naturally from the Canon S90's six-bladed diaphragm.
The base shot is fine by itself, if I didn't need detail in the two white signs. It looks like this:
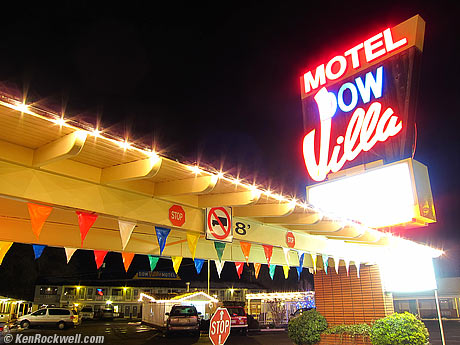
4 seconds at f/4 at ISO 80.
HDR looked horrible when I tried it with my bracketed files, as expected. One of the many reasons HDR almost always looks so bad is that automated tone mapping looks horrible because it lacks an artist's vision. For HDR to look good, you must do all the layer selecting by hand with an artist's eye.
Of course all this was shot in JPG. Colors and everything else are exactly as they came out of the Canon S90.
Next: 25 January 2010 (top 22nd 23rd 24th 25th 26th 27th)
Home Donate New Search Gallery How-To Books Links Workshops About Contact