enlarge
I bought my
D200 and 18-200VR from Adorama here.
I also bought another from Ritz here. Also try Amazon here for the camera and here for
the lens. Adorama usually has D200/18-70 kits in stock here.
INTRODUCTION
Raw or JPG?
If Raw, should you use compressed or uncompressed?
If JPG, should you use FINE, NORMAL or BASIC? Should you use Size Priority or Optimal Quality JPG Compression? How about Large, Medum or Small image dimensions?
Let's make some tests and compare resolution, artifacts and sharpness.
The good news is that these images are all sent with extremely high quality so nothing, not even the artifacts, are altered. The bad news is it will take forever to load over a dial-up Internet connection.
I used the Raw + JPG mode to make pairs of identical images for comparison.
Feel free to skip to the examples if you're fluent in the terminology.
TERMINOLOGY
Image Size
Image size is measured in pixels. In the D200 they are called Large (3,872 x 2,592 pixels), Medium (2,896 x 1,944) and Small (1,936 x 1,296).
Raw data can't have it's image size changed in-camera. JPGs can be saved in these different sizes.
Raw
All cameras create an image from raw data sucked off the sensor. Most cameras create JPGs with it and then throw the raw data away.
Fancy cameras allow you to save this data so you can screw with it later in software on your computer. Software does the same thing to create images from the raw data that the camera's hardware does. Software is much slower than the hardware that does the same thing in the camera. That's why cameras can spit out JPGs at 5 per second, but your computer probably takes 10 seconds to open just one raw file. Each is doing exactly the same thing to the same data.
If you want to save the raw data you can save it as the random data from the sensor. This is called uncompressed raw. Nikon's version is called NEF.
Compressed Raw
Since this data is mostly random, it can be compressed losslessly to save a lot of space. It later can be reconstiuted (decompressed or expanded) exactly and used the same as raw data. it saves half the space! Nikon uses lossless compression of the data, but is clever enough to map 12-bit data to 10 bits to save more room.
JPGs
The camera creates images from the raw data.
The camera then uses a very clever trick called JPG compression to make a much smaller file from this image while keeping the same image size and resolution.
Just as slugs can't comprehend the cosmos, laypeople without PhDs in mathematics can't comprehend how JPGs retain image quality. One day I'll explain how JPGs use gamma conversions, discrete cosine transforms, quantization matrices and Huffman coding to pack 14 bit linear raw data into 8 bit jpgs. Don't worry, JPGs work great as I'll show.
File Size
File size is measured in MegaBytes, MB. There is no direct way to set this on the D200.
File size depends on the image size in pixels, the amount of detal im the image, the level of JPG qualty desired, and the
JPGs can compress more if there is less detail in an image. A flat image of a blank sky requires very few bits.
GUIDE IMAGE
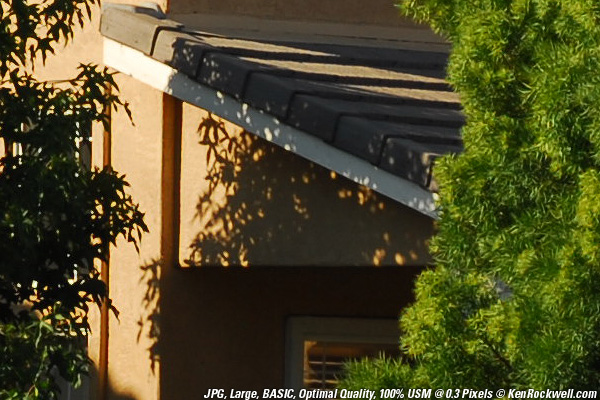
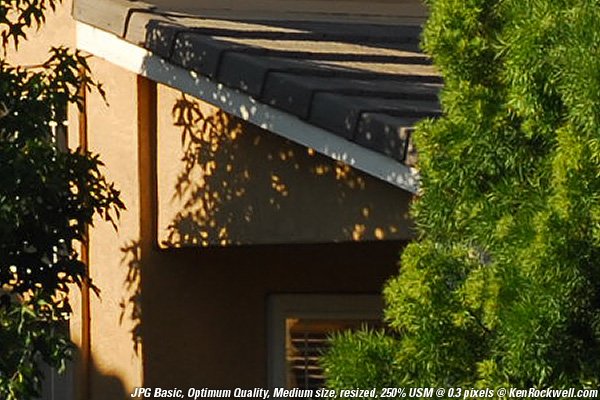
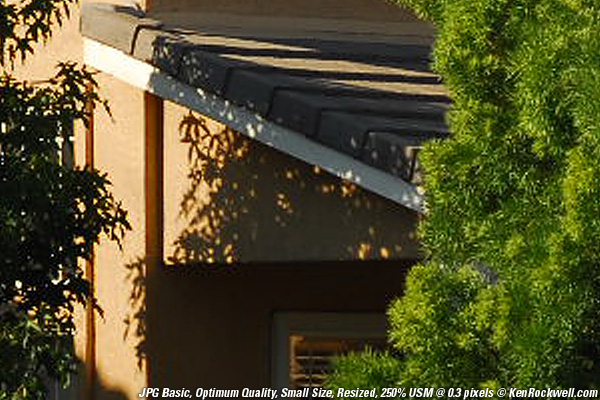
Here's the overall image from which the 100% crops below are taken. I made these with my 55mm Micro lens at f/5.6, the sharpest thing I've got.
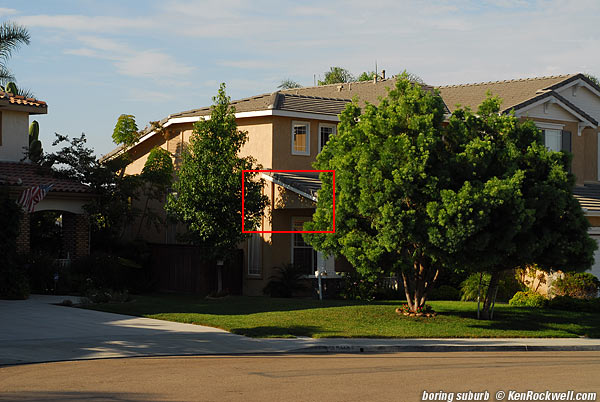
Guide image, full frame. Each image below is a 100% crop taken from the red area.
Uncompressed NEF vs. JPG BASIC, Size Priority
This compares a 16 MB uncompressed NEF with
the crummiest 1.2 MB Large (3,872 x 2,592 pixel) JPG you can get.
There is an obscure JPG compression menu option in the D200 and D2X: Size Priority and Optimum Quality. Size Priority, shown here, is the default and the only option in cameras like the D1X and D70 which don't offer this.
Roll your mouse over the image to see the NEF. Move the mouse away to see the JPG.
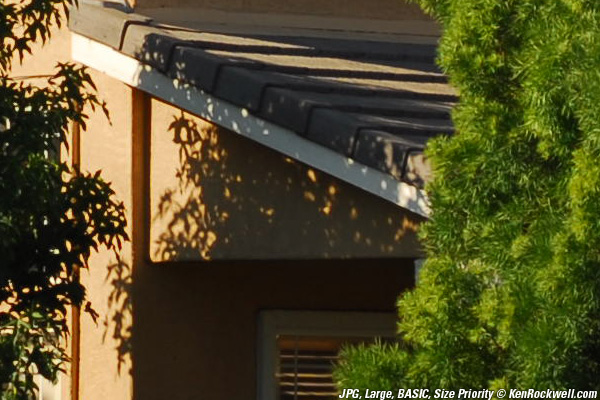
They look pretty much identical, with the JPG having the same resolution, just with less sharpening than was used by the NEF.
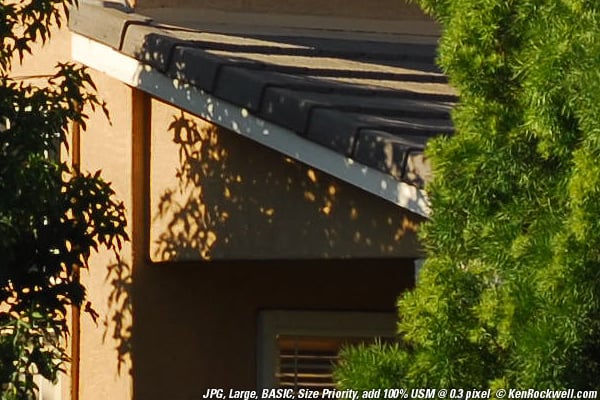
Add USM to Make Them Match:
Let's add some sharpening to the JPG and see if we can make them match.
I added some delicate sharpening at 0.3 pixel radius, 100% to the JPG. See how they compare now:


