Fujifilm X100V User's Guide
<— back to X100V Review
Fuji's own X100V Owner's Manual PDF
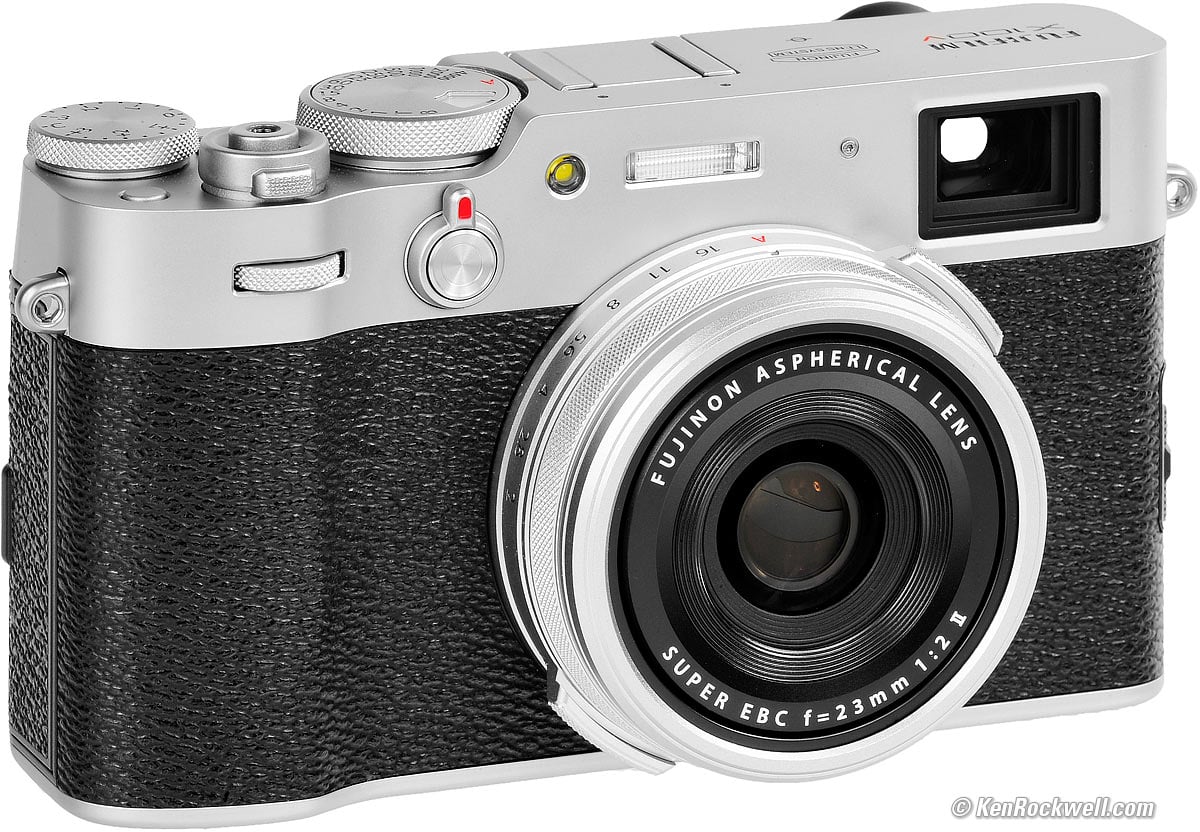
Fujifilm X100V (reversed metal 49mm filter thread, 16.7 oz./474g with battery and card, 4 inch (10 cm) close focus, $1,399.95). bigger. I'd get mine at Adorama in silver, at Adorama in black, at Amazon in silver, at Amazon in black, at B&H in silver, at B&H in black, at Crutchfield in silver, or at Crutchfield in black. Eventually you'll be able to get it used at eBay if you know How to Win at eBay.
This all-content, junk-free website's biggest source of support is when you use those or any of these links to approved sources when you get anything, regardless of the country in which you live. Thanks for helping me help you! Ken.
March 2020 Fuji Sony LEICA Zeiss Nikon Canon All Reviews
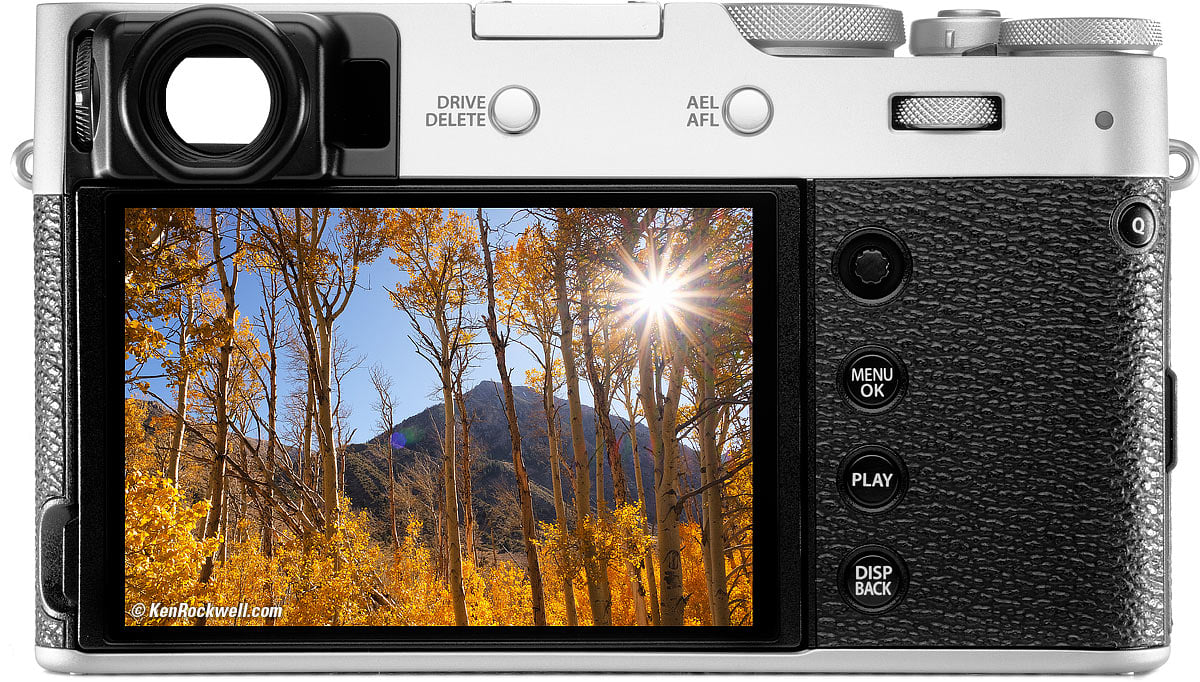
Fuji X100V (note lack of rear four-way controller). bigger.

Introduction top

I buy only from these approved sources. I can't vouch for ads below. |


This X100V User's Guide will teach you tricks and secrets to get the most from your X100V, however photography is all about seeing the picture in the first place, not simply how to operate a camera.
This page will teach you how to be an expert X100V operator, but this page can't teach you how to take great pictures. Be sure to read all my articles at How to Take Better pictures, especially the classics like F. A R. T. and What Makes a Great Photo. Once you're learned how to take better pictures, you'll be able to take great pictures with any camera.
The X100V runs and shoots great once you've set it up, but its obtuse menu system makes it more time consuming than it should be to get it set up in the first place.
Free Live Help top X100V review
If you're in the USA, just phone Fujifilm at (800) 800-FUJI (3854) and they'll walk you though whatever you need.
Charging top X100V review
Just plug it into any USB port with any random USB-C cable.
A green LED on the back means it's charging. It goes out when done.
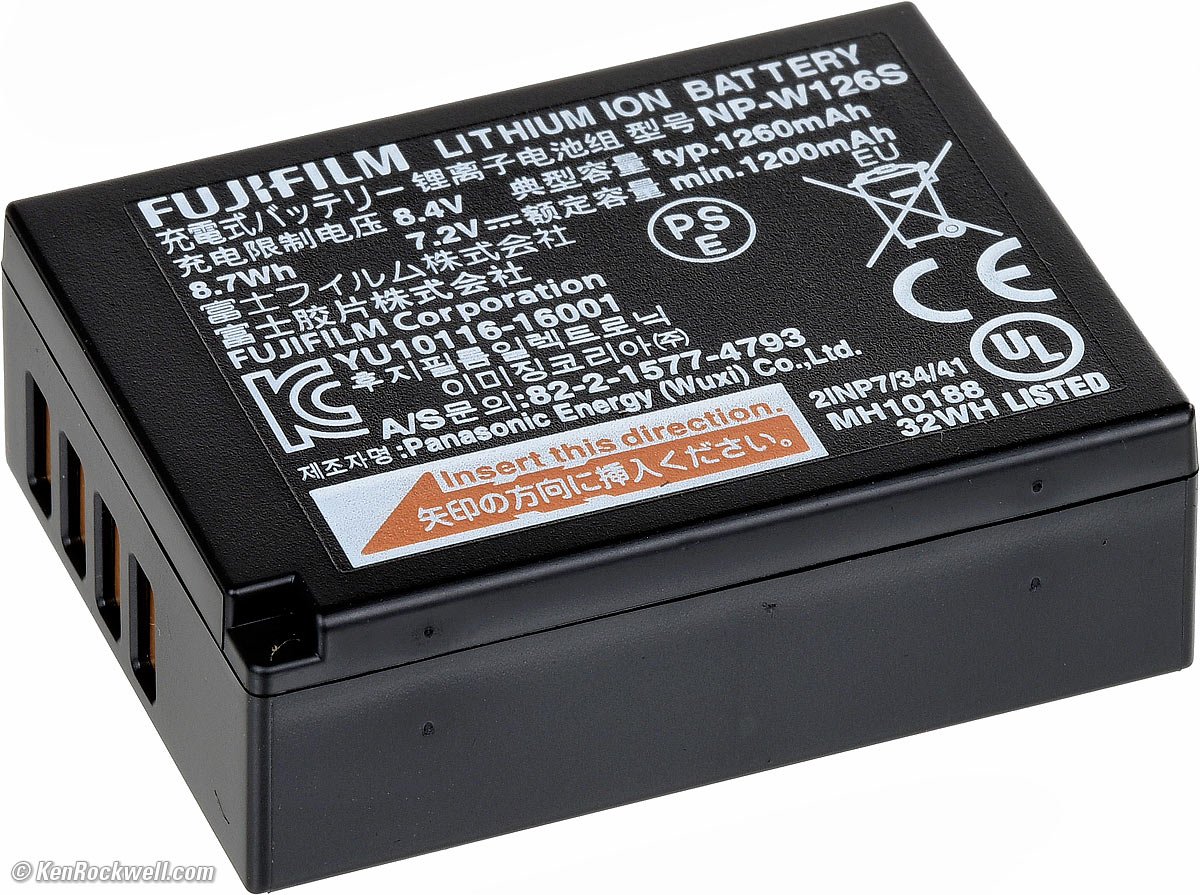
Fuji NP-W126S.
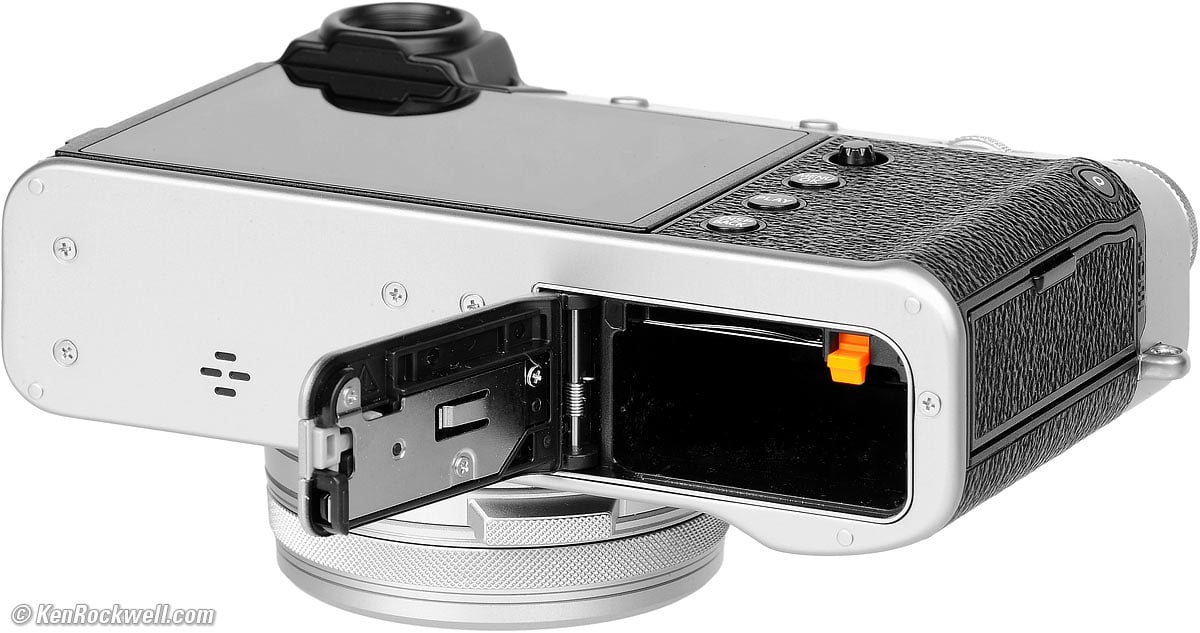
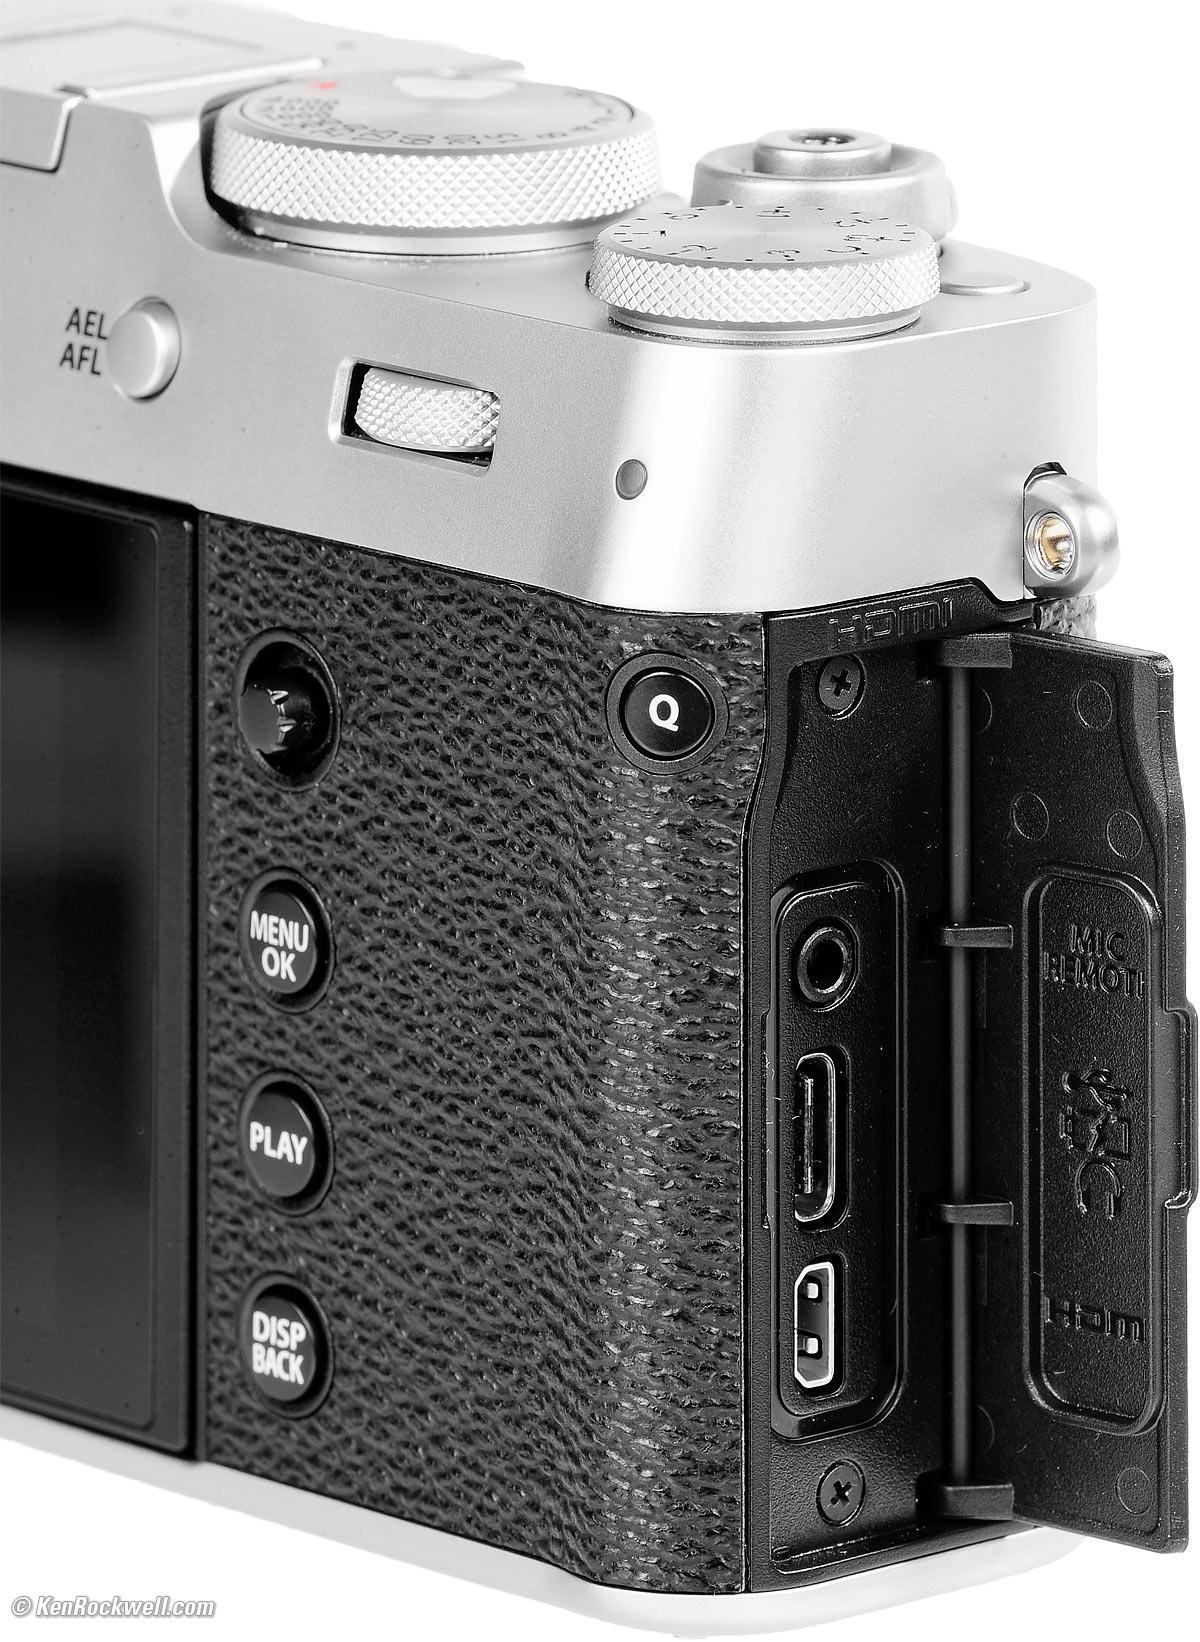
Fuji X100V Battery and Card Door. bigger.
Optional BC-W126 External Charger
The BC-W126 lets you charge a second battery outside the camera at the same time another battery is charging in the camera:
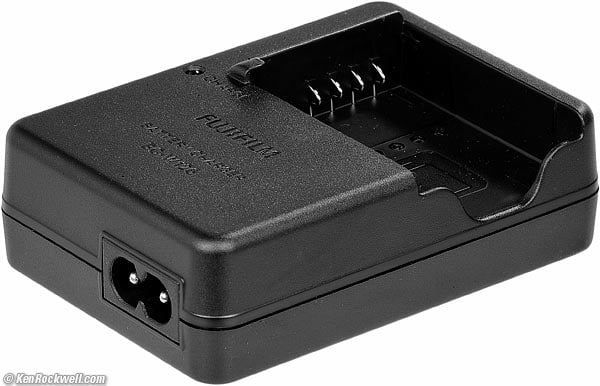
Optional Fuji BC-W126 Charger.
Corded, uses common "∞" shaped plug end.
Power top X100V review
I always leave my power switch ON and it goes to sleep by itself, and wakes when I press the shutter, which is better than most mirrorless cameras.
I prefer to set it to go to sleep after 15 seconds at MENU > WRENCH > POWER MANAGEMENT > AUTO POWER OFF > 15 SEC.
It's very smart, for instance if you have IMAGE REVEW set to CONTINUOUS (as I do), the camera does shut off after 15 seconds rather than run down your battery without you.
I also leave it at its default of MENU > WRENCH > POWER MANAGEMENT > PERFORMANCE > NORMAL.
Straps and Clips top X100V review
Forget Fujifilm's cockamamie split rings and oddball tools you need to attach them. I leave Fuji's included strap and accessories in the box for resale time.
I use the genuine MADE IN GERMANY LEICA 14312 strap, the same one included with their immortal $8,000 cameras, which attaches immediately without needing any tools and doesn't need any guards or fiddling to avoid damaging your finish. I put some Scotch Magic Tape on the top cover to keep the strap from rubbing.
LEICA's strap is also ultra-comfortable and just the right weight for this lightweight camera.
Sure, the German LEICA strap costs more than $2, but you'll be using it long after you've forgotten about this camera. I'm still using the same strap I bought back in 2008!
Fuji also offers a GB-001 Wrist Strap if that's your thing.
Caps versus Filters top X100V review
I never use the fancy original metal Fuji cap. I leave it in my box for resale time.
I use a clear (UV) protective filter instead of a cap so I'm always ready to shoot instantly. I only use a cap when I throw this in a bag with other gear without padding — which is never. The UV filter never gets in the way, and never gets lost, either.
The very best protective filter is the Multicoated Hoya HD3 49mm which uses hardened glass and repels dirt and fingerprints.
For less money, the B+W 49mm 010 is an excellent filter, as are the multicoated B+W and the basic multicoated Hoya filters, but the Hoya HD3 is the toughest and the best.
Filters last a lifetime, so you may as well get the best. The Hoya HD3 stays cleaner than the others since it repels oil and dirt.
All these filters are just as sharp and take the same pictures, the difference is how much abuse they'll take and stay clean and stay in one piece.
I use the fantastic Multicoated Hoya HD3 49mm. Not only is there no problem with ghosts, it really doesn't get dirty. Even if I put my thumb on it, no fingerprints stick! It's made of extra-tough glass, so I throw my X100V around and am always ready to shoot. I never have to futz with a lens cap. I beat on this glass filter as if it's a cap — but it's a cap through which I can shoot.
Fuji sells a PRF-49S filter if you prefer.
Filters, use with top X100V review
The X100V has a deliberately reversed (male) filter thread so Fuji can get lazy people to pay $70 for the Fuji LH-X100 filter adapter and hood or $45 AR-X100 filter adapter ring just to mount any of the 49mm filters above.
I'm cheap and resourceful, so I use an empty 49mm filter ring and mount the filter backwards to do the same thing:
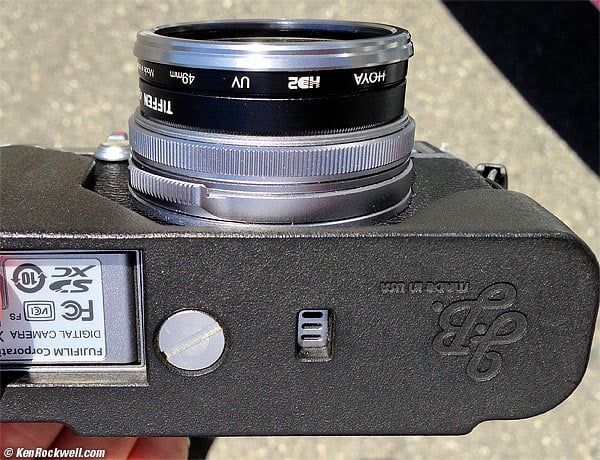
49mm filter mounted in reverse with an empty 49mm filter ring.
A filter may fit backward without an empty 49mm spacer ring, but the empty ring adds space for the lens to move forward to focus at macro distances.
I took an old Tiffen 49mm UV filter and unscrewed the retaining ring. I took out the glass and saved it for later. I removed the X100V's front trim ring, screwed the empty 49mm Tiffen filter ring on backwards, screwed my 49mm Hoya HD3 filter backwards on top of the empty ring, and put the X100V's silver trim ring back on the reversed filter. Done.
Most people will prefer the $13 JJC Fuji X100 Filter Adapter and Hood I use instead. It's well made, dull black on the inside and silver on the outside to sort of match the X100V (these adapters also work on the X100, X100S, X100T and X100F). This adapter is well machined and works fine; I doubt Fuji's Fuji LH-X100 is any nicer.
Each works as well and is all metal and the same size and shape, but the hoods don't quite interchange between them. The filter adapters are useful for anyone lacking a spare empty 49mm filter ring, and each of the hoods bayonets the same way.
NEW: NiSi dedicated front protective filter for all Fuji X100 series cameras, also in silver.
Weird but true; this is a protective filter in a special backwards mount, so no adapters are needed.
Digital Teleconverter 3-Lens Turret top X100V review

Fuji X100V with 23mm f/2 ASPH. bigger.
Want the same performance as a trio of the LEICA SUMMICRON-M 35mm f/2 ASPH, LEICA APO-SUMMICRON-M 50mm f/2 ASPH and the LEICA APO-SUMMICRON-M 75mm f/2 ASPH?
All you do is rotate the focus ring without pressing the shutter, and the X100V magically synthesizes these lenses for you. The X100V is smart enough that if you're shooting at the lower resolution settings it doesn't lose sharpness.
It's even easier than the LEICA poser dropping his lenses on the ground while he tries to change them; all you have to do is turn the lens' ring and you've instantly got your lens — and your shot.
I love that a $1,397 camera can replace $17,000 worth of lenses, and include a better camera than anything LEICA has ever imagined. Heck, LEICA still hasn't graduated to autofocus; LEICA lenses are still all manual focus; good luck!
Try it; I find it super helpful in letting me get great files right out of the camera to send directly to clients without having to crop them later in a computer, which lets me get onto the next job faster.
Lens Converters top X100V review
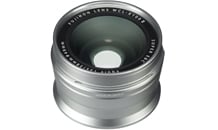
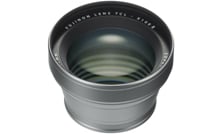
I haven't tried these screw-on optical converters; I think these are silly wastes of time and money — but that's just me. They don't do much (they don't get much wider or longer at all), and they spoil the simplicity of a compact camera:
 |
 |
WCL-X100 II 0.8× converter. |
TCL-X100 II 1.4× converter. |
The WCL-X100 II only converts the lens to about a 28mm versus 35mm equivalent; not enough to worry about.
The TCL-X100 II only converts the 35mm lens to 50mm equivalent, not enough to worry about. Making this lens even sillier, the X100V includes a digital converter that does a great job of giving the equivalent of 50mm and 70mm lenses — for free!
If you do get either of these, advantages are that the camera should recognize them and draw the appropriate frame lines in the optical finder. The EVF of course always shows what's going on regardless of attachments. Fuji also claims that the X100V automatically tries to correct for optical aberrations when either is attached.
Again, who cares? Neither of these lenses makes much difference; the WCL-X100 II isn't much wider and the TCL-X100 II isn't much longer.
Hoods top X100V review
Fuji sells a LH-X100S hood in silver and a LH-X100 B in black.
I don't bother with these. They block the built-in flash and optical finder!
If I wanted a hood, the all-metal JJC Fuji X100 Filter Adapter and Hood mentioned above does the same thing for $13, including a filter adapter.
Finder top X100V review
You have both optical (OVF) and electronic (EVF) finders!
Pull the front lever to select which you see. It's so smart you can shoot optically, while playback and menus magically appear electronically.
If you'd like an electronic focus-aid insert in the lower right corner of the optical finder, push the front lever towards the lens while you're in the OVF mode with a single focus point selected.
2-Axis Level Display top X100V review
To get a great 2-axis level display you first assign this to your choice of button, lever or swipe by holding the DISP BACK button a few seconds (or press MENU > WRENCH > BUTTON/DIAL SETTING > FUNCTION (Fn) SETTING) and set a control to ELECTRONIC LEVEL.
Now use this control to see the 2-axis level.
Format Card top X100V review
Format Card is hidden at Menu > Wrench > User Setting > Format.
I format my card every time I put it back in my camera to prevent against the possibility of data corruption or that the card was formatted in a different camera — but be sure you've downloaded everything from that card before formatting it.
Menus top X100V review
It's a bear trudging through all the menus, sorry.
You can't hit MENU again to get out of the menus to shoot, press the shutter or hit the BACK (not MENU) button.
MENU always starts back at the top, unless you have a MY MENU set at MENU > WRENCH > USER SETTING > MY MENU SETING > ADD ITEMS, in which case the menu system will always start at MY MENU.
Autofocus top X100V review
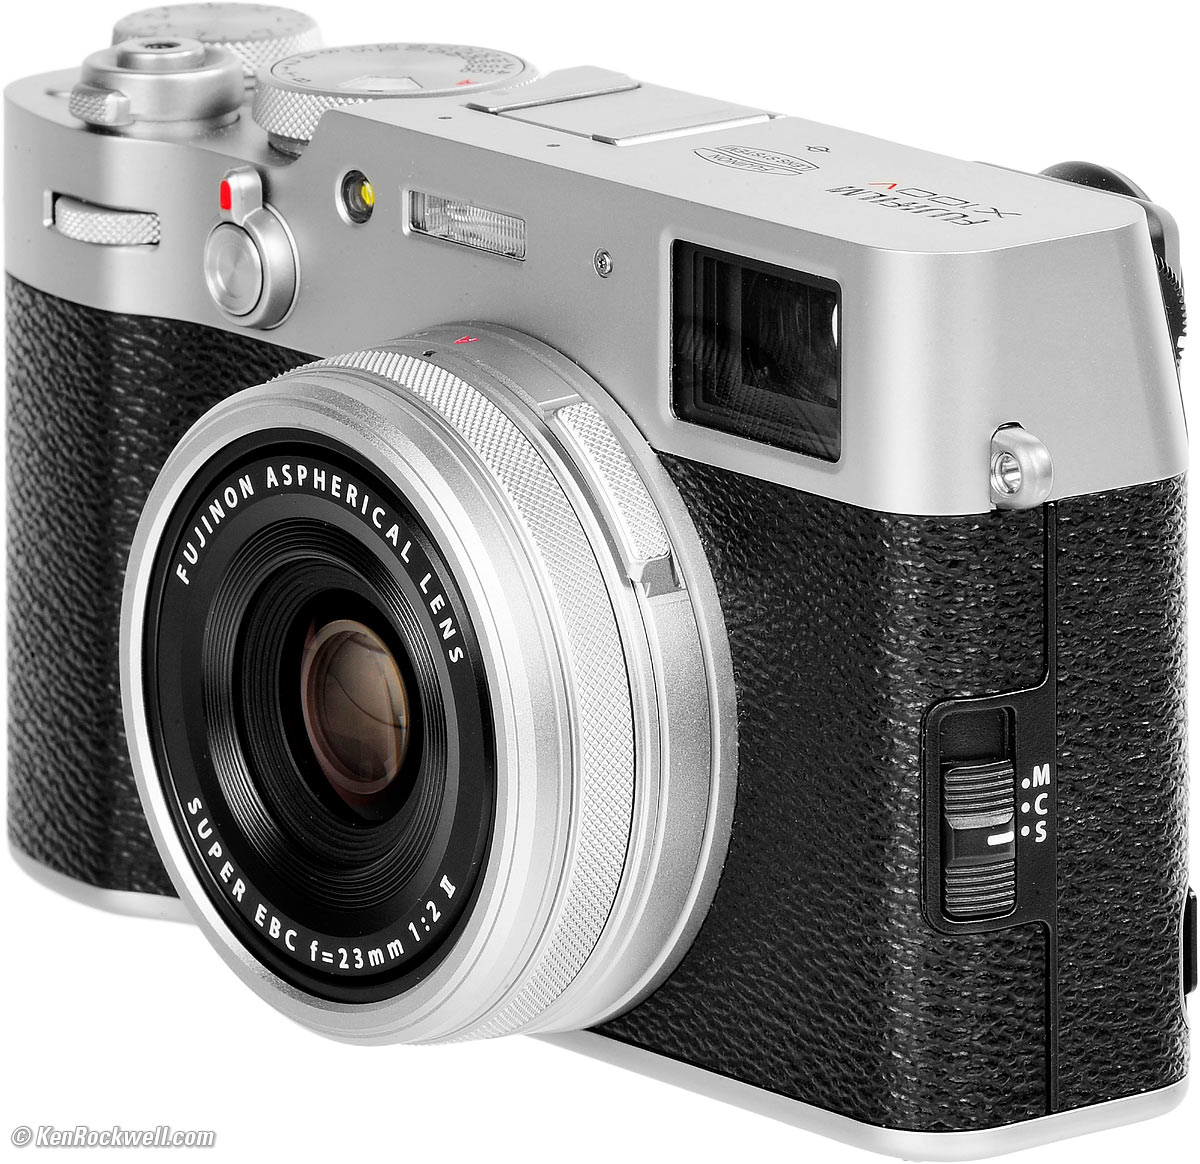
Focus Mode Switch, Fuji X100V. bigger.
The M/C/S (MF/AF-C/AF-S) switch is on the side front of the camera; it's not on your lens or in the menus, Hallelujah!
Autofocus tracking is slow; while it has fast frame rates for subjects that hold still, this is not a good camera for sports or action.
The best settings to try for sports and action AF tracking are AF-C with wide/tracking.
The nubbin can't select AF areas in the WIDE/TRACKING mode. You have to manually go into a more restricted AF-area mode to be able to select areas.
I prefer to program my AEL/AFL button to select AF Area mode.
Face Detection top X100V review
You have to enable face detection manually at MENU > AF/MF(page 2 of 3) > FACE/EYE DETECTION SETTING > FACE DETECTION ON. The default is off.
FACE DETECT can't be overridden by moving an AF point, even if it's WRONG and locks-on to something stupid. If this happens and you can't focus on what you need to, turn it off. If this happens a lot, set an Fn button to allow fast switching of FACE DETECT ON and OFF.
Manual Focus top X100V review
Set MENU > AF/MF > AF+MF > ON and then turning the focus ring with the shutter button pressed halfway gives manual focus override (without the shutter pressed this ring is the digital teleconverter). This feature works best when AF is locked; it doesn't do much in AF-C.
The AF Lock (AEL/AFL) button is ignored in either AFS or AFC modes. To lock focus, slide the AF mode switch to M (Manual).
In Manual focus mode, the AFL/AFL button is a spot-focus button: tap it and the X100V will autofocus once and lock! Just tap and the X100V does its thing; you don't have to hold the AEL/AFL button.
I prefer to program my AEL/AFL button to select AF Area mode.
Exposure Compensation top X100V review
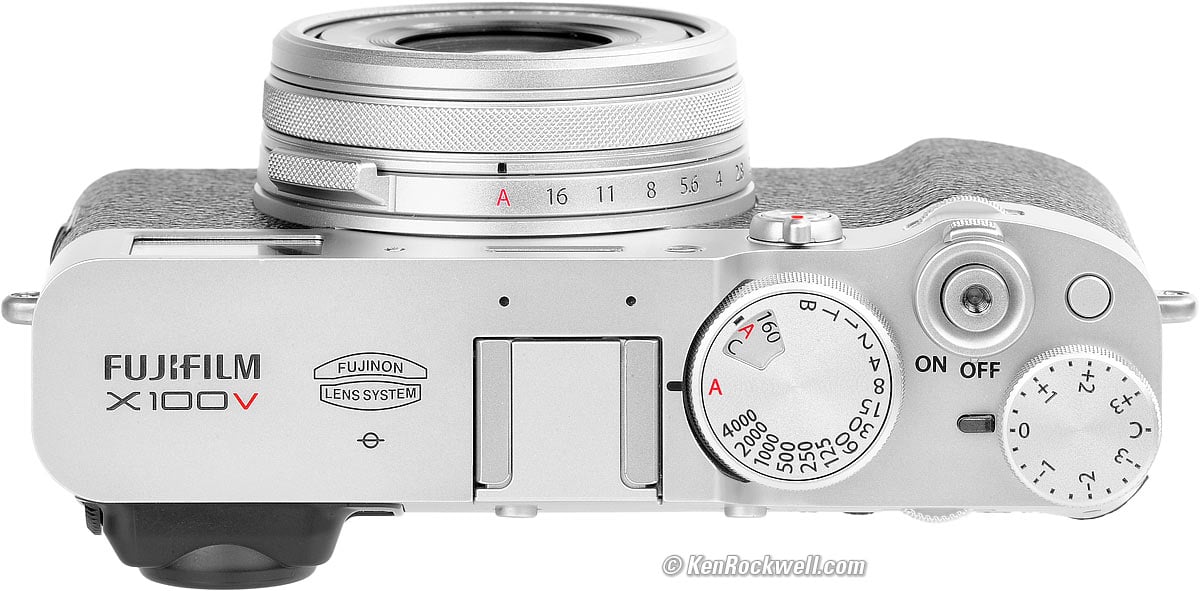
Just turn the top dial.
If you need more than a ±3 stop range (you don't), set the dial to "C" and use the front dial to set compensation as far as ±5 stops.
Exposure Modes top X100V review
There's no need for PSAM selections. All you do is set the aperture or shutter rings to A if you want the camera to select that value for you:
Mode |
Shutter Dial |
Aperture Dial |
Program |
A |
A |
Aperture-Priority |
A |
Choose Aperture |
Shutter-Priority |
Choose Shutter Speed |
A |
Manual |
Choose Shutter Speed |
Choose Aperture |
Easy!
Long Exposures top X100V review
New in the X100V is the ability to set exposure times directly out to 15 minutes.
To set these, set the top dial to T (TIME), and turn the rear dial to set the exposure time.
Long exposures count-down on the rear LCD or in the finder, depending on which you were using when you pressed the shutter.
These super-long times even work in Shutter-Priority mode!
To use BULB, set B on the shutter dial and pick a fixed aperture (BULB will change to a 30 second exposure if you left the aperture at A). The rear LCD or finder will count-up the time.
Remote Shutter Release top X100V review
I use a standard $6 threaded cable release.
You're free to use the RR-90.
More honestly, I never use remote release. I use the self timer if I need it.
ISO top X100V review
Lift the shutter dial and turn to set ISO. “A” is Auto ISO, and "C" means you instead can set ISO with the cameras front unmarked command dial.
You only can set ISO 160 ~ 12,800 on the dial; for the other speeds set the ISO Dial to "C" and then set ISO with the front (unmarked) command dial.
Only ISO 160 ~ 12,800 works with the electronic shutter or movies; use the regular leaf (mechanical) shutter for the full range from (L) 100 to (H) 51,200.
While “A” is Auto ISO, there are three different Auto ISO settings, which are programmed and then selected in the menu system.
Movies top X100V review
Just use your iPhone; it works better.
To get the X100V to shoot movies, press the rear DRIVE DELETE button and click down to the bottom MOVIE mode. Start and stop shooting with the shutter button. Set the left-side AF mode switch to C for continuous autofocus, but be forewarned that autofocus is very slow and the audio is effectively in mono.
You might prefer to use a MIC-ST1 Stereo Microphone for better, stereo audio — or just use your iPhone for video.
Programming Buttons, Levers & Swipes top X100V review
You can set this in the menus the hard way at MENU > WRENCH > BUTTON/DIAL SETTING > FUNCTION (Fn) SETTING, or just hold DISP/BACK a few seconds, and BINGO!, you'll be in the same place from which you can set them all!
Front Dial top X100V review
You can set what functions it controls at MENU > WRENCH > BUTTON/DIAL SETTING > COMMAND DIAL SETTING.
When set, you supposedly can press-in the front dial to change its function, but I've never seen this work on the X100V.
Flash top X100V review
Built-in Flash
I use the built-in flash all the time. It's wonderful indoors and out.
Leave it ON all the time unless you have a strong reason not to, like shooting through glass. It works flawlessly under all conditions from moonlight to daylight at any distance.
Unlike interchangeable-lens cameras, the special leaf shutter of the X100V synchronizes at every shutter speed, so it never locks you out at faster speeds so long as you're using the mechanical shutter.
If you set flicker reduction, the silent electronic shutter or a continuous advance mode (or possibly in other modes as well), the flash simply won't turn on, and the camera won't tell you why. Sorry; it simply expects you to guess what you need to deactivate so flash can work.
The shutter modes are set at MENU > SHOOTING SETTING (camera icon) > SHUTTER TYPE. Flash works in Mechanical, or in (M+E Mechanical & Electronic) so long at the speed is 1/4,000 or less, which also uses the mechanical shutter.
Flash doesn't work at high frame rates (the Continuous Drive Mode), so use Still Image Drive Mode, set with the DRIVE DELETE button. If you set any of the CONTINUOUS advance modes the flash simply turns off, even if you turn it ON.
Flash Sync Mode and Exposure Compensation flash top X100V review
Slow sync and rear-curtain modes are set at MENU > FLASH BOLT ICON > FLASH FUNCTION SETTING > SYNC.
Flash exposure compensation is also set there.
Oddly mine tends towards overexposure at close distances in the SLOW sync mode, so I leave my flash sync at NORMAL. If I need slow sync, I just set a slower speed on the shutter speed dial in NORMAL mode and it works great at that slow speed!
Flash Color flash top X100V review
For fabulous fill-flash results indoors, use a colored filter taped over the flash to make the flash match the tint and color temperature of the ambient lighting, and then to set the camera's white balance to match that lighting. This way your flash matches the color of the ambient light; too often fill-flash looks too blue or purple compared to ambient light indoors when people forget to filter the flash first.
I tape a small piece of 1/2 CTO gel over my flash when shooting against a sunset (leave the X100V at AUTO WB), or a full CTO when shooting under tungsten (with tungsten white balance). Just cut a small piece from the big sheet and use some Scotch Magic Tape to hold it over the flash. Don't tape over the part through which the flash shines.
Use a fluorescent conversion gel filter to match fluorescent light (again with the camera's white balance set to match).
External Flash flash top X100V review
I use no external flash. Why would I want to crud-up my camera with more junk I don't need? The built in flash is flawless.
If you must,
The EF-X20 is a tiny flash designed for the X100V. It takes 2 AAA cells with a guide number of 65'/20m.
The EF-20 is a small flash that takes 2-AA cells with a guide number of 65'/20m. If I got a flash for my X100V, I'd get this EF-20 since I prefer common AA cells to the puny AAAs. This is the same as the Sunpak RD2000.
The EF-42 is a huge DSLR flash that takes 4 AA cells with a guide number of 42m/137' and a zoom head. We don't need a zoom head with the X100V, I wouldn't put this thing on my X100V — but it will do a great job for heavy-duty daylight fill.
The EF-X500 is even bigger!
Live Color YRGB Histograms as You Shoot top X100V review
You can see live color YRGB histograms before you press the shutter (something neither Sony nor Nikon can do except in playback when it's too late), but you have to activate this by programing an Fn button to call-up the color histogram.
You set this by holding DISP/BACK a few seconds (or the hard way at MENU > WRENCH > BUTTON/DIAL SETTING > FUNCTION (Fn) SETTING), and then programming a function button (or touch-screen swipe) of your choice to HISTOGRAM.
Now press that button to show the color histogram as you shoot.
Warm/Cool Tone B&W Images top X100V review
This lets your as-shot B&W images be toned warmer or cooler, instead of just being neutral gray.
First choose a B&W option in the Film Simulation menus: MENU > I.Q. > FILM SIMULATION > and choose any of the many B&W options.
Now choose how warm or cool you'd like them at MENU > I.Q. > MONOCHROMATIC COLOR.
Image Review (showing the just-shot image) top X100V review
Turn this on at MENU > WRENCH > SCREEN SET-UP > IMAGE DISP. > choose display time, or CONT leaves the just-shot image up until you press another button.
IMAGE DISP only works in the finder with Eye Control ON, otherwise it only shows on the rear LCD.
The X100V is smart enough to time-out and turn-off automatically even if a photo is displayed in CONT mode; it won't run down the battery if you walk away after taking a photo in that setting.
Playback top X100V review
"Autorotate playback" simply displays vertical shots as small vertical images on the horizontal screen. Other cameras call this "rotate tall." It doesn't rotate the image if you turn the camera, so I leave this option OFF. This setting is not in the Playback menu; it's hidden at MENU > Wrench > Screen Setup > AUTOROTATE PB.
LCD top X100V review
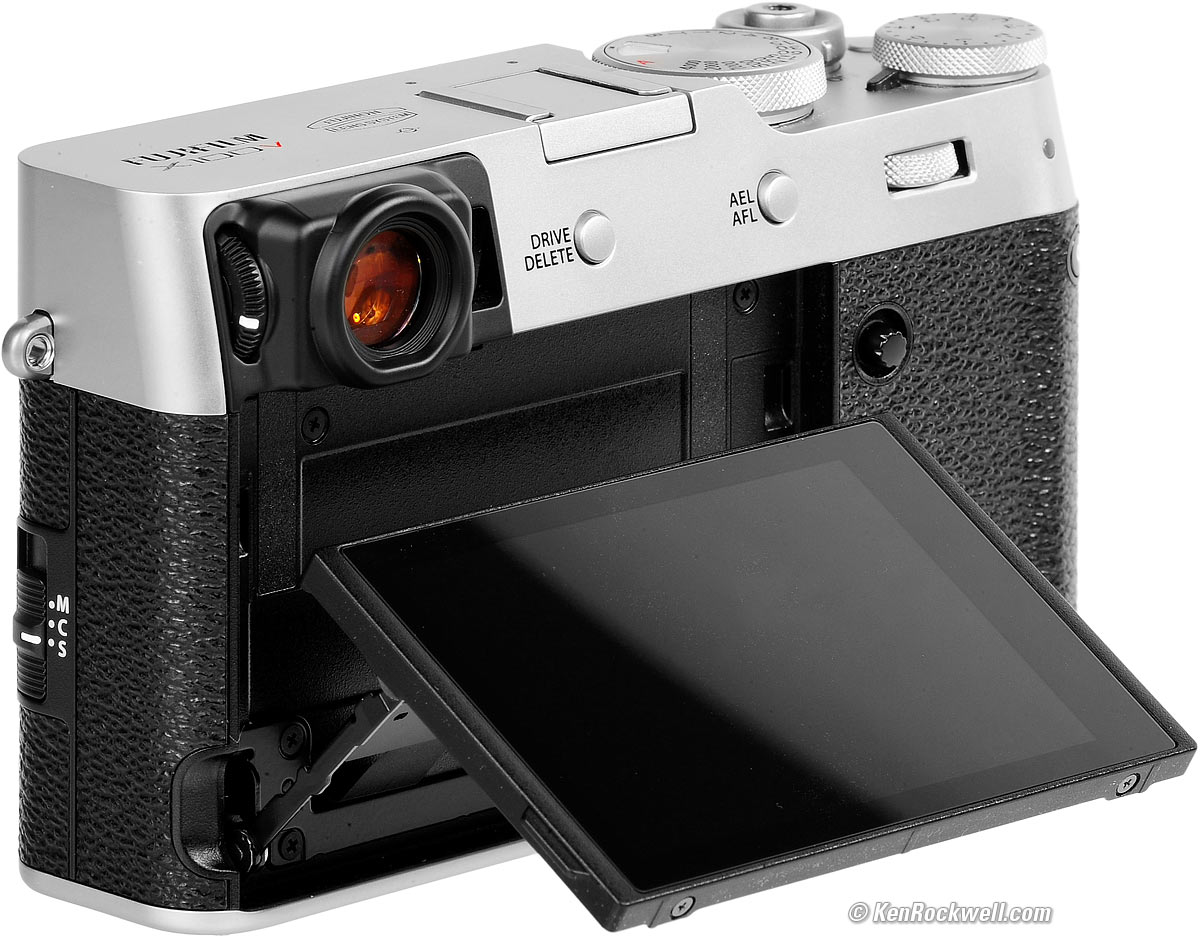
Fuji X100V flipping LCD. bigger.
The LCD is fine in most light, but dim in daylight as it has no auto brightness control.
No worries; set it to +5 and it looks great outdoors. Do this at MENU > WRENCH > SCREEN SET-UP > LCD BRIGHTNESS > +5.
Likewise for night photography, set it to MENU > WRENCH > SCREEN SET-UP > LCD BRIGHTNESS > -5, or otherwise you might make pictures that look too dark when seen during the day.
Screen Protectors top X100V review
I use a generic cut-to-fit screen protector.
Use any of them, simply cut it to fit, and you're done.
In my case, I'm still working off a set of ten protectors I bought on close-out for the Palm Pilot of the 1990s! They don't go bad in storage.
Touch Screen "Touch Function" Swipe Settings top X100V review
Watch the video first for 99% of this, but two points specific to the X100V different from this video are:
You should set the half-screen touch screen mode (MENU > WRENCH > BUTTON/DIAL SETTING > TOUCH SCREEN SETTING > EVF/OVF TOUCH SCREEN AREA SETTING > RIGHT HALF OF SCREEN so your nose doesn't select AF areas for you, but you have to be tricky about how you swipe around the LCD to be able to select AF areas all the way over to the left. Try starting at the far right of the LCD so you have enough length to run with just half the screen. It took me a few tries to get to select all of the AF areas with just half the screen, but it does work..
To make the toilet go away from the top right side of your LCD, press MENU > WRENCH > SCREEN SETUP > DISP. CUSTOM SETTING > EVF/LCD > uncheck TOUCH SCREEN MODE.
Tripods top X100V review
I use no tripods. They went out with the introduction of Kodachrome 200 back in 1986.
If I need a time exposure, I rest my X100V on a ledge (most of the time).
If I do use a tripod, it's my amazing little Oben CTT-1000 that weighs less than a pound and does everything. More at Tripods. Use the lightest you can find; only someone wanting to sell you a tripod will tell you to buy an expensive one.
Battery Percentage Readout top X100V review
There is a percentage indication, but it is very well hidden.
The only way to see it is only on the rear LCD, only when the camera is ready to shoot (not on playback and not in menus), and only in the one data screen that comes up as you press DISP BACK to change the screen functions.
If you can get the percentage to display, it will be in the top right of that screen:
I'd get my X100V at Adorama in silver, at Adorama in black, at Amazon in silver, at Amazon in black, at B&H in silver, at B&H in black, at Crutchfield in silver, or at Crutchfield in black. Eventually you'll be able to get it used at eBay if you know How to Win at eBay.
This all-content, junk-free website's biggest source of support is when you use those or any of these links to approved sources when you get anything, regardless of the country in which you live. Fuji does not seal its boxes in any way, so never buy at retail or any other source not on my personally approved list since you'll have no way of knowing if you're missing accessories, getting a defective, damaged, returned, store demo or used camera. I use the stores I do because they ship from secure remote warehouses where no one gets to touch your new camera before you do. Buy only from the approved sources I use myself for the best prices, service, return policies and selection.
Thanks for helping me help you!
Ken, Mrs. Rockwell, Ryan and Katie.
© Ken Rockwell. All rights reserved. Tous droits réservés. Alle Rechte vorbehalten.
Help Me Help You
I support my growing family through this website, as crazy as it might seem.
The biggest help is when you use any of these links when you get anything. It costs you nothing, and is this site's, and thus my family's, biggest source of support. These places always have the best prices and service, which is why I've used them since before this website existed. I recommend them all personally.
If you find this page as helpful as a book you might have had to buy or a workshop you may have had to take, feel free to help me continue helping everyone.
If you've gotten your gear through one of my links or helped otherwise, you're family. It's great people like you who allow me to keep adding to this site full-time. Thanks!
If you haven't helped yet, please do, and consider helping me with a gift of $5.00.
As this page is copyrighted and formally registered, it is unlawful to make copies, especially in the form of printouts for personal use. If you wish to make a printout for personal use, you are granted one-time permission only if you PayPal me $5.00 per printout or part thereof. Thank you!
Thanks for reading!
Mr. & Mrs. Ken Rockwell, Ryan and Katie.