LEICA Q3 Pro Tips, Secrets & User's Guide
▼ Index of Sections ▼
LEICA Q3 Review
LEICA: SL3-S SL2 SL2 S Q3 43 Q3 Mono Q3 Q2 Q2M M EV1 M11-P SAFARI M11-P M11M M11 M10-R M10M M10P M10 M240 M-E M9P M9T M9 M7 M6/TTL CLE M3 IIIf IIIa Lenses
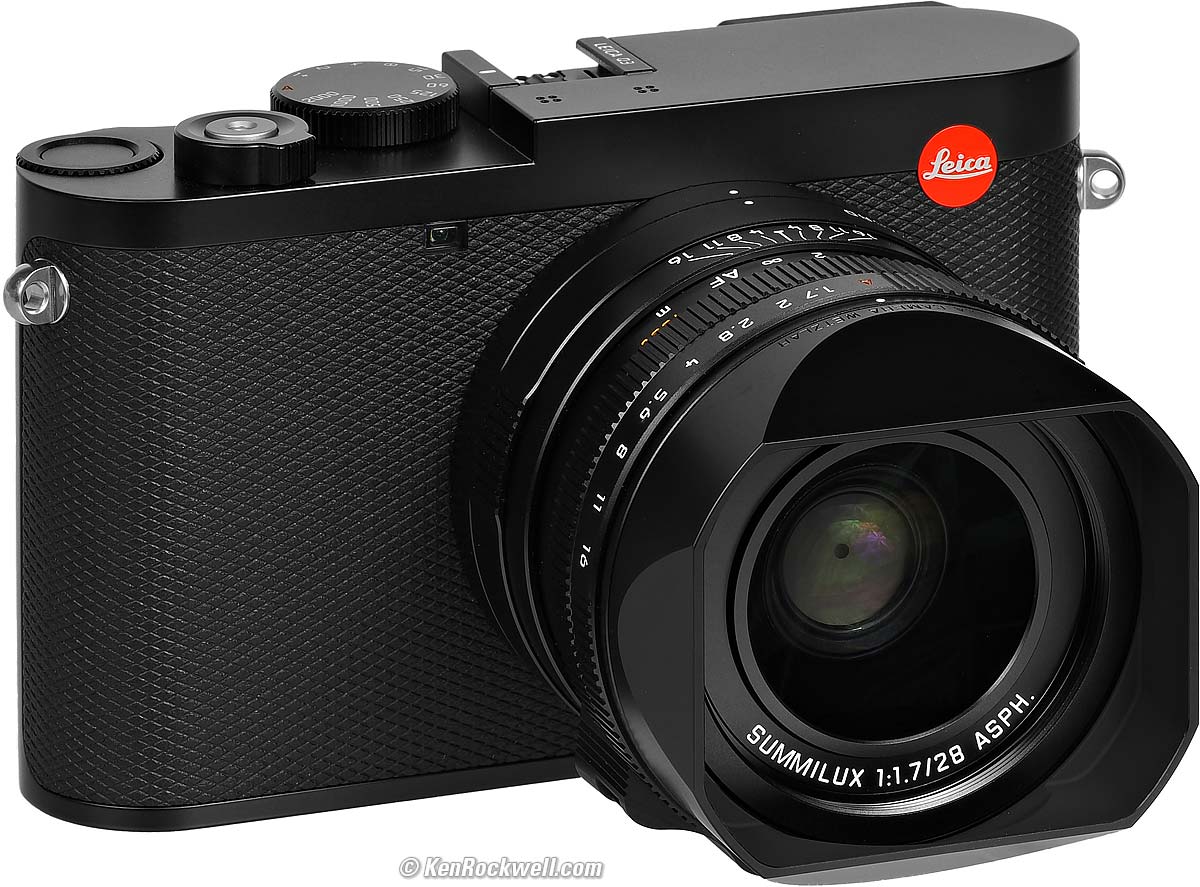
LEICA Q3 (49mm filters, 26.9 oz./764g with hood, battery and SD card as shown (or 26.4 oz./748g with protector ring, battery and card), 1'/0.3m close focus (0.56'/0.17m in macro mode), 0.11× macro ratio (0.24× in macro mode), $7,350 new or about $5,500 used if you know How to Win at eBay.
The Q3 also comes in metal gray metallic, comes in a version with a special black-and-white-only sensor for greatly improved high ISOs and effective resolution, and comes in a version with a 43mm f/2 lens). größer (bigger).
I got my Q3 at B&H. I'd also get it at Crutchfield, at Adorama, at Amazon or used at eBay if you know How to Win at eBay, or get it used at KEH.
This all-content, junk-free website's biggest source of support is when you use those or any of these links to approved sources when you get anything, regardless of the country in which you live. Thanks for helping me help you! Ken.
June 2026 Better Pictures LEICA Reviews LEICA Lenses lesser-brand reviews
Why Fixed Lenses Take Better Pictures
Basics Q3 review top
Menu System: Control Screen Navigation
Adding Your Copyright Information
Programming Fn Buttons Customize Top Dial
Lens & Focus Q3 review top
Autofocus Settings Manual Focus
Digital Lens Selector MACRO Mode
Lens Corrections Hoods, Filters & Caps
Shooting Q3 review top
Exposure Modes Exposure Compensation
Picture Settings Color Spaces ISO Resolution
Perspective Control Mode Scene Modes Flash
Shutter Modes Third-Stop Shutter Speeds
Remote Releases Frame Rates Frame Buffer
Profiles (Presets) Q3 review top
Save or Load All Presets to or from a Card
Playback Q3 review top
Playback: Zoom Image Swapping Deleting
Straps, Accessories & More Q3 review top
LEICA Q3. größer.
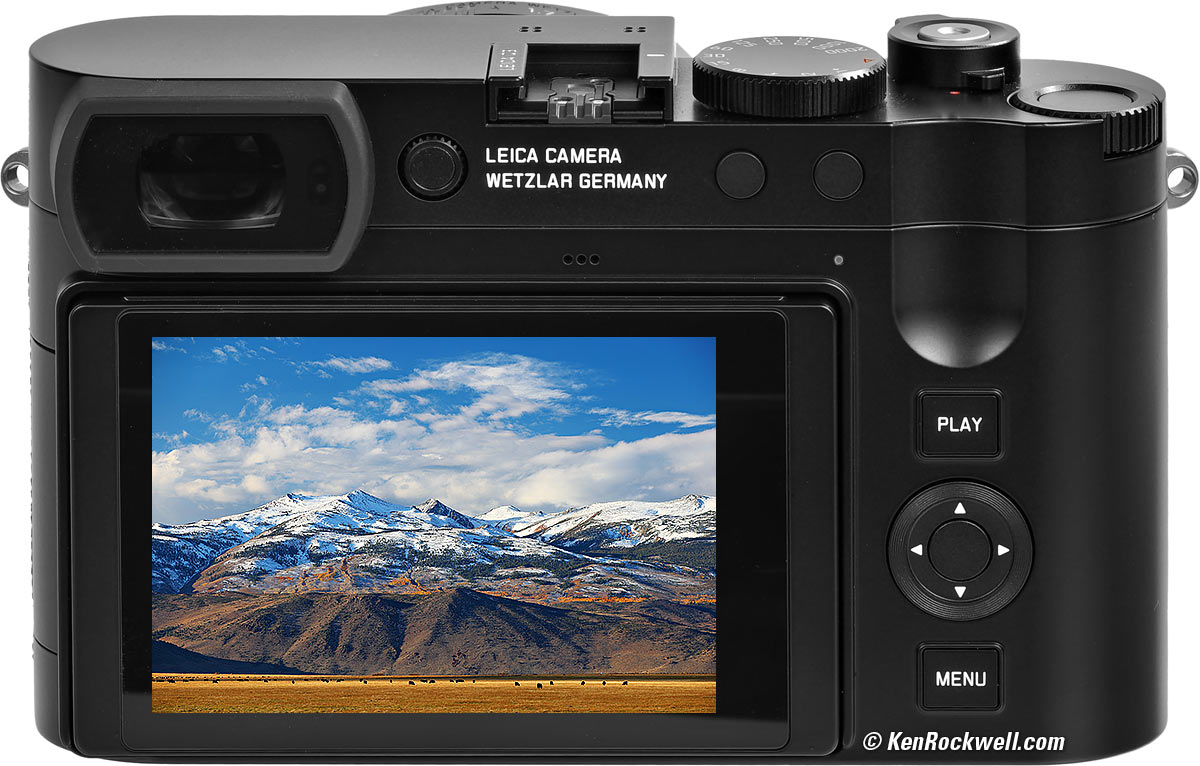
Bridgeport, California im Display der LEICA Q3. größer.

Introduction Q3 review index of sections top

I buy only from these approved sources. I can't vouch for ads below. |


This is my plain-English guide to the tricks I use with my LEICA Q3. If you want to spend hours reading about the excruciating details, see also LEICA's own Q3 Manuals.
This is as of firmware 4.1 in 2026, which completely changed everything from version 3.
This will make you an expert on the LEICA Q3's controls and menus, however to get great photos you still need to get yourself to the right place at the right time and point the camera in the right direction, which is a lot harder than mastering the settings of the Q3. Making a great photo involves timing, FARTing, knowing the critical basics of what makes a great photo and a whole lot more.
Please enjoy my articles on How to Make Great Photos if you haven't already. Cameras don't take pictures, people do. It's all about finding something cool, and then showing us exactly what's cool about it. This guide will help you become an expert at the Q3, but more importantly you need to be able to see the picture in the first place.
I'm going to explain how and why to set a slew of different things. After all your effort to set these I'll show you how to save all these to a card, and then I'll give you my own settings file you can load into your camera which will make all these settings for you.
If you find this free-to-read, directly to-the-point guide as helpful as a book you might have had to buy or some waste-of-time workshop you may have had to take, consider helping me write more of these with a gift of $5.00 — especially if you intend to make a printout of this copyrighted guide.
Charging & Power Q3 review index of sections top
It works with the included BP-SCL6 Battery, and also works with the older BP-SCL4 battery.
It charges via USB-C from any USB-C or USB-A source with any USB-C to USB-C cable or USB-A to USB-C cable.
The USB-C connector is behind a flap on the left side of the Q3:
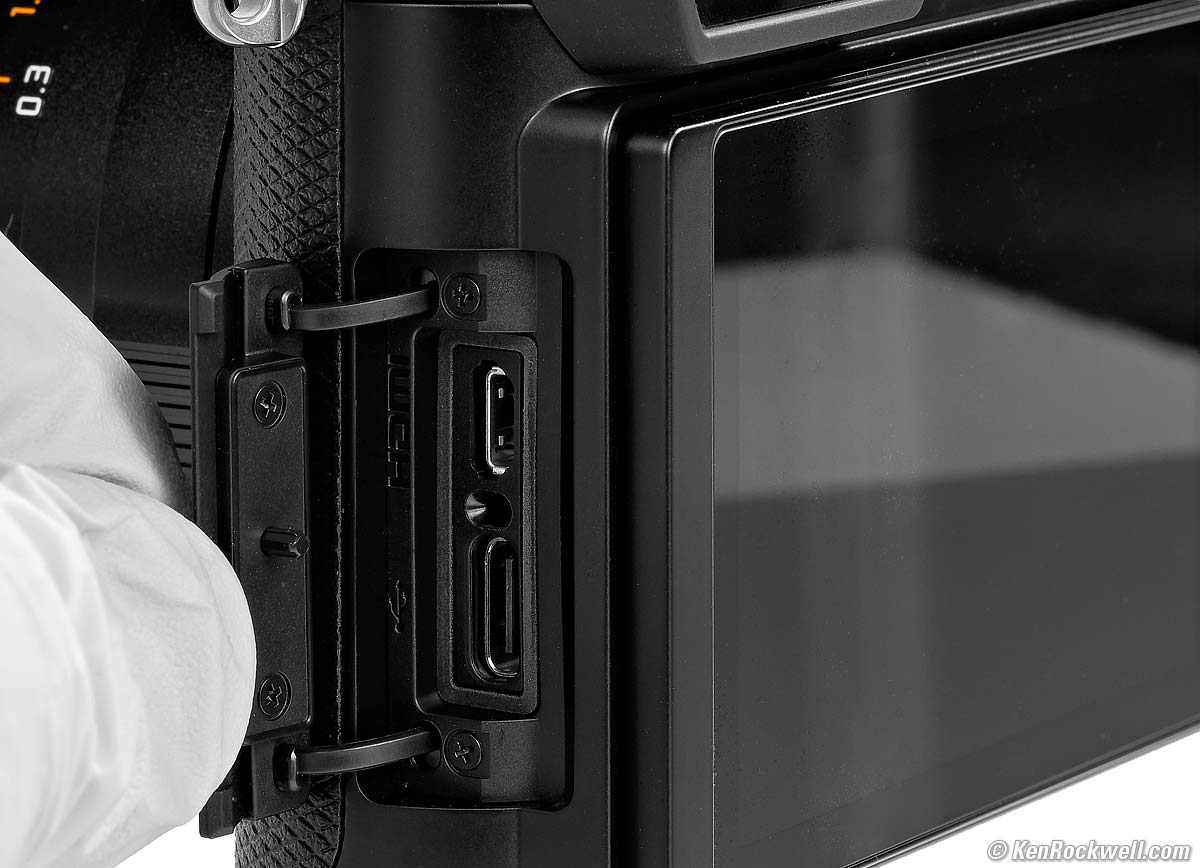
LEICA Q3 Connector Flap. größer.
It charges at a measured 10⅔ W (4.72V at 2.22A) over USB-C. It also charges at 9V at the same rate.
It charges at a measured 6⅔ W (4.63v 1.42a) over USB-A .
It charges from 20% to 50% in 40 minutes, consuming 6 Wh.
It draws 177 mW when done (34.7mA at 5.1V).
A small green dot on the back flashes slowly at 30 BPM while charging, and turns solid when done.
The big battery needs no battery door. It's easy to drop it out and slam a fresh one home without having to stop and look carefully or fiddle with anything. In fact, it's easy to do blindfolded!
Alternately, or if you need to charge a second battery at the same time, use the BC-SCL6 USB-C External Charger.
You also can use the BC-SCL4 External AC Charger which was discontinued in 2026, but easily available at eBay if you'd rather plug into AC power.
A LEICA-Klasse solution is the HG-DC1 Handgrip & Wireless Charging Station, which is a nice grip with a thin base and an included wireless charging pad. Pop this grip on your Q3 and you can just plop it down on the included pad to charge. Brilliant!
By default the Q3 goes to sleep after two minutes of not pressing any buttons, which works great. I never have to turn off my Q3; I just sling it around my shoulder and go shooting. It wakes with a half-tap of the shutter.
When it's asleep it ignores the MENU and PLAY buttons. Half-tap the shutter to wake the Q3, then press MENU or PLAY.
Menu System Q3 review index of sections top
The LEICA Q3's menu system works very differently from other cameras.
Not only that, it was completely changed as of firmware version 4, so even if you used to know how to use your LEICA Q3, here's how to work the menu system as of June 2026.
Control Screen (Control Center) index of sections top
Press MENU once to get to the control screen, which LEICA calls the Control Center.
Tap or click around to highlight what you want to change, then press the center control button or turn the top wheel to change that setting.
Tap the shutter to exit and shoot, or to get to the menu system, press MENU again.
To change what an item in the Control Screen does, long-press it.
Menu Navigation index of sections top
Press the MENU button twice to get to the menu system.
One click only gets you to the Control Screen; the second and further clicks get you to the pages of the menu system.
To move to the next page in the menu system, press the MENU button again.
Press the left arrow ◀ on the four-way rear controller (not MENU) to go back to a previous page.
When I say "press MENU so many times," this is presuming it's starting at the first page after you press it twice. It may start at another page, so just as often you'll be pressing MENU lots of times until you find the page you need out of a total of six unnumbered pages. Look for a white dot at the left of the screen; it moves up or down as you select pages. Good luck.
You'll see "Auto Magnification" in the menus, which means that the view magnifies simply by turning the manual focus ring.
Adding Your Copyright Information Q3 review index of sections top
I prefer to have © KenRockwell.com added to the EXIF data of all my images.
To do this, set Artist and Copyright by:
Press MENU seven times > Camera Information > Copyright Information > Copyright > Turn ON, and add up to 20 characters in each of the Information and Artist spaces.
Sorry, but only 20 characters is barely enough to add (c)KenRockwell.com, these fields are much shorter than cameras from lesser brands.
There is no real © symbol, you'll have to make do with (c).
Programming Function Buttons Q3 review index of sections top
To program a function button (Fn1, Fn2 and the button inside the Top Dial), have the camera in the mode for which you want to set that button (live view or playback), then hold the button for a few seconds.
Easy!
Programming the Unmarked Top Dial Q3 review index of sections top
Press MENU five times > Customize Control > Thumbwheel > and select what you want it to do in each exposure mode.
The middle of the dial is also an unmarked function button. Hold it a few seconds to set it.
Showing Levels, Grids, Histograms, Clipping & etc. Q3 review index of sections top
The settings you choose apply to Live View shooting as well as to playback, and are the same for the rear LCD and the finder.
Program what you want for up to four different screens, called Info Profiles. You cycle through these four pages as you press the little button in the center of the four-way rear controller.
To select the items displayed for each of the four screens:
Press MENU five times > Capture Assistants > Select one of the four Info Profiles > Settings and turn things on and off as you like for each of them.
By default these four screens are programed with varying levels of detail.
If you don't want four levels of this, feel free to turn off some of the Info Profiles in that same menu.
If the Live View is in a "clear" mode (no icons), then it won't show you any aperture, shutter, compensation or other values as they are adjusted!
There are NO color histograms available in either shooting or playback. There is but one tiny grayscale histogram option, and that's it.
Autofocus Q3 review index of sections top
Set this however you want.
I shoot things that hold still, so I gave up on all the trendy but fidgety modes about which non-LEICA shooters get excited, like subject recognition and tracking.
By fidgety, I found that having to select AF Areas or subject types or anything else became distracting and required a lot of concentration as the touch screen would take off on its own.
Therefore as a LEICA shooter I simply set my AF system to AF-S (single AF, or focus once and lock) and set it to use only the fixed central AF point, period — exactly like shooting my Klassik LEICA M3.
I point my camera at my subject, press the shutter halfway to focus and lock, recompose and shoot. Done.
Auto or Manual Focus Q3 review index of sections top
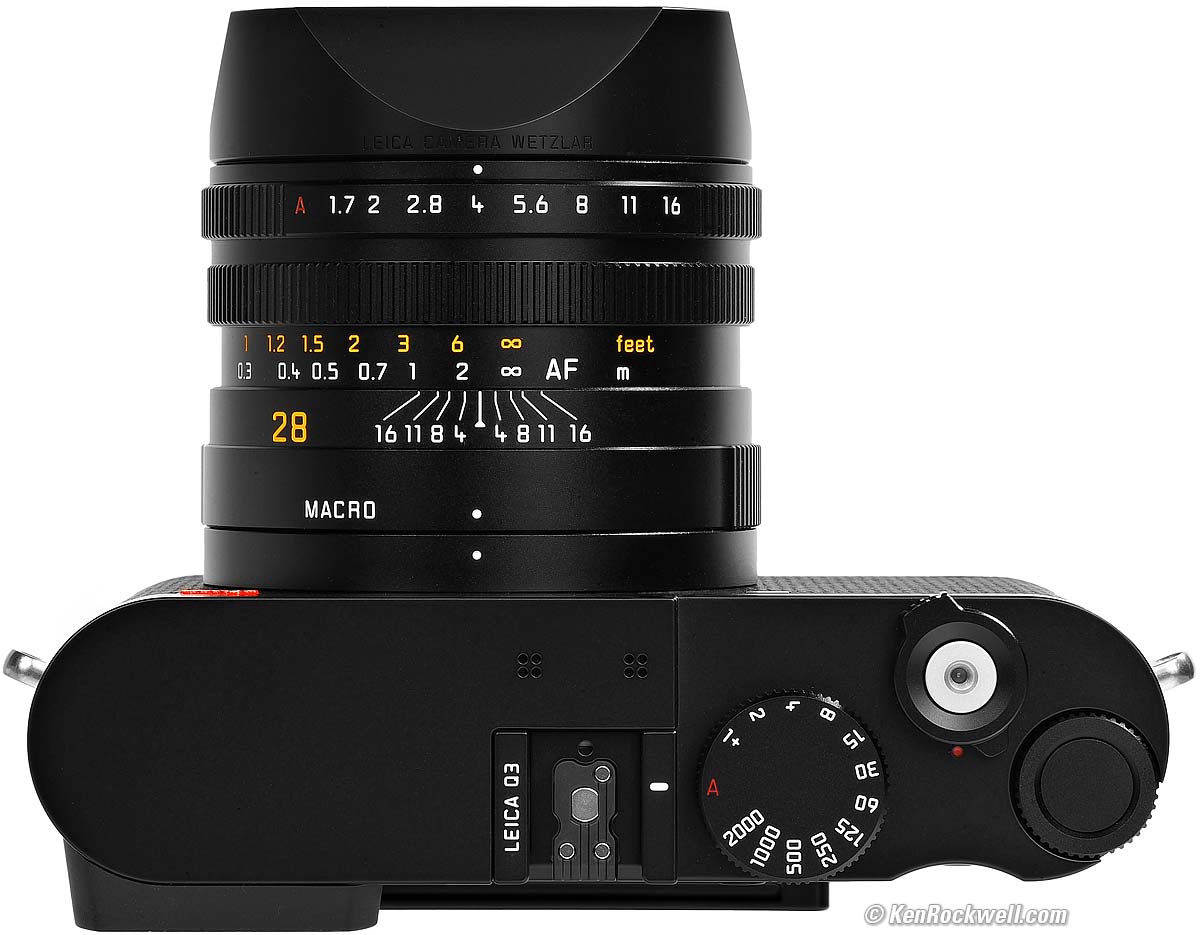
Press the release button on the thumb rest on the bottom of the focus ring to move between AF and manual (the distance scale).
Digital Zoom Lens Selector Q3 review index of sections top
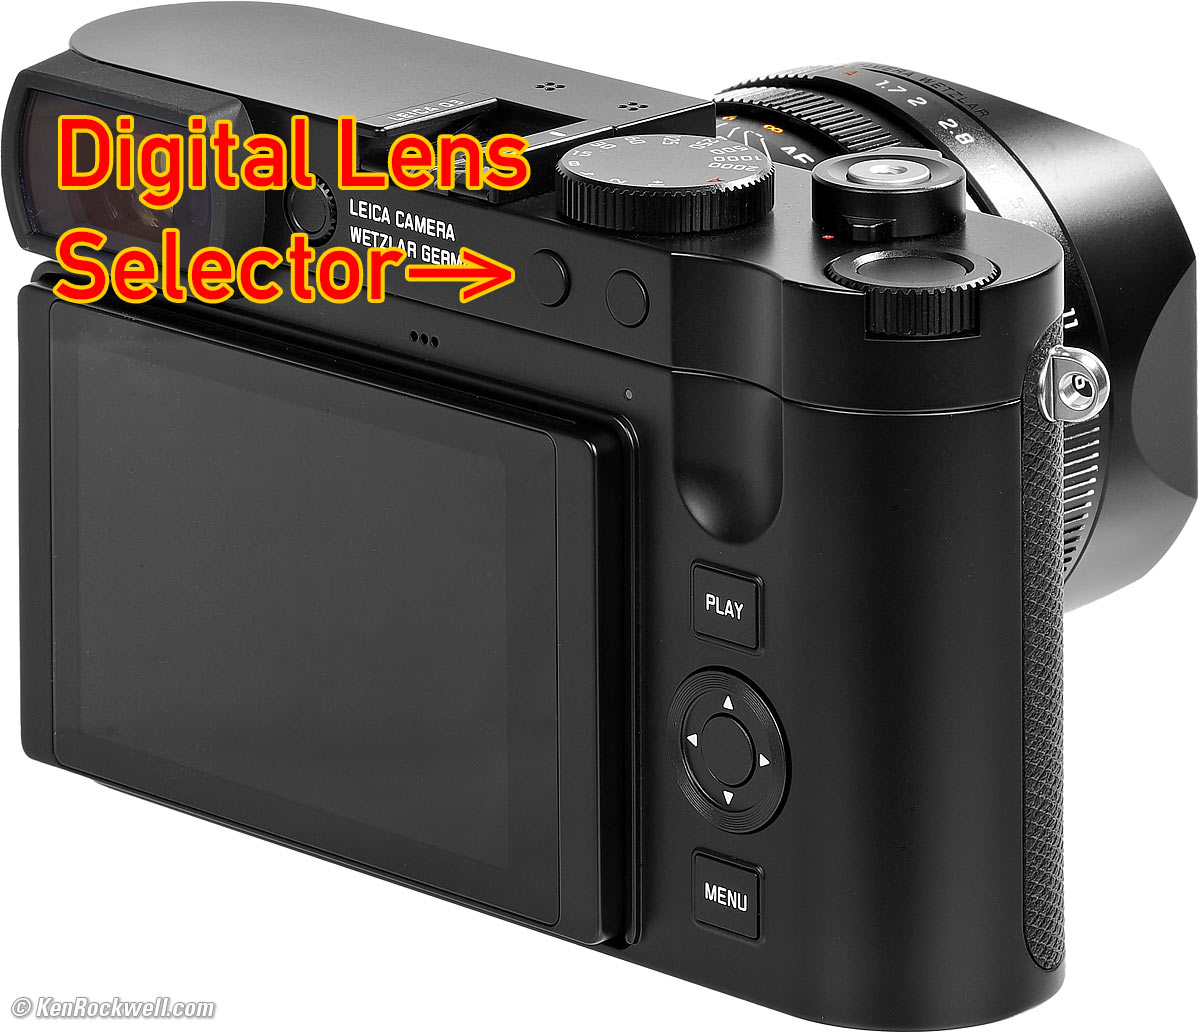
LEICA Q3 28mm, 35mm, 50mm, 75mm und 90mm Lens Selector. größer (bigger).
You can reprogram these buttons, so if yours doesn't switch lenses, change it back or program things as you prefer.
The Q3 provides easy digital zoom (crop modes) to 35mm, 50mm, 75mm und 90mm lens equivalents:
Large JPG |
Medium JPG |
Small JPG |
|
60 MP |
36 MP |
18 MP |
|
39 MP |
23 MP |
12 MP |
|
19 MP |
11 MP |
6 MP |
|
8 MP |
5 MP |
3 MP |
|
6 MP |
4 MP |
2 MP |
It simply crops-in from whatever setting you have for resolution.
The finder doesn't zoom-in with these modes. Instead the finder draws frame lines inside the larger view, mimicking non-zoom optical viewfinders of 1950s cameras.
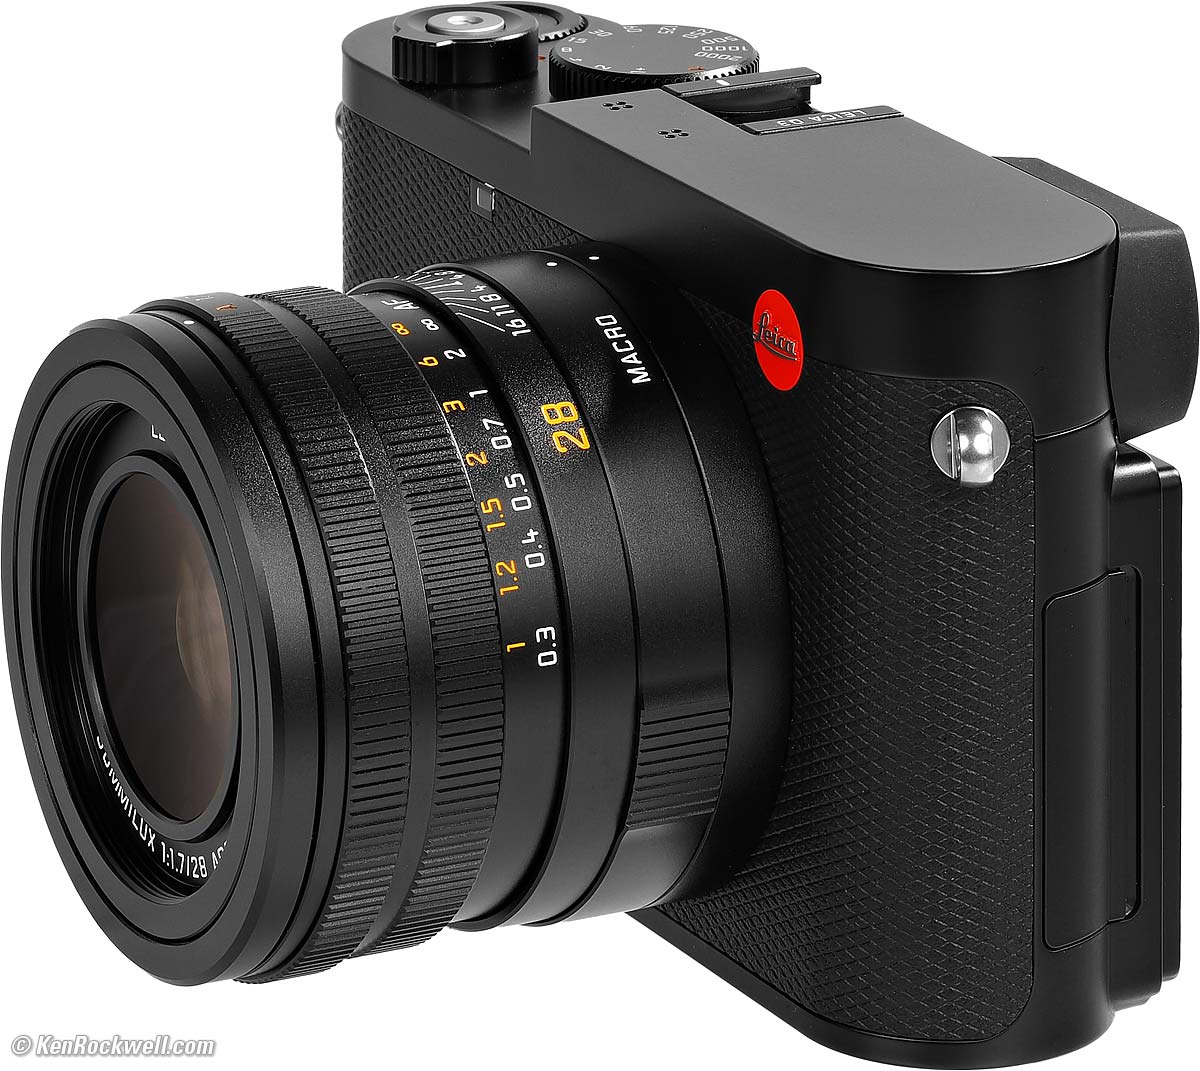
MACRO Mode Q3 review index of sections top
Just turn the MACRO ring at the base of the lens.
Pay attention as you move the ring and you'll see two completely different focus scales come into view:
|
|
Normal Mode. größer. |
Macro Mode. größer. |


It works in AF and manual focus exactly as it does in the regular mode.
The lens will not open beyond f/2.8 in the MACRO setting. This is to limit lens aberrations at close distances.
If you forget and leave it in MACRO, it won't warn you for regular photos. If your Q3 won't focus on something, check that you're not in MACRO.
The MACRO ring needs to be all the way in MACRO or at the dot, not in between. If you're not all the way at either position the Q3 will warn you.
Lens Corrections Q3 review index of sections top
I don't see that there are any lens corrections.
I have a sneaking suspicion that the SUMMILUX 28mm f/1.7 ASPH is so good that it doesn't need any stinking corrections.
Distortion, falloff and lateral color performance are superb for an uncorrected lens. This is the whole point behind a LEICA: their cameras are pretty bad, while their lenses for the past 100 years have always been the state-of-the-art and the best on the planet for the 24 × 36mm format.
Hoods, Filters & Caps Q3 review index of sections top
It comes with this solid alloy screw-on hood attached:
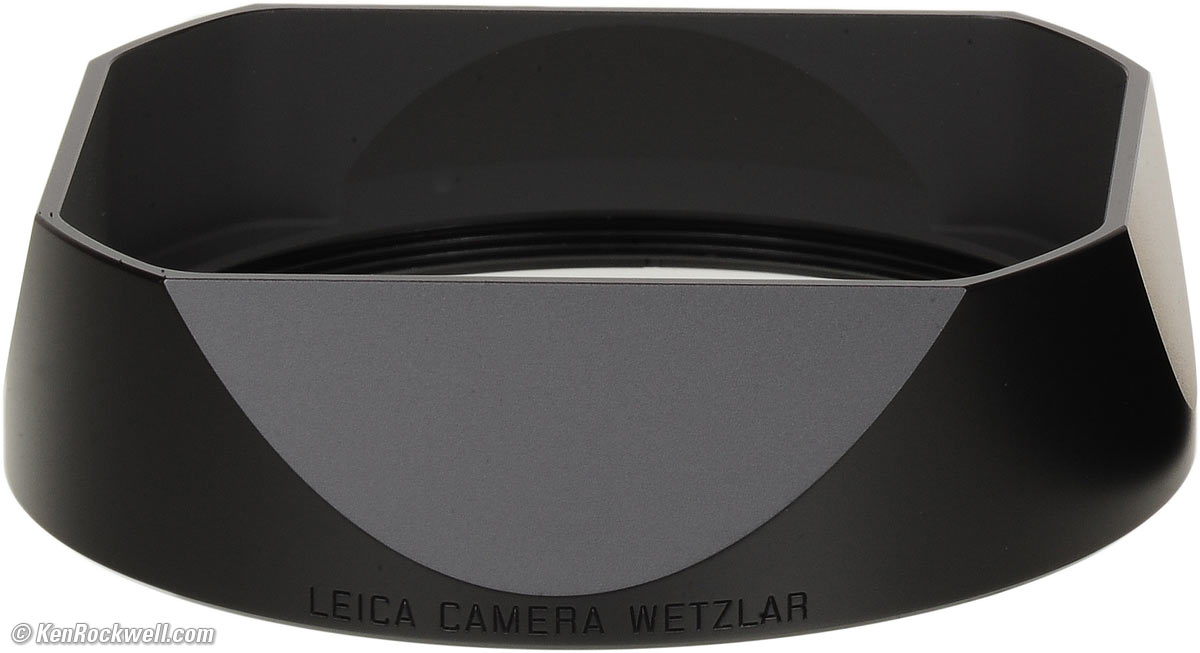
Included screw-on metal hood. größer.
If you prefer not to use this hood as shown at the top, LEICA includes a thin Gewindeschutzring ("thread protection ring") which screws over the front of the lens instead, and gives you this more kompakt look:
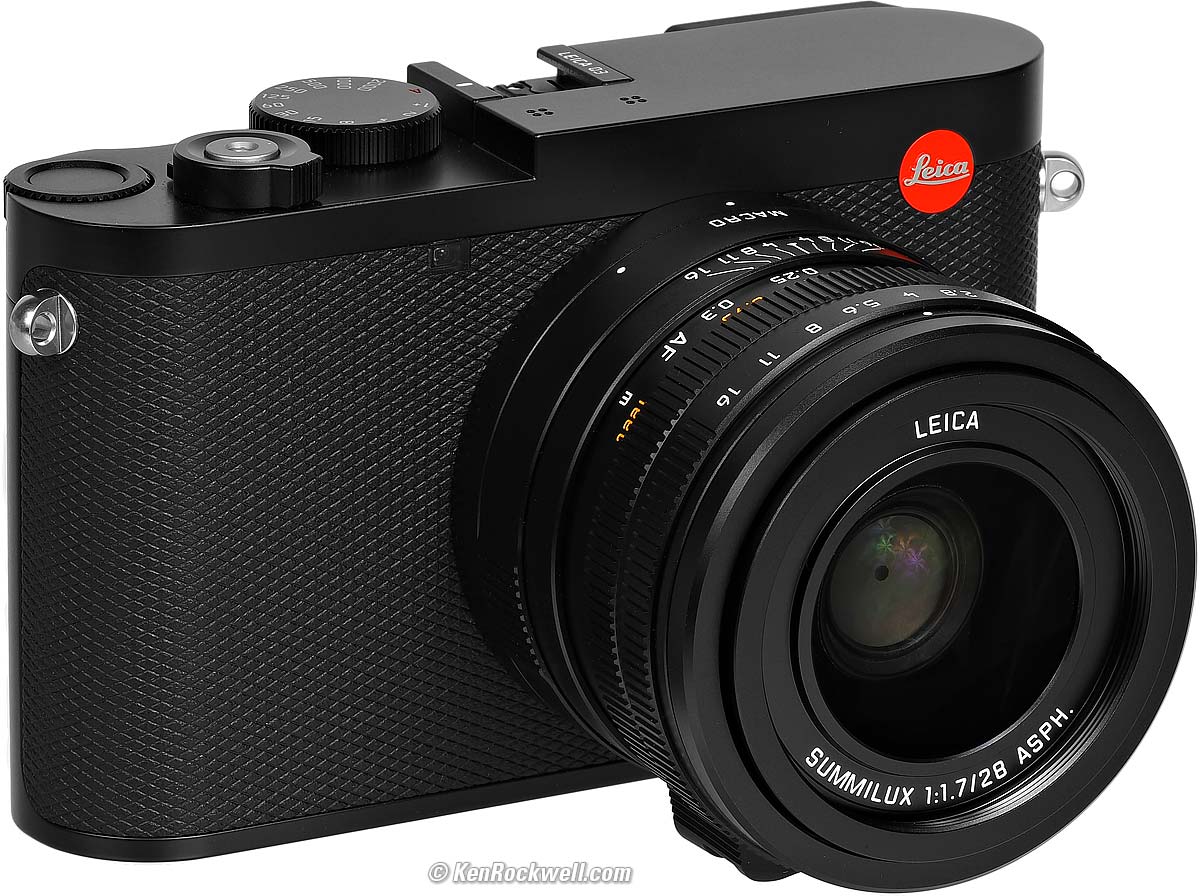
LEICA Q3. größer.
LEICA Q3. größer.
The included felt-lined metal cap slips over the hood:
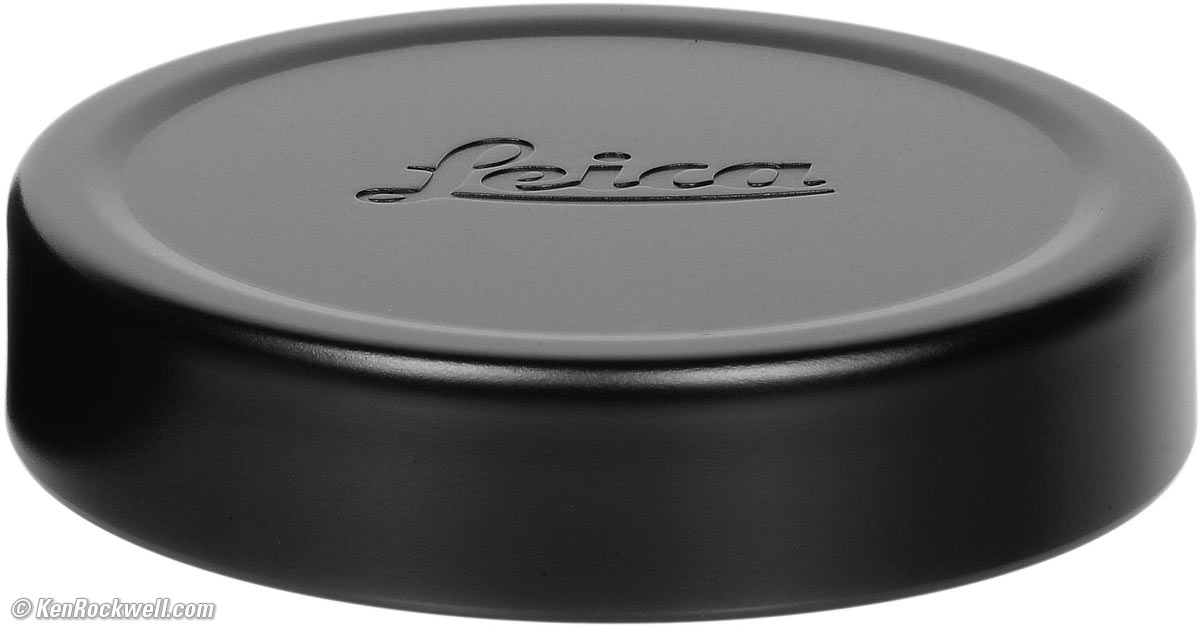
Included felt-lined metal cap Nr. 19 673. größer.
It does not work unless the hood is attached.
If you don't use the hood and use the thread protector instead, you'll want to get a 49mm cap separately; especially LEICA's own E49 49mm lens cap Nr. 14 001.
I use a clear (UV) protective filter instead of a cap so I'm always ready to shoot instantly. I only use a cap when I throw this in a bag with other gear without padding — which is never. The UV filter never gets in the way, and never gets lost, either.
The LEICA faithful use the LEICA Slim 19 691 49mm UVa II filter. Fuji sells a PRF-49S filter if you prefer, which also comes in silver.
Technically, the very best protective filter is the Multicoated Hoya HD3 49mm because it uses hardened glass and repels dirt and fingerprints.
For less money, Canon makes a great 49mm UV filter, and the multicoated B+W 010, the Hoya NXT Plus multicoated and the basic multicoated Hoya filters are all optically superb, while the Hoya HD3 is the toughest and therefore the best.
Filters last a lifetime, so you may as well get the best. The Hoya HD3 stays cleaner than the others since it repels oil and dirt.
All these filters are just as sharp and take the same pictures, the difference is how much abuse they'll take and stay clean and stay in one piece. Since filters last a lifetime or more, there's no reason not to buy the best as it will last you for the next 50 years. Filters aren't throwaways like digital cameras which we replace every few years, like it or not. I'm still using filters I bought back in the 1970s!
If you use a filter too big to fit under the included hood (the lens' inner barrel moves forward as focussed more closely), then LEICA suggests this larger 49mm screw-in hood Nr. 19 658.
Exposure Modes Q3 review index of sections top
There's no need for a PSAM dial, button or menu.
All you do is set the aperture or shutter rings to A if you want the camera to select that value for you:
Mode |
Shutter Dial |
Aperture Dial |
Program |
A |
A |
Aperture-Priority |
A |
Choose Aperture |
Shutter-Priority |
Choose Shutter Speed |
A |
Manual |
Choose Shutter Speed |
Choose Aperture |
Easy!
Exposure Compensation Q3 review index of sections top
I set my Top Dial to control this. It's called "EV" in the menus where you set the dial's function.
Picture Settings Q3 review index of sections top
LEICA calls these "Leica Looks" as of firmware 4 in 2026. They used to be called Film Styles.
There are several options and you can download others.
In each of these we can set each of Contrast, Sharpening and Saturation as far as ±2 steps. The B&W modes have no saturation settings.
Sadly the B&W modes have no ability to simulate the use of a colored contrast filter; most other cameras give us the option to simulate the use of a yellow, green or red filter. So? Man-up and use a real glass filter.
Set these from the Control Screen, or:
Press MENU three times > Leica Looks > and have at it.
There are Standard, Vivid, Natural, B&W & High-Contrast B&W modes.
Contrast, Saturation and Sharpening are adjustable in ±2 steps.
I set VIVID, +2 Saturation and +2 Sharpening, but it's not particularly vivid.
Color Spaces Q3 review index of sections top
I only see sRGB.
I see no mention of ECI RGB V.2.0 or AdobeRGB either in the manuals or the menu system.
ISO Q3 review index of sections top
ISO only sets in full stops. There are no third stop settings except between ISO 50,000 and 100,000.
AUTO only works from 100 ~ 100,000.
Set what you want, but for still subjects I set 1/8 as the minimum speed in Auto ISO, as I almost always get sharp results at 1/8.
For people I set 1/125, and for action I set 1/500.
I use the same setting regardless of the Digital Lens Selector.
Resolution Q3 review index of sections top
Set it how you want, but "Small" is 18 MP and more than enough for anything if you're not also using extreme settings of the Digital Zoom at the same time, so there's no shame in using "Small" to keep your file sizes much more manageable.
Go ahead and shoot at 60 MP, but LEICA doesn't want anyone to know that there is almost no way to see more than 8 MP at once, so 18 MP is more than enough.
The only reason I'd shoot at other than the Small settings is if I'm using the longer settings of the Digital Zoom, which reduce resolution to below 18 MP in Small.
Perspective Control Mode Q3 review index of sections top
The Perspective Control mode (press MENU four times > Perspective Control > ON) corrects and compensates for camera tilts to keep horizontal and vertical lines horizontal and vertical, and it works swell.
Scene Modes Q3 review index of sections top
If you want Night Scene, Ansel Adams, Flower, Henri Cartier-Bresson, Pet, etc, these are in the Q3, hidden as options for the shooting mode as set at the Control Screen or
Press MENU four times > Scene Mode and have at it.
Be sure to set this back to P-A-S-M for normal use.
Flash Q3 review index of sections top
Flash is critical for fill-flash for people and most kinds of photos in real-world lighting conditions, especially harsh Sonnenlicht (sunlight).
By default, the hot shoe only works when your Q3 thinks it's dark. This is backwards, so I set my Q3 flash options to ALWAYS ON so my flash works anytime I turn the flash's power switch ON. To set this:
Press MENU five times > Flash Settings > Flash Mode > ON.
With its 1/2,000 sync speed, even a small flash becomes quite well suited to daylight fill even at longer distances.
Flash only works with the mechanical (leaf) shutter.
There is no built-in flash, but there is a dedicated hot shoe for your choice of flash:
Should work well with any of the LEICA SF 26, SF 40, SF 58, SF 60 or SF 64 flashes, or the LEICA SF C1 remote commander.
Should work great with the Godox iT32 and dedicated X5L LEICA module or Godox iT30Pro TTL, but I haven't tried either yet.
Works with my LEICA CF Compact Flash, but with no in-finder indication and no TTL (use Manual or the non-TTL Auto modes).
Works with my SF-24D, but only in Manual and non-TTL Auto modes. (Boo! My SF-24D worked perfectly on my Q2.)
My SF-24D is rated to cover a 35mm lens and the Q3 has a 28mm. You actually will get a darker bottom, so if you're shooting blank walls or at close distances, use the SF-24D's wide diffuser. I don't because it robs one stop of light, and using my flash for fill outdoors I need the power more than I need even light distribution.
Flash is important; lighting is by far the most important technical aspect of every photo.
Shutter Modes Q3 review index of sections top
Set to the default Hybrid shutter mode (press MENU five times > Shutter Type > Hybrid), the Q3 uses the regular mechanical leaf shutter for everything and magically switches to the electronic shutter at 1/2,500 and faster as needed.
Flash only works with the regular mechanical leaf shutter, but the mechanical leaf shutter only works at up to 9 FPS.
Third-Stop Shutter Speeds Q3 review index of sections top
Choose a shutter speed with the top dial.
Now rotate the unmarked top dial to set ±2/3 stops from the marked speed.
Remote Releases Q3 review index of sections top
Via the app. Good luck.
There's a standard threaded cable release socket, but it's only for looks or soft release accessories. My cable releases attach, but don't work.
Frame Rates, Still Photos Q3 review index of sections top
Set these at the Control Screen, or press MENU two times> Drive Mode.
You can use either shutter at any frame rate, except that the Q3 will magically switch to the electronic shutter for 15 FPS. Thank goodness it doesn't lock you out or make you guess; it just does it.
It works at 2, 5 or 5 FPS with full tracking AF, AE and AWB set for every frame.
At 7, 9 or 15 FPS it LOCKS the exposure, focus and white balance, sort of making the faster frame rates useless for photographing the things for which we want fast frame rates.
Also at the fastest frame rates it only works in 12-bits rather than 14:
Tracking AF, AE + AWB |
Bits |
|
2 FPS |
Yes |
14 |
4 FPS |
Yes |
14 |
5 FPS |
Yes |
12 |
7 FPS |
No! LOCKED AF, Exposure & AWB |
14 |
9 FPS |
No! LOCKED AF, Exposure & AWB |
12 |
15 FPS |
No! LOCKED AF, Exposure & AWB |
12 |
These are as indicated in my menu system with firmware 4.1. LEICA's printed specifications from May 2023 differ.
Still Image Buffer Q3 review index of sections top
8 GB:
JPG |
DNG |
DNG + JPG |
|
2 FPS |
947 |
164 |
88 |
4 FPS |
104 |
83 |
72 |
7 FPS |
83 |
74 |
69 |
9 FPS |
76 |
70 |
66 |
15 FPS |
67 |
63 |
63 |
Self Timer Q3 review index of sections top
The Self Timer is not set in the advance modes at the Control Screen, or by pressing MENU twice > Drive Mode, either.
This is set in the menus at:
Press MENU three times > Self timer > ON and set your preferences.
Achtung! The self timer can only be set if you first select the Single Frame or Bracketing advance mode. It will be grayed-out in the continuous advance modes (2 ~ 15 FPS) or the Intervalometer modes.
Bracketing & Intervalometer Q3 review index of sections top
These are options among the advance modes set at the Control Screen, or
Press MENU two times > Drive Mode.
Long Exposures Q3 review index of sections top
Set the shutter dial to 1+ and then use the unmarked top dial to select any speed out to one minute with the electronic shutter, or to an hour with the mechanical shutter.
There is no need for a bulb setting. The maximum exposure time is one hour, period.
A count-down timer is displayed during long exposures or dark-frame noise-reduction exposures, but it only stays lit a few seconds. Tap the shutter halfway to display the countdown for another few seconds.
User Profiles (Presets) Q3 review index of sections top
These are super handy for saving and recalling everything about the camera's settings.
You can save and recall six complete sets of settings in the camera. You can edit and twiddle with each of them individually in the camera, and you also can save and recall all six together as a single file to or from a card.
You can set one for your usual shots, another for use on a tripod (lock-in ISO 100 and self-timer), another for people (Auto ISO minimum speed 1/125 and normal saturation), etc.
First set up your new camera as you like it before saving anything. Program your copyright information and anything else you're going to want set the same for all your profiles before you start saving, so that information will be in all the profiles you save without having to enter it all again. Hint: there are only 20 characters available in the copyright and Artist fields, and each profile name is limited to only 10 characters.
Once you think you have your first profile ready to save, save it. Then change the camera as you like for your next profile, and save that. By saving versions of your first settings, everything else you didn't change (like copyright information) for the next profile gets saved without having to re-enter it all again for each new profile.
There is no way to set the Q3 to "auto-update" a profile as you change camera settings. Instead you must change something and then deliberately resave those settings as you refine your personal preferences.
Be sure to save profiles as you're setting up your camera. I spent a day or two setting up mine, and somehow I did something to recall the default profile which wiped out all my own settings, and since I hadn't yet saved them to a profile, they were all gone!
To Create a New Profile
Just set your camera any way you like it, then save a Profile:
To Save a Profile
Press MENU seven times > User Profile > Manage Profile > Save as Profile > and select a location for it.
To Recall a Profile
Recall these at your Control Screen.
To Edit a Profile
Recall the profile, change things, and then save it back to the same location.
To Copy a Profile
Recall the profile and then save it back to another location.
Save or Load All Profiles to or from a Card index of sections top
Press MENU seven times > User Profile > Manage Profiles > Export Profiles > YES. A 57 kB settings.lcs file is written to your card.
Feel free to back that file up to your computer, from which you could put it back on a card to restore them all later.
To import profiles from a card, copy a settings.lcs file to your card, and then:
Press MENU seven times > User Profile > Manage Profiles > Import Profiles > YES.
While you can save and edit each profile individually in the camera, a setup file contains all six profiles — even if they are blank — and will replace all six in-kamera profiles with whatever's on the card.
If you recall a different set of profiles, like from me, then all the other profiles in your camera are overwritten with whatever is in that settings file.
My Personal Settings File index of sections top
Here is my personal settings.lcs file if you'd like to try my settings. Know that it will overwrite all six of your camera's profiles, so be sure to save your own profiles to a card and save them someplace before you try mine.
Download mine to your computer, and then copy the file to a memory card. This file won't do anything here in your browser or on your computer. The only reason we're using a computer is to be able to get the file onto a card so you can load it into your camera.
I suppose if you're really good and have a card reader attached to your phone you could do it there, too. I haven't tried.
It's only a 57 kB text file with all my menu settings. I only have the first two set; the other four are still blank.
Once it's on your card, put that card in your Q3 and:
Press MENU seven times > User Profile > Manage Profiles > Import Profiles > YES.
Playback Q3 review index of sections top
Zoom-in and Out
Turn the top dial.
Swapping to Other Images While Zoomed
It takes two hands!
Hold PLAY while you turn the top dial to swap among other images at the same playback zoom setting.
This works the same if you're zoomed-in, zoomed-out to show multiple images, or showing one complete non-zoomed image.
Deleting Images
🗑 Q3 review index of sections top
LEICAMEN don't make mistakes and therefore there is no DELETE button on the Q3.
LEICA Q3 photos are always masterpieces, so no one would delete them in camera.
If you insist, look for the trash icon
Straps & Accessories Q3 review index of sections top
I don't use the included thin leather strap with its tiny split rings and suspiciously delicate stitching.
I use LEICA's Classic Instant-On Typ. 14 312 Strap:
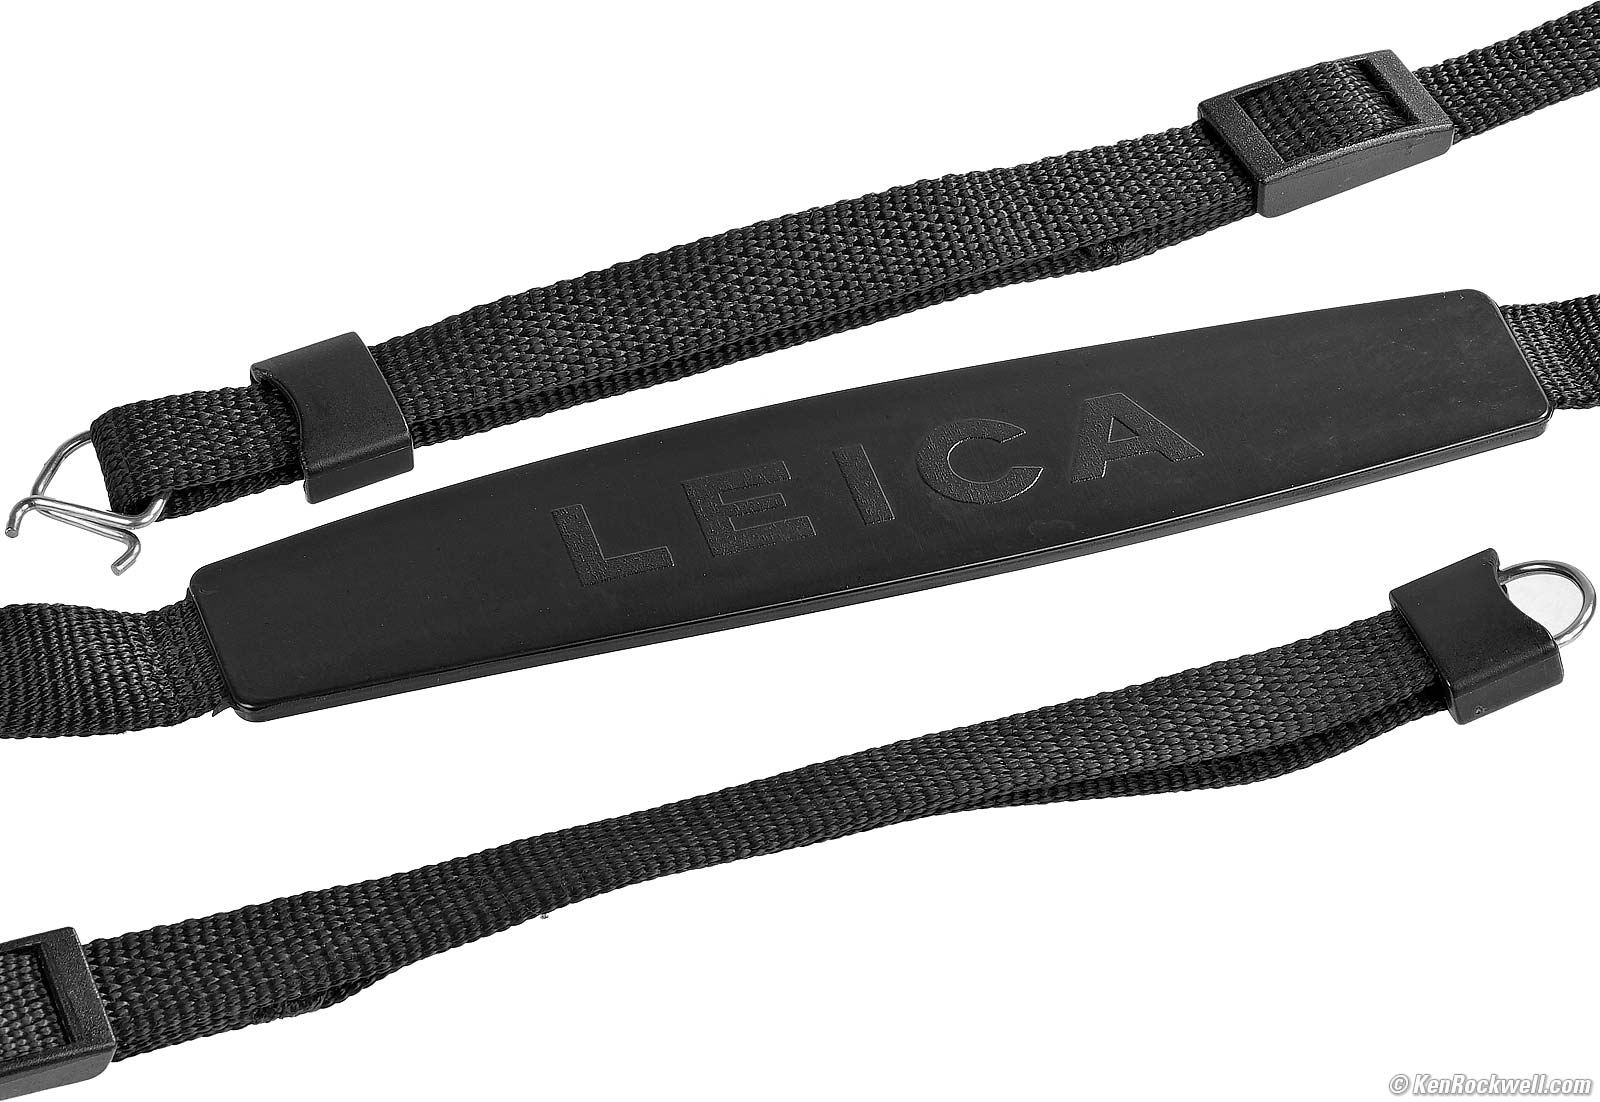
LEICA's best strap ever for the Q3. It's discontinued and easily available used.
I have lots more cases, grips and other accessories listed back at my Q3 Review.
More Information Q3 review index of sections top
I got my Q3 at B&H. I'd also get it at Crutchfield, at Adorama, at Amazon or used at eBay if you know How to Win at eBay, or get it used at KEH.
The Q3 also comes in metal gray metallic, comes in a version with a special black-and-white-only sensor for greatly improved high ISOs and effective resolution, and comes in a version with a 43mm f/2 lens.
LEICA's Q3 User's' Guide (firmware 4 and above, 03 June 2026).
LEICA's old Q3 User's Guide (firmware version 3 and below).
LEICA's printed list of Q3 specifications, May 2023.
Pressemitteilung (Press Release), 25 May 2023.
© Ken Rockwell. All rights reserved. Tous droits réservés. Alle Rechte vorbehalten. Alla rättigheter förbehållna. Toate drepturile rezervate. Niciun vampir nu a fost implicat în crearea acestei lucrări. Doe! Omnia jura reservata. Ken Rockwell® is a registered trademark.
Help Me Help You
I support my growing family through this website, as crazy as it might seem.
The biggest help is when you use any of these links when you get anything. It costs you nothing, and is this site's, and thus my family's, biggest source of support. These places always have the best prices and service, which is why I've used them since before this website existed. I recommend them all personally.
If you find this page as helpful as a book you might have had to buy or a workshop you may have had to take, feel free to help me continue helping everyone.
If you've gotten your gear through one of my links or helped otherwise, you're family. It's great people like you who allow me to keep adding to this site full-time. Thanks!
If you haven't helped yet, please do, and consider helping me with a gift of $5.00.
As this page is copyrighted and formally registered, it is unlawful to make copies, especially in the form of printouts for personal use. If you wish to make a printout for personal use, you are granted one-time permission only if you PayPal me $5.00 per printout or part thereof. Thank you!
Thanks for reading!