Home Donate New Search Gallery Reviews How-To Books Links Workshops About Contact
Nikon
D5100 Guide:
Custom Setting Menu (pencil icon)
© 2011 KenRockwell.com. All rights reserved.

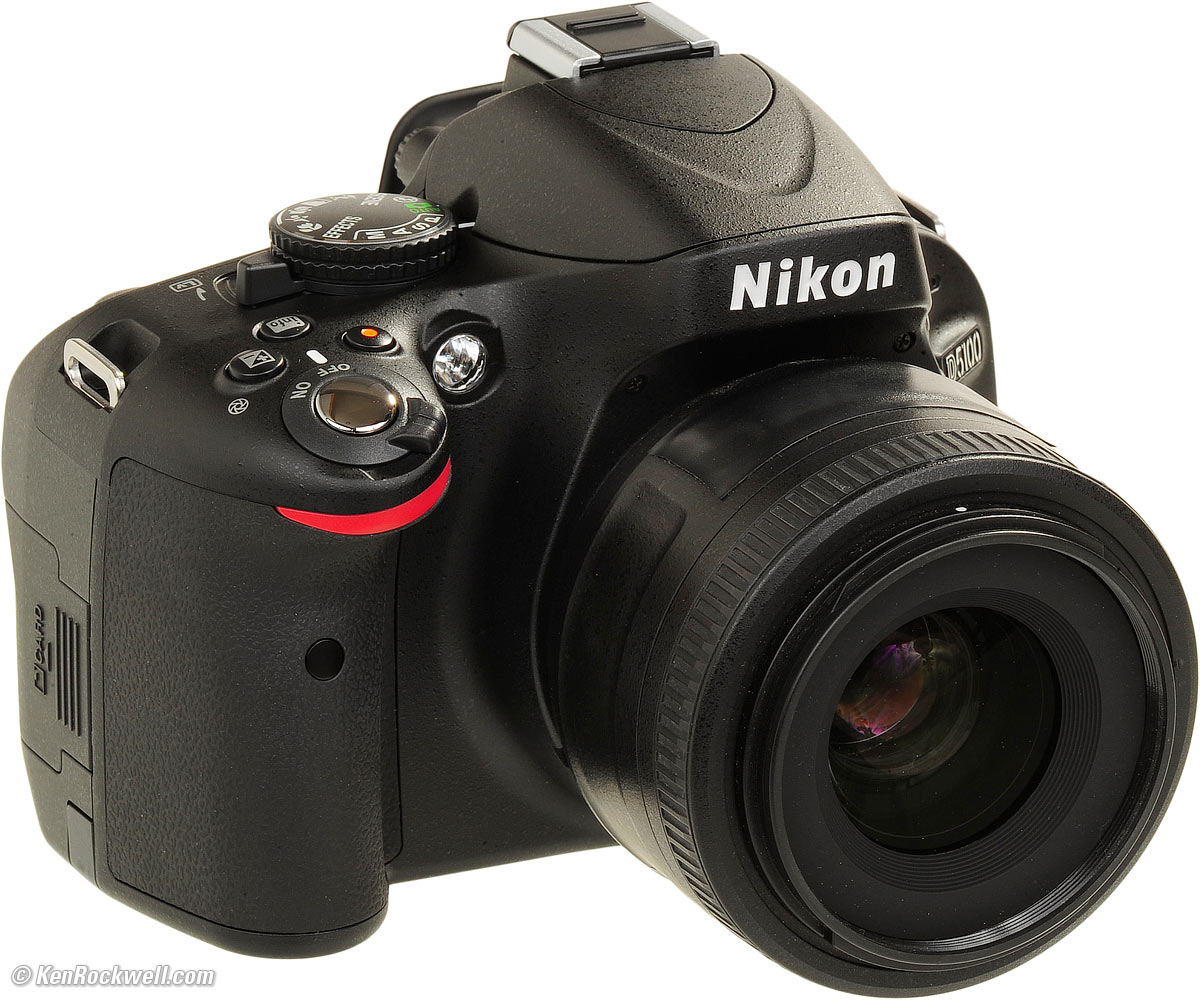
Nikon D5100 and 35mm f/1.8 DX lens. enlarge. This free website's biggest source of support is when you use these links, especially these directly to the D5100 at Adorama, Amazon or Ritz (body-only) or these to Adorama, Amazon or Ritz (kit with lens) when you get anything, regardless of the country in which you live. Thank you! Ken.
October 2011 Top of Nikon D5100 User's Guide Nikon D5100 Review
NEW: Nikon D5100 User's Guide App 12 October 2011
More Nikon Reviews Nikon Lens Reviews
Help me help you top
I support my growing family through this website, as crazy as it might seem.
The biggest help is when you use any of these links to Adorama, Amazon, eBay, B&H, Ritz, Calumet, J&R and ScanCafe when you get anything, regardless of the country in which you live. It costs you nothing, and is this site's, and thus my family's, biggest source of support. These places have the best prices and service, which is why I've used them since before this website existed. I recommend them all personally.
If you find this page as helpful as a book you might have had to buy or a workshop you may have had to take, feel free to help me continue helping everyone.
If you've gotten your gear through one of my links or helped otherwise, you're family. It's great people like you who allow me to keep adding to this site full-time. Thanks!
If you haven't helped yet, please do, and consider helping me with a gift of $5.00.
As this page is copyrighted and formally registered, it is unlawful to make copies, especially in the form of printouts for personal use. If you wish to make a printout for personal use, you are granted one-time permission only if you PayPal me $5.00 per printout or part thereof. Thank you!
Thanks for reading!
Mr. & Mrs. Ken Rockwell, Ryan and Katie.
I use Adorama, Amazon, Ritz, B&H, Calumet, J&R and ScanCafe. I can't vouch for ads below.
|


Free Live Help (USA only) top
Want free live phone support?
In the USA, call (800) NIKON-UX, 24 hours a day, 365 days a year.
Many of these menu options are often deactivated in anything except the P, S, A and M modes.
How to get to the CUSTOM Menu
Press MENU, click left and then up and down to select the pencil icon (CUSTOM SETTING) menu. You'll see "CUSTOM SETTING MENU" on the top of the LCD monitor.
What it Sets
It sets thing having to do with the camera's own settings, like autofocus.
The D5100 is much better thought out than earlier Nikons, which spread these settings around in three other menus.
What I Change
I change a lot of little details here.
Reset custom settings top
This resets everything below back to factory defaults, so play with these all you want without fear.
a1 AF-C priority selection top
By default, the FOCUS selection ensures that all your pictures will be in focus in AF-C mode. If the subject is moving a lot, the D5100 may run a bit slower as it tries to focus properly for each frame.
If you'd prefer the D5100 to run full-speed, even if it's not in focus, choose RELEASE instead. I never use this; why would I want out-of-focus pictures?
a2 Built-in AF-assist illuminator top
This lets you turn off the annoying AF assist light, but if you do and it's very dark, don't expect the D5100 to be able to focus.
a3 Rangefinder top
In addition to the viewfinder's focus-confirmation dot, this activates a simple bar graph at the bottom of the viewfinder to help with manual focusing.
b1 EV steps for exposure control top
This sets half- or third-stop steps for setting exposures.
c1 Shutter release button AE-L top
If you want the exposure to lock when you half-press the shutter, set this to ON.
I leave it at its default of OFF; I use the AE-L AF-L button when I want locked exposure, and let the shutter button lock only the focus, which it does by default.
c2 Auto off timers top
This is where you may change the amount of time the various parts of the D5100 stay on, like the LCD, after they've been used.
Making these longer may be more convenient, but also can run down the battery more quickly.
c3 Self-timer top
Here you can change the delay of the self-timer.
Even more fun, you can set it to make up to 9 shots when it does go off. By having it mae a few shots each time it fires, you're much more likely to get a good shot of your group.
c4 Remote on duration top
When you set the Release mode to either of the remote-release settings, the D5100 has to stay turned on, waiting for the signal from the remote.
You can set this to longer times, and likewise, the batteries will run down faster.
If you set the D5100 to expect a signal from the remote control and it sits longer than the number of minutes you've set, the D5100 goes back to sleep.
d1 Beep top
For goodness' sake, please turn this OFF.
Otherwise the D5100 makes all sorts of inappropriate beeps as it functions.
Cameras should be seen and not heard.
d2 ISO display top
Set this ON, and the ISO (as well as the automatically-set AUTO ISO) will show instead of the frame counter in the finder.
d3 File Number Sequence top
This lets you ensure that your new pictures don't start from DSC_0001.JPG every time you use a new card. If they did, you'd have hundreds of photos all named DSC_0004.JPG on your computer.
ON (default): FIles keep counting up. Use this.
OFF: Files start at 0001 on each new or reformatted card.
Reset: Starts counting again at the lowest possible number.
d4 Exposure delay mode top
For use with very long telephoto lenses on tripods, this delays the shutter from firing until about a second after the mirror has flipped up.
Use this if you're on a tripod with a long (200mm or longer) lens between about 1/60 and 1 second. At faster or slower speeds, or with a shorter lens, it won't matter.
d5 Print date top
This permanently burns-in the date, time or other items selected in this menu onto your image.
It's not the invisible data in the EXIF; this is data written over the image that you'll see in every print or other use. You'll need Photoshop to repair your images if you leave this on by accident, or forget to set the camera to or from daylight savings time.
e1 Flash control for built-in flash top
This sets what the built-in pop-up flash does.
TTL is normal: the flash works as it should.
MANUAL fixes the flash to one set output. Use this only if you have a fixed setup and need to get just one specific level of flash.
e2 Auto bracketing set top
This sets what changes as the camera brackets.
The only way to engage bracketing is on the INFO screen via the < i > button.
f1 Assign ( `\ ) / Fn button top
This sets what happens when you hold the Fn button.
It's the self-timer by default.
I set mine to White Balance (WB).
f2 Assign AE-L/AF-L button top
The AE-L/AF-L button is on the top right of the back of the camera.
I set mine to AE lock only, using the shutter button to lock focus.
f3 Reverse dial rotation top
This makes the rear dial work in the other direction.
f4 Slot empty release lock top
This prevents us from taking pictures with no card in the camera.
Set it to LOCK.
If you want to play with your camera with no card, set it to OK. This mode is only here so that Wal-Mart can put cameras out on display and have them work with no card; you would never want to set your camera to OK.
f5 Reverse indicators top
This lets you make the in-finder bar graph read correctly.
Nikons' bar graphs and even mechanical in-finder meters have always read backwards since they were created in the 1960s! On every Nikon ever made, minus goes to the right, and positive goes to the left.
This is because the Nikon F and all of Nikon's SLR system was designed as a simple extrapolation from Nikon's rangefinder cameras, which were designed in the 1940s, when very few people even owned a light meter.
The shutter dials and aperture rings of Nikon's newest cameras still turn in the same direction as they did on Nikon's very first cameras of the 1940s.
When Nikon introduced in-camera light meters in the 1960s, the needles were designed to go in the logical direction as you turned the rings and dials: positive went to the left.
Even after Nikon did away with shutter dials and aperture rings on their cheaper cameras in the 1990s and 2000s, the bar graphs still go the wrong way.
Now that your D5100 has no shutter dial and your G lenses have no aperture ring, you can set this straight once and for all.
Of course the rear dial of the D5100 still works in the same directions as Nikon's 1940s cameras, so if you chose this option, be sure to select set f3 Reverse dial rotation above to ensure the bar graphs follow the dials.
Hey, you asked.
back to top of page back to top of Nikon D5100 User's Guide
MENUS
SETUP MENU < NEXT
Home Donate New Search Gallery Reviews How-To Books Links Workshops About Contact