Home Search Gallery How-To Books Links Workshops About Contact
|
Nikon
D70 Test Review
and Users Guide
The
D70 has pretty much evaporated from stores. PERFORMANCE back to top General Usability Metering White Balance Noise Dirt Shutter Focusing Viewfinder LCD & Histogram Automatic Settings Battery and Power Data Memory Durability Curves Infra-Red Minutiae Blooming Aliasing IOWCSS Cold Weather Astrophotography
General back to Performance back to top The D70's performance is exemplary. I consistently print spectacular 12 x 18" prints from it at my local Costco warehouse discount store, even from BASIC JPG files. The images are sharp and clean, in fact, far cleaner than some other exotic DSLRs. Here's a 3.5 meg download of an image from a Swiss photographer. All the Canons are also excellent, but honestly the results from current Sigma and Kodak cameras were poor by comparison. This is so much fun since I'm sponsored by no one except myself and the few donations that come in so I can be so blunt! Yes, I personally have shot with and brought home images from the Canon 1Ds, 1D-II, Rebel, 10D, Sigma SD-10 and the new Kodak Pro SLR/n at PMA. The Kodak and Sigma look awful at ISO 800 and all the Canons and Nikons look great. At ISO 200 the Kodak and Sigma are less bad, however the higher ISOs are critical to getting sharp results with the slower lenses popular with amateurs. I found the D70 at ISO 800 cleaner than the Kodak at ISO 200! Those two stops are what helps you get a sharp image in available light, not more megapixels. TRICK: There are at least two settings to pump up the colors in-camera, which the D1H can't do. I love this one. You can set the saturation to + in the custom menu, and at the same time choose color mode IIIa, each of which bumps up the saturation. As you know most of my work is about color and I like to emphasize it. Portraits of course are another story.
Usability back to Performance back to top The most important parameters of a digital camera's performance is how easy it is to use, how fast it works and how long it runs on a battery. The D70 is so easy to use you don't need a manual! I could run everything on the camera just by picking it up. It even has built in help if you need any to understand what the menu items mean. You also never have to go into a menu while shooting except to set the AF mode between Single and Continuous. Pro cameras never need you to go into menus while shooting, amateur ones do. This is the clearest differentiator of a camera's class, and personally I find the D70 much easier to operate then any Canon DSLR. You'll always be able to get great results fast on the D70, unlike most other digital cameras which are confusing because they are poorly designed. The D70 is brilliant! Real image quality depends more on these factors than anything you see on test charts posted elsewhere; especially since on static test charts all cameras with a class are pretty much the same. Don't worry about resolution or noise or whatever, almost all DSLRs from Canon and Nikon are within an invisible 20% of each other. Top quality images require one to set the camera properly for each shot. I'm always setting ISO and WB between shots since the lighting is always changing. You just can't forget these adjustments, which is why pro cameras make them easy and instantaneous to adjust. One slight difference between the D70 and the professional standard D1H is that some of the setting buttons on the D70 like ISO and White Balance have a different function while playing back an image. Thus if you are in playback mode and hit the WB adjustment you accidentally will set the delete lock on the image being played back and not adjusting the WB as you intended. TRICK: I'm in the habit of always tapping the shutter button right before I adjust any of those shooting parameters to put the camera back into record mode so these buttons do what they need to do. When I'm in the field I know where these buttons are by feel and don't even look at the inscriptions, so tapping the shutter first save me the time of looking to see if an image is still being previewed. Not as good as the D1H, but it's still better than the best Canon DSLRs which still require pressing and holding two buttons at once while spinning a wheel for many of the critical shooting adjustments. TRICK: The focus area selector only works when the meter is on. If the meter has turned off as it does with the rear LCD lit or after a few idle seconds the D70 will ignore the directional control. To set the AF zone again just be sure to tap the shutter button to turn the meter back on, and also be sure that the LOCK switch below the selector is set to "-," not the "L" position. Even set to LOCK ("L") you can still navigate the menus. The D70 is far better than non-SLR cameras with higher on-paper resolution like the Nikon 8700, Sony DSC-F828 and Canon 8MP Pro-1. This is because the D70 has a much bigger CCD (much bigger pixels) than any of the fixed-lens cameras. The teeny CCDs used in fixed lens cameras can't collect as much light per pixel and therefore have slower ISO speeds AND noisier images than real SLRs like the D70. I have a whole page here explaining all this.
Metering back to Performance back to top A little publicized feature is that the D70 has the most accurate exposure metering system I've ever used. It gives me the correct exposure in almost every bizarre situation I throw at it, including fill flash and mixed light. Yes, the published meter hardware specifications are the same as the F5 and D1X, however the firmware that makes it work has clearly advanced so I almost never have to compensate the meter. BRAVO! No camera in my over 30 years of shooting has made it so easy to get great results so easily. I wish my 4 x 5" view camera could do this. Of course you still need to be in control. For instance, when photographing residential interiors during the day with the shades open I need to dial in +2 or even +3 stops of exposure compensation since otherwise the bright windows cause the meter to try to make a compromise to get some detail there. (If you don't add the exposure compensation you can use the Highlight/Shadow control of Photoshop CS to recover the detail and lightness indoors and retain the highlights outside.) In all cases just dial in whatever compensation you need and believe the camera's rear color LCD. When it looks right it is right. Of course for interiors an even better plan is to use lots of fill flash to balance the outdoor light so you can see everything, but in this case I just wanted to blow out everything outside the kitchen to make it more ethereal.
Note: The ingenious AUTO ISO feature can be set to increase the ISO automatically in dimmer light. I love this! You even can program the D70 to the shutter speed below which the D70 starts to increase the ISO. The camera also will decrease the ISO if the shutter speed would go above the camera's shutter or sync limit. Of course now I'd like to be able to program in different limiting shutter speeds for different focal length lenses, but I'm always asking for something. One big problem: the AUTO ISO mode does not automatically cancel in Manual exposure mode, so often it will attempt to "correct" whatever exposure you have so carefully set. I consider this a defect in the D70's firmware I hope Nikon will rectify. The July 2004 version 1.01/1.02 still is defective. For today just remember to disable this mode if you use it and the manual exposure mode. More here for use with fill flash. OBSERVATION: The meter has an odd and clever bit of programming. In normal operation (not setting AE lock to ON for the shutter button) the AE is still half locked when you press the shutter halfway! What does this mean? It means if you lock the focus by holding the shutter button halfway that the exposure only moves half as many stops as it has to when you recompose. You'll only notice this if you recompose to something many stops different. If you do you'll see the meter change its reading as you recompose, but now if you take your finger off the button you'll see the reading jump the rest of the way to the exposure at your final composition. This is also what you might call "sticky" exposure: it sort of partially sticks to where you locked focus, even when you have not intended to lock exposure.
White Balance back to Performance back to top Read how to set white balance here. WB is very good, in fact so good and so important to real photography that this is one of the key reasons I prefer the D70 to the Rebel and other DSLRs. The AUTO WB setting is far better than the old D1X ever was. I actually use AUTO WB most of the time, unlike with the earlier cameras that often gave different colors for each shot. Two more reasons it's so good is because it's easy to set for each shot and you can fine tune each and every WB setting. (OK, you can't fine tune the manual PREset setting but that's not the point.) There is a direct button to set WB: no menus are needed. The fine tuning for each setting lets you set your preference of warmth or coolness for each preset. For instance, I usually use AUTO and set the fine-tuning to -3, which gives a warmer result. The Canon Rebel lacks the fine tuning, so if you had a Rebel you have to revert to the manual setting, and since you only have one manual setting you have to twiddle with it every shot instead of having all the fine-tuned presets of the D70. Correct WB setting is critical to getting a good photo. All the other incomprehensible gobbledygook tested on other sites seen only with small segments blown way out of proportion has little to nothing to do with how your photo looks, and WB has everything to do with it. Ignore easy to measure but completely irrelevant "accuracy" tests. Anyone can photograph charts to see how well the manufacturer's settings correlate to their apartment's lighting and post the results to look authoritative, but that has nothing to do with your lighting. These tests are even less relevant to good photography since in real photography we often want to use our camera to modify the colors to look better. Good photography has nothing to do with trying to duplicate reality, unless you're doing forensics. TRICK: Use the SHADE setting often. Use it most of the time outdoors unless your subject is in direct sunlight. Use it even if you're in mixed sun and shade or back light. Why? Simple: if you're outside and not in direct sun, you're in shade. Shade is light that comes from the blue sky. If you don't use the SHADE setting your images will be too blue and cold, which looks really bad for photos of people. Try the SHADE setting and see for yourself. The AUTO setting on the D70 and other cameras I've used will not adjust all the way to do this by itself; you have to select SHADE. Of course if it's completely overcast there is no blue sky so try the AUTO setting as usual. The SHADE setting is also for partly cloudy days when the sun pops behind a cloud, remembering that your subject is again mostly lit by blue sky. I never use the PREset setting. If you shoot through car or zoo or bus windows I would suggest trying it to eliminate the green cast. Then again, stop the car and get out, and don't take bus tours if you want great photos! TRICK: to set the preset (manual) WB you have to 1.)
select PRE with the WB control You also can select it from another photo, and you can read about how to do that in the instruction book. I've never done this. TRICK: When setting preset WB you can point the camera at whatever you want to use as a neutral reference. The camera prefers a gray card, but let's face it, carrying around a gray card is for dweebs. Neutral grays are very hard to find on anything other than a special gray card and it's easier to find neutral whites anyway. Thus I find or grab anything that's white and use that. If you use white in direct sunlight you'll always get a "No Gd" response from the camera because the Matrix meter is rendering it white instead of gray. Thus the trick is to select the center weighted meter when using a white reference in bright light and you'll get "Good" from a happy camera. Remember to set back to Matrix meter as soon as you're done. This is the only time I use anything other than Matrix metering. TRICK: WB Bracketing is very clever. You make only one shot and it processes the same data to record three JPGs each with different WB. Here's the trick: even if you've maxed out the trim to + or - 3 the bracketing will go even further if you ask it to. Thus if you have a problem with not being able to balance to some dim tungsten at tungsten +3, set the bracketing to go to even more to the plus side and you get get shots at +6!
Noise back to Performance back to top The noise (grain) is similar to other good digital SLRs and much better than any fixed-lens digital camera with their small CCDs. It's much better than the Sigma SD-10 and Kodak Pro SLR/n at speeds like ISO 800 where it counts. Directly compared to my D1H, a speed king, the noise is about the same level at the various speeds, but oddly at a lower spatial frequency. That means the noise or grain structure is a bit softer on the D70 than on my D1H which is bit sharper or finer. This is in JPG mode; the NEF files have more visible grain due to the higher sharpness with the settings I used. Different settings will change this. The noise is good, clean, noisy noise at high frequencies. It is not the nasty kind of lower frequency noise I've seen on the Sigma SD-10 and Kodak Pro SLR/n which puts subtle purple/yellow blotches over larger areas, visible even at low magnifications. The good noise of the D70 pretty much goes away when you resample down. The "long exposure NR" mode is a little defective in implementation. It does not automatically disable itself at faster shutter speeds where it can't help, so when selected in the shooting menu it slows down the camera when it shouldn't. At faster shutter speeds it cuts the frame rate from 3FPS to about 1.5FPS and the buffer depth halves. It only helps with exposures longer than about a second. I would prefer that this mode disable itself automatically at faster shutter speeds. Today you have to tweak the menus manually. The July 2004 firmware upgrade to 1.01/1.02 did not fix this. I never use the NR mode because of this and because the noise is so low anyway that there is little to be gained. The NR mode works by making a second photo with the shutter closed for an identical amount of time to serve as a black reference. The camera automatically subtracts this black image from your photo, which very effectively eliminates any hot white pixels or sparkles and half the noise, too. Just remember that since the reference black exposure is equal to your exposure time that for a 10 second exposure you have to wait an extra 10 seconds after the first 10 second exposure. The camera indicates something like "job nr" on the LCD while it's working. Sorry for the funny written descriptions and no boring samples, but honestly I'd rather spend my limited time to go make some real photos or write something else you can't find on other websites than spend the time formatting in Photoshop. Remember I do this site for fun!
CCD Dirt back to Performance back to top Quite miraculously my new D70, bought at retail just like anyone else, has NO dirt on the CCD. Every other DSLR, including brand-new D1X and D1Hs, have had dirt on the CCD. BRAVO!! Of course over time dirt will accumulate and you will get dark spots on your skies, ha ha. All practical DSLRs will do this, unlike film, and then you need to have them cleaned. If this becomes a problem for you remember that the problem is worse at small apertures like f/22. Shoot at f/4 and it is much less a problem. So far so good. My CCD is still clean. In fact, my CCD is still so clean I have a sneaking suspicion that Nikon wised up and put an optical plate further ahead of the CCD to throw any dust out-of-focus. If so, Nikon has solved a very serious problem that almost all other DSLRs still have. I'm such a chicken I have not wanted to peer right at the sensor for fear of letting dust in. Tough, you have to realize I buy my own gear like you do and no one is giving me this stuff for free, so I'm not THAT curious. I run this website for fun based on donations.
Shutter back to Performance back to top The D70 uses a superior combination of mechanical and electronic shutter. This very important innovation is what makes the D70 so superior to every other consumer digital SLR. The mechanical shutter is used at speeds below about 1/125, and the speeds from about 1/250 and up are controlled electronically. Obviously the electronics can work far faster than any mechanical shutter, and importantly allows flash sync of 1/500 and faster. Amateur cameras like the Digital Rebel and D100 and the Sigmas and even the Nikon D2H and D2X only have a mechanical shutter, which severely limits the flash sync speed, which limits flash range, battery life, recycle time and ultimate frames per second with flash. More on the importance of flash sync here. The top speed without flash is 1/8,000, which is no big deal because no one ever uses those nutty speeds. I never shoot above 1/1,000 anyway. The D70 shares the same great shutter performance with the D1X, D1H and D1. The D70 probably shares a secret feature of the D1 series that with any external flash or studio strobe in manual mode that you can sync all the way up to 1/8,000, of course with a loss of light, in regular sync mode. Shutter lag isn't an issue with DSLRs, and it's not an issue for the D70. When you press the button it makes the photo as soon as it's focused, and focus is fast. Prefocus or manual focus first and it's instantaneous. The D70 offers 30 seconds through 1/8,000 and BULB like many cameras. TRICK: there is a TIME mode if you use the optional ML-L3 infrared wireless remote you can get here for $16.95. TIME means that the shutter opens when you press the button and stays open until you press it again. This is fantastic for long exposures of minutes to hours, since you don't have to stand there holding it the whole time.
Focusing back to Performance back to top Autofocus speed is quite respectable. Even with my slow-focusing 80-400VR it focused fast enough. It should be interesting to see if this combination works well enough for sports. It can focus the sluggish 80-400 VR fast enough to track cars zipping down my street at 40 - 50 MPH. It's not as fast as my D1H for trying to photograph hummingbirds in flight. Those little guys are so fast I have a hard time photographing them with anything, and it's a tough test since they fly against a background on which every camera tries to focus. I'm not talking about the easy shots of hummingbirds sucking at my feeder, but the little guys in free flight buzzing all around my feeder. There was a problem in the first two of seven D70s I've used. The focus calibration was off by about a tenth of a millimeter (that's why I say teeny). This means that your images will not be focused on your subject, but instead on something somewhat behind your subject. Don't confuse this with the common mistake of having selected the wrong AF area or otherwise pointing the AF sensor to the side of your subject. Nikon of course will adjust this under warranty if it's a problem. With common f/3.5 and slower lenses it's not much of a problem, and at regular shooting apertures of f/8 or so its completely invisible. Some people incorrectly call this the "backfocus" problem. On the other hand, if you have fast lenses that alone cost more than the complete D70 kit and you shoot them wide open you ought to check your camera. My $1,700 28mm f/1.4 lens wide open at f/1.4 was useless on two cameras, but of course OK at normal apertures. You won't see this through the finder. You have to look at the images at 100% on your computer. It's simply the image being focused on something just a little behind where it should have, which is usually invisible if you have enough depth of field, and of course Nikon will stand behind it if it really is a problem. The samples I've used in May 2004 now seem AOK and mine is perfect, even at f/1.4. Heck, my D70 focused better than any other camera I've owned, even with my f/1.4 lenses. Testing this is simple. Just go make at least a dozen photos with your lens wide open and look at the results at 100% on your computer. See if the camera really focused where it should have. If you haven't done this kind of test before there's the potential that your technique may be off and not looked for it before, but you get the idea. The only concern here is that you need to have the focus be where you put it. This miscalibration is the reason some people think their D70 images are soft. They aren't soft; they simply are focused on the wrong thing! If your camera is out of adjustment, which I only saw on some of the very first samples, of course it's covered under warranty. If you are crazy, like this guy here (look out, it's a slow loading page), you can use a nail to mess it up further and void your warranty at the same time. I don't have this much guts; the D70 has a year warranty and I know your camera isn't that old! On the other hand, I respect his innovative spirit and it's this pioneering spirit which makes him an honorary American as far as I'm concerned. Please use a real Allen wrench to make these adjustments, and remember that Nikon will do it correctly for you for free under warranty and probably clean your camera as well at the same time! TRICK: You can get the D70 to wait and release the shutter only when an object has moved into a preset focus distance if you set the AE-L/AF-L button to AF ON (set in custom function #15) and then keep the shutter pressed all the way down while NOT pressing the AE-L/AF-L button. This is called Trap Focus. Some people report that this works great for getting sharp macro shots on their D70s. How does this trick work? Presuming you have the camera set to AF-S (CF #02) the camera won't shoot until it thinks the subject is in focus. By setting the AE-L/AF-L button to AF-ON the camera won't focus itself unless you press that button. If you don't press the AF button or focus ring the camera has to wait for the subject to move and when the "in focus" dot lights up the camera will shoot so long as you've been holding the shutter button all the way down. This trick works so long as you have the camera and lens set to AF-S mode and keep holding the shutter all the way down. If you set the camera to manual or touch the focus ring on an AF-s lens while holding down the shutter it will shoot at the wrong time. It's a primitive hack and I doubt it's smart enough to predict subject motion for good results photographing something like horses jumping over a fixed object, but worth a try. It also doesn't work if the subject is moving so fast that the camera doesn't notice it's in focus as the object flies by. Of course you need to prefocus the lens where you want it while not holding the shutter down.
Viewfinder back to Performance back to top The viewfinder is bright, clear and sharp, just like an N80 but smaller, with a teeny thumb-adjustable dioptometric variator on the right of the peephole. Handy gridlines can be turned on or off. The active AF zone lights up in dim red at night or turn black by day. There is a lot of data on the bottom of the viewfinder, including more data than earlier cameras. My D1H can't indicate more than 999 (or maybe that was 99) exposures, for instance in the finder, and the D70 is clever enough to be able to display "1.8k" for instance if you have 1,800 exposures left. No one cares if it's a hollow DACH-pentamirror (lighter and cheaper and what the user manual says it has) or solid glass pentaprism (more expensive and heavier and what the Nikon US full-line product catalog volume 10 says it has). Big deal, whatever it is it works great. My rubber eyecup kept falling off due to defective design and eventually got lost. Guess what? I don't even miss it. Big deal, many of my Nikons since the 1970s have done this. Actually small fuzzy viewfinders would be OK, too. Painters often will stand far back from their canvas to get a better idea of composition, or even flip the canvas over or look at it through a mirror! This is done deliberately to see the composition while removing distracting details. Today AF is more accurate than manual focusing, so I can't see any reason to want a bigger finder. DSLRs have smaller finder images than film cameras. Not to worry, the D70 is very sharp but it wouldn't matter if it was fuzzy. In reference to manual focusing, the D70 finder, like almost all film and digital SLRs made since 1985, are no longer ground glass, but precisely etched plastic laser screens with zillions of microprismatic cells that collect as much light as possible from today's zoom lenses. They are optimized for best brightness for lenses from f/2.8 and faster. One little secret is that if you have a lens faster then f/2.8 they get no brighter and they also only show the depth-of-field of the lens set at f/2.8!!! Of course you won't believe me till you try this: get an f/1.4 lens and tap the depth-of-field preview button to stop down from f/1.4 to f/2, f/2.8 and f/4. You'll see nothing change until you stop down past f/2.8! This is because these very advanced screens only look through sections of a lens corresponding to f/2.8 or slower. There is no advantage for finder brightness or manual focusing with lenses faster than f/2.8. The point of this digression is that you are at a severe disadvantage with any AF camera for manual focusing of fast lenses because the AF camera's ground glass is no longer good for this, and the traditional split-image and microprism collars of manual focus SLRs have been removed. Thus AF is the way to go and the only reason for a finder as crisp and clear as the D70's is to entertain the photographer, not for creating better shots. My viewfinder is very slightly out of adjustment. If I follow the viewfinder my images are rotated by a fraction of a degree counterclockwise. That sort of renders the nifty gridlines useless, since I have to rotate the camera clockwise by a small amount to get a perfectly level image.
LCD, Histogram and Highlight Displays back to Performance back to top The rear color LCD is great. Unlike many other cameras I can see it easily outdoors in the California sunshine, although of course I shield it with my hand in direct sunlight. Unlike other cameras I don't have to hide it inside a jacket just to see it. Colors are true and I gauge color, white balance and exposure right off the display. It's better than my laptop iBook's LCD, too. LCDs are made of glass. Most digital cameras including the D70 have a clear protective plastic sheet integrated with the camera case to keep you from breaking the LCD. These plastic sheets may be replaceable as a service part but are not user replaceable in the field. When they get scratched you usually throw the camera away, or at least have to send the camera in for service. The D70, like all the Nikon DSLRs, has an additional user-replaceable snap-on plastic cover. After you scratch it up you throw it away and buy a new cover, the BM-4, for $10 here. I thought BMs were #2, but they must number them differently in Japan. With the Canon you usually have to buy a new camera, or have service replace it if available. These covers get scratched up just from carrying the camera around your neck. I dislike the great precision in selecting the level of playback zoom and position of the zoom window. Because of this I have to wait for the scrolling selectors to buzz around my image to check sharpness. By comparison the D1H only had one zoom level and only a few positions around the window to which you could scroll the zoom, thus you could see everything immediately. I would prefer Nikon eliminate the precision so I can see what I need to see fast. In other words, there must be ten or twenty different horizontal positions and just as many vertical positions and zoom levels. You have to scroll through all of them to get from one side to the other. Beware of the histogram display. It stinks. You see this during playback by tapping the four-way directional selector to the left or right a few times. The histogram display is defective in design and therefore less than useless because its inaccuracy can lead you to make heinously overexposed images that still read AOK. The problem simply is that the histogram display of the D70 (just like the D1H and D1X) only displays the green channel. (some say the luma channel, which is very similar, typically 60% G, 29% R and 11% B.) This is just fine if you are shooting something either gray or green, but almost guarantees overexposure if your subject has a lot of red or blue in it. Why? Simple: a strongly red subject, be it a sunset or a white gown in warm afternoon sunlight, will have more red than green or blue in it. If you make the mistake of using the D70's histogram to set your exposure you'll have set the green channel to optimum exposure. Since your image has more red than green you'll have more than 100% red, which means you'll be clipping the red channel and get the according nasty hue shifts as well in your blown out highlights. Want to see this yourself? Easy: shoot something predominantly warm colored or red, like a brick building or a white wedding gown in evening sunset light. Give it enough exposure to give a full histogram display on the D70. Load the image into Photoshop and put the CF card back in the D70 so you can look at the histograms both in the camera and in Photoshop at the same time. Get to the histogram in Photoshop however you like. I prefer CMD + L (Mac) to get to the levels adjustment. Now select each of the red, green and blue channels in the drop-down menu above the Photoshop histogram display which defaults in RGB mode (or hit CMD + 1, CMD + 2 and CMD + 3 (Mac)). Look at the different channels and you'll see the green channel matches what you see on your D70. Look at the red channel in Photoshop and you'll see it's blown out! This defect is why many photographers, even full time professionals, blow out exposures and get nasty hue shifts in the highlights: simply because they are overexposing. How do you work around this? Simple: I IGNORE the histogram. I find looking at the image itself is a much better indication! Likewise the blinking "Highlight" display is equally useless and potentially misleading. Both the histogram and highlight display can be made to read AOK even in cases of nasty overexposure for colored subjects. Why would Nikon make this bone-headed mistake on their digital SLRs? Beats me, someone simply got lazy in firmware or hardware. I would have hoped that this would have been fixed in the D70 since I published these findings for the D1X.
Automatic White Balancing, Contrast and Sharpening back to Performance back to top The auto WB feature is the best I've used. It's worlds ahead of the D1H and other DSLRs I've used. The other $4,000 cameras last year were all so bad you usually got an awful result every few frames, thus no one really used the Auto WB settings except in mixed artificial light. I used to run my D1H in Cloudy all the time and today I run my D70 in Auto. Likewise, the firmware smarts of the D70 have come so far that I've never had any reason to use anything other than the default Auto settings for sharpness and contrast (tone). TIP: I personally love wild colors so I have both my color settings cranked up. Go into the green shooting menu (little icon that looks like a camera) and go into Optimize Image. Go to Custom and set Saturation to + and COLOR MODE to IIIa (enhanced sRGB).
Battery Life and Power Management back to Performance back to top November 8th, 2005: Battery Recall. FANTASTIC!!!!!!!! I goofed and left my D70 in my bag for over a week with the power switch ON. It still read FULL. I then made a thousand shots with it over the next week! That was with a lot of looking at playbacks and piddling with menus, too. I get between 600 and as many as 2,329 shots on a single charge. It's very hard to run down the battery in a single day. It's tough to make that many shots, I usually just charge the battery at the end of the day. I have gone as long as three weeks before charging, and it still read FULL. I have no idea how long it may stay charged with no use. Unlike the primitive D1X, the D70, D70s and all the current Nikon DSLR cameras use rechargeable lithium-ion batteries. These batteries love being charged after or before every time you use the camera. They have no memory and no need to be discharged before recharging like the crappy nickel based batteries in the D1X. Lithium batteries give the best service when charged frequently, which is completely opposite from Ni-MH. More at my Batteries page. The key to getting a lot of shots is not to use flash and not reviewing each shot on the LCD. In other words, I got 2,329 shots when I was photographing surfing with many multiple shot sequences, no flash and image review (CF 07) turned off. I get only 600 shots if I use a lot of flash and image review and play with the menus a lot. I may be able to get more shots on a charge; most of the 2,329 shots were of sports, but others were with flash. Let me know if you've gotten more on a charge, we can make this a contest. On this Methuselah charge I got 1,835 shots reading FULL, after which the gauge changed to 90%. At 1,880 shots the gauge dropped to 40% for a moment and went back to 90%. At 2,014 shots it stayed at 40%. It finally died at 2,329 shots. You measure shots by looking at the numbering of the JPGs, presuming you have the File Num Seq set to ON in the wrench menu so the camera doesn't reset the file numbers when you reformat the card. The D70 battery meter isn't too helpful. As soon as the battery meter on the top LCD reads anything other than 100% get ready to change it. You have to pay close attention since the 90% indicator is just a tiny chip off the battery indication on the top LCD. By the time the battery gauge drops to the 40% position you're almost dead. It would be better if the important 90% indication was more than just the teeny tip of the very top of the battery bar. It is easy to miss it unless you look very closely. The next and only other time I actually ran down the battery I was at 678 shots when the meter went from 100% to 90%; 746 shots when the meter went to 40% and the viewfinder battery warning lit and it went dead at 773 shots. Like most film and digital true SLRs, unless the meter or menus are ON or you take a picture the battery is not being used, even when left to the ON setting. This is a reason I prefer the D70 to a pro camera like my D1H. The D70 is designed for great battery life instead of speed like the D1H. I got to 750 shots on my first charge and it still read FULL before I charged it for the next day's big shoot. Not only that, but since that was my first use most of it was playing with menus for a long time, which also runs down the battery. By comparison the first day I had my F100 I ran down the first set of batteries before I finished the first roll of film! The D70 has a Li-Ion battery and you should charge it before or after each use. It is completely different from the primitive Ni-Cd and Ni-MH batteries used in the D1 series which need to be run all the way down each time before charging. The Li-Ion battery is much happier being charged after each partial use and is strained by complete discharges. This is completely opposite from the Ni-MH batteries in the D1 series, which prefer a full discharge each time and are weakened by repeated partial discharge. Just charge your D70 battery after each use, the best of all worlds. A full charge takes about an hour and 40 minutes, and a partial charge takes less. After 650 shots (battery gauge still reading Full) it takes an hour, after 300 shots it takes about 45 minutes and after 150 shots it takes about 30 minutes. HINT: I never can figure out the hieroglyphs on the charger. Just know that light off means unplugged or not charging, light flashing means charging, and light on means done. People new to DSLRs may think it odd that there's no overall sleep mode. The good news is that the only thing that uses power is the color LCD which usually is set to turn off ever 10 seconds or so (you can set that). You only reason to turn off the camera is to prevent accidental operation when you put it away in a case, just like a modern film camera. Just tap the shutter to turn it on immediately when you need to take a shot. GREAT! This is just like the professional D1H and D1X pros have been using for years, but this advantage is probably new to people coming from digital p/s cameras. More about these two kinds of cameras here.
Data and Software back to Performance back to top My D70 runs great: I've made over 15,000 shots on mine since March 2004 and have not lost a single shot to data corruption. By comparison, my D1H lost images fairly frequently. I use Lexar 512 MB and 1GB 40x cards and love them. Personally I prefer to use a card reader instead of plugging my camera into my computer since I work in the field. If you run your camera tethered to a workstation you may find the special USB cables here helpful since they are longer and angled to be less likely to pull out of the camera. It's really smart. For instance, in the BULB setting the data actually times the exposure to the tenth of a second. Make a 238.4 second exposure and that's what the data says. TRICK: You can program the D70 to add a short text message in the meta data automatically to every file. Mine adds © 2004 KenRockwell.com to the files right on the CF card, no software required. You could program yours with your name and phone number, for instance. OK, actually it says "(c)" since I couldn't find the "©" symbol, so let me know if you find it. You'd figure if Nikon designed cameras in the English speaking world they would have included this. Legally (c) doesn't count, since it's not the © symbol, but since legally you don't need to mark the photos anyway, so no big deal. You do all this in the wrench menu under "Image Comment." To read these comments you open the file in Photoshop or other viewer program; there is no visible marking of the image. In Photoshop and hit FILE > FILE INFO. The data shows up in different places in different programs since there is no standardization for displaying this. For instance, it's easy to read in PS 7 under "User Comment" under EXIF under FILE > FILE INFO, but in PS CS you have to find it under FILE > FILE INFO > ADVANCED > EXIF PROPERTIES (click down arrow) > USER COMMENT (alt container) (click down arrow). Another advantage of this "comment" function is you'll probably be able to identify your camera even years from now since it's unlikely anyone else will ever bother to reset it. Also if you are a wiseguy you could set it to say "my boss is an idiot" for all the files you shoot at an office party or whatever. Just remember the data is there, but it's not that obvious to anyone unless you look for it in Breezebrowser or whatever. TRICK TO THE TRICK: I'm too cheap to pay for Nikon Capture and too lazy to want to use it even if I had it, however one better photographer than I wrote to share this trick if you use Nikon Capture to get a real © symbol in each image file. Another advantage of using © instead of (c) is you free up two more character spaces. This reader, a windows user, suggests: 1. In
windows XP go to Programs > Accessories > System Tools >
Character Map. So much for the © symbol. On with more about data transfer: I use Nikon Transfer, part of Nikon View 6.2.2 to transfer the files to my Mac OS 10.3.4. The transfer program lets me tag the files again with a real © symbol, take all the shooting data and add it to the comment field so all the f/stops etc. can be read on most versions of Photoshop, correctly rotates the images automatically so they open properly in every program, and adds little preview images to each file so you can see them in the Mac Finder listings. You add a small amount of data to each file this way, so the file sizes are a teeny bit more than just copying the files straight from the card. A reader writes that attempting to use the extra-cost Nikon Capture software that it gave him an "unsupported character" error when he attempted to have that program add the real © symbol to his files. I have not tried this; I'm too cheap to buy the capture program. The usual file mode, NORMAL JPG at 3,008 x 2,000 pixels, gives a 1.5 MB JPG file. The file size varies little with subject complexity. It rarely gets smaller than 1.1 MB or larger than 1.8 MB at he NORMAL setting. This makes it handy for estimating how many images will fit on the rest of your memory card, but unfortunately lets image quality vary with subject complexity. I prefer the way simpler cameras like my Canon A70 or Sony FD-88 make JPG files that vary in size depending on subject complexity. The Nikons tend to keep file size constant and let the image quality vary with subject complexity. The other brands tend to keep image quality constant while letting file size vary with subject complexity. More complex subjects with a lot of lines and texture and contrasts need bigger JPG file sizes to retain the same image quality as a simpler subject like a blank sky. With the Nikons I sometimes set HIGH JPG for more complex subjects to keep the quality constant. The RAW + JPG mode records two separate files, an NEF and a BASIC JPG, far more useful than the silly method Canon used to use. Before the 20D Canon used to record both to the same file which only can be read by special software, which makes no sense since the whole point is to have JPGs handy on your card without having to work these over in a computer first. Not only does the D70 make two separate files, but just as importantly it is super easy to set this mode. You only can get a BASIC JPG in this mode along with the NEF to save you from clogging up your memory almost immediately. The BASIC JPGs are all pretty close to 640 kB and the NEFs close to 5.6 MB for a total of 6.2 MB for the two files. No, you only get a BASIC JPG with the raw and no option to select other JPG options as some more expensive cameras offer. Automatic image rotation if you download through Nikon's included software or many other programs. Image rotation is how you get your vertical shots to be vertical instead of being flipped sideways. The auto rotation of the D70 is better than most cameras which have none, but still only sets a flag in the EXIF data which some software sees and other software ignores. Thus these play back OK on the camera itself, however the D70 does not actually record the JPGs rotated correctly. Therefore depending on what software you run you may need to rotate the JPGs manually if you just copy them from your card to your computer. The previous 1.5 version of the professional (not free) program iView nor PhotoShop 7 nor Apple's free "Preview" program read this flag. Photoshop CS works great. It works great with the latest iView version 2. A reader reports that Apple's iPhoto 4 and Image Capture (included free with all new Apples) read these fine on OS 10.3.3. If you use Nikon's free dedicated software for downloading all the images then they are correctly rotated during the download and are thus correctly rotated forever, regardless of the subsequent software used to open the files. The other software reads the flags and always remembers to open them correctly rotated. I'm not sure why some cameras record EXIF data in different places. For some maddening reason I see no EXIF data for ISO or lens type in the JPG files when downloaded directly and read with iView 1.5 or Photoshop 7, although they read just fine with the Nikon View 6.2.1 software and iView 2. My D1H reads just fine by comparison. When you download from your camera or card through Nikon's software you can have all the data written to a caption which has all the lens and other data not seen in the files with direct file copying from the cards. Nikon View 6.2.1 won't transfer files under Mac OS 10.3; you'll have to use it on OS 10.2 instead. 6.2.1's NEF plug in works fine on 10.3, and NV 6.2.1 also can read all the EXIF data perfectly in 10.3 on files you have simply copied from the CF card. The only reason to care about Nikon View is to read the ISO and lens used in the EXIF data and to autorotate images, otherwise it's still very klunky and other pay-for software like iView is much better for sorting through your images. More under RAW below. But wait! Two wrongs DO make a right! I called Nikon who told me that NV 6 doesn't work on OS 10.3 and they are right, their software usually works poorly if at all on my Mac. On the other hand, I was surprised when the transfer part started to work fine one night. What changed is that I had plugged my USB card reader into my Mac through a USB HUB instead of directly into the computer. Now every time there is a computer problem, support people love to tell you to remove all the hubs and connect everything directly. They tell you this just to get you off the phone, since every time I have a problem that never fixes it. Once the transfer started to work the files transferred just fine, all rotated perfectly and with all the shooting data captured as a caption with the file. Personally I avoid camera brand software since it's often buggy like this compared to serious software like Photoshop. Be sure to have the latest version of iView and you can skip the Nikon software. All the pros I know do what I do: they just copy all their files into their machines and just skip any camera company provided software. Camera company provided software is included as a courtesy to amateurs who, unlike pros, usually don't have more invested in software than the cost of this camera.
Memory back to Performance back to top CF cards and microdrives both work great. I have a whole page about these here. In May 2010, I popped a new 32 GB Lexar 600x CF card into my D70, and lo and behold, to top LCD clearly showed that it could fit 26.2k LARGE BASIC JPGs on my partially ful 32GB card. Unlike some other cameras, I've shot over 3,000 images on my D70 in the first few weeks and had no problems with lost data on any of my cards or microdrives. Thankfully these problems are becoming fewer and fewer as the technology matures. Nikon only recommends a few card sizes from a couple of brands like San Disk and Lexar, so be sure to read the latest D70 sales literature for these suggestions. Nikon lists these as a footnote to the specs, guaranteeing performance only when used with the cards they have specifically tested. CF cards are best but cost more. Microdrives take longer to play back. With a microdrive personally I'm bothered by the slight delays when playing or selecting the 9-up displays or whatever, but I'm pretty impatient. Record times are unimportant unless you fill the buffer. You really have to be a crazy sports shooter to fill up the 12 or so frame buffer, and you know who you are if you do. If you are you probably want a faster overall camera like the D1H. The D70's top LCD and viewfinder underestimates the number of remaining exposures. This is a flaw in the firmware. For instance, my D70 shows I can fit 286 images on a blank 512MB card, but in fact I get 352. This defect errs on the safe side and becomes less of an issue as you fill up your card it. For instance, it may say 9 shots left when you really have 11. No big deal, just that other cameras like my D1H was correct. The D70 is worse with RAW files: the D70 tells me I can only fit 99 RAW images on my 1GB card which holds more like 175.
Durability back to Performance back to top It's a $200 plastic camera with electronic guts. It has a metal lens flange. In my younger days I really hated plastic, and experience has shown me that well done plastic like the D70 lasts just fine. I've learned to trust the designers at Nikon to do their jobs and choose the best materials. Also plastic means it weighs less, which is a huge benefit to me. I think the important internal framework is metal; read the specs if you really worry. I bought an abuse warranty so of course I kind of hope I can break it to justify my expenditure on that warranty. Some adventurous people have submerged theirs and they worked fine after drying out as you can read here.
Custom Curves back to Performance back to top So long as you learn how to use your "Image Optimization" and WB and other settings you can ignore these. I'm astounded at how many amateurs worry about custom curves. This is how pros keep the amateurs from competing: by confusing them so badly with this that they never make any photos! There are always some guys (and never women) who love to screw with stuff just for the sake of screwing with it. I've never used a custom curve and made about 50,000 shots on my D1H and about 22,000 shots on my D70 since I bought it in March 2004. I strongly suggest you ignore custom curves, too, unless you have a really good reason. A custom curve requires you go buy some complex software from Nikon to be able to load them in. A custom curve is how you alter the already excellent built-in curves of the D70, which have been developed by Nikon through years of continuous collaboration with the world's best professional photographers, and instead replace them with a something developed by some greasy computer hobbyist who still lives in his parents' garage. If you insist, you can use curves to get different looks to the camera, much as different films have different looks. You could program a green highlight crossover to get the same nasty highlights that Kodachrome gave, or trade shadow noise for extended highlights, etc. I prefer to use the excellent defaults in the camera and alter the images later in Photoshop in rare cases. If I was going to twiddle with custom curves I'd want to add a highlight shoulder to mimick film's better highlights. Curves are best used by photographic virtuosi who have exhausted every other possible way to get their look. The good news is that once you arrive at a curve you like you can just get JPGs right out of the camera that use them, no more piddling needed. The bad news is that this should be your last resort, and mostly for people needing bizarre and alternative looks. Yes, you could load custom curves to mimick cross processing or possibly even faux iinfrared as I explain for Photoshop here.
Most people shoot IR by using a filter which blocks visible light and only passes infra-red. One problem is that "blocks visible light" is a fancy way of saying "completely black!" You may or may not be able to see anything through the viewfinder with one of these filters. See my IR page here for more. Because invisible IR light would screw up colors for normal use almost all digital cameras, including the D70, have a filter over the CCD deliberately to remove any IR. Because of this if you actually want to record the IR you will need to make a very, very long exposure through your opaque IR filter. This is typical for all digital cameras. Bjørn says the D70 is better at this than the D2X in his D2X review. Here's one guy's step-by-step illustrated instructions of how to cannibalize the D70 and remove the IR filter to optimize it for IR but render it useless for regular photography. Doing this lets him shoot IR at full speed hand held without the usual long exposures, and lets him see clearly through the viewfinder. Don't try this at home. Of course the easiest thing is to simulate the IR look from normal photos in Photoshop. I explain how to do this here. If you really are clever you might be able to use the custom curves to do this in-camera, however I doubt the D70's curves function supports the matrix math needed which Photoshop does.
Minutiae and other stupidity back to Performance back to top Some crazies are always trying to break their cameras. Some people enjoy pointing them at blank walls and test patterns looking for every sort of defect, and then of course anyone can post whatever minutiae on the internet so all the normal people get worried, too. Then normal people send me email asking for my opinion, so here it is. Here's where wisdom comes in: personally I can break anything. I know how to create test setups that can exploit just about any imperfection. I do this when I get a new product so I know its limits when I need to push it. As soon as I find the limits I get over it and go make pictures. Everything has its limits if you know how to find them. I've shot with this camera and it works great. Want to see the sort of things I shoot? Look here. Some people, the measurebators, never get over this. Their fetish is to find minute technical limitations so they feel smarter than you. They aren't photographers. Face it, there has never been a perfect camera yet. You can't just buy a different product that has all the advantages of the one you own and also just magically fixes the few limits you found. Guess what: that other product probably has far more real problems. The minor points measurebators find are invisible in photography. The real issues, like how long does the battery last or if you can find the power switch, are obvious so the measurebators get no kick out of pointing them out. You want to see a camera obviously bottom of the heap? Go look at the specs on the Sigma SD-10. Measurebators do this fault finding as a hobby, just as archeologists and astronomers love to find hidden things. Measurebators are not photographers, so if you want to make pictures you can safely ignore them.
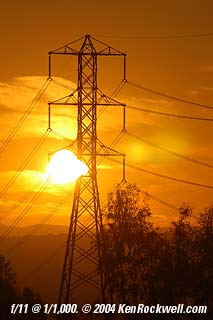
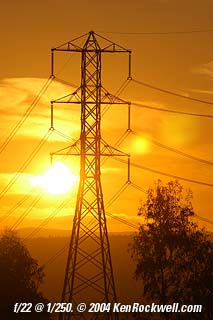
Blooming back to Performance back to top Blooming is when a very bright source of light in the image, like the disk of the sun, gets bigger than it should be and "blooms." I have seen this happen on rare occasion when I am stupid enough to point my telephoto lens directly at the sun. The way around it is to choose a smaller aperture and longer shutter speed. It's not a problem unless the subject is so bright that it is uncomfortable to look at it through the finder.
I even found a problem the measurebators haven't yet: I once got an artifact where a dark band spread across the image crossing the sun! This happened once in a series of images, so I don't care. Here's what it looks like:
Guess what: this isn't blooming. Look carefully and you'll notice that the disk of the sun is outside the top of the image. The dozens of similar images with the sun actually in the photo as I intended and the horizon straight were fine. What happened is that the sun leaked through the black paint on the edge of the CCD. CCDs need to see black along the edges outside the image so they can calibrate the rest of the active image to what black should look like. If you are stupid enough to focus the direct light of the sun on the very edge of the calibration area of the CCD with an ultra-wide angle lens then the CCD presumes that the elevated brightness of the direct sun sneaking under the black paint should be black. The camera's circuits then corrected this elevated level back to black and at the same time corrected the rest of the image which left the darkened band. Moral? Compose correctly and you'll be fine.
Aliasing (vernacularly called Moiré) back to Performance back to top The D70 has a weak anti-alias (AA) filter which improves sharpness for 99% of photos compared to a full AA filter. 1% of the time and if you have sharp edges or repeating fine patterns like a screen window you may excite aliases. An alias on a fine repeating pattern looks like bands of color on the area of the pattern that should not be there. Sharp edges might get a little jaggy in spots, visible only at high magnification. These instances are few and far between, and only happen in situations where the frequency of a grate is close to the pitch of the CCD pixels. If this happens just zoom (or move) in or out a little and it goes away. I'd much rather have this in the 1% to 0.1% of the images in which I can see it that the crummy noise visible in 100% of the images made on some of the more expensive cameras I mentioned at the top. Likewise, the exposure accuracy of the D70 is so superior to every other camera I've used I'd rather have aliases on 0.3% of the images than have to compensate exposure on 20% of them as I have to do on other cameras. This is not enough bother for me to try to minimize; if it was I suspect it will evaporate when the camera is set to lower resolutions and I also read if you bother with NEF that Nikon Capture has a way to make this go away, too. Want to see this yourself? Shoot through a screen window with a pitch of about 16 threads per inch from about 9 feet with a lens set to 28mm. Remember to focus on the screen, not the subject behind it. You'll see weird bands of color through it, even on the camera's LCD preview. Now if I shot screen windows all the time I might care, but I don't. If I did care, just remember to focus on the subject, not the screen, and it goes away! This said, once an alias (color bands) make it into your image they cannot be removed. If you photograph a lot of finely striped things like picket fences and fabrics then you may want a different camera.
Inscrutable Oriental Warm-Cool 1/8,000 Shutter Syndrome (IOWCSS) back to Performance back to top 18 March 2004: Also in the category of minutiae I got an email from the Orient that someone thinks that at 1/8,000 of a second at ISO 200 he's seeing a very minor color balance shift from one side of the image to the other. From the images I saw it's invisible, even if the images really are showing the performance of the camera and not just some artifact of his test method. I have no idea who the source is or how the photos were made. Even if the images I saw are really showing the D70's performance, it was still invisible so who cares? 1.) I couldn't see the purported shifts unless I cranked the saturation to +100 in Photoshop. These shifts, even if a true artifact of the D70, are irrelevant for photography. 2.) No one really shoots above 1/1,000 anyway, and certainly not down at ISO 200. The problem supposedly is at 1/4,000 and 1/8,000 at ISO 200. The only time I even use 1/2,000 or above is so I can deliberately shoot a lens wide open in daylight to look for flaws. To shoot at 1/4,000 or 1/8,000 you'd have to be shooting in broad daylight at f/2.8 at ISO 200, and only time you'd do that is for portraits in which case you'd have scrims to reduce the light levels so you wouldn't be using 1/4,000 anyway. If you did shoot in broad daylight the light would be so harsh that the subtle effects of the Inscrutable Oriental Warm-Cool 1/8,000 Shutter Syndrome (IOWCSS) would be invisible, and if the light got soft you'd have to use a longer speed at which the IOWCSS no longer is reported by its discoverers. This could be an artifact of the electronic shutter, which as you've read above is CRITICAL to the 1/500 flash sync that photographers really do use. I'd rather get 1/500 sync (which matters) and this purported color shift at 1/8,000 (which doesn't matter) any day. 3.) Anybody can publish anything on the internet. I know I sure do. So who cares? This seems like another case of analysis paralysis or measurebation. As I said at the very top one can always find nitpicks with anything and, even if true, isn't worth worrying about. For instance, a lens or filter with sloppy coating like you might get in a non-Nikon lens could cause this. |


