Home Search Gallery How-To Books Links Workshops About Contact
|
Nikon
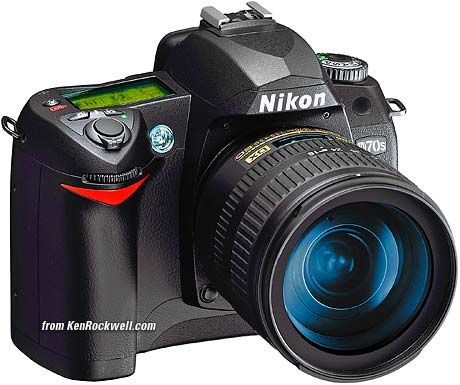
D70s, D70 and D50 Suggested Settings
Nikon D70s. INTRODUCTION back to top People keep asking how I set up my D70. These settings are the same way I'd set up a D70s or D50, which share the same menus and adjustments. The D50 skips five custom menus for items it doesn't have, like the viewfinder grid. Don't worry about these if your D50 lacks them. To get to many of these adjustments you have to be in the P, S, A or M exposure modes (top dial) and you must have the custom menu selected as Detailed. You get the detailed custom menus by going to MENU > SET UP MENU (wrench) > CSM Menu > Detailed > OK. If you use many of the preset scene or green AUTO modes or forget to select the detailed menus you may not be able to adjust all of these. I leave most settings at their defaults and use the Program exposure mode. I never use the cute little preset icon modes because I prefer to set anything special myself. I've mentioned these throughout my D70 review page. Here I present exactly how I set mine. BASICS: ISO: I use 200. I would love to use ISO AUTO, but usually don't because it also remains active in Manual exposure mode, completely defeating the purpose of the manual mode. Taking the time in minutes to deactivate this in manual mode is more effort than the effort saved in AUTO mode. WB: I use AUTO -3 and use an 81A glass warming filter on the lens. I prefer warmer (oranger) images. QUAL: I shoot Normal JPGs. This is called NORM and L on the top LCD, which stands for NORMal JPG compression and Large (3,008 x 2,000) image size. I'll use BASIC for parties and uncritical images, and FINE only for really important shots with a lot of fine details. I don't use Raw, as you can read on my Raw vs. JPG page. OPTIMIZE IMAGE: I prefer the vivid color I get from Fuji's Velvia 50 film, so I tweak my D70 to give color as vivid as I can get. To do this go to MENU > Shooting Menu (camera icon) > Optimize Image > Custom > (set Saturation to + and Color Mode to IIIa) > - - Done > OK. If you forget to select - - Done and then hit OK it won't remember these settings. For photos of people I either set the colors back to normal, or cheat and use the Portrait preset mode on the top dial. FOCUS: AF METERING: Matrix That's the basics. Now I'll go into more detail. I get into explicit detail for every menu item towards the bottom. CONTROLS AND SETTINGS Focus Mode (the little lever at the bottom of the lens): I set it to AF. This means AutoFocus. From left to right: Exposure Mode Dial (Left side): "P" for program auto exposure. In this mode the camera chooses f/stop and shutter speed. if I want to use different apertures of shutter speeds I rotate the rear command dial, which selects alternate combinations of f/stops and shutter speeds which give the same exposure. Nikon calls this "Program Shift." A * is added to the P on the top LCD to let you know you've chosen a different pair for exposure. If you want to use only one aperture or one shutter speed then use S or A mode. If you want to set it the hard way, use M, manual, mode. Metering Mode (push-button on right): Matrix (you get a little icon showing four corners and a central dot. Exposure: I have an article on How to Set Exposure. I leave it set as explained above, and correct if I need to. Power Switch (right side around shutter release): ON, unless the camera is put away in a case. The D70s only wakes up when you tap the shutter, so it's off even when the switch is set to ON. There is no battery drain unless the shutter is tapped and the camera wakes up.The only thing the OFF position does is act as a lock against unintended operation. [*] (Metering}: Selects between Matrix, Center Weighted, and spot. I leave it in the default of Matrix, and if that doesn't give the right result, use the next control to fix it. * Green Dot (combined with metering button). This resets many of the camera's controls to their defaults when held in along with the other green dot button on the top left of the back of the camera. This is handy at the beginning of each day, since it will reset everything from whatever whacky ISO, white balance, file format and other settings you were using the night before +/- Exposure Compensation. This makes the picture lighter or darker. Hold it and spin the rear dial to change the brightness of your pictures. Remember to set it back when you're done. If you don't you will see a note in the viewfinder. You can read this setting both from the top LCD and through the viewfinder. Backlight (button on right with a sun on it): press this to light the top LCD at night. Format (combined with backlight button): Hold this along with its brother on the back left rear of the camera (combined with the rectangle button). You'll get a blinking "For" on the top LCD. Hold both of these again and you'll completely reformat your memory card. Professionals reformat a card each and every time we put a card in the camera. This is because files and structures are sometimes picked up or changed when read with a card reader or used in any other camera. Professionals prefer to be safe than sorry. We don't use cards to archive previous photos. One time I kept saving my winner shots on a card by simply erasing the rest each time. After a few months I started to get errors. These went away as soon as I reformatted the card. Reformatting completely renovates the card. Erasing does not, and may leave the potential for errors. BACK of CAMERA From left to right: BKT: I don't use this. It lets you set bracketing if you hold it and spin the two control rings on the right of the camera while looking at the top LCD. Rectangles (also doubles as one of the two FORMAT buttons): This controls the frame advance mode of the camera. You hold this and spin the rear control dial. When you see [S] on the top LCD you have the normal mode I use, which gives one shot each time you press the shutter. Hold and spin to show rectangles on the top LCD and you're in Continuous mode. In Continuous mode the camera keeps taking pictures for as long as you hold down the shutter button. Pro cameras label the rectangles as C, for Continuous. Spin it some more and you'll see a clock. This is the self timer, in which mode the camera goes off a few seconds after you press the shutter. The mode that shows a narrow black rectangle sets the D70s to respond to the EN-L3 remote control. AE-L AF-L (Top center): Hold this to lock settings while shooting. You can alter what this button does in the custom menus. ISO/Checkerboard, WB/?, and QUAL/ENTER Buttons: these do different things depending on whether the camera is taking a picture or playing one back. If the camera is idle, or you tap the shutter, the camera is in the taking mode and the silver ISO / WB / QUAL functions work. If the camera is playing an image, either because you just took one or pressed the PLAY button, the buttons do the checkerboard, ? or ENTER functions. I'll explain them as if they are six different buttons below. When shooting the camera is often still in playback mode from the last shot and yo need to tap the shutter button to put the camera back in to taking mode for the ISO/ WB / QUASL functions to have effect. I now always tap the shutter button first before using those buttons just in case. ISO: I set 200. If you just took a picture be sure to tap the shutter button to return the camera to the taking mode. If you don't and are viewing a photo you just made the button will lock the image (the key symbol WB: I use AUTO -3 and use an 81A glass warming filter on the lens. I prefer warmer (oranger) images. QUAL: I use NORM - L, or NORMal compression, Large (3,008 x 2,000) JPEG, I'll use BASIC for parties and uncritical images, and FINE only for really important shots with a lot of fine details. Checkerboard: this lets you see one, four or nine images on the screen during playback. Press the button to switch among these modes. ? / Key: Press this on playback to protect (lock) the image from erasure. Warning 1: it marks the file so well that it won't empty out of my trash on my computer unless I go in and remark the file on my computer first. Warning 2: these images are erased from your memory card when you format anyway. I don't use this lock feature. THe ? will give more information when you are in the menus. ENTER: Used while playing with the menus. Lock Switch: This is the L - dot switch below the four-way thumb switch. The dot (unlocked) position lets you move the AF area with the rocker button. The L (locked) position prevents moving the selected AF area. It doesn't lock your ability to navigate the menus, which is a huge advantage over the professional D1X! I usually leave it in dot to allow me to select different AF areas. Trash Can: Press once, then press again to confirm and delete an image during playback. LENS Many lenses have no switches or settings. If so, don't worry. More advanced lenses have focus mode settings, which will be either M/A - A, or A - M on older lenses. If the choices are M/A and A I set the focus mode switch to M/A. This gives autofocus, and if I grab the focus ring it instantly lets me make manual corrections. As soon as I tap the shutter button again I get autofocus. This M/A setting, if the lens has it, lets get both kinds of focus without ever having to move anything. It's the best. Non-G lenses will have an aperture ring where the lens is attached to the camera. Set this this ring to the largest number, usually 22, if not 32 or 16. This number will be in orange on autofocus lenses. There usually is a lock to keep this ring set there, since if it comes off that setting you'll get an error message from the D70s/D70/D50. MENUS: Now I'll get into explicit detail. PLAYBACK MENU (">" icon) To get to the playback menu press MENU and then select the ">" (play) icon. Delete: This is helpful if you want to delete all images while saving those for which you pressed the Key button to lock. I don't use this. I do all my editing and selection in my computer and I do my in-camera deletions one-by-one with the trash can key, so I don't use this. Playback Folder: The camera can record and playback from different folders. I leave this set to ALL. CURRENT ignores any other photos on the card in different folders. You'd only have different folders on your card if you shot them in a different camera without reformatting ( a bad idea) or played with your camera deliberately to create new folders. THis is difficult with the D70 and I cover it later. Rotate Tall: I set this to NO. If you set this to ON and if you have vertical images and set autorotate to ON, vertical shots will rotate themselves on playback. I prefer to rotate the camera physically on playback. When the camera does this electronically the resulting image is very tiny, since the screen is much less tall than it is wide. Slide Show: Lets you amaze your friends with an exciting slide show on the tiny screen. I don't bother with this. Hide Image: This lets you mark images not to playback on the camera, even though they remain on the card. Use this if you get an embarrassing shot of a friend and want to make believe you deleted it! Move the cursor left and right to select images, tap it up or down to mark as Hide or Unhide, and press enter to save. Now the camera won't play these images, even though it still tallies them in it's counter on the top right that reads "34/284." Print Set: I ignore this. You can mark which images to print, how many of each and if you want data and dates imprinted. I do all this in my computer. SHOOTING MENU (camera icon) To get to the shooting menu press MENU and then select the camera (shooting) icon. Optimize Image: This is where you can program the look of an image. You can mimic the effects for which we used to have to select different kinds of film. There are choices of several presets, as well as CUSTOM, which lets you set your own. I already explained my preferred setting at the very top. Remember to select DONE if playing with the custom setting, otherwise it won't remember it. Long Exposure Noise Reduction (NR): Forget this. It slows the camera frame rate down to half! If you make exposures of a minute or more it will get rid of the minor purple haze in the corners, but in exchange you have to wait for another exposure as long as your first time exposure! You can see examples of this haze on my D200 Long Exposure page. I've never seen this haze under any night photography I've done. It only becomes apparent for astronomical purposes, thus I never use this setting. Image Quality: This duplicates half of the QUAL button. I only use this menu if I want to see this on the back of the camera instead of the top LCD. Image Size: This duplicates the other half of the QUAL button. I only use this if I want to see this on the back of the camera instead of the top LCD. White Balance: This duplicates the WB button. I only use this menu if I want to see this on the back of the camera instead of the top LCD. ISO: This duplicates the ISO button. I only use this menu if I want to see this on the back of the camera instead of the top LCD. CUSTOM (CSM) MENU (pencil icon) Select the custom settings menu by pressing MENU and selecting the pencil icon. Be sure to have "Detailed" set under Menu > Setup Menu > CSM menu, otherwise you'll default only to get the first few items! The numbers refer to the D70 and D70s. The functions are the same on the D50, just numbered differently since a few aren't in the D50. [R] Menu Reset: This returns everything below to factory default. Play with everything below to your heart's content, since if you do screw anything up this reset will fix it. 01: Beep. For God's sake, turn this to OFF. Beeping cameras annoy everyone and scream "RUDE AMATEUR!" If you insist, use this only in private. 02: Autofocus: Use AF-S (default) for still subjects, and set AF-C (continuous) to track moving subjects, like sports. More at my Sports page. 03: AF Area Mode: Set Single area (the default) for still subjects. Set Dynamic area for moving subjects. Dynamic Area lets the camera select the AF areas by magic as the subject moves. This really works and is perfect for birds and sports. Use Closest Subject when you hand your camera to a non-photographer. It uses al the AF sensors and guesses that the closest one is your subject. This prevents the common problem with people shots where the camera focuses in the middle, on the wall behind them! 04: AF Assist: This is the little light that helps the camera focus in the dark. Default is ON. Set it to OFF if you're spying on people in the dark and don't want to be noticed. ISO AUTO: This lets the camera increase the ISO automatically as the light fades. I would use it all the time, except that a firmware flaw leaves this active even in manual exposure mode. If you set it to ON you have the option to select the lowest shutter speed the camera will use before it starts to increase the ISO. 06: NO CF Card?: Leave this to LOCK. if you turn it off it will let you take pictures with no card! You accidentally could shoot a wedding and not realize you have no card. When set to ON it locks the camera if you have no card. 07: Image Review: This shows the photo you just took on the monitor after you take it. I set mine to ON, unless I'm shooting a lot and don't plan to look at the monitor after each shot. When you use this remember that the functions of the ISO, WB and QUAL buttons will do things you don't expect after you take a photo, since the camera goes into playback mode for a few seconds after each shot. Because of this I make a habit of tapping the shutter button to return to shooting mode before I make any ISO, WB or QUAL adjustments. Otherwise I often would change something related to playback by accident! 08: Grid Display: These are fine horizontal and vertical lines in the finder. I leave these ON to help me keep my horizons straight. Default is off. (absent on D50). 09: EV Step: Your choice of 1/3 or 1/2 stop increments. I prefer the default of 1/3. 10: Exposure Compensation: I leave this in default OFF. This means you have to hold the +/- button at the same time as turning the command dial to alter the exposure compensation. If you turn it ON then any turning of the command dial will alter your exposure. 11: Center Weighted: This controls the diameter, in millimeters, of the area of the center weighted meter. I leave mine alone at 8mm, since I never use the center weighted meter anyway. This control allows you to make your center weighted meter more like an averaging meter of more like a spot. This isn't in the D50. 12: BKT Set: This controls what's changed when the camera brackets. You can change it to alter the white balance, or the exposure, or just the flash or ambient light exposure. I don't use bracketing, so I don't use this. 13: BKT Order: This controls the order of the shots made with bracketing. Normal is the metered exposure then the altered versions. You may select instead for it to make the underexposed shots first. I don't use this. 14: Command Dial: You may choose to flip which dial does what when setting manual exposure. I leave it in default OFF/NO. 15: AE-L/AF-L: This sets what the AE-L AF-L button locks when held, and how. I leave mine in AE lock only, since in AF-S the AF locks when I press the shutter half way. I use this lock in strong backlight: point the camera down at something as dark as your subject, hold the button, then point the camera at the subject, hold the shutter to lock focus, then move the camera again to compose, then release the shutter. This gyration of three camera positions saves you from having to use manual exposure and manual focus. THe AE-L button locks exposure and the shutter locks the focus. Slick! 16: AE Lock: more of the same. I leave this OFF. If you turn it on it locks the exposure when you hold the shutter halfway. This would mimic cheaper point-and-shoot cameras, but is silly since 1.) the camera has a dedicated AE-L button and 2.) one usually wants to lock exposure and focus on different things. If you wanted to lock them al on the same thing you probably wouldn't need any of these locks. 17: Focus Area Wrap: I leave this off. If I keep pressing the AF selector in one direction the selected AF area goes to the end and stops. To go from far right to far left I have to go left and pass the center. If you turn this to ON (wrap) you can cheat and get to the left sensor by clicking one more time to the right! This is too confusing for me, so I leave it OFF (no wrap). 18 AF Area Illumination: This lights up the AF areas in the finder. I leave it at AUTO, in which it turns it on in the dark. OFF never turns it on, which is silly, and ON leaves them on even in bright light, which is stupid. 19: Flash Mode: I leave it in TTL, which lets the built in flash expose properly and automatically. Manual sets the power manually. Commander mode lets you control an SB-600 or SB-800 by magic. I have a page on using the Wireless Flash Modes. If you forget to set it back to TTL the flash goes off, but has no effect on the exposure! Be sire to check this before thinking you camera is defective. 20: Flash Sign: Leave this ON. Turning it off extinguishes the bolt in the viewfinder if you need flash. THis is more than an idiot light: the matrix meter analyzes subject lighting ratio and turns on the bolt when the ratio exceeds the camera's (or aesthetics) dynamic range. This is why you'll see the flash bolt come on even in direct sunlight if you have deep shadows. 21: Slowest Shutter Speed: This sets the slowest shutter speed the camera will use in low light in the P and A modes, in normal flash sync. I set this to 1/8 indoors if people hold still. Default is 1/30. I usually leave it at 1/15. Set this slower to let the ambient light have more effect indoors with flash, and set it faster to stop your kids from leaving weird blurry ghosts behind them. Use a higher ISO with the faster speeds to help the backgrounds fill in better. 22: Monitor Off Time Delay: This sets how long the rear LCD stays lit each time. I leave it at 10s. Set it longer if you want the screen to stay lit longer without having to hit any keys. Luckily the camera has such great battery life there's no reason to set it as long as you like. 23; Meter Off: This sets how long the meter stays on each time you tap the shutter. I leave it at 6 seconds. Set it longer if you like; I've never had any battery life issues with this camera. 24: Self Timer Delay: I leave it at 2s, since I use the self timer to replace a cable release. Set it to 10 s to give yo enough time to run and get into a picture. 25: Remote: This sets how long the camera stays awake ready to release as controlled by the remote infra-red shutter release. If you set this too short the camera will ignore the wonderful little release before you get to pressing it. Se tit longer and the battery may run down faster, but I've never had a problem. I set this to 5 minutes. After 5 minutes I'll have to use the rectangles button to set the camera back to remote release mode again. SET UP MENU (wrench icon) Select the Set Up menu by pressing MENU and selecting the wrench icon. Folders: You can create, select and rename folders on your memory card. Normal people never use this menu. I love the trick on the pro cameras which creates a new folder if you hold the "?" button on power on, but the D70 has no automatic feature. It's more of a pain to make new folders than it is to sort the images later from the same folder. Select Folder chooses the folder into which new photos are recorded New lets you make a new folder and name it. Rename and Delete are self explanatory. File Number Sequence: This lets the camera number your images starting at the last shot you made, even if you've formatted your card. I leave this to ON. If you turn it off you'll start from 0001.JPG each time, which is stupid., In time you'll have 150 files all called DSC_0012.JPG on your hard drive. You'll thank me when you try to put together a slide show and don't have to rename them all! Also it lets you keep track of how many shots you've made, since it runs up to 9,999 shots before it resets. Format: this is the hard way to format a card. If I'm in bright enough light to see the dim red FORMAT buttons I use those instead. Professionals always reformat a card every time it's put back into a camera to prevent any potential for card errors. CSM Menu: As I suggested at the top, set this to Detailed. Otherwise you only get a few custom settings. DATE sets the time and date. LCD Brightness isn't. LCD Brightness sets the viewing angle for the LCD, not the brightness of the backlight. I leave it on 0. Only play with it if you look at the LCD from odd angles or work in very hot or cold temperatures Mirror Lock-Up isn't. This setting is used to lock up the mirror to clean the LCD. I never use this, since I find it easier to set the camera to Bulb and hold open the shutter. It's not a lock up for telephoto lenses on tripods. Video Mode sets the format of the video output. Use NTSC (525 lines, 59.94Hz) in the Americas and Japan, and PAL (625 lines, 50Hz) in Europe. Language: Set yours to Swedish, then see if you can navigate back to English. Fun! Image Comment: This lets you encode a secret text message into every file. Mine is set to (c) KenRockwell.com with my phone number! You see this text looking at the EXIF data in software on a computer, You set this by going to MENU > Setup Menu > Image Comment > Input Comment > (add your message like you did on 1970s video games) >> Enter. If you forget to hit ENTER the Japanese will have a laugh on you, since you have to start over. So sorry! When you get your message text messaged, go to Attach Comment and hit SET so a small check shows. Now go to and select DONE. If you forget to check Attach it won;t attach, and if you forget to hit DONE it will also forget everything you just did. So Sorry! I don't write the firmware. I suggest you bear with this, since it's great having everything you shoot have your contact info embedded. It also allows you to prove ownership in some third-world country when you catch some thief with your camera after he steals it. Just go through the menus and find where it has your information. USB: I leave it at mass storage. Use whichever works better with your computer better. Dust Ref Photo is used to take a picture of the dust on your sensor. If you pay Nikon another $100 for Nikon Capture software you can use this erase the dust more easily from your images shot in Raw. You people know who you are. I don't do this! Firmware Version lets you check the version. This is handy to figure out if your camera is up-to-date with Nikons' free firmware updates. Image Rotation sets a flag in vertical images which keys most software to display the image vertically. It does not actually rotate the images; it just sets a flag. Someday the firmware will work properly and rotate the image itself, but no camera does that yet.
|