Home Search Gallery How-To Books Links Workshops About Contact
|
Sharpening
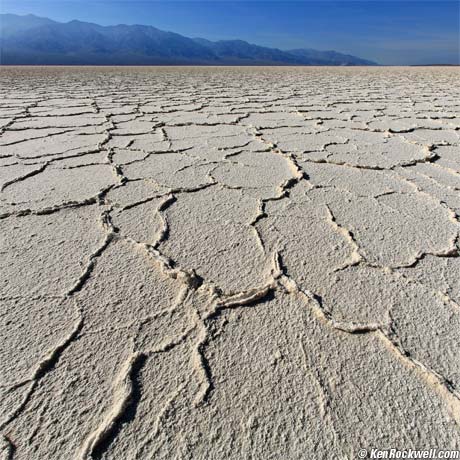
I get my goodies at Ritz, Amazon and Adorama. It helps me publish this site when you get yours from those links, too. March 2007 INTRODUCTION Photoshop is funny. The worst way to do things, like sharpening, dodging and burning, and lightening and darkening, are to use those menu commands. As the decades roll on and Photoshop gets smarter, the old commands never die when they are replaced with much better ways. The best way to sharpen had been the Unsharp Mask, but now it's Smart Sharpen. To add to the humor, the default settings are usually the worst. Let me give you my secret recipes, since many ask how I get my latest online images so three-dimensional. These differences may be subtle on this page; don't worry, try my settings on your own images. It has nothing to do with the cameras I use (see these sharp b/w images from a $3 throw-away using a poorer technique than I'm going to describe). Sharp web images are all about the right settings in Photoshop. Here's an unsharpened image. It was downsized from a digital camera in Photoshop and left unsharpened. Always sharpen after you size your image, not before.
Salt Flats, Badwater, Death Valley, California. Unsharpened. Poor: Sharpen Command
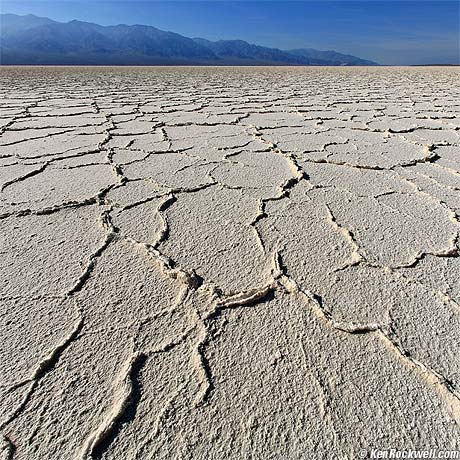
Filter > Sharpen > Sharpen. Poor to Good: Unsharp Mask
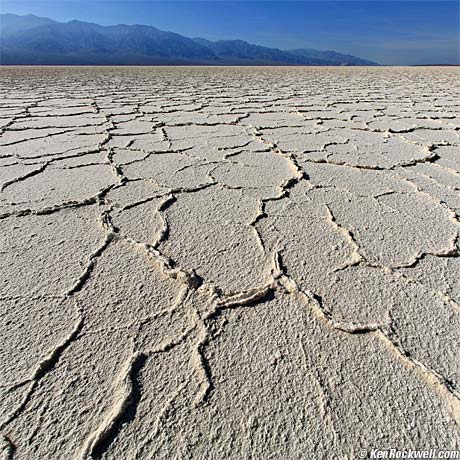
Filter > Sharpen > Unsharp Mask > 50%, 1 pixel radius. (mouse over for 150% at 0.3 pixels.) The Unsharp Mask filter is poor at its defaults. At its defaults it's the same as the Sharpen command, so why bother? I forget Photoshop's default percentage, I think it's 50%. The radius setting defines the size of the details sharpened. Things are going on in your images measured in fractions of pixels. Large radii, like the default of one pixel, sharpens coarse details. This hides the finest details we most want to sharpen. Setting smaller radii lets us sharpen the finest details. When you decrease the radius you must increase the percentage to get the same feel. By doing so you sharpen the finest details even more. This looks much better. Back in the old days of 2005 when the unsharp mask filter was the best way to sharpen, my personal defaults were 150% and a radius of only 0.3 pixels. To see this improvement, roll your mouse over the image above. To see the improvement, see how far away you can see detail. It's further away in the 150% at 0.3 pixel version because those settings sharpen fine details three times as much as the default settings, while sharpening the medium details the same amount. See how the smaller radius almost doubled the apparent resolution? This was hot stuff until CS2 gave us the Smart Sharpen filter. Ignore the threshold setting. In film days we set it to 3 to avoid sharpening grain. Feel free to use it on grainy digital images. It tells the filter not to sharpen grain in flat areas. 2007: Smart Sharpen
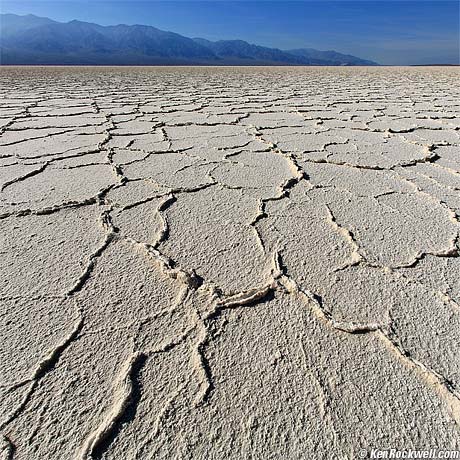
Filter > Sharpen > Smart Sharpen (100%, 0.2 pixels, Lens Blur). Mouse over to compare to the previous USM example at 150% and 0.3 pixels. As of 2007, my favorite is the Smart Sharpen filter. Just like almost everything else in Photoshop, the default settings aren't what I want. I forget the defaults, but I recall that they don't select Lens Blur. I think they select Gaussian Blur, which almost duplicates the unsharp mask. Selecting Lens Blur and a small radius is the key to great results from the Smart Sharpen filter. You can see detail in the salt a little farther away. This filter works even better with regular subjects. Try it yourself and see. It's smart, so it sharpens what we want, and leaves other things alone. This benefit isn't that obvious in this easy-to-sharpen example. RECOMMENDATIONS back to top I could spend all day finding better examples, but I don't need to. It's more important that you try these yourself on your own images. These techniques are optimized for online display at 100%. You'll need to experiment for printing, since every printing technique varies in how it dulls or sharpens images from your screen to final results on paper. We scientists call this the modulation transfer function. I sharpen for online use. I print directly from the JPGs from my camera without sharpening. The $150,000 professional printers I use for 15 cents a print at my local Costco or any discount lab like WalMart, Adorama or Target add just the right amount of sharpening automatically. Good luck if you're still piddling around at home on an inkjet. If you're not getting these results when you downsize for the web, you're probably making some very common mistakes. See How to Get a Sharp Photo. If you need more or less sharpening, change the percentage slider, not the radius. Lightening, Darkening and the CIE 1976 L*a*b* Space The best way to lighten and darken is to use curves layers. The best way to burn and dodge are to paint on curves adjustment layer masks, but that's another day's article. If you're not familiar with the basics of layer masks for basic image expression, go out now and learn them before worrying about anything else. I'll write about them someday, but for now you can read about them in any Photoshop book, online and at any community college Photoshop class. I'm saddened that many well-meaning photographers will worry themselves silly over minutiae between sharpening normally, and only sharpening the L layer. It's sad because most of these same people are still clueless about the critical basics of layer masks. Sharpening isn't critical to anything if your image lacks the correct burning and dodging to get your visual point across. If you're not up to speed with adjustment layer mask basics, don't even bother worrying about minutiae like L*a*b* sharpening. I don't have the time to worry about L*a*b*; I sharpen normally in RGB. Trick: If you want to punch up an image's contrast, try the unsharp mask at 20% and 20 pixels radius. The large radius and small percentage means you are sharpening the overall contrast instead of fine details. Sharpen the fine details next with the Smart Sharpen filter. I use this trick often in my car photos. It emphasizes the shine. See also Increasing Contrast and How to Use PhotoShop. PLUG If you find this as helpful as a book you might have had to buy or a workshop you may have had to take, feel free to help me continue helping everyone. Thanks for reading! Ken
Caveat: The ads below come from a third party and I don't see or approve them. They are sent to your screen directly from a third party. They don't come from me or my site. See more at my Buying Advice page. Personally I get my goodies at Ritz, Amazon and Adorama. |


Home Search Gallery How-To Books Links Workshops About Contact