Canon EOS R6 II User's Guide
EOS R6 II Review
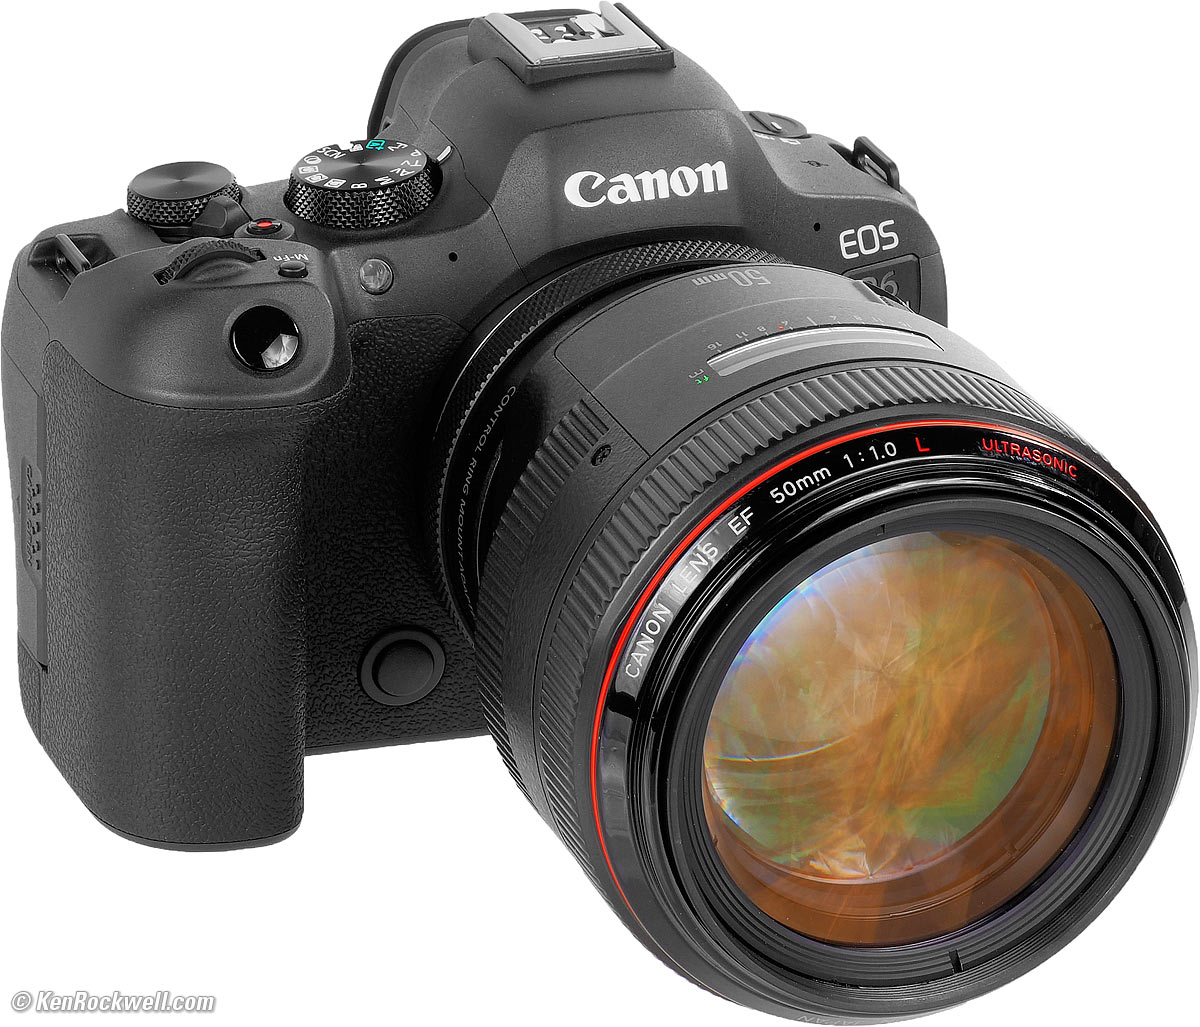
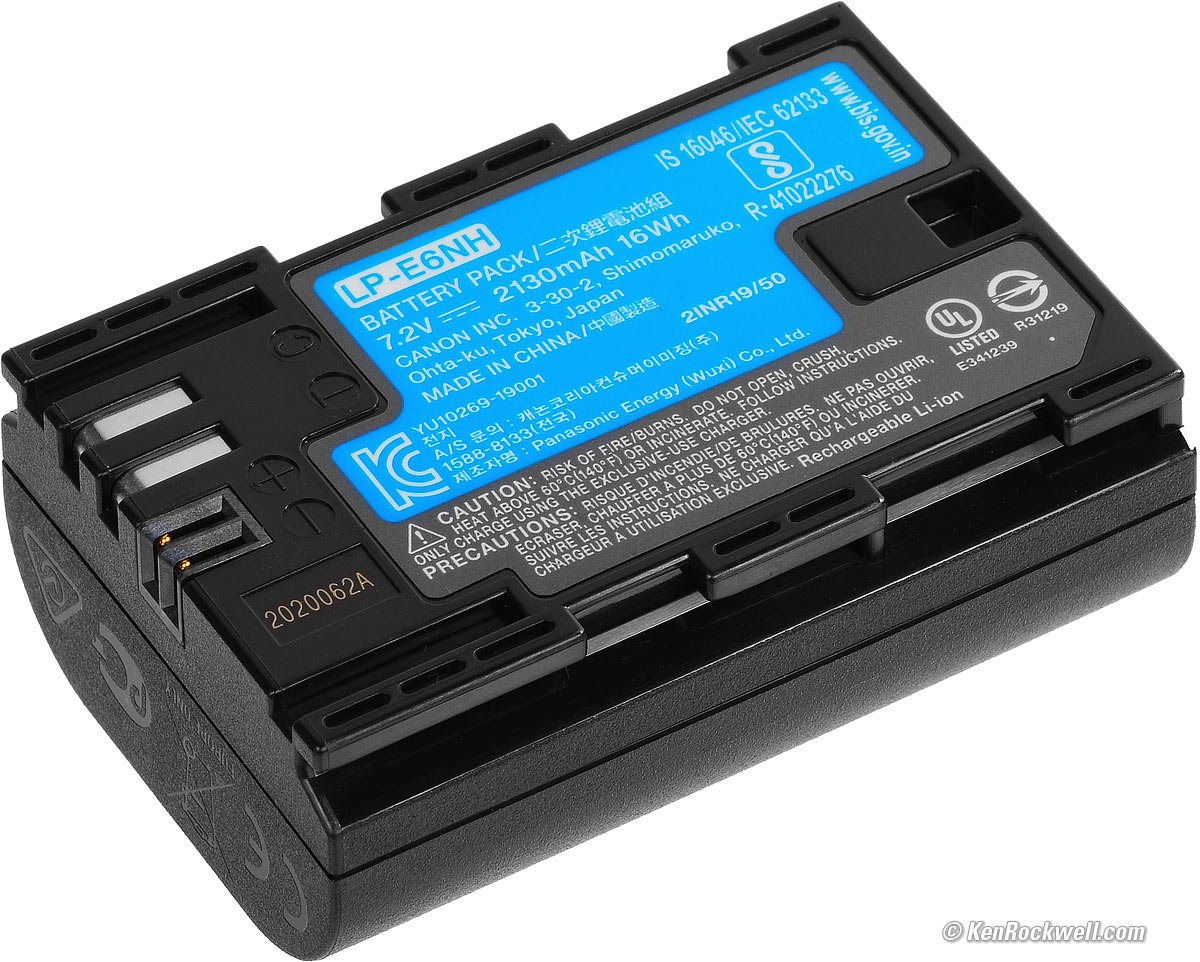
Canon EOS R6 Mark II (two SD card slots, 23.6 oz./670g. with battery and one SD card) with Canon EF 50mm f/1.0 L USM on EF to RF Ring Adapter. bigger. I got my R6 II at B&H; I'd also get it at Adorama, at Amazon or at Crutchfield, or get it used if you know How to Win at eBay.
This all-content, junk-free website's biggest source of support is when you use those or any of these links to my personally-approved sources when you get anything. Thanks for helping me help you! Ken.
If you find this guide as helpful as a book you might have had to buy or a workshop you may have had to take, consider helping me write more of these with a gift of $5.00 — especially if you intend to make a printout of this copyrighted work.
Introduction Power Format Card Backup
Use the LCD select AF while using the EVF
Manual Focus Peaking Magnifier
Focus Bracketing & Depth Compositing
ISO Getting ISO 50 (L) & 204,800 (H)
White Balance Exposure Compensation
M-Fn Button Custom Buttons & Controls
Customize the Finder & Rear LCD
Electronic Shutter & Silent Mode
Stabilizer Modes Long Exposures Self Timer
Display Brightnesses Vertical Finder
Quick Control Screen Picture Styles
File Formats Getting 40 FPS Lens Corrections
C1, C2 & C3 Preset Modes My Own C Settings
Non-EF Lenses on Adapters Video
Shutter Open or Closed at Power Off
Canon's Own EOS R6 II User's Manual
R1 R3 R5 II R5 R5C R6 III R6 II R6 R R8 RP R7 R10 R50 R50V R100
Bodies Compared RF Lenses EF Lenses Flash
January 2024 Canon Reviews Mirrorless RF Lenses EF Lenses Flash All Reviews
Canon's own EOS R6 Mark II User's Guide.


I buy only from these approved sources. I can't vouch for ads below. |


Introduction index top
This is a plain-English guide about how I use my Canon EOS R6 II. If you want more excruciating details, refer also to Canon's own EOS R6 Mark II User's Guide.
This will make you an expert on the EOS R6 II's controls and menus. It also includes a lot of tips, tricks, and the settings I prefer to use.
To get great photos you still need to get yourself to the right place at the right time and point the camera in the right direction, which is a lot harder than mastering the settings of the R6 II. Right out of the box at default settings, the R6 II does a great job all by itself. Making a great photo involves timing, FARTing, knowing the critical basics of what makes a great photo and a whole lot more.
Please enjoy my articles on How to Make Great Photos if you haven't already. Cameras don't take pictures, people do. It's all about finding something cool, and then showing us exactly what's cool about it. This guide will help you become an expert at the R6 II, but most importantly you need to be able to see the picture in the first place.
On with how to use your R6 II:
Power index top
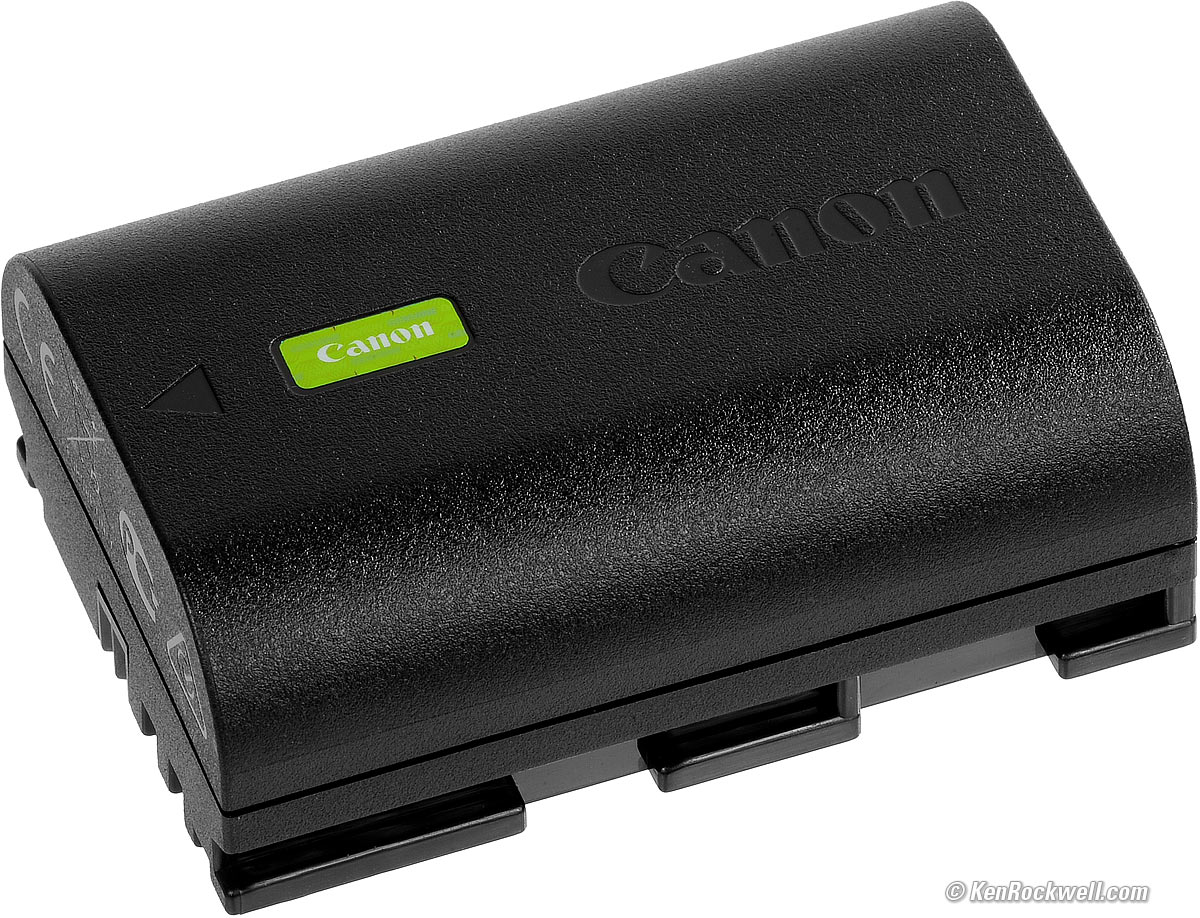
Batteries
Canon says it should work with any of the new included LP‑E6NH, the LP‑E6N or even the ancient LP‑E6 batteries, although I don't know if it will charge in-camera with Canon's LP‑E6N or LP‑E6; I haven't tried.
|
|
Charging
It's easiest to charge the battery in-camera. You have to use a USB-C source for in-camera charging; a USB-A to USB-C cable won't work. I prefer to use any USB-C charger or a USB-C PD power bank or even a USB-C PD solar panel.
You have to keep the battery and card doors closed to charge in-camera, otherwise it stops.
It draws only 7 W while charging its 16 Wh battery, so any USB-C charger should charge as fast as any other, regardless of power rating. Charger power ratings are the maximum power they can provide; the R6 II regulates its power so it only draws what it needs.
When charging in-camera you'll see a solid green LED on the back. The LED blinks if there's a charging problem.
I don't bother with the included external charger; that's mostly for if you want to charge a second battery at the same time as you're charging another one in-camera.
The external charger plugs in the wall with a flippy plug:
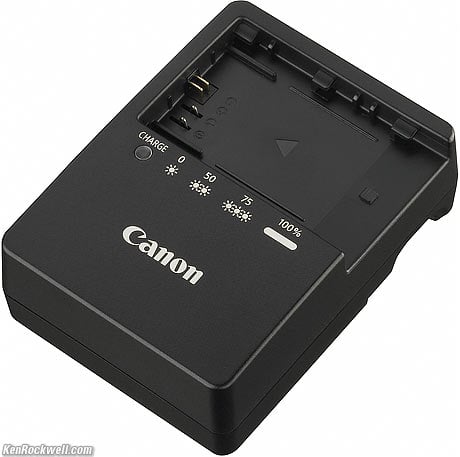
Included Battery Charger LC-E6.
Format Card index top
I do this every and any time I put a card in my camera, presuming of course that I've downloaded everything from my card.
To format the card, MENU > WRENCH page 1 > Format Card > Select a card > OK.
Backup and Card Functions index top
Use your choice of one or two SD cards.
Personally I set my R6 Mark II to record the same thing to both cards as backup at MENU > WRENCH page 1 > Record func+card/folder sel. > Rec options > Rec. to multiple.
This way I have two copies of everything, and if I accidentally delete from one card (oops!), it's usually still on the other.
Menu System index top
You can set menus with the touch screen, or use the thumb nubbin and dials. Tap the screen, push-in the nubbin or press SET to select things.
HINT: Pressing MENU on a sleeping camera simply wakes it. Just press twice, slowly, if the camera is off to get to MENU.
HINT: I program my rear AF-ON button to be another MENU button so I can hit MENU when shooting with just one hand.
Pressing the [Q] button while in MENU jumps directly to the next color-coded set of main menus (CAMERA, AF, [▶] PLAYBACK, <~> (network settings), WRENCH, CUSTOM and MY MENU (★)).
Use thumb nubbin or the top front dial to move between the pages inside each colored category.
Use the thumb nubbin or the big rear dial to move up and down in each menu page.
HINT: Many of the menu options I describe below are not available in the [A+] AUTO mode as set on the exposure mode dial. Be sure to use any of mode other than [A+] AUTO, movie or SCN to have access to all the settings I describe.
My Menu index top
I add these items to MY MENU (★). Of course your needs will be different:
Battery Info: Shows the battery percentage as well as the total number of shots so far on this charge.
Lens aberration corrections: I leave these all ON, except I may turn Distortion Correction OFF if I'm not shooting buildings, straight lines, or shooting with a fixed, distortion-free lens like the RF 50mm f/1.2L.
Custom shooting mode (C1 - C3): I use this to save and modify the C1, C2 and C3 settings selected with the MODE dial.
ISO speed settings: This is where you can unlock ISO 50 (L) and 204,800 (H) and program the particulars of AUTO ISO.
IS (Image Stabilizer) Mode: This is where I can turn the camera's stabilizer ON or OFF with unstabilized lenses.
Customize Buttons: Handy when I first get my new camera to program what buttons do what.
Other items I might add there (you only can have so many in one at a time) are :
Shutter Mode: This is where I choose Electronic so I can get to 40 FPS or First-Curtain so I can use flash.
Screen brightness: This sets the rear LCD brightness. Setting the LCD to max works very well in direct sunlight; give it a try.
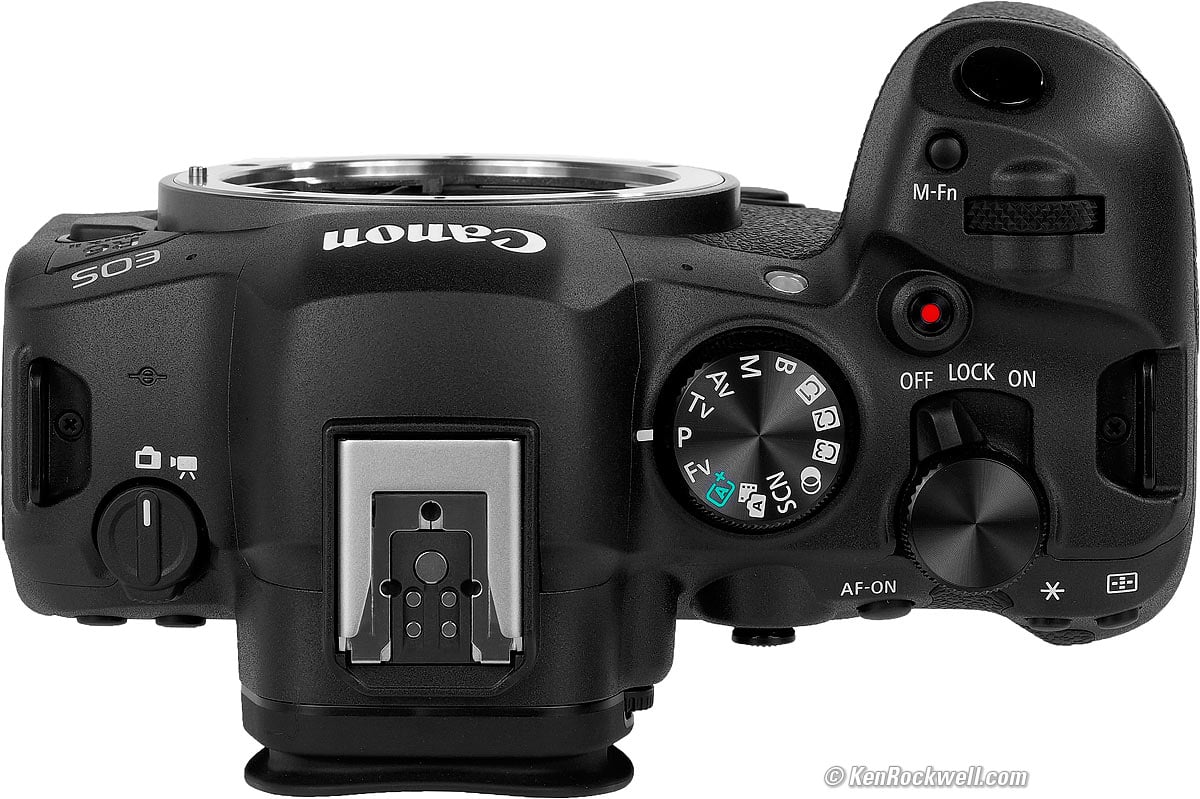
Exposure Mode Dial index top
Just turn the dial to set exposure modes.
I use Fv, P, Av, Tv or M, and once I get my new camera set as I like it, save all my settings for each of three various sets of circumstances into the C1, C3 and C3 presets.
Fv Exposure Mode index top
Try this new Fv ("Function Value") exposure mode right between the AUTO and P settings on the top MODE dial. It's all automatic unless you change something. I love it!
I really like Fv mode because it makes it easy to set any of shutter, aperture, compensation or ISO manually if you need to, and return to auto selection just as easily.
Fv mode is like Program mode, but lets you set individually any of Shutter, Aperture, Exposure Compensation or ISO, while the others continue to set themselves automatically. You can set more than one manually at a time, and those you don't set manually will change automatically as needed. Cool, huh?
If you want to change something, turn the top rear dial to select what you want to change (shown with an orange icon in the finder and on the rear LCD) and then turn the top front dial to change it. Once you set one item you can set other things by turning the top rear dial to select them.
The top front dial will change the aperture in this example below:
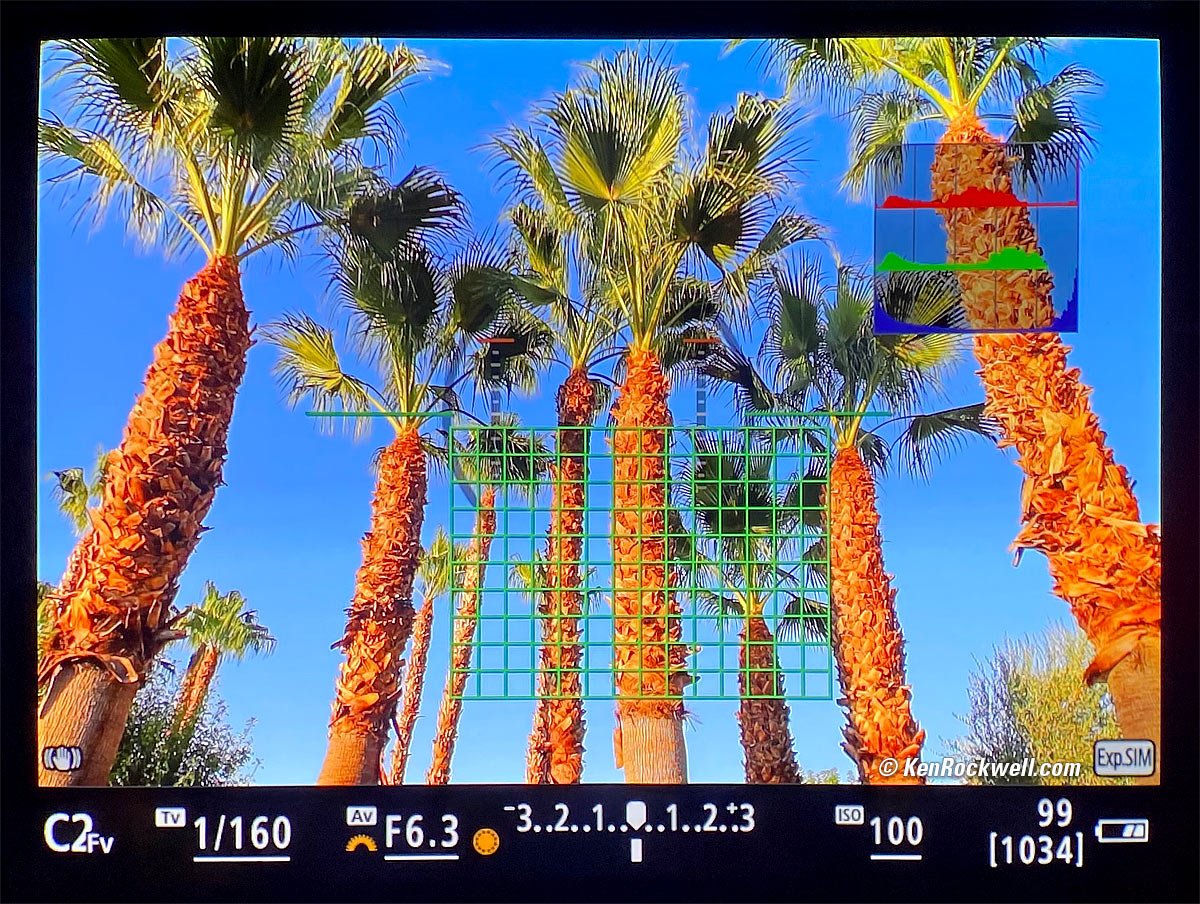
View through R5 finder (R6 Mark II is similar). The orange dial is left of the aperture, which will change when you turn the top front dial. Turn the top rear dial to move the orange dial icon to select other items to set. bigger.
The display underlines whatever the camera is controlling automatically, and has no underline for what you've set manually. Simple.
Unlike Program mode which resets any Program Shift as soon as the meter turns off, Fv settings don't reset even if you turn off the power. Your settings stay until you clear or reset them yourself.
Tap the rear 🗑 trash can (delete) button to reset a selected item back to AUTO, or hold it a moment to reset everything back to AUTO.
Even if you change something like Exposure Compensation by another method like the lens' control ring, a tap on the rear 🗑 trash can (delete) button will reset the selected item back to AUTO.
Oddly in the Fv mode Auto ISO ignores any auto or manually set minimum shutter speeds below about 1/60. Weird, but it has been this way ever since Canon invented the Fv mode. Sorry about that; this makes the Fv mode not useful me shooting still subjects in low light where I reliably handhold down to 1/8 all the time.
Autofocus index top
AF Modes
There are two main autofocus modes: ONE SHOT and SERVO.
A third mode, AI FOCUS, looks at the subject and automatically picks one of the other two modes depending on if it's moving or not.
ONE SHOT means the EOS R6 II focuses once and locks. Use this for still subjects.
SERVO means the EOS R6 II continuously autofocuses and tracks moving subjects.
AI FOCUS picks one of the other two modes automatically.
You can select this at the second item down form the top left after pressing the [Q] button, or at MENU > AF page 1 > AF operation.
AF Area Color AF Settings index top
Blue boxes mean tracking in SERVO AF.
Green boxes mean LOCKED in ONE-SHOT autofocus.
Gray means unfocused. I've never seen these.
Using the rear LCD Touch Screen to select AF areas while using the finder AF Settings index top
Better than using the rear thumb nubbin, I set my R6 II so I can move my finger around on the rear LCD to select AF points as I look through the finder.
Set this at MENU > AF page 4 > Touch & drag AF settings > Touch & drag AF: Enable, Positioning method: Relative, Active touch area: Right and Rel. sensitivity: 0.
Set this and you can swipe your finger around the touch screen as you're looking through the finder for faster, easier and more precise positioning of the AF area than messing around with the rear thumb nubbin.
Swapping between Touch LCD selection and Auto AF Area Selection AF Settings index top
I leave the camera set to All Area/Face detect, and presuming the Touch Screen is active as just set above, just touch the screen to select one area and move the AF area around, especially as you're looking through the finder.
This is easy: I prefer to use Auto Area, and only if my EOS R6 II isn't selecting the correct area automatically I then will manually select an area by simply tapping the touch LCD. I don't have to make any manual AF mode changes other than touching the screen. BRAVO!
The bad news is if I tap the LCD by accident my R6 II will then be tracking whatever random area I accidentally selected, and it won't give up! HINT: To get the R6 II to go back to normal All-Area AF auto-selection, press MENU twice, or take your eye away from the finder and tap the [ OFF ] icon near the top right of the rear LCD.
Selecting AF Area Modes Quickly AF Settings index top
I remove all the AF modes I don't use at MENU > AF page 4 > Limit AF areas > and uncheck all that I don't use (I use only the 1-Point AF and Whole Area AF options).
There are many ways to select among these AF Area modes. In older days before being able to use the touch screen to swap magically from auto-area to one-tracking zone I preferred to tap the M-Fn button and use the rear dial to select among the AF Area modes.
I never have to swap AF Area selection modes manually any more. My R6 II usually is in Auto AF Area Select, and if I tap or touch the read LCD, it selects the one AF area I tell it to. BRAVO!
Eye Detection AF Settings index top
Eye detection is set at MENU > AF page 1 > Eye Detection. I set it to Auto.
Eye Detection means the EOS R6 II focuses on the nearest eyeball as it should. It doesn't mean eye-controlled AF-area selection like in the EOS R3 and 35mm EOS 3.
Subject Detection AF Settings index top
Subject detection is also set at MENU > AF page 1 > Subject Detection. I set it to Auto so the R6 II just figures it out.
I can manually set it to people or animals or other things, and thank goodness, so much better than Sony which lacks this, I can leave it at AUTO so it figures it out for itself.
It ticks me off that other brands require me to select this manually; it's not really autofocus of I have to tell it what kind of subject I have, is it?
Getting Tracking Autofocus and Exposure AF Settings index top
Tracking AF in Continuous Advance Mode
Be sure to select SERVO AF at MENU > AF page 1 > AF operation, or in the Quick Control screen (press [Q]), the M-Fn button or any other screen it appears.
It won't track focus if you leave it in ONE SHOT.
If things are moving it will probably automatically select SERVO AF if you're set to AI FOCUS.
Tracking Exposure in Continuous Advance Mode AF Settings index top
Not only do you have to select SERVO AF to get tracking autofocus, you also have to select SERVO AF for exposure to track from frame to frame in Continuous advance mode!
Weird, but true. Leave AF in ONE SHOT and exposure locks at the first frame, along with focus.
Exposure only tracks (changes) from frame-to-frame if you're in SERVO autofocus.
If things are moving it will probably automatically select SERVO AF if you're set to AI FOCUS.
How to Lock Focus and Exposure in Continuous Advance mode AF Settings index top
I doubt you'd want to do this, but set ONE SHOT AF in the Quick Control or any other screen and the EOS R6 II will lock both focus and exposure at the first frame of any sequence shot in Continuous advance mode.
Adjusting SERVO AF Tracking AF Settings index top
In SERVO the camera will track subjects all over the frame using multiple sensors. Normally the R6 II just figures this all out on its own, and it also allows us to adjust how it tracks things at MENU > AF page 2 > Servo AF if we so desire. I've never had to adjust these away from their AUTO settings, but if you feel the need, here you go:
"Tracking sensitivity" means how tenacious is the camera to staying locked on one subject even if obstacles get in the way as you follow it. Setting +1 or +2 for Tracking sensitivity lets it refocus on new things faster, while -1 or -2 tells it to take longer until it decides you've lost the subject and want to focus on a new one, all while tracking in one sequence of photos.
"Accel/decel. tracking" means how quickly it will adapt to changes in subject speed. Ever since the 1980s AF systems have been able to track objects moving at a constant speed; they predict where it will be next based on how fast it's moving. If you set Accel/decel. tracking to +1 or +2 it will allow it to adapt more quickly to changes in subject speed, while setting it to -1 or -2 will keep it more locked-on to a constant speed.
It may seem tempting to set both of these to +2 to let it adapt much more quickly, but these also mean it's more likely to go focus on the wrong thing. Likewise be careful setting them towards -2, as these settings will make it want to stay with what it thinks is the subject — even if the actual subject just changed direction quickly.
I've never had to adjust these settings at MENU > AF 2, but if you're not getting the results you want, feel free to play around. Leaving these SERVO tracking options at AUTO lets it figure out what's going on and adapt to the situation, which is as I leave it. Older cameras lacked the AUTO ability here.
Manual Focus AF Settings index top
If your lens has no AF/MF switch, like the RF 24-240mm, select manual focus at MENU > AF page 1 > Focus mode > MF.
In manual focus you have options of 5× or 10× magnifiers. I assign this to my SET button at MENU > CUSTOM page 3 > Customize buttons > SET > Magnify. Now just tap SET and it toggles among 1×, 5× and 10×.
Select the in-finder focus-distance scale at MENU > CAMERA page 9 > Shooting info. disp. > Lens info display > Focus distance disp.
Focus peaking is set at MENU > AF page 5 > MF peaking settings > Peaking > ON. It's OFF by default.
Focus & Playback Magnifier index top
Tap the rear 🔍 button to magnify by 5× or 10× . Tap again to return to 1×.
I find the 🔍 button hard to find by feel, so I program my SET button also to be a magnifier at MENU > CUSTOM page 3 > Customize buttons > Camera Column > SET > Magnify.
HINT: Use the rear nubbin or swipe the rear LCD to move the magnified area.
HINT: You also can use the rear nubbin or the rear LCD to move the magnified area even if you're looking through the finder and the rear LCD is off, at least if you activate touch & drag as I do.
Manual-Focus Override index top
By default, there is no always-responsive instant manual-focus override as we take for granted in our DSLRs. By default, the focus ring is always ignored in AF.
To get manual override in ONE SHOT (or in AI FOCUS if things hold still) AF mode, we need to set:
MENU > AF page 6 > Electronic full-time MF > ON
or otherwise the focus ring is always ignored in AF.
Now manual focus override works if you turn the ring while continuing to hold the shutter halfway, but only after focus locks in ONE SHOT. In SERVO the camera keeps tracking all the time. Sorry.
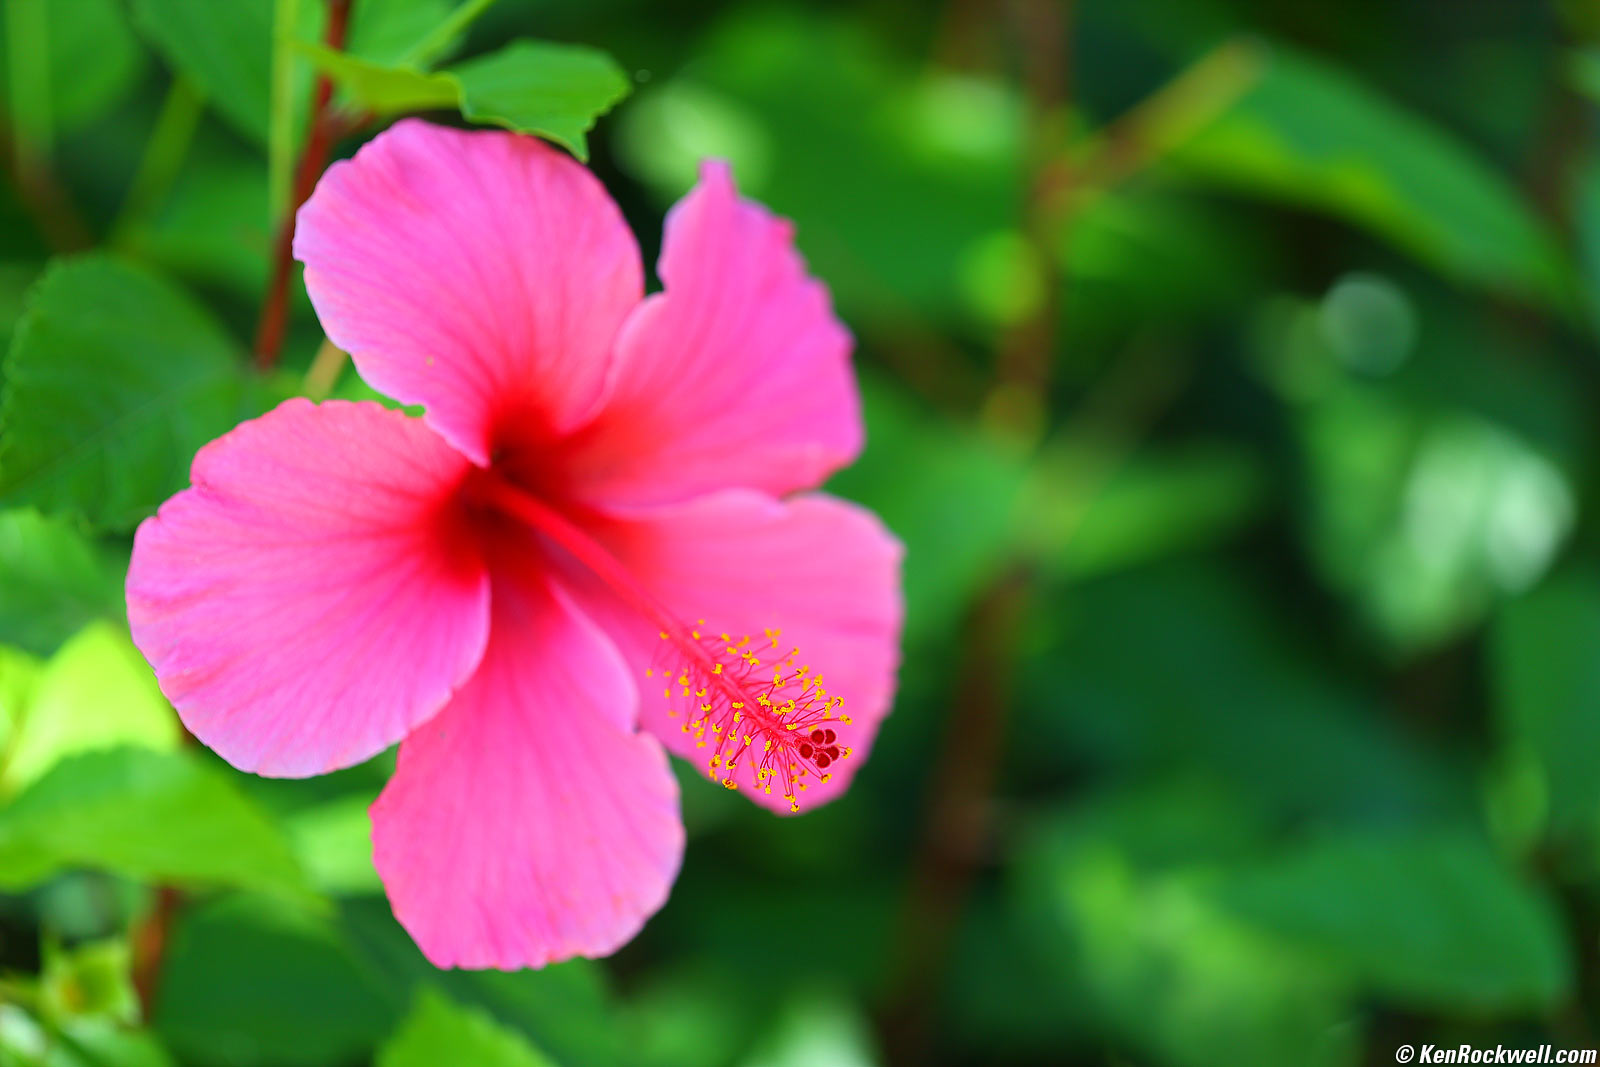
Focus Bracketing, Stacking & Compositing = Infinite Depth-of-Field index top
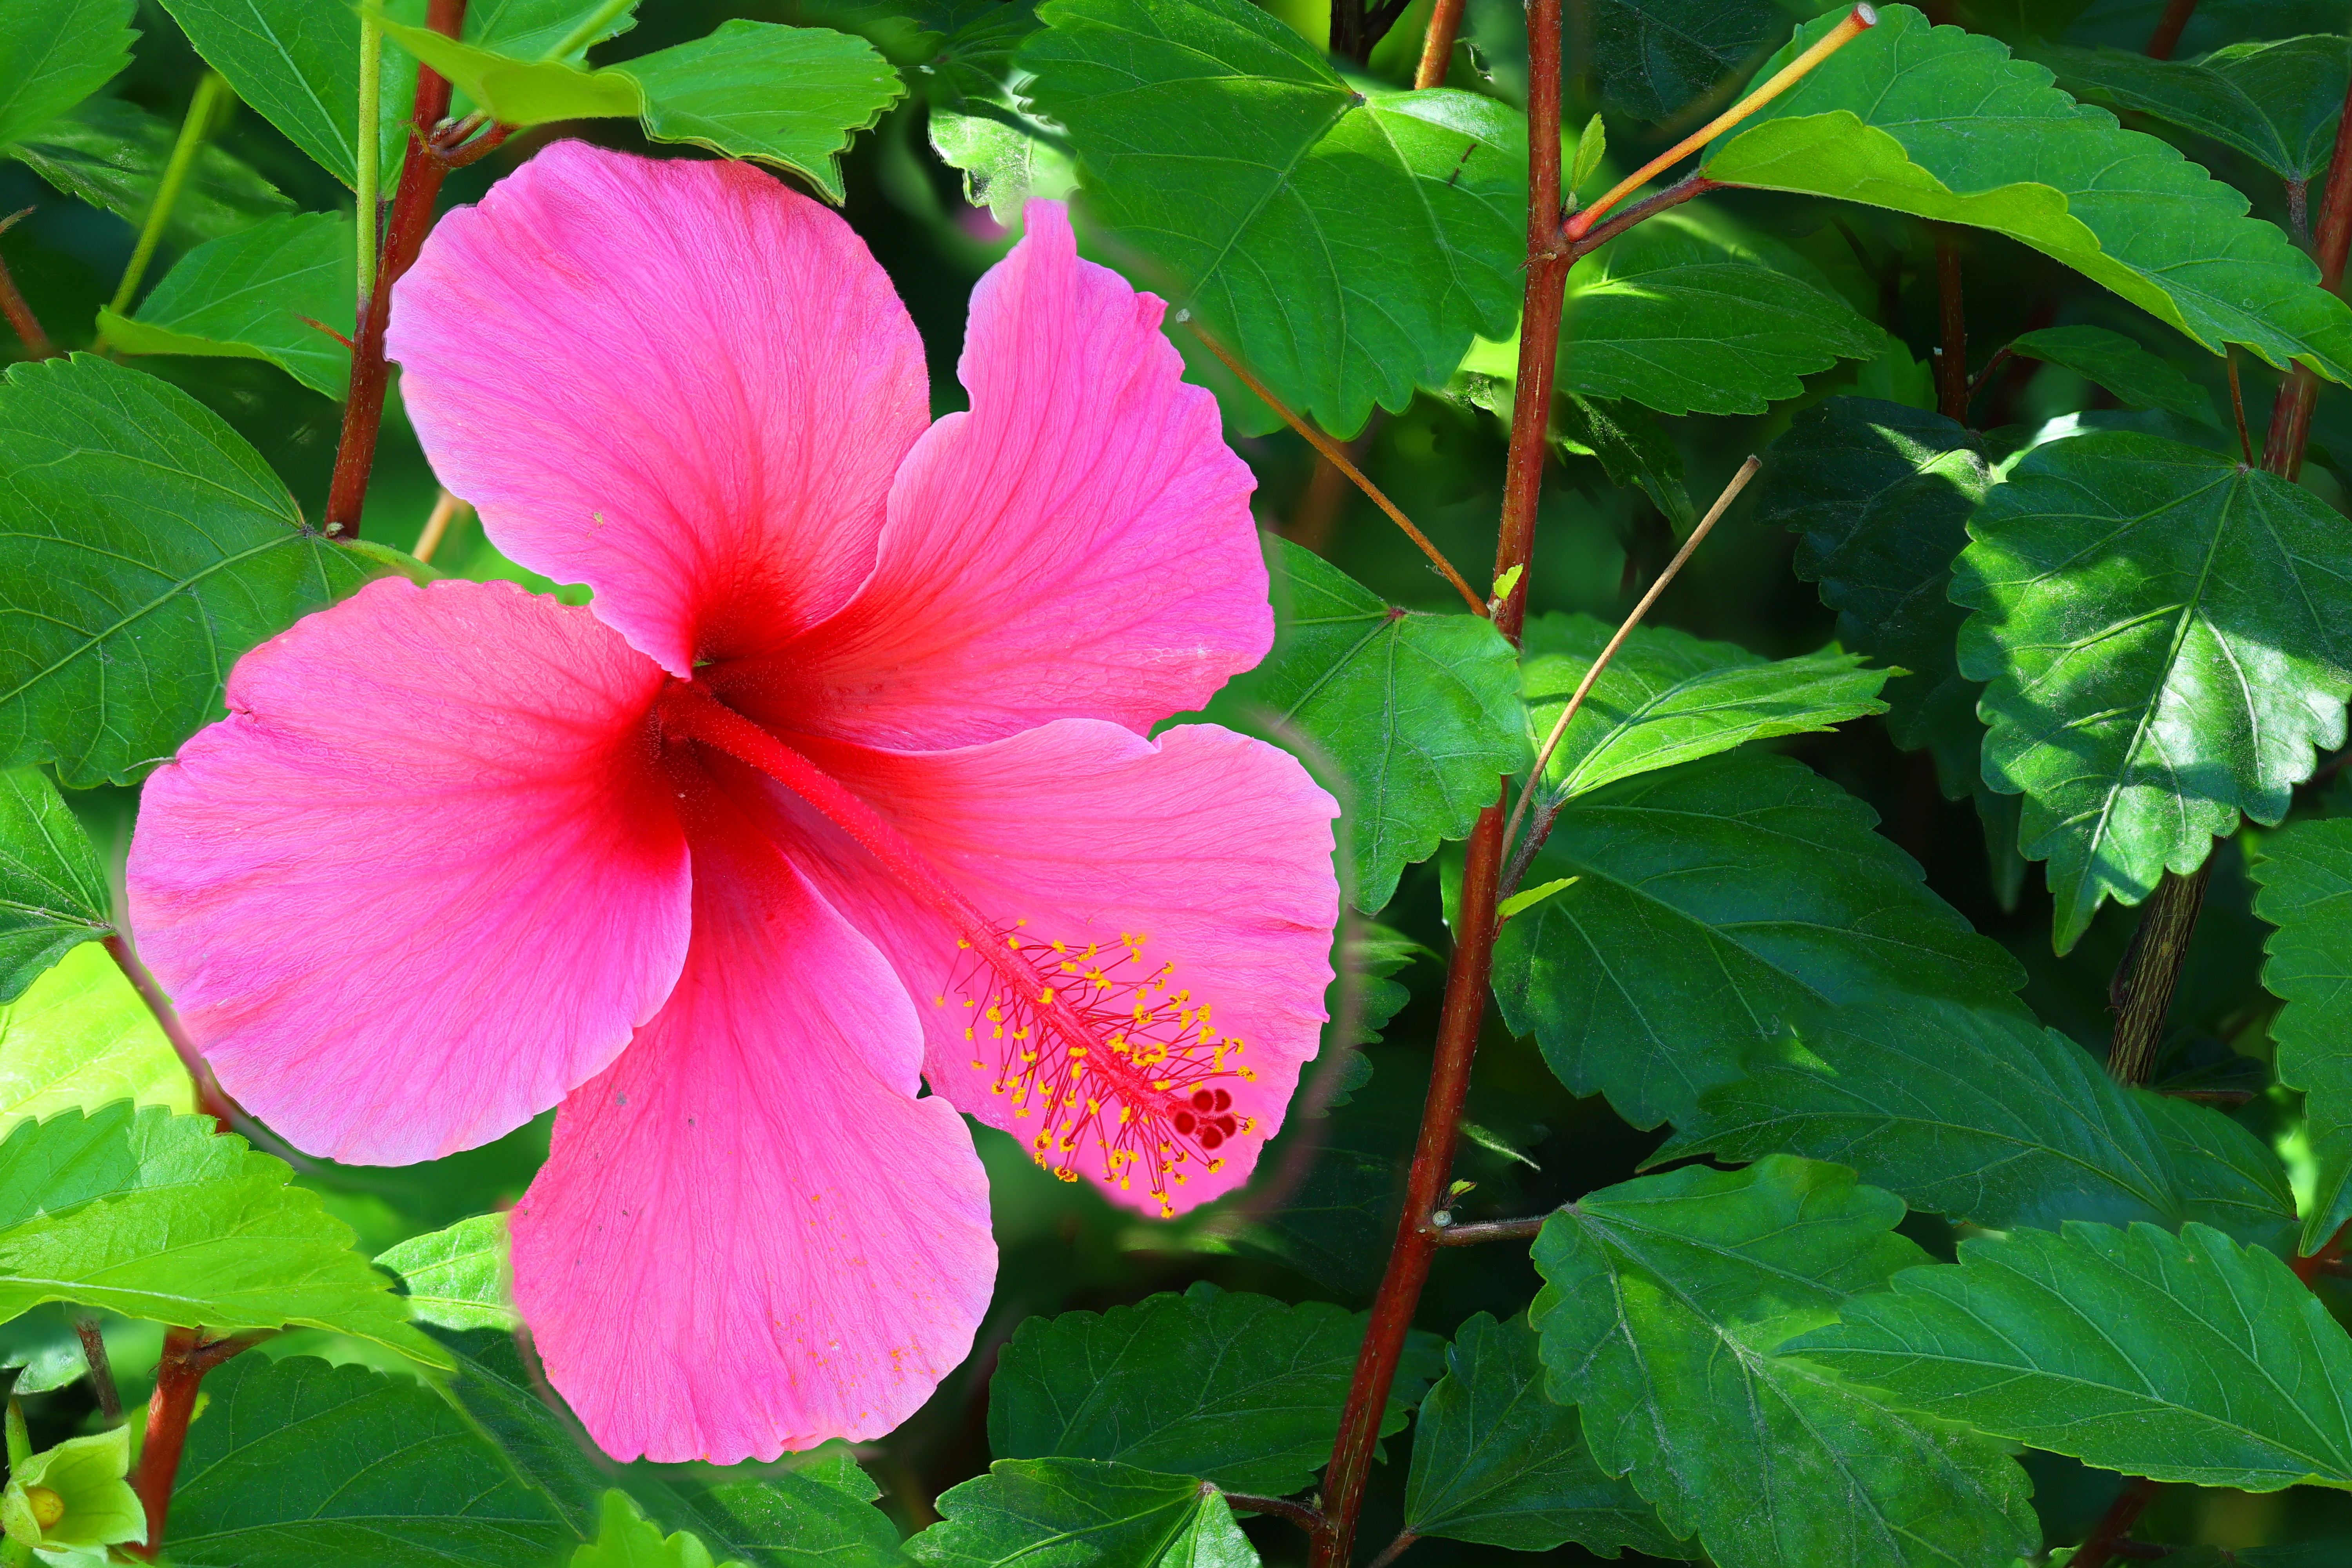
There is a trick in the EOS R6 II that lets us get unlimited depth of field by letting the R6 II shoot a series of focus-bracketed shots and then compositing the sharpest parts of each into one final ultrasharp image (samples from the R8 at that link).
This process has many names, including Pan Focus and Focus Stacking.
|
|
One Frame of Many. bigger. |
In-Camera Composite of 100 Frames. bigger. |
See more samples in my R8 Review. © camera-original composite from about 100 frames.
This is very simple today. To make a series of focus-bracketed shots that are composited into one final image, go to:
MENU > CAMERA page 6 > Focus bracketing:
and set:
Focus bracketing: enable.
Number of shots: 100 (default). Set this to taste if you like. You may need a larger number if you shoot at a large aperture or use a small focus increment; adjust to taste.
HINT: If it's shooting so many images that it's reaching far into the background that you don't want in focus (as in the flower photo above), use a smaller Number of shots.
Focus increment: 4 (default). Set this to taste if you like.
Exposure smoothing: enable (default). This evens-out differences in brightness between shots.
Depth composite: enable. This tells the R6 II to assemble the best sections of every image into one final, usable, ultrasharp image all by itself.
HINT: If you forget to set Depth composite to Enable so the R6 II does it itself, you'll have to go back to the stone age and do it manually in a computer later.
Crop depth comp: enable. This crops edges that might not be in all the shots.
Canon suggests a tripod, but my R6 II works great even hand-held as the shots above were made.
If you're on a tripod, use the lowest ISO you can like ISO 50 (L) or ISO 100, even in the dark, for the sharpest results. You should turn off Image Stabilization when on a tripod, but it probably works fine either way.
Canon suggests using one of the newest STM lenses, but I usually use my USM Canon EF 180mm f/3.5L Macro which came out in 1996 and it works flawlessly, even hand-held!
Set a moderate aperture like f/8, although any aperture should work. Smaller apertures like f/22 soften the image due to diffraction, and wider apertures like f/2.8 may require many more shots and processing time to do the same thing.
Use available, natural or continuous lighting. I don't know that I'd use flash or studio strobes as 1.) you'd be using a lot of flash pops, and 2.) I don't know if the EOS R6 II will wait or can be set to wait after each exposure for flash or strobes to recycle.
Be sure your lens is set to AF and the camera is in SERVO, AI FOCUS or ONE SHOT autofocus. Don't set your lens to MF (Manual Focus) or this won't work because the lens won't focus.
Focus your camera on or slightly closer than the closest part of the scene, and press the shutter. The EOS R6 II will now make a silent series of many images from your near focus out to a long way away. It's usually smart enough to make fewer than your preset Number of shots if it doesn't need them all. The reason to set a lower Number of shots is to make it stop once it's shot out to the longest distance you want in focus, otherwise it tends to run all the way out to near infinity. Experience may show you what's a good number for your typical setups.
The final composite image uses the time-stamp of the first image in the series and is file-numbered one more than the last image in the series, if that helps you find the final composite image.
The Olde-Fashioned Way for Hackers
In olden days before the R6 II and R8 we had to use Canon's free Digital Photo Professional software to composite all the images together later in our computer.
I haven't bothered with this since 2019 since it's a pain, however one advantage to doing this the hard way is that you can select which images to use for the composite which lets you control the in-focus region precisely. Exclude images that have in-focus regions you want to remain soft.
If you prefer to do this on your computer, then:
1.) Load all the images into your Mac or PC.
2.) Open Canon's free Digital Photo Professional software, at least version 4.10.0 in which this feature was introduced.
3.) Find and select the group of images you want to process. Even if you shot a lot of images it helps to preview them and only include the ones that include the range of focus (depth of field) you want. Often you'll have many images that focus too far away and past your subject. If you don't include them it runs much faster. Ditto if any images are in-focus on distracting foreground elements; don't select those images and the system won't make the foreground in focus.
You can control the look of the background by including or excluding the images that have the background in focus. Select only the images with the desired subject in focus and that will give a super-sharp subject and nice, soft background. Choose all the images and it will make the background sharp, if there are shots with the background in focus. Obviously you get to choose this after you've shot, and can try it anyway you like until you get exactly the look you want.
4.) From your computer's top menu bar select TOOLS > DEPTH COMPOSITING > Start Depth Compositing tool. Leave all on defaults.
5.) Your computer makes a new folder with data, and saves a new "Depth Composited" image called DC_IMGxxxxx in the originally folder. You're done!
My 8-core 3GHz 32GB RAM Mac Pro (late 2013) on OS 10.14.3 Mojave draws about 160W from the wall and its fan spins at 1,030 RPM, up from its usual draw of 60~100W and 780 RPM fan for most other uses. You'd never notice it, but the computer does have to chew on all this math with running the program.
6.) I delete the folder with the extra data. I'm unsure why you'd want to save this, unless it helps you process the same image again.
The results aren't always perfect; if I have a subject in front of a detailed background and let the camera focus-bracket all the way to include a very distant background, the composited result may look weird at the subject's edges, especially if your lens changes image size as focus (breathes). No problem, run the software again but exclude the images that are focused on the background.
I've wondered if focus breathing (the image changing size as focused) would lead to distortion, but I haven't looked for it.
ISO index top
There's no marked ISO button, but many ways to set it.
I change ISO from within the Fv mode or I use the M-Fn button. I also will use the [Q[ button, and of course you can set ISO at MENU > CAMERA page 2 > ISO speed settings, which I also add to my My Menu menu.
I almost always shoot in AUTO ISO unless I'm on a tripod. I set AUTO ISO so it can select anything from ISO 100~51,200 (MENU > CAMERA page 2 > ISO speed settings > ISO speed range).
For people, groups and portraits I set Auto ISO Minimum Shutter Speed to 1/125 (MENU > CAMERA page 2 > ISO speed settings > Min. shutter spd.).
For sports and action I set Auto ISO Minimum Shutter Speed to 1/500 to 1/2,000 depending on what it takes to freeze the action at hand. 1/1,000 is a good place to start, and just look and see if your images are sharp.
For everything else that holds still I set Auto ISO Minimum Shutter Speed to AUTO, which varies by itself depending on focal length. If I have a stabilized lens I'll set this two or three clicks slower at (MENU > CAMERA page 2 > ISO speed settings > Min. shutter spd. > Auto > (turn the front top dial two or three clicks to the left for Auto -2 or -3 slower).
Oddly in the Fv mode Auto ISO ignores any auto or manually set minimum shutter speeds below about 1/60. Weird, but it has been this way ever since Canon invented the Fv mode.
Expand or Limit the Range of ISOs index top
You have to go here to enable ISO 50 (L) and ISO 204,800 (H). Set this at:
MENU > CAMERA page 2 > ISO speed settings > ISO speed range.
This has always been a weirdness with Canon: you have to go here to enable the highest and lowest ISOs, and while you're here you instead can limit them further, for instance, make only ISO 400 through ISO 1,600 work. The only reason I can fathom for this is if you give it to your mom and don't want her accidentally setting ISO 25,600 in daylight — as my mom does because her Sony A6000 has an ISO button she often hits by accident.
White Balance index top
I almost always shoot in Auto White Balance (AWB): Ambience priority. This lets ambient indoor, candle and fire light look warm.
Set this with the [Q] or M-Fn buttons, or at MENU > CAMERA page 4 >White balance.
The "White priority" option (AWB-W) makes warm lighting look white, in other words, it corrects completely for warm indoor light and removes any warm color cast. While the White priority option is scientifically more correct, I prefer the warm indoor look from Ambience priority. This is art; use whichever looks best to you.
I'll only use the other non-AWB options if for some reason AWB isn't cutting it. No big deal; look at the playback or finder and set it to whatever looks best to you.
Exposure Compensation index top
Like every other EOS camera with a big dial on the back since 1987's EOS 620, the big back dial adjusts exposure compensation at any time, unless you program it otherwise.
You can program an extra lens control ring to become exposure compensation — or program the M-Fn button, but honestly when Canon gives us a gift like the big back dial, I use it.
Multi-Function (M-Fn) Button index top
The M-Fn button near the shutter button is one of many ways to set WB/Metering, Advance mode/AF Mode, Flash Comp./ISO and Picture Style/AF Area mode.
Tap the M-FN button to wake it up and/or tap it again select among four combinations of settings. Move the front or rear dial to set what you're going to set, then tap the shutter to return to shooting.
Easy!
By default it's set to allow changing eight different settings, and you can program it for up to ten functions at:
MENU > CUSTOM page 3 > Customize buttons > M-Fn > (leave it at DIAL FUNC) > press the SET button > press INFO > and now you can select any of the ten positions and then select which function you would like in that spot.
If you add more than eight functions you'll see five, rather than four, pairs of settings as you press M-Fn, and if you remove settings you don't need, you'll see fewer pairs and be about to swap among them with fewer clicks. It's all programmable; it doesn't get better than this!
You can reprogram the M-Fn button to be another single-purpose button, and you may be able to program other buttons to behave as a multi-function M-Fn button if you can program it to " DIAL FUNC:"
Customizing Controls index top
Customize Dials and Lens Rings
Set these at MENU > CUSTOM page 3 > Customize dials.
There are three rings or dials, but not that many functions to which to set them.
The options showing a down arrow mean that the ring will only respond during a half-press of the shutter to prevent accidental adjustment.
Customize Buttons
Set these at MENU > CUSTOM page 3 > Customize buttons.
HINT: I prefer to set my rear AF-ON button to MENU so I can set my MENU without having to reach all the way over to the real MENU button on the left side of the camera.
HINT: I program the red button next to the shutter button to set the cropping (aspect ratio). To shoot movies, I turn the top left switch to MOVIE and use another button to start recording instead.
HINT: The M-FN button does its magic because it's set to DIAL FUNC, or you can set it to other regular single functions.
HINT: I don't waste this camera on video, so I program my red MOVIE button next to the shutter to be an as-shot crop button.
Customize the RATE Button
Set what the RATE (top left rear) button does at at MENU > PLAYBACK page 6 > RATE btn function.
You can set it to set star ★★★ ratings, set it to a 🗝 Key button to protect files, 🗑 a trash can (delete) button, and more.
Customize the Finder & LCD index top
You can select what gets displayed at MENU > CAMERA page 9 > Shooting info. disp.
You can program up to five different sets of preferred displays at MENU > CAMERA page 9 > Shooting info. disp. > Screen info. settings > INFO button.
Once set, you select among these sets while shooting by pressing the INFO button repeatedly.
If you'd rather just have one or two sets, you can disable the extras by unchecking the others at MENU > CAMERA page 9 > Shooting info. disp. > Screen info. settings.
You can set quite a few different kinds of displays, you can set different ones for the LCD and for the finder, and even select the size of the finder image at MENU > CAMERA page 9 > VF display format. The Display 2 option makes the finder image a little smaller so you can hold the camera further away from your eye and still see the entire image.
Drive Modes index top
The easiest way to select among Self Timer, Single, Continuous, Continuous High, etc. is to tap the M-Fn button until the Drive Mode icon is highlighted and then turn the front dial to select them. Tap the shutter halfway to return to shooting.
You also can press the rear [Q] button and find the advance mode settings on the rear LCD, or do it old-school at:
MENU > CAMERA page 7 > Drive mode.
Electronic Shutter & Silent Modes index top
These are set at:
MENU > CAMERA page 7 > Silent shutter function
or
honestly I just go with the electronic shutter at:
MENU > CAMERA page 7 > Shutter mode > Electronic.
Silent mode is both the electronic shutter and it turns off the beeps and flash.
You only can set these if you first turn off flicker reduction at MENU > CAMERA page 3 > Anti flicker shoot. > OFF, otherwise both are grayed-out and the R6II won't tell you why!
Stabilizer Modes index top
Thankfully the built-in sensor-shift stabilization just does its thing in concert with whatever stabilization the lens may (or may not) have without any need for adjustments or settings.
With an unstabilized lens, then (and only then) will a menu option appear at MENU > CAMERA page 8 > IS (Image Stabilizer) mode to turn the camera's internal stabilizer ON or OFF.
With a stabilized lens this menu option simply disappears. That's good because instead you use the lens' own IS switch to turn both the lens' optical stabilizer and the camera's sensor-shift stabilization ON or OFF at once.
With a stabilized lens, there is no way to turn the in-camera and in-lens stabilizers ON or OFF separately. It's either both or none. Easy.
Long Exposures: Bulb Timer index top
In BULB (B on the top MODE dial), an MM:SS timer shows in the finder or rear LCD, and switches between displays as you move your eyes. Cool.
Better, the R6 II, like many newer Canon cameras, has a clever BULB TIMER option at MENU > CAMERA page 7 > Bulb timer that lets us set precise long exposures out to 100 hours long. Select B on the top dial, enable Bulb timer, set the self timer, tap the shutter and walk away, no need for a remote cord or stopwatch. Bravo!
1.) Set the top mode dial to BULB (B)
2.) Set the Bulb timer at MENU > CAMERA page 7 > Bulb timer. In that menu set it to Enable and then you can press INFO to set the hours, minutes and seconds for your exposure. (The Bulb timer option is grayed-out unless the mode dial is at B.)
HINT: Set your Drive mode to Self Timer and you won't need to use a remote cord to eliminate camera shake!
4.) It will make an exposure while counting-up the elapsed time on the rear LCD and then close the shutter after your programed duration. If you want to end an exposure early, just tap the shutter again.
Since it closes the shutter early on a second press, you can reprogram BULB to TIME by setting a very long value for Bulb timer, but you do have to enable the Bulb timer each time you go into Bulb mode.
Self Timers index top
These are set as one of the Drive Modes. I prefer to set them by pressing the [ Q ] button and setting the Drive Mode near the bottom left, and you can set this with the M-Fn button or old school at MENU > CAMERA page 7 > Drive mode.
The Drive Mode setting is saved and recalled as part of the C1, C2 and C3 modes; you can set one of these for tripod shots and use the 2-second self timer in it, so anytime I recall that C option, I'm at 2s self timer and fixed ISO 100 and everything else I set on a tripod, rather than Auto ISO and regular release etc.
Flash index top
The EOS R6 II works perfectly with all EX-series flash, as well as the newest EL-5 that has no traditional contacts and has only the newest "multifunction digital" contacts. The R6 II has the same I-TTL II flash system and traditional hot shoe as Canon's SLRs and DSLRs since the 1990s, as well as the latest 21-pin digital "multi function" contacts.
You can save money with old used flash which work as well as the newest flashes. I use my 580EX II (about $85 used if you know How to Win at eBay) when I want a lot of power, or my 320EX (about $50 used if you know How to Win at eBay and also available used at Amazon) when I'm traveling light.
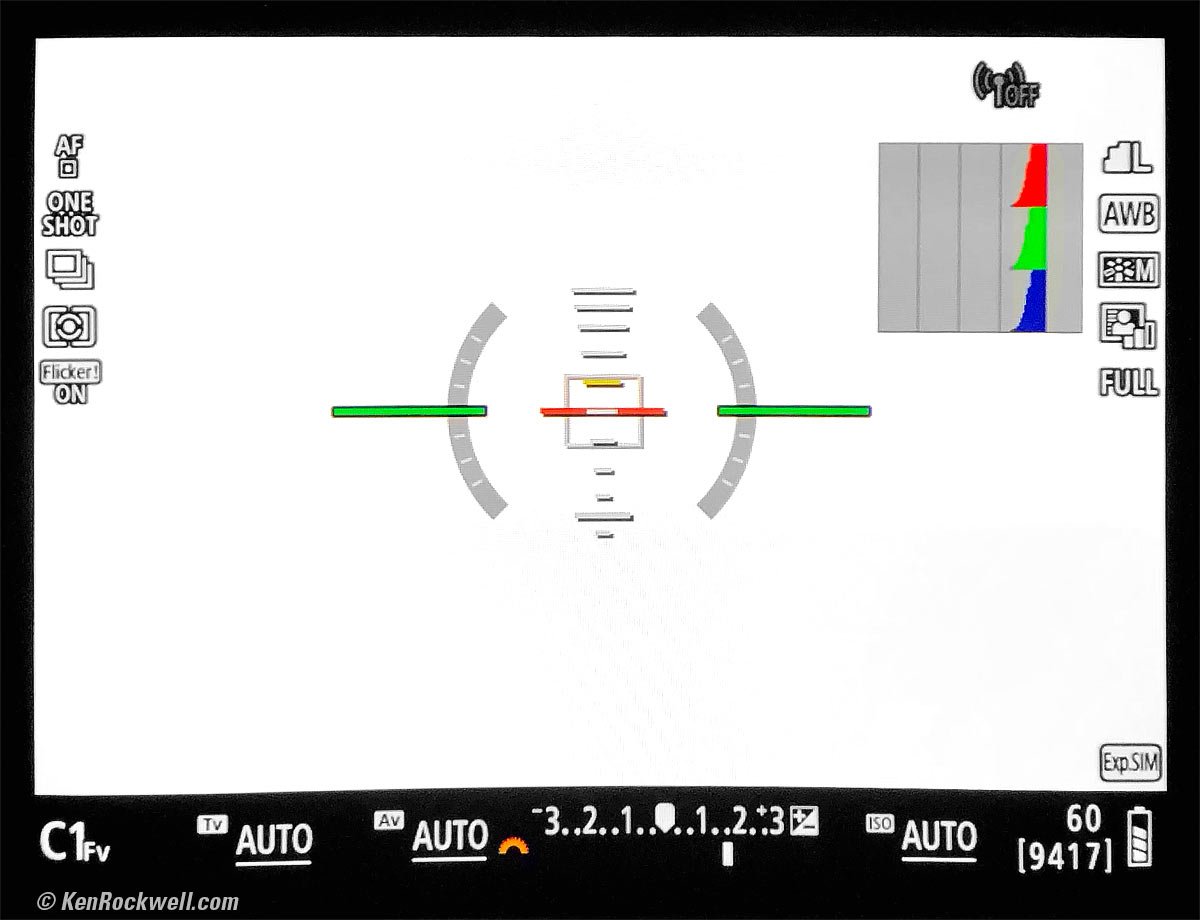
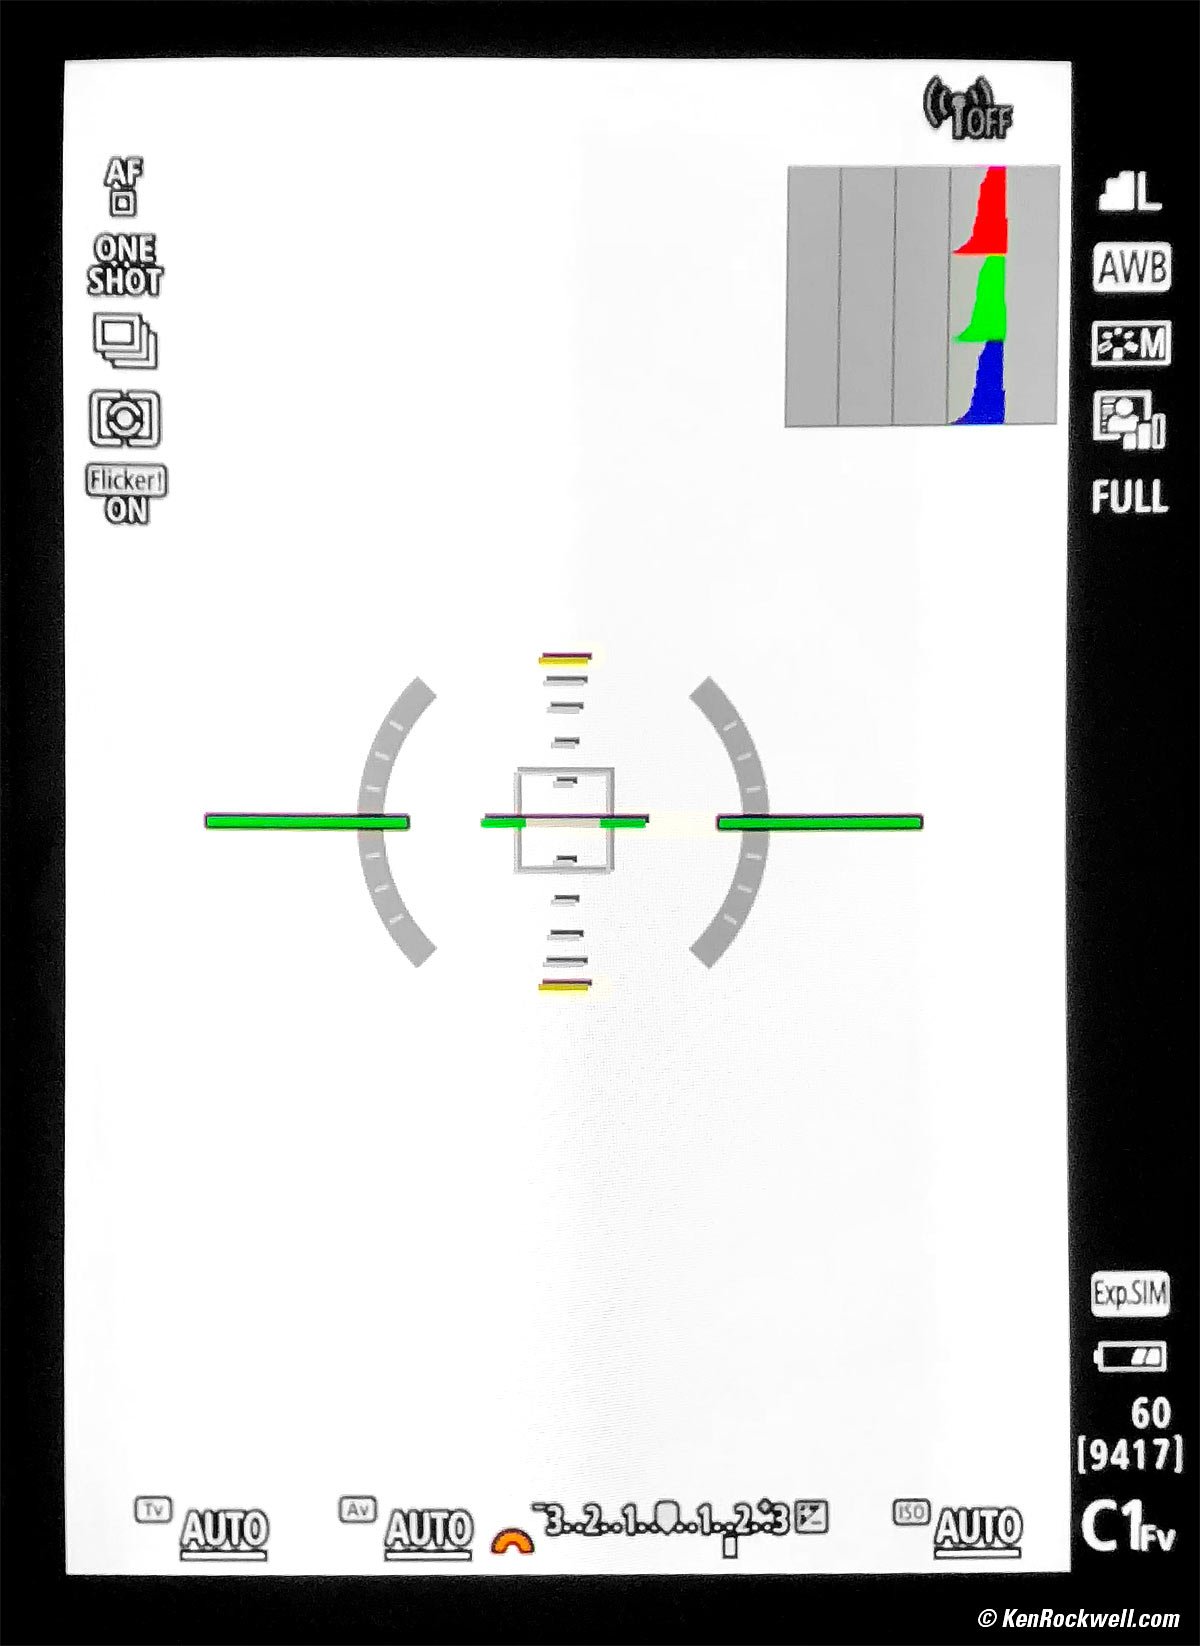
Live Color RGB Histograms index top
Neither Nikon nor Sony can do this at all, but Canons can show you live RGB histograms in Live View before you take the picture.
Most other brands of cameras, and the R6 II by default only show a useless B&W histogram, but set this below and you can get a live RGB histogram in the upper right. Color histograms are needed for color photography to avoid overexposing anything with color.
Set this at
MENU > CAMERA page 9 > Shooting info. disp. > Histogram disp > Brightness/RGB > RGB.
I prefer to make the histogram smaller so I don't take up too much of the screen, which I set at
MENU > CAMERA page 9 > Shooting info. disp. > Histogram disp > Display size >Small.
Keep pressing INFO to swap among various levels of display complexity as you're shooting.
Display Brightnesses index top
Set these at MENU > WRENCH page 4 > Screen brightness and MENU > WRENCH page 4 > Viewfinder brightness.
I always use AUTO for viewfinder brightness.
Since the rear screen brightness has to be set manually, you may want to set different screen brightnesses in the C1, C2 and C3 presets to save and recall your brightness preferences so you can use one for outdoors and one for indoors. Easy!
Vertical Finder Displays index top
I set my finder data to rotate when held vertically! Set this at MENU > CAMERA page 9 > Shooting info. disp. > VF vertical display > ON:
Actual view through Canon EOS R Electronic viewfinder. (The EOS R6 II is similar and it's much sharper in actual use than in this special photograph.)
I've turned on almost every display option here; just press the INFO button a few times to get a clear window through which to compose if you prefer.
Quick Control [Q] Screen index top
Press the [Q] button either above the big rear dial or on the top right of the rear LCD to make many settings as superimposed around the sides of the rear LCD. This is one of many ways to make a lot of shot-to-shot settings.
Once the Q screen is up, you can use the touch screen, dials or rear nubbin to move around and set things.
Picture Styles index top
This is how we set saturation, sharpening and other aspects of how the pictures look.
Set these either at the [ Q ] screen, with the M-Fn button or at
MENU > CAMERA 4 > Picture Style.
I use STANDARD [*S] Picture Style setting for everything.
For photos of everything except people, I increase Saturation to +4. For pictures of people I leave saturation at 0.
I increase Sharpening to Strength 7, Fineness 1 and Threshold 1. Use whatever looks good to you; this is art and we're all different.
More Image Tweaks index top
I always set the shadow optimizer (Automatic Lighting Optimizer) to:
MENU > CAMERA page 2 > Auto Lighting Optimizer > Standard.
I don't use highlight recovery (Highlight Tone Priority), since it deactivates the shadow optimizer above.
HDR Modes index top
Set the HDR modes at MENU > CAMERA page 2 > HDR shooting HDR PQ and
MENU > CAMERA page 2 > HDR Mode.
HDR PQ shots are only recorded either as raw and/or HEIF.
Regular HDR shots (HDR MODE) can be saved as either raw and/or JPG.
HEIF (.HIF) Files index top
While HEIF files may offer the potential for more dynamic with the same file size as JPG, HEIF files probably won't be compatible with most existing computers, software or websites, so be careful that you can read or post them before you get all excited and shoot something important in HEIF.
It's like shooting raw; you have to be sure you have a way to read the files; HEIF is nowhere near as standard as JPEG.
The only way to shoot HEIF files is if you have the HDR PQ mode set at MENU > CAMERA page 2 > HDR shooting HDR PQ > ON and have JPEG/HEIF selected at MENU > CAMERA page 1 > Image quality.
If you want to have a JPG version of an HEIF you can convert them in-camera at MENU > [▶] PLAYBACK page 4 > HEIF —> JPEG conversion.
File Formats index top
I shoot at LARGE 24 MP JPG, and set it to NORMAL (▟ stairstep icon) instead of the default of FINE (quarter-circle icon). The pictures look the same, but take up half the file space, twice as many fit on a card, they download twice as fast and twice as many fit on my computer drives.
For people and event photos or anything where I'm shooting a lot of images where I don't need 24 MP LARGE, often I may shoot at MEDIUM (11 MP) to make everything work even faster in post-production.
I never shoot raw, but you may do whatever you like.
If you want a JPG from a raw file you can convert them in-camera at MENU > [▶] PLAYBACK page 3 > RAW processing (RAW/DPRAW).
Getting Still Photos at 40 FPS index top
The EOS R6 II only runs above 12 FPS with its Electronic Shutter. See the full list of frame rates and settings.
To set the electronic shutter, you have to remember first to set Flicker Reduction to OFF (MENU > CAMERA 3 > Anti flicker shoot. > OFF) and after you've set that, then set Shutter Mode to Electronic (MENU > CAMERA 7 > Shutter mode > Electronic), otherwise it will stay in the partial or fully mechanical shutter modes and not run anywhere near 40 FPS.
The trick is you have to know to set Flicker to OFF first and then Shutter to Electronic because you can't set Shutter Mode to Electronic unless you've first deactivated Flicker reduction.
Once you've done this, select MENU > CAMERA 7 > Drive mode > H+ and you're good. Don't forget to select AF SERVO to track focus.
I usually set this with the [Q] or M-Fn buttons, or honestly I save all these settings into my C1, C2 and C3 modes rather than resetting all of them between shooting landscapes in C1 (slow frame rate, mechanical shutter, ONE SHOT AF & etc.) and sports in C3 (40 FPS, SERVO AF & etc.).
Exposure only tracks (changes) from frame-to-frame if you're in SERVO autofocus (or if AI FOCUS selects SERVO for you).
Fast Finder Update Rate before Rolling Video index top
When the top left dial is set to VIDEO mode, by default the finder reverts to a slow frame rate while you're not rolling video to save power. This is the
MENU > CAMERA page 8 > Standby: Low res. > ON setting.
For smoother finder motion while video isn't rolling, set:
MENU >CAMERA page 8 > Standby: Low res. > Off.
Regardless of this setting, the finder updates fast for smoother motion when you're rolling at the higher video frame rates, and never updates at faster rates if you're set to shoot at the slower video frame rates.
Lens Corrections index top
Corner darkening, distortion and more are usually corrected by default.
You can usually can switch off any of these three corrections at MENU > CAMERA page 5 > Lens aberration correction, except with some lenses with which Canon won't let us turn off distortion correction.
If you turn off the Digital Lens Optimizer (DLO), you're offered à la carte options of reactivating lateral color fringe correction and/or diffraction correction without the rest of the DLO.
The only reason to turn off the DLO or others is if for some reason these are using too much processor power and slowing down the camera. I've never seen this happen, but if it concerns you, you probably don't need distortion correction when shooting portraits, sports or anything else that's shot at high frame rates.
C1, C2 & C3 Modes index top
These are three programmable spots on the top dial. Program them, and everything about the camera is instantly recalled, making it a one- or two- click swap between any three completely different sets of settings.
I live by these. I set C1 for photos of places and things, C2 for dogs and C3 for sports and action. Everything about the camera: EVF and LCD brightness, Saturation, frame rates, AF modes, resolution, image review options Auto ISO settings and everything magically recall with the click of a dial.
Each time you turn the dial to one of the C1, C2 or C3 positions, everything is reset to what was stored in that position.
Feel free to change any settings as you shoot in the C1, C2 or C3 positions. By default you won't erase what you saved unless you choose to have these settings saved as you change them (explained below). Otherwise these changes stay until the camera times-out, usually one minute (you can change that duration in the menus), and the next time you go to shoot, even if you had changed something, you're back at your saved settings.
If you want to return to the saved settings more quickly, just move the dial to any other position and return.
New-Camera Setup
When I get a new camera I set everything as I want it in the Fv, P, Tv, Av or M mode.
I then save it to C1.
I change what I want about it in C1, and save it to C2.
I change what I want about it in C2, and save it to C3.
I then select MENU > WRENCH page 6 > Custom shooting mode (C1 - C3) > Auto update set > Enable so that everything updates as I use and get familiar with my new camera. Now each setting updates as you change it. If you select another mode and come back to that mode it will be as you last left it.
I use this when I first get a camera and am still fine-tuning my favorites.
After I'm confident that my camera's presets are all as I want them, I then set MENU > WRENCH page 6 > Custom shooting mode (C1 - C3) > Auto update set > Disable so my preferred settings are fixed.
It's OK to leave this set at Auto Update all the time; just try to unset it if you're making big changes you don't want saved.
To Save a Suite of Settings
To save a complete camera-state setting of your EOS R6 II:
1.) Set the camera as you like. Everything is saved.
2.) Press:
MENU > WRENCH page 6 > Custom shooting mode (C1 - C3) > Register settings > choose C1, C2 or C3 > SET > OK.
Permanently Change a Stored Setting
To change a stored setting:
1.) Set the dial to the setting you want to change (C1, C2 or C3). This recalls that setting.
2.) Change something.
3.) Save the camera's current state back into that dial position:
MENU > WRENCH page 6 > Custom shooting mode (C1 - C3) > Register settings > choose C1, C2 or C3 > SET > OK.
If you select the wrong C1, C2 or C3, you will have overwritten the settings at that position.
Copy a Stored Setting
To copy a stored setting into the other location:
1.) Set the dial to the setting you want to copy into the other position. This recalls that setting.
2.) Save the just-recalled camera state into the other dial position:
MENU > WRENCH page 6 > Custom shooting mode (C1 - C3) > Register settings > choose C1, C2 or C3 > SET > OK.
If you select the wrong C1, C2 or C3, you will have overwritten the settings at that position.
Make a Temporary Change to a Stored Setting
Just change something as you would anywhere else. By default (MENU > WRENCH page 6 > Custom shooting mode (C1 - C3) > Auto update set > Disable), the next time the camera wakes up or you re-select that setting, it will be back as it was saved. The C settings are not altered unless you deliberately save something into them as described above, or if you set Auto Update:
Have C1, C2 & C3 Settings Update Automatically
The EOS R6 II resets the C1, C2 or C3 settings each time it turns on or you reselect C1, C2 or C3, unless you set:
MENU > WRENCH page 6 > Custom shooting mode (C1 - C3) > Auto update set > Enable.
My Personal C1, C2 & C3 Settings index top
Everything about the camera is saved into each of these C1, C2 or C3 memories. This is just a little of what I save that changes for me from setting to setting:
C1 |
C2 |
C2 (alternate) |
C3 |
|
Used for |
General Scenics |
People (general) |
Dogs |
Sports & Action |
Exposure Mode |
P or Fv |
P or Fv |
P or Fv |
P or Fv |
Picture Style |
Standard with +4 Saturation and 7, 1, 1 sharpening |
Standard with 0 or +1 Saturation and 7, 1, 1 sharpening |
Choice of Saturation and 7, 1, 1 sharpening |
Standard with 0 or +1 Saturation and 7, 1, 1 sharpening |
ISO |
Auto |
Auto |
Auto |
Auto |
Max Auto ISO |
51,200 |
51,200 |
51,200 |
51,200 |
Minimum Auto ISO Shutter Speed |
AUTO for the slowest possible hand-held speed that lets the camera use the slowest possible ISO for the sharpest pictures. If the lens has IS, I'll shift this to AUTO -2 or -3 Slower. |
1/125 to freeze people talking |
1/500 to 1/1,000 to freeze jumping dogs |
1/500 ~ 1/2,000 or whatever it takes to stop the action |
AF Mode |
AI FOCUS so it selects the mode by itself, or ONE SHOT if I know nothing's moving. |
AI FOCUS so it selects the mode by itself, or ONE SHOT if I know nothing's moving. |
SERVO AF |
SERVO AF |
AF Area Select* |
Whole area AF | Whole area AF | Whole area AF | Whole area AF |
Electronic |
1st curtain electronic |
Electronic |
Electronic |
|
Usually not |
Usually not for action Usually for portraits |
No |
||
Advance |
Continuous Low (3 FPS) |
Continuous Low (3 FPS) |
High or High+ (20 or 40 FPS) for action Continuous Low (3 FPS) for portraits |
High or High+
(20 or 40 FPS) |
* If the camera isn't finding the subject by itself, I'll tap the rear LCD to select an AF point.
Obviously set all these as you want for whatever you shoot.
I find these invaluable for most of my shooting as I often have to shoot many different kinds of different things from shot to shot.
Non-EF Manual-Focus Lenses on Adapters index top
The EOS R6 II works flawlessly with Canon EF Lenses on Canon EF to RF Adapters because all the electronics talk to each other properly.
However, with Canon FD and other random manual-focus lenses on random adapters there are no electronic contacts so the EOS R6 II thinks there is no lens attached and so it won't take pictures.
To get the EOS R6 II to shoot with randomly adapted lenses, set MENU > CUSTOM page 4 > Release shutter w/o lens > ON. This is OFF by default.
Use the Av or M exposure modes. Exposure will be poor in Fv, P or Tv modes because the EOS R6 II can't control the aperture of a non-electronic adapted lens.
Video index top
In the most basic setup, tap the top red (movie) button to start and stop video recording. Since I set my red button to set the aspect ratio, I turn the top left dial to VIDEO and then I can use the red button near the shutter to start and stop video recording.
Most video settings are at MENU > CAMERA page 10.
Delete Burst ("Erase scene including image") index top
If you made a series of shots in Continuous advance mode, you'll see a new "Erase scene including image" as well as the usual "Erase" option when you press the 🗑 trash can (delete) button.
"Erase scene including image" erases all the photos from a burst, unless you've marked some as Protected.
HINT: You can change the RATE (upper left rear) button to be a 🗝 Key button to mark images as protected.
Shutter Open or Closed at Power-Off? index top

Canon EOS R6 Mark II. Shutter set to close. bigger.
You can select if the shutter closes or stays open with power-off. I leave it at its default of CLOSED to protect and keep dust off the sensor.
You can set this at MENU > WRENCH 5 > Shutter at shutdown.
© Ken Rockwell. All rights reserved. Tous droits réservés. Alle Rechte vorbehalten. Alla rättigheter förbehållna. Toate drepturile rezervate. Ken Rockwell® is a registered trademark.
Help Me Help You
I support my growing family through this website, as crazy as it might seem.
The biggest help is when you use any of these links when you get anything. It costs you nothing, and is this site's, and thus my family's, biggest source of support. These places always have the best prices and service, which is why I've used them since before this website existed. I recommend them all personally.
If you find this page as helpful as a book you might have had to buy or a workshop you may have had to take, feel free to help me continue helping everyone.
If you've gotten your gear through one of my links or helped otherwise, you're family. It's great people like you who allow me to keep adding to this site full-time. Thanks!
If you haven't helped yet, please do, and consider helping me with a gift of $5.00.
As this page is copyrighted and formally registered, it is unlawful to make copies, especially in the form of printouts for personal use. If you wish to make a printout for personal use, you are granted one-time permission only if you PayPal me $5.00 per printout or part thereof. Thank you!
Thanks for reading!
Ken Rockwell.