How I Made These Photos: New Mexico
07, 08, 09, 10, 11 and 12 October 2026
We traveled very light because we had one rental car for all four or five of us with our luggage.
I put my iPhone 18 Pro Max in my pocket and carried my tiny Canon EOS R7 with its kit lens, the Canon RF-s 18-150mm IS STM, tiny ultrawide RF-s 10-18mm IS STM and miniature Godox iT32 flash in my small Think Tank Retrospective EDC Backpack along with snacks and books and everything else on the plane.
While out shooting my R7 with lens and flash went around my neck. Whichever lens I wasn't using, even the 18-150mm IS STM seen below, fit snugly in my front jeans pocket along with my keys and wallet. I put two filters, a 55mm Hoya HD circular polarizer and a 55mm Tiffen HT Graduated ND 0.6 (2-stop) filter in the tiny little watch pocket in the front of my jeans, and I was good to go, always having more than enough equipment for anything and not having to weigh myself down with a camera bag. It was salvation walking and shooting without a camera bag.
It was a huge help that my R7 automatically levelled every photo for me as I ran around shooting hand-held.
I saw no need for full-frame. The pictures are the same and it's much bigger and heavier, especially when you consider the lenses. Full frame lenses are too big to fit in my pocket, so forget that. Here's a full-frame DSLR compared to my mirrorless EOS R7:
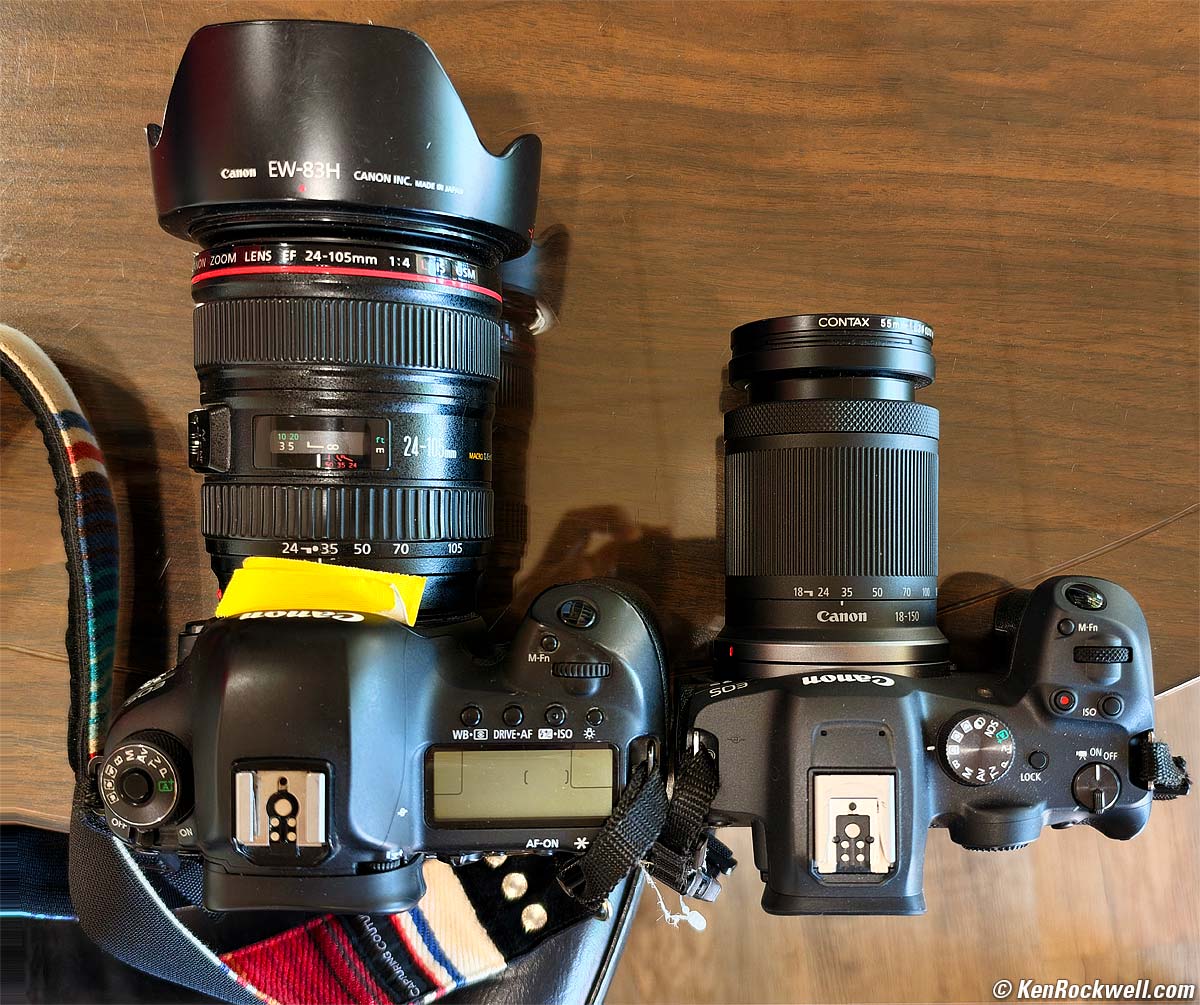
5D Mk IV and EF 24-105mm f/4L IS USM next to my R7 and RF-s 18-150mm IS STM. bigger.
5D Mk IV and EF 24-105mm f/4L IS USM: total weight 54.8 oz. (1,555 g) with battery and card.
R7 and RF-s 18-150mm IS STM: total weight 32.5 oz. (921 g) with battery and card, and this little combo has double the zoom range and internal stabilization.
Thank goodness I didn't bring any iPads or computers or any other distractions to lug around. I brought a hoodie and a light jacket, hat and gloves and hoped for the best. I did bring my ultralight Nitecore NB20000 mAh Gen 3 Powerbank in case my iPhone needed charging while out in the boonies; my indefatigable R7 never needed any charging during the day.
Of course I needed no tripod. With modern equipment I've been shooting handheld under starlight since 2019.
I usually shot in P (program auto exposure) or Aperture-Preferred (Av) modes. I always use Auto ISO with Auto Minimum Shutter Speed and Auto White Balance. I only come off any of these Auto modes if for some reason the camera isn't setting itself the way I need automatically. I use all these Auto settings because they almost always set the camera the way I need much faster than mucking around with manual settings, and this lets me concentrate on what's actually in my photo rather than camera settings.
I shot my EOS R7 in STANDARD Picture Style with Sharpening set to +7,1,1 and Saturation set to +4. This gave me the colors you see without needing any saturation increase.
I only shoot JPGs, specifically normal (▟ stairstep icon) JPGs; no FINE (quarter-circle icon) JPGs or RAW CR3 files were used or needed. JPGs give me full freedom to adjust exposure and dynamic range exactly like raw; don't let bullies make you think you need to use card-choking raw files just to edit your photos! I'm only throwing away pixel bloat and saving file and card space; my 32 MP JPG images have more than enough depth and detail for everything I need, and due to pixel dumping you can't even see more than 8 MP at one time anyway!
Of course I brought my new iPhone 18 Pro Max. I use its native Camera app in Amber Picture Style in its default HEIF format (Settings > Camera > App Settings > Formats > Camera Capture > High Efficiency). More at How to Shoot the iPhone 17. The colors I got were great as shot.
The iPhone doesn't simply have three or four "lenses," it actually has three complete cameras on its back, which is why I refer to its various cameras rather than lenses. Each camera has a different-sized sensor optimized to its lens.
I read the EXIF exposure data for all my shots later in Photo Mechanic so I can report them under each image; I certainly didn't fiddle with manual exposures. It's also easy to read the iPhone's apertures, ISOs and shutter speeds in the Photos app by tapping the ⓘ (photo info) icon in the iPhone's Photos app.
Data Wrangling top
When I got home I copied the JPGs from my EOS R7's Sony TOUGH 64 GB SD card into my Mac. Easy! I never needed the backup SD card I had in my EOS R7's second slot.
My R7 was running firmware version 1.8.0.
Because my copy of Photoshop 2021 doesn't read the modern HEIF images I shot on iPhone 18 Pro Max, I had my iPhone 18 Pro Max convert the HEIFs to JPGs as I import them by selecting the appropriate images, tapping the SHARE icon, then OPTIONS > FORMAT > Most Compatible (code for JPG😁), and Saving them to a File folder with iCloud Drive. I opened this folder full of JPGs on my Mac and dragged them to my SanDisk 8TB SSD where I save all my work.
I don't worry about archiving the HEIC files because they're still stored in my iPhone (and its backups) if I ever need them.
Selecting the Best Shots top
I sorted and picked the winners with Photo Mechanic. This is the fun part.
I code red (pressed 1) for deletion, yellow (pressed 2) as picks, and green (pressed 3) as super picks for publication.
Editing top
Once selected, each pick received significant artistic input in Photoshop, usually with the Luminar and/or the Radiant Photo plugins until each completed work looked as I originally envisioned it. I'm not a fan of presets; I use software as tools to get to the image I first saw in my mind faster, but skip the presets each offers.
Yes, not only can I recover highlights and shadows from the JPGs from my Canon, likewise I did all my editing on the JPGs I downloaded from my iPhone as "most compatible."
I use only one Thunderbolt 3 cable to connect my hotrod touchbar 4-port 2018 13" MacBook Pro with a quad-core 2.7 GHz i7 with 16 GB RAM and 1 TB SSD to power and connect to everything, like my Samsung 55" 4K UHD TV (connected with an active Mini Display Port to HDMI cable to my OWC dock) as well as all my external drives and exotic audio system via TOSLINK. I store all my images on an 8 TB Samsung SSD mounted in a cheap and entirely functional USB-C enclosure.
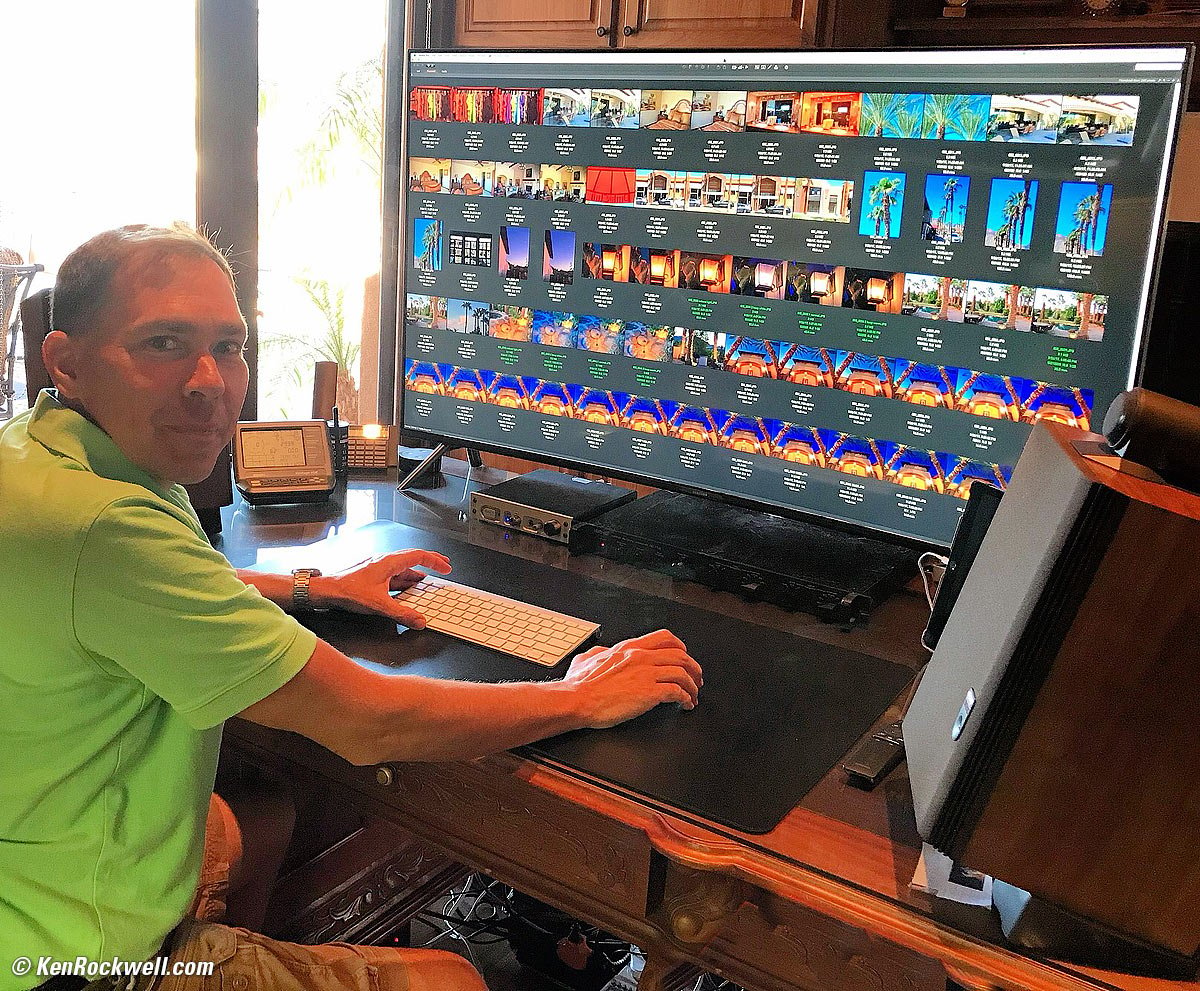
Samsung 55" 4K UHD TV as computer monitor. bigger.
I can't give you the exact steps I used to create any particular image; this is performance art for me. I just get into Photoshop and keep working with whatever it takes until the image looks as I first imagined it. Every step brings me closer and closer to my previsualized result; I use no presets.
Like all of Man's creations, each works first exists in my imagination, and I do whatever it takes until the final result matches my vision. For instance, I often add deliberate burning and dodging (localized lightening and darkening), cropping, edge-burning (edge darkening or vignetting), strong levels and saturation changes, perspective corrections and/or split-toning. Photography is a creative art, not an application of rules. You have to know what the picture is going to say and how you want it to look before you take it. See also my articles at How to Take Great Pictures.
Some of the iPhone 18 Pro Max shots were optimized in Apple's own very competent Photos app on my iPhone before I sent them to my Mac. The iOS 27 Photos app not only does a great job correcting colors, it also can correct tilts and perspectives and does a bang-up job removing distractions like cars and wires — all from HEIC files which I export as JPGs.
Once optimized in Photoshop and my plug-ins, I used a a one-click action I programmed decades ago to resize each image to 1,920 pixels wide, sharpen it for resampling aperture correction, add my ©KenRockwell.com bug and Saved For Web at 51% quality to preserve full chroma bandwidth. Please excuse the lingo; I've worked in digital image processing since the 1980s and haven't taken the time yet to explain the lingo for things like "kernels" and resampling apertures.
I built and published these pages in my 2010 copy of Dreamweaver CS5. There is no template; all 6,500-plus pages of this website have been created by my own hands. I tried the 2019 CC version of Dreamweaver and it was AWFUL, continuously crashing and often unable to complete basic copy-and-pastes, so I stick with CS5 and my old Mac operating system, which all work great so I can focus on making pictures rather than chasing new bugs and learning new versions of the same old software.
Viewing top
Turn up your screen brightness all the way for best results.
Click or tap any image to make it fit your screen. On Mac Safari, command ⌘ and + or - on will change the size of the page or image, and command ⌘ + 0 brings it back to normal.
Everyone's screens, from iPhones held vertically to computers with squinty 16:9 monitors, have different shapes. I can't make my differently-shaped shots fill everyone's screen at the same time.
These are 1,920 pixel-wide images; the originals are much higher resolution, but only a few of those original files are shared. These images will fill your screen horizontally, up to 1,920 pixels wide (or 3,840 pixels wide on Mac Retina displays). The vertical size will vary with each image.
On iPhone and iPad, everything changes size when you rotate between vertical and horizontal.
Good luck and enjoy!
< < Back to Photos
© Ken Rockwell. All rights reserved. Tous droits réservés. Alle Rechte vorbehalten. Alla rättigheter förbehållna. Toate drepturile rezervate. Niciun vampir nu a fost implicat în crearea acestei lucrări. Doe! Omnia jura reservata. Ken Rockwell® is a registered trademark.