Home Search Gallery How-To Books Links Workshops About Contact
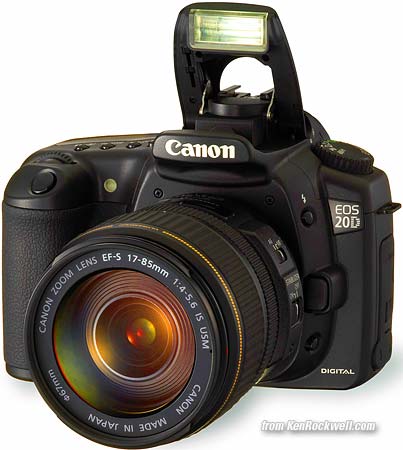
Canon 20D User's Guide
This one came from here. I'd also get it here and here. CUSTOM FUNCTIONS (More Menus) Back to top of 20D Users Guide. Custom Functions are little menu tweaks that let you configure the 20D to your liking. You are welcome to forget all of these if your 20D is the way you want it. They are easy to see and to change. There are 18 of them, each with their own options. Some are wonderfully helpful while and others are only for special purposes. Sadly they are all well hidden. How to Get to the Custom Functions Menu Press MENU. Spin the Big Dial to select Custom Functions, which is in the orange wrench section almost on the bottom. Press SET. You're here. How to Select a Custom Function After the above, spin the Big Dial. How to Change a Custom Function After the above to select what you want to change, press SET. Spin the Big Dial to see the options. Press SET to save your choice. THE CUSTOM FUNCTIONS The default setting is "0" for each. 01: SET function when shooting lets you have the SET button do something helpful while shooting. These are cool; they give you instant access to your choice of a function, skipping a few clicks. I use the Change Quality setting. Options are: 0: Nothing. The 20D ignores the SET button while shooting. 1: Change the Quality setting. You have to look at the top LCD. 2: Select a different Parameter set. 3: Call up MENU (duplicates the MENU button). 4: Replay the image. 02: Long Exposure Noise Reduction. This means after an exposure of a second or longer, the 20D makes a second exposure as long as the first, except with the shutter closed. The top LCD blinks BUSY during this second, dark, exposure. The 20D then subtracts any noise, fog or hot pixels seen in the known dark exposure from your image. I never use this. I hate waiting, and I especially hate waiting for double-long exposures for this to finish. Use it only if you see fog or hot pixels and then only if it improves them. 03: Flash Sync in Av Mode. 0: Auto: the shutter speed remains as set for a good ambient exposure. I use this. 1: 1/250: It locks the shutter at its fastest 1/250 sync, making the backgrounds dark or black. 04: Shutter Button/AE Lock Button chooses the function of these two buttons. Hint: The AE lock button is the one marked *. 0: AF/AE Lock: The shutter button focuses the lens and locks the exposure. The * button locks exposure, too, and holds it after you've released it. I have no idea how to unlock the set exposure, except by cycling the power or tapping the AF-WB or DRIVE-ISO buttons. 1: AE Lock/AF is backwards from how I like things. The shutter button locks exposure, and the * button focuses. 2: AF/AF lock, no AE lock: the shutter button focuses and locks exposure. The * button locks focus. 3: AE/AF, no AE lock. The shutter only releases the shutter. Only the * button focuses, and it also locks exposure. This is different from what I'd expect from the labeling. I use the default. Sadly, I have no idea how to get the buttons to work the way I want, which is for the shutter to lock focus but not exposure, and the * button to lock exposure only when held down. 05: AF Assist Beam. This is a trick: the 20D has NO AF illuminator! Sadly, the 20D instead fires off the flash numerous times, blinding your subjects. My wife kicked me out when she thought I was going to blind her dogs. The little light near the shutter button on the front of the body is only for the self-timer, not the AF illuminator. Sorry. 06: Set Exposure in 1/3 or 1/2 Stops: purely personal preference. I prefer full stops (not offered), except in Manual, where I prefer thirds. 07: Flash on/off: This one is silly. Turn it off, and the flash won't go off, even if popped up! That's the easiest way to confuse yourself and send in your camera for unneeded service. Really want to confuse your friends? Even if this is turned off, the flash will still go off in the dark to help focusing, but won't go off for the photo! leave this one alone at it's default of ON. 08 ISO Expansion (ISO 3200 Enable): by default, this is off. If it's off, the highest ISO is 1,600. Set it to ON to let you get to ISO 3,200. Once set ON, you get to ISO 3,200 easily through the usual ISO setting. Canon hid ISO 3,200 so inexperienced photographers wouldn't accidentally shoot photos at ISO 3,200 and be unhappy with the grain (noise). Of course ISO 3,200 is noisy. See examples at ISO Comparisons. I use ISO 3,200 if it's dark and the difference between a sharp shot and a blurry one. I always leave this custom function set to ON so I can get to ISO 3,200 any time I need it. 09: Bracket Sequence /Auto Cancel sets two things. (You enable bracketing in the menus.) Sequence is the order of the exposures. Normal is 0 - +, which means the first shot is at the normal exposure, the next is underexposure, and the last is overexposure. You can change this to - 0 +, which makes the underexposure first, followed by the normal and then overexposed shot. This also applies to WB bracketing: + refers to more green or amber; - refers to more magenta or blue. Auto Cancel is whether or not the bracketing cancels when you turn off the power or change lenses. By default, bracketing turns off with the camera. If you set this to disable (a double negative: you're disabling the auto-cancel so it doesn't cancel) then the bracketing is still turned on next time you turn on the 20D. I wouldn't do this; I'd leave it alone. Canon's manual implies that you have to choose a non-default "disable" in order to repeat a bracket sequence. I think this was lost in translation, you can repeat sequences in any setting. 10: Superimposed Display (Red AF Sensor Lights) let you turn off the red AF sensor lights in the finder. I don't know why you'd do this. I leave this at its default, which lights up the sensor in use as you shoot. If you turn it off, you'll still see the sensors as you're selecting them manually. 11: Menu Button Display Position selects where you are each time you hit the MENU button 0: Previous (top if power off): Every time you hit MENU you are where you were the last time you hit it, unless you've turned off the 20D, in which case it starts again at the top of the menu list. 1: Previous: You are where you were the last time you hit the Menu button even if you've turned off the 20D. 2: Top. Every time you press the MENU button you start at the top of the list. (hint: use JUMP to jump to each section) 12: Mirror Lockup. This is to prevent vibration and blur for exposures on a tripod. Neither Canon nor Nikon do this correctly. They all did it correctly in the 1960s - 1980s, which is to have the mirror flip up as soon as the self timer starts. 0: Disable. Normal shooting. 1. Enable: Mirror flips up on first press of the shutter button, and picture is taken either when the shutter is pressed again, or the self timer completes (if you've set the self timer.) This is a pain. For normal use (if you haven't paid the big bucks for the special Canon remote release cord) you have to set this way down in the menus, and then also set the self timer. Now all works fine: press the shutter, the mirror flips up, and 2 seconds later the shutter releases. All is fine until you're done: you have to go back into BOTH these settings and return them to normal. I would suggest Canon do the right thing and make the mirror flip up by default at the beginning of the self timer interval, without any menus needed. 0: Normal. The unmarked rear button selects them after you hit [+]. 1: Direct. The unmarked rear button selects them without having to hit [+]. I prefer this; it's faster. The 20D ignores the unmarked rear button when it's asleep and around your neck anyway. 2: Quick Control Dial Direct (Big Dial). The Big Dial selects them directly without needing to hit [+]. Of course this is what you used to do to set exposure compensation, so now Canon says you have to hold [+] and spin the Big Dial to set exposure compensation. Mine doesn't do this - it ignores the [+] button and keeps changing AF points with the big dial. In this mode the unmarked rear button is ignored during shooting. Of course the 20D ignores the Big Dial for this unless you have the power switch set to "/." 14: E-TTL-II (Flash Metering) allows you to screw up the flash exposure. 0: Evaluative gives correct flash exposure, and balances it with daylight to fill in shadows. Lovely! Leave it here. 1: Average fires the flash with enough power to expose everything by it's light alone. It won't look good as fill. Don't do this. 15: Shutter Curtain Sync (Flash Mode) is how you select rear-curtain sync to make moving objects look like they're moving in the right direction, presuming you're using a slow shutter speed in Tv, Av or M modes. 0: 1st curtain: Flash fires as soon as the shutter opens. 1: 2nd Curtain: Flash fires at the very last instant of exposure. If a subject is moving and making a blur under ambient light, the final image will have the subject stopped with a ghost flash image at the beginning of the blur. This results in a sharp image with blurs behind a moving subject, implying speed. The default above (same for all cameras) puts the blur in front of a moving object, which looks silly. Nikon makes this easy to select with a direct button and knob, no menus. Sadly, Canons can't do slow sync in Program mode as Nikons do. You have to work in M, Tv or Av. 16: Safety Shift in Av or Tv is great. I wish Nikon had this. 0: Disable. If the camera runs out of apertures or shutter speeds to work with the one you've chosen in Tv or Av, you get over or under exposure. This is silly. 1. Enable: if you've selected a shutter speed in Tv mode or an aperture in Av mode and the light isn't right to get a correct exposure with that setting, the 20D is smart enough to change your chosen value to get the right exposure. It works great! Example: Set 1/500 in Tv mode., In a dark room, the finder will blink the maximum aperture of the lens, since it's gone to the largest aperture and still can't get enough exposure at 1/500. When you press the shutter halfway, you'll see the aperture stop blinking and a lower shutter speed appear. The 20D will shoot at the maximum aperture and a slower shutter speed, instead of being stupid like my Nikons and underexposing the image. I love this. I leave it Enabled. I wish my Nikons could do this. 17: Lens AF Stop Button lets you select what happens when you press AF Stop buttons which appear only on Canon's super telephoto lenses. Most lenses don't have these buttons. 18: Add Original Decision Data adds a checksum to the image file. If you pay $700 extra for the DVK-E2 software kit, when playing back images you can get your computer to tell you if your file is as it came from the camera, or if it's been altered. This is something Canon pitches to people who use photos for evidence and forensics. I have no idea if anyone believes any of this. I wouldn't. That's it! Thanks for reading! Dedication Adorama was a big help with this article. If you find this article helpful and want to get a 20D, getting it here helps us all continue to do more of this. PLUG No one pays me anything to write this site. It's all here free for the reading (but not copying). If you find it as helpful as a book you might have had to buy or a workshop you may have had to take, feel free to help me share more. Thanks! Ken Back to top of page or top of 20D Users Guide. |
Home Search Gallery How-To Books Links Workshops About Contact