Yosemite & California's Eastern Sierra
17, 18, 19, 20, 21, 22 & 23 October 2022
Join us on this year's tour 17-20 October 2024: Fall Color in the Eastern Sierra
How I Created These Pictures
Introduction
I made these photos on two back-to-back trips I led with Dave Wyman to California's Eastern Sierra, and another trip we led as a fund-raiser for The Yosemite Conservancy in Yosemite National Park.
The Eastern Sierra section was the first time we've run this particular trip since our extraordinary October 2019 Eastern Sierra trip, which was our very last before COVID.
These were real photo trips where we were outside from well before dawn until long after dark, shooting all day, every single day. These weren't nerd-a-thons locked in motel rooms fiddling on computers; we were outside hiking around the whole time.
Viewing top
Everyone's screens, from iPhones held vertically to computers with squinty 16:9 monitors, have different shapes. I can't make my differently-shaped shots fill everyone's screen at the same time.
On iPhone and iPad, everything changes size when you rotate between vertical and horizontal.
Click or tap any image to make it fit your screen. On Mac Safari, command ⌘ and + or - will change the size of the page or image, and command ⌘ and 0 brings it back to normal.
Turn up your screen brightness for best results.
These are 1,920 pixel-wide images; the originals are much higher resolution. These images will fill your screen horizontally, up to 1,920 pixels wide (3,840 pixels wide on Mac Retina displays). The vertical size will vary with each image.
Enjoy!
17 October 2022, Monday top
17, 18, 19, 20, 21, 22 & 23 October 2022
I awoke at 4:14 AM, left my house at 5:15 AM and headed to my friend Dave's house in Los Angeles. Sunrise was at 6:55 AM and I arrived at 7:40 AM.
We packed up and headed out at 9 AM. We drove north all day, passing through Olancha about Noon. We passed Lone Pine at 12:20 PM and stopped in Bishop at 1:22 PM. We had lunch at Carl's Jr., took on fuel and headed out of Bishop at 1:55 PM.
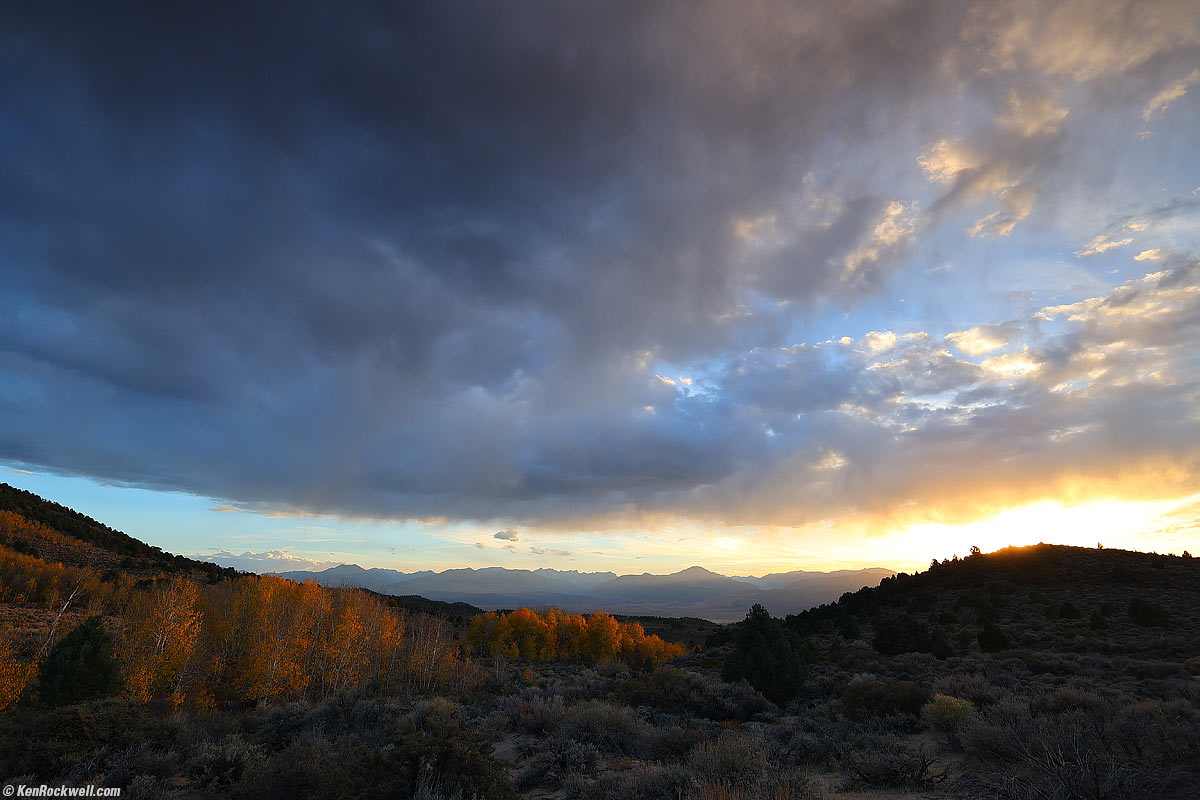
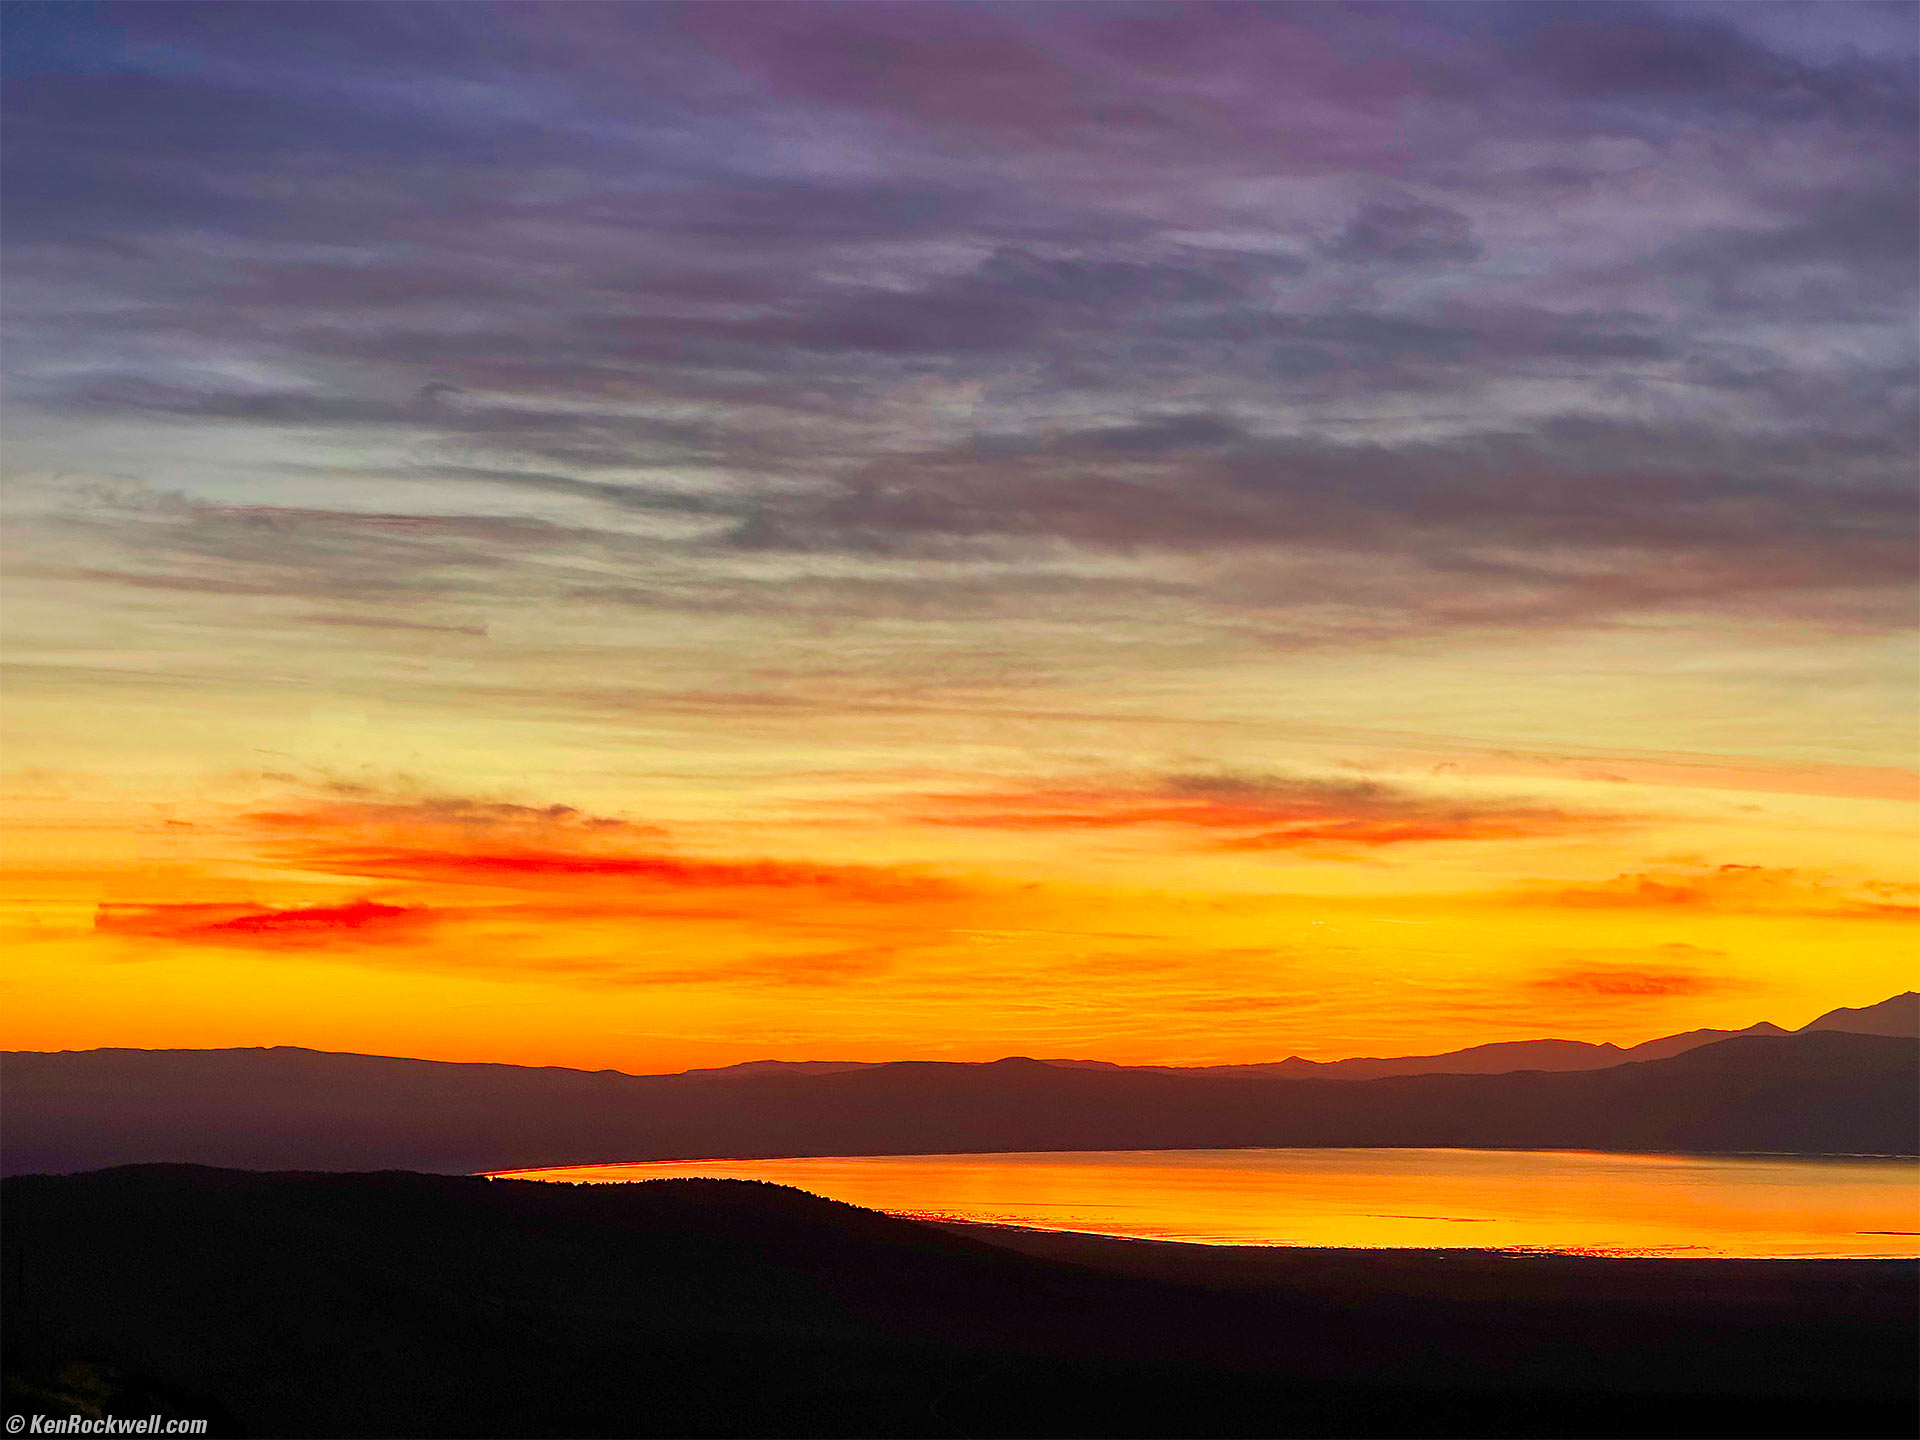
We had great clouds. Here's a snap through my car's windshield:

Clouds over June Lake, California as Seen from a Moving Car on US Route 395, California, 2:56 P.M. Apple iPhone 14 Pro Max 1× (6.9mm actual or 24mm eq.) camera, f/1.8 at 1/4,762 at Auto ISO 80 (LV14.2). More tech details. bigger or fit-to-screen.
I used Skylum Luminar Neo to amp-up the general "wow" factor (Enhance and Color Saturation sliders), and also used Neo's state-of-the-art "Erase" junk removal tool to remove my dashboard reflections.
A great thing always about iPhone is that it shoots wide-open even in daylight. It has and needs no lens diaphragm. Its short 6.9mm actual (24mm equivalent) focal length 1× standard camera has plenty of depth of field at f/1.8, and shooting at f/1.8 in daylight means that the 1/4,762 shutter speed stopped all the motion. The foreground would have been horribly motion-blurred if I had tried to jam my EOS R6 up to the windshield, and good luck to me trying to see the EOS R6's tiny dim LCD at arm's length while we were driving.
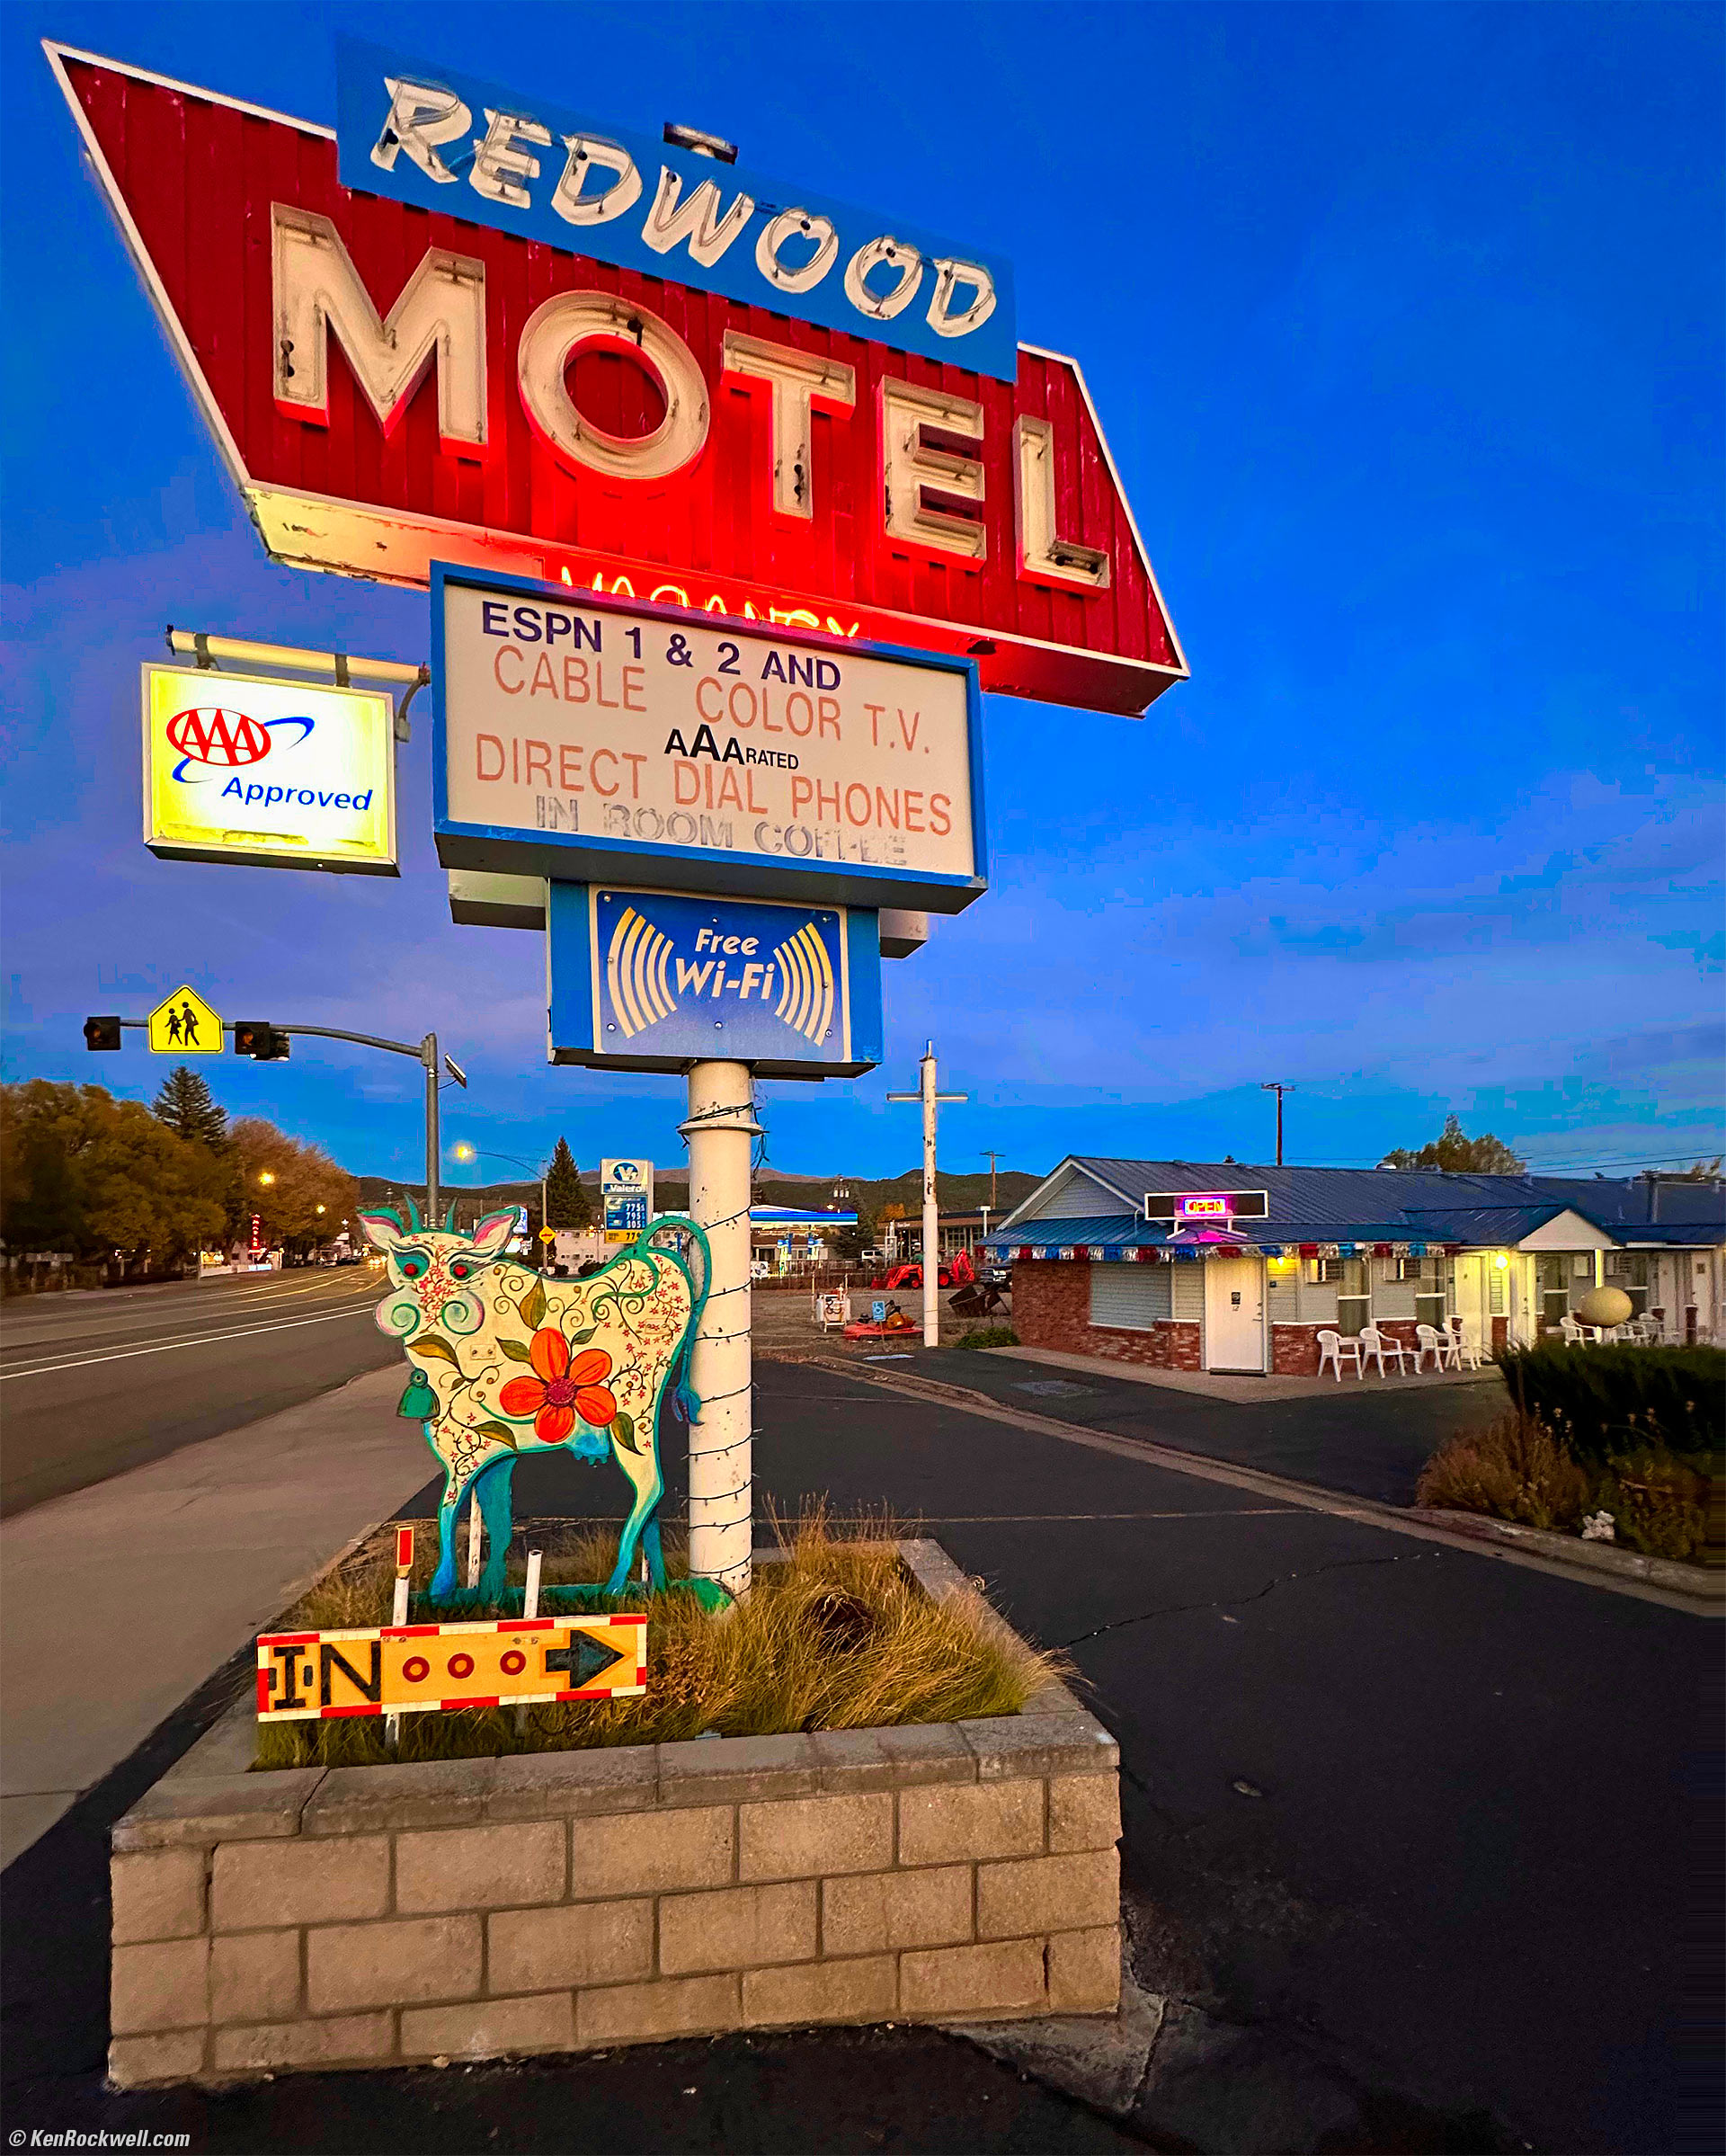
We arrived at our base, Bridgeport's Redwood Motel, at 3:33 PM. So many fond memories! First we met Lukas, our greeter, in the lobby:

Lukas, Redwood Motel, Bridgeport, California, 3:51 P.M. Apple iPhone 14 Pro Max 1× (6.9mm actual or 24mm eq.) camera, f/1.8 at 1/60 at Auto ISO 125 (LV 7¼). More tech details. bigger or fit-to-screen.
I burned and dodged in Photoshop CS6 (from 2012) and used Perfectly Clear to brighten it a bit.
Among the many things that impress me about the iPhone is how I can completely remain in the moment and reach down with one hand and capture whatever's going on. Unlike big cameras with tiny LCDs and finicky autofocus systems, the iPhone has a huge screen I can see from a few feet away and a LIDAR LASER-guided autofocus system. The iPhone's AF system is superior to larger cameras in that it magically figures out - even in pitch black - that it's a dog and focuses directly on his eyes, not his nose, letting me capture totally crazy action like an excited dog jumping all over me after he hasn't seen me for three years. Lukas still missed some other friends from the last trip who weren't here this year.
It's so sharp in the original file that you can see Lukas' own view of me towering over him reflected in his eye. Check your monitor now; the image here should have every hair very clearly delineated around his eye. You may or may not see this depending on your monitor and its size; windows PCs still seem to use obsolete 106 DPI displays compared to ultrafine iPhone, iPad and Mac Retina displays that run around 225-475 DPI.
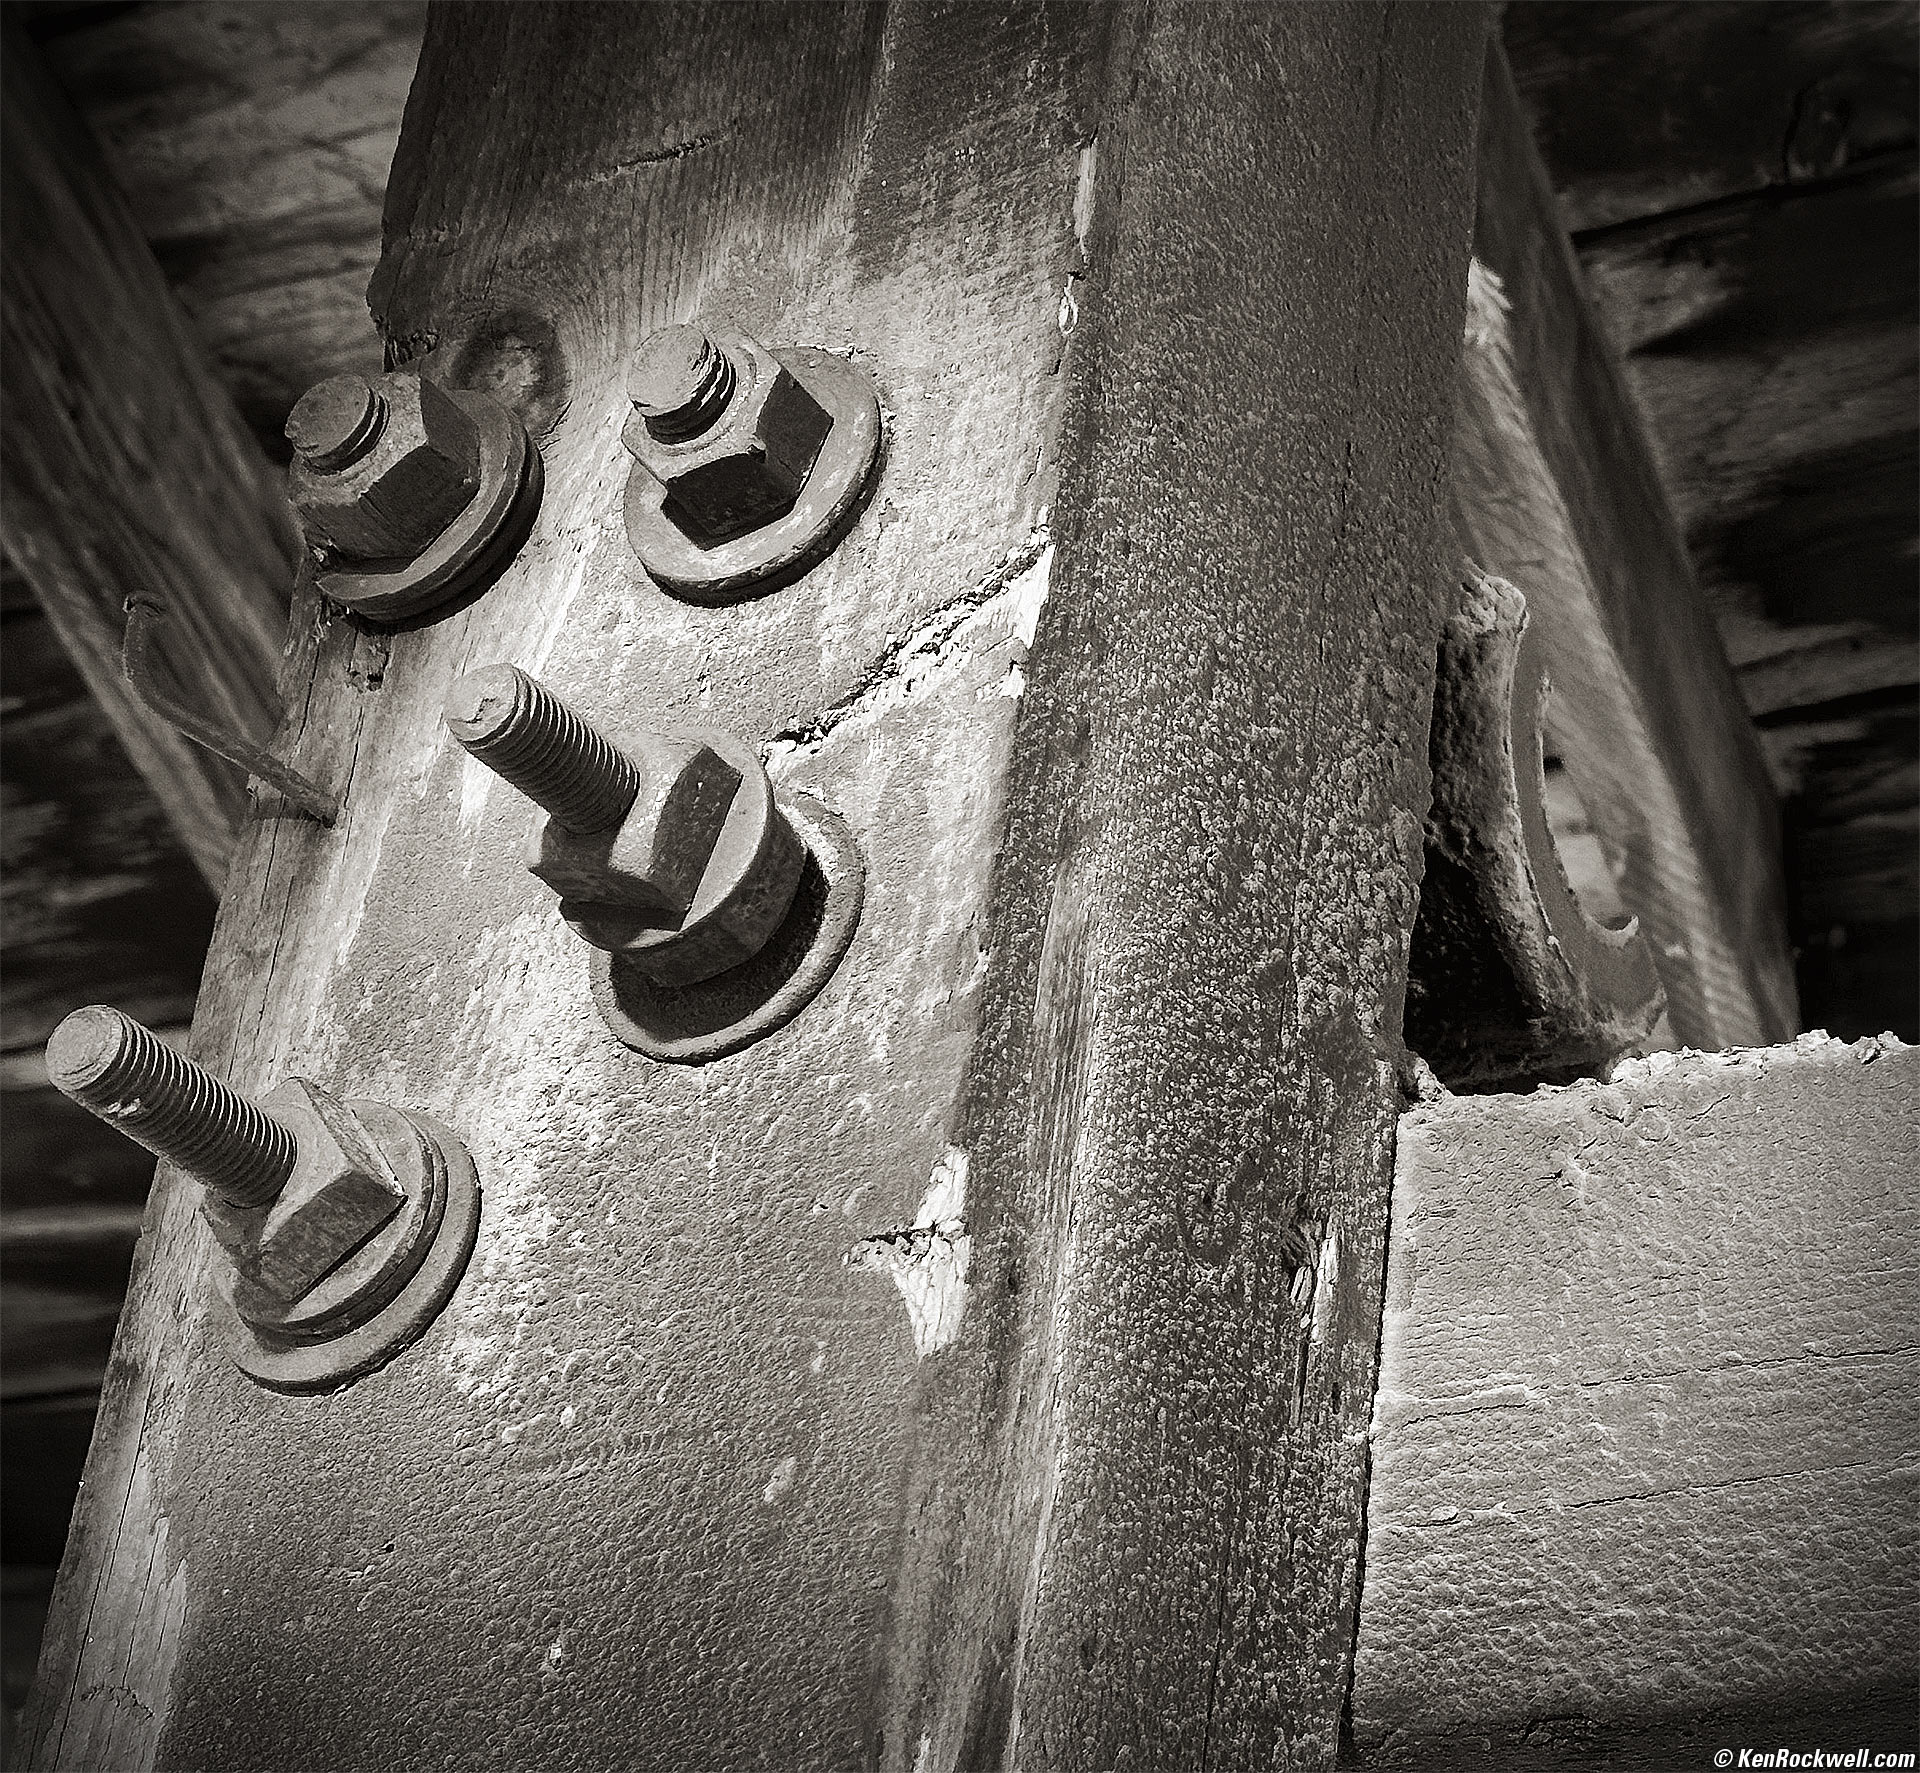
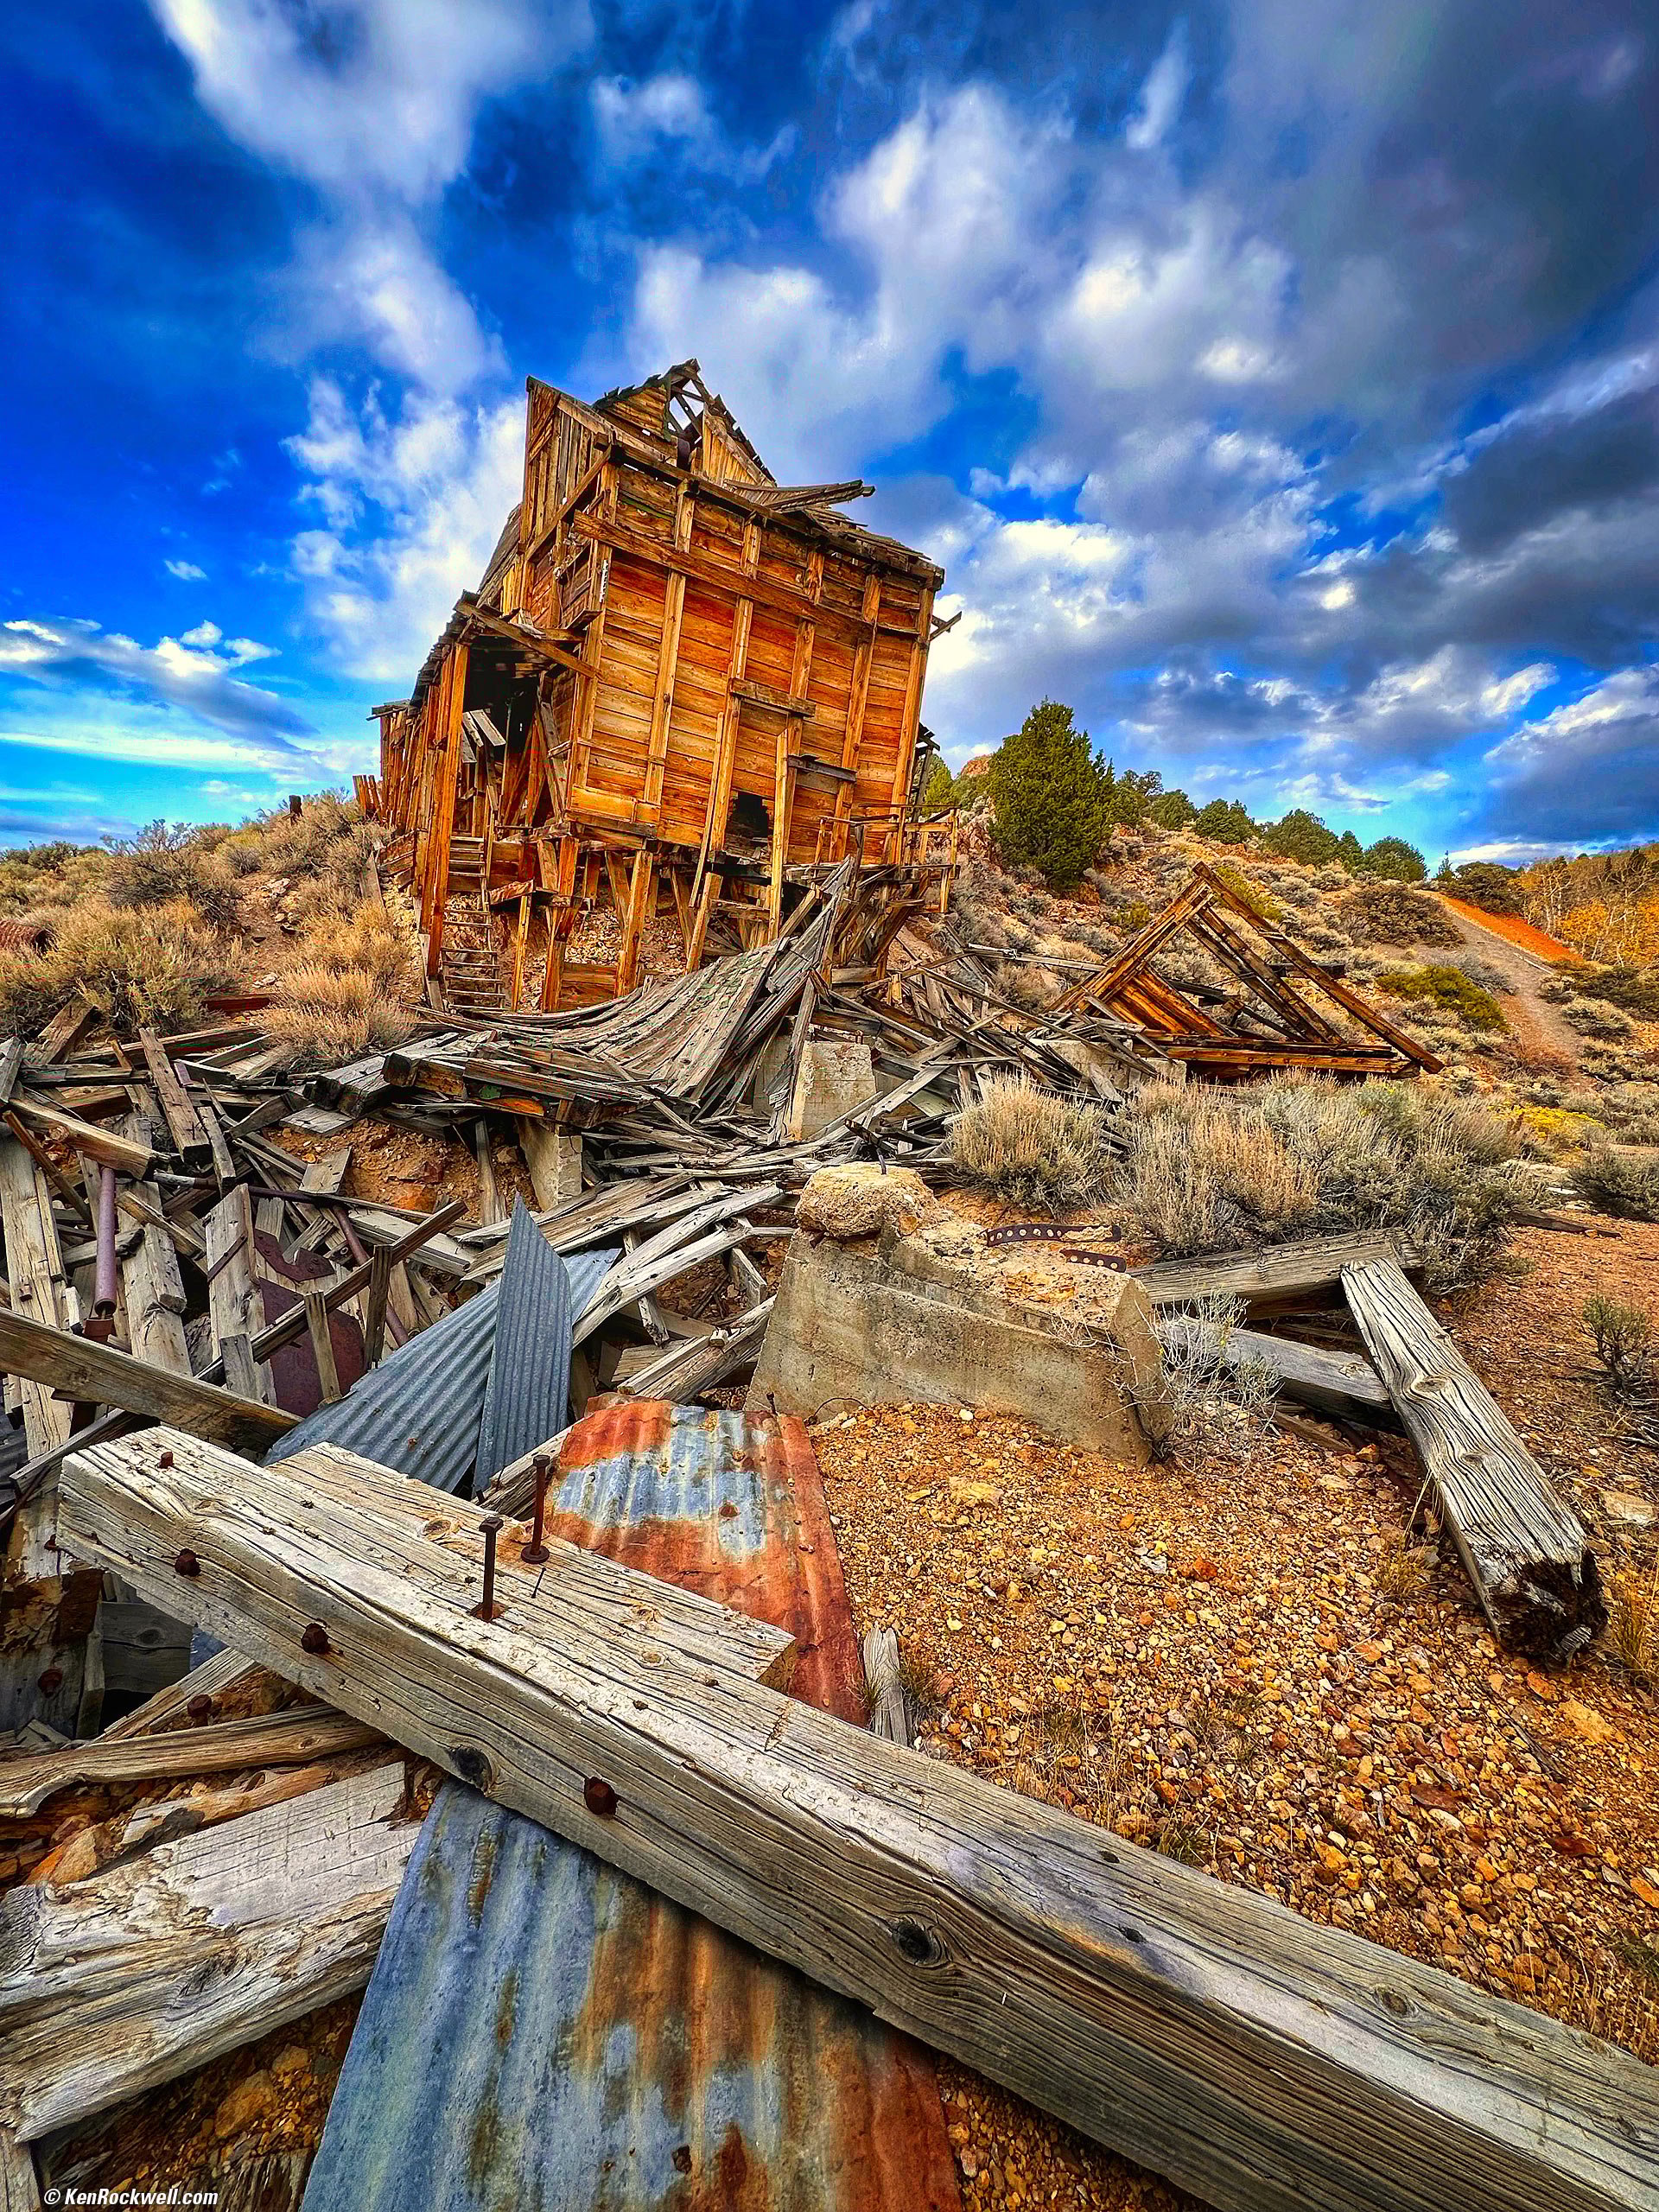
We checked in, met our group, and headed up to an abandoned mine:
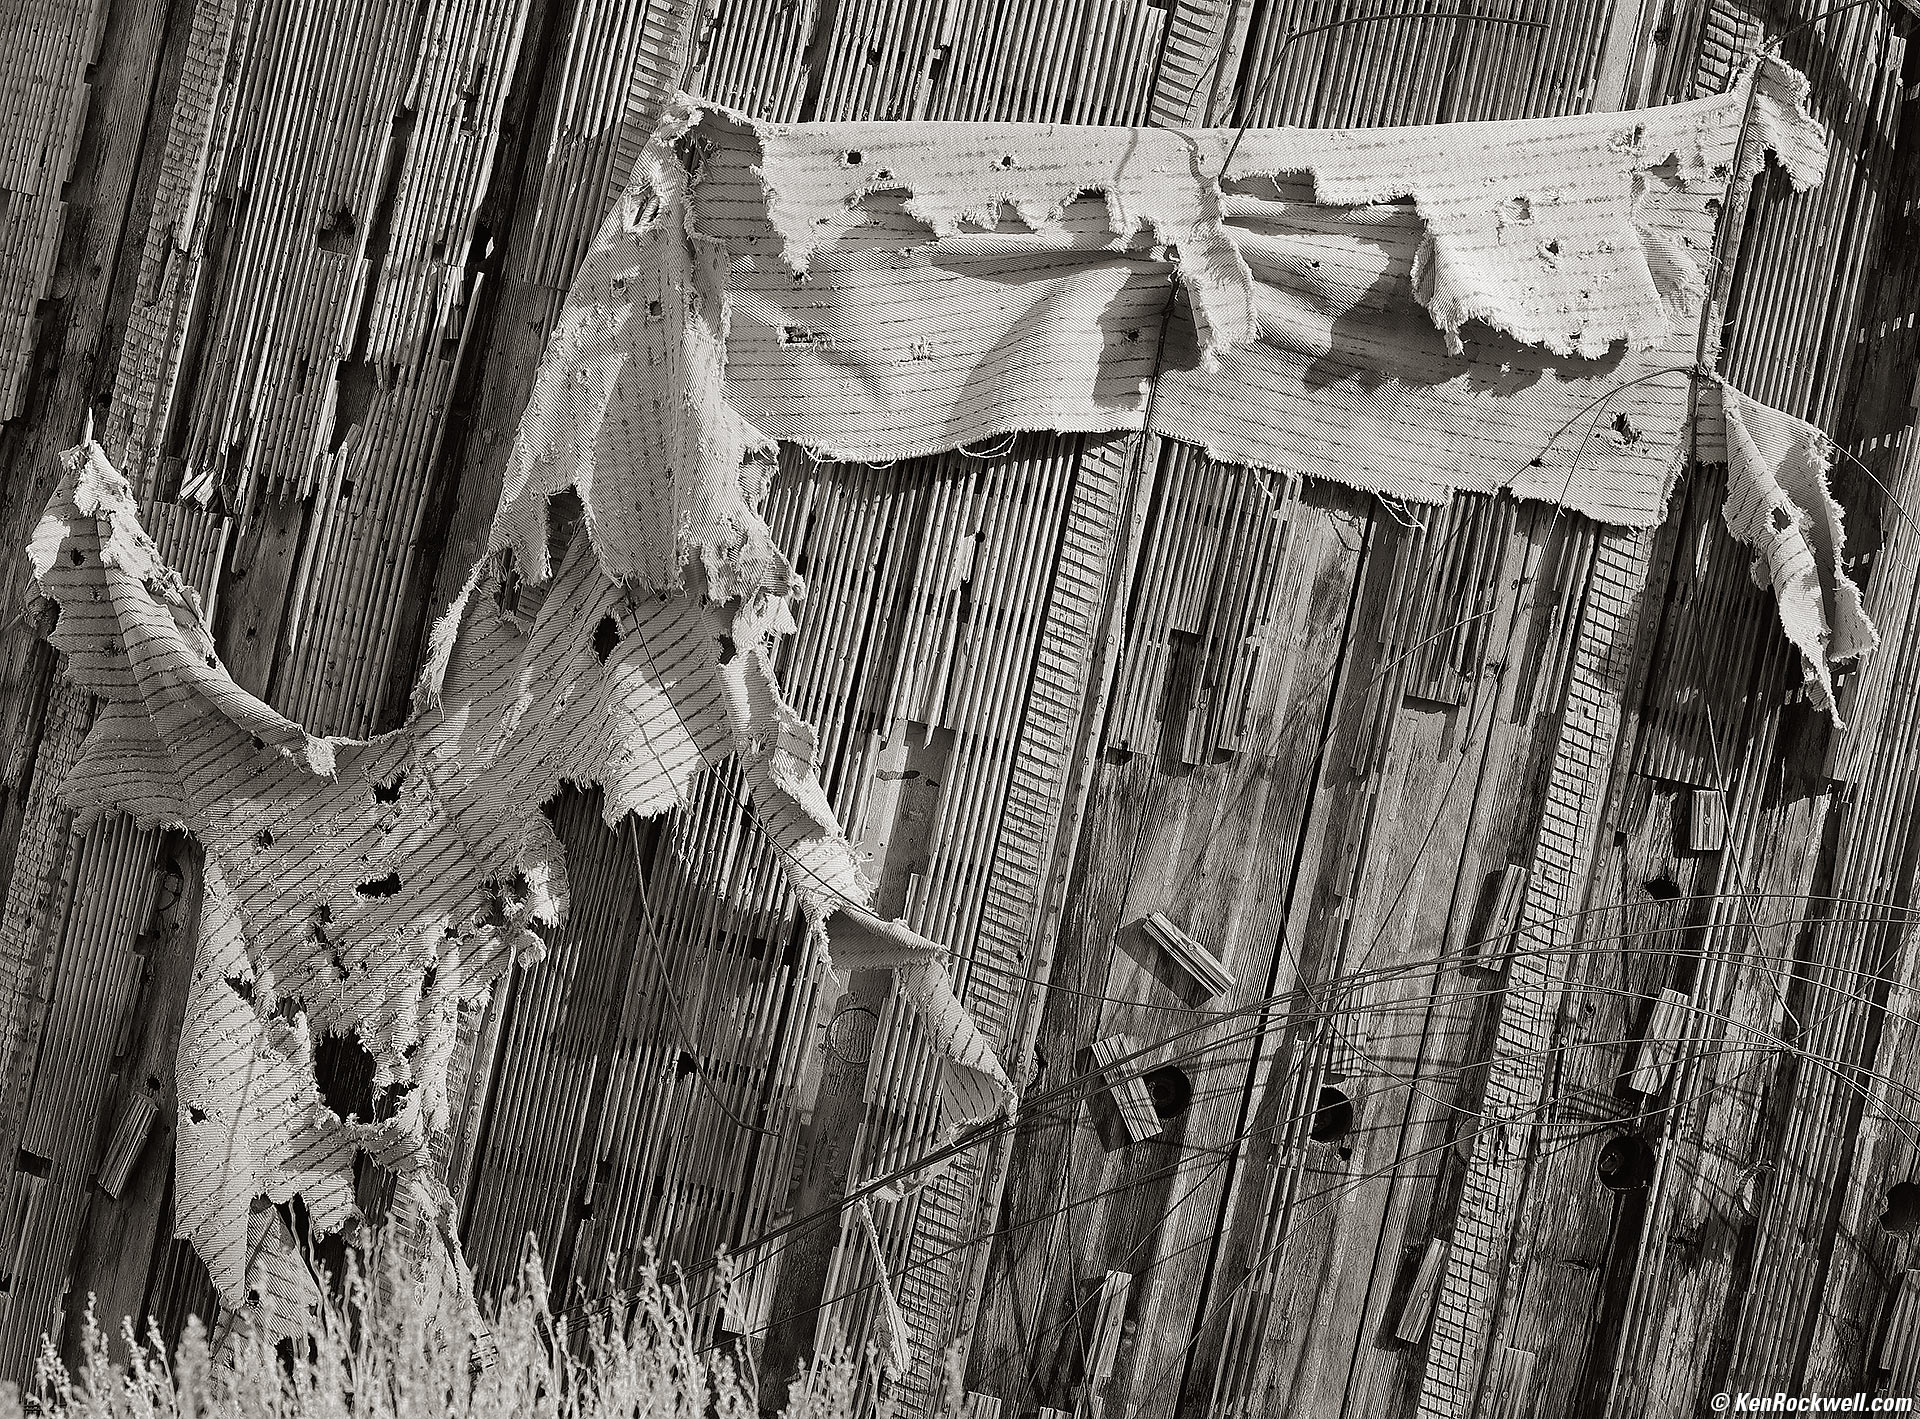
Detritus on the Side of a Water Tank, Abandoned Mine near Walker Lake, Bridgeport, California, 4:45 P.M. Canon EOS R6, EF 100-400mm L IS II USM on EF to RF adapter at 100mm, f/ 7.1 at 1/250 at Auto ISO 100, -2/3 stops exposure compensation (LV 13.6), split-toned print. More tech details. bigger or fit-to-screen.
I used Perfectly Clear to bring up the shadows.
Highlight inside an Abandoned Mine near Walker Lake, Bridgeport, California, 5:14 P.M. Apple iPhone 14 Pro Max camera system at its 2× setting (which magically crops from the 1× camera's 48 MP sensor and 6.9mm lens to a full-frame equivalent of 48mm), f/1.8 at 1/64 at Auto ISO 80 (LV 8.0). More tech details. bigger or fit-to-screen.
I used Skylum Luminar Neo to add vignetting, and then I split-toned the print. God made the light shining through a hole.
Abandoned Mine near Walker Lake, Bridgeport, California, 5:16 P.M. Apple iPhone 14 Pro Max 0.5× (2.2mm actual or 13mm eq.) camera at f/2.2 at 1/155 at Auto ISO 40 (LV 10.9). More tech details. bigger or fit-to-screen.
I first worked this in the free Snapseed app on my iPhone while on location, and later used Skylum Luminar Neo to take it further.
I love how my iPhone makes it trivial to jam it into any weird position and still be super-easy to compose on its huge, bright screen, especially with its ultra-ultra wide 0.5× (2.2mm actual or 13mm eq.) camera with which every millimeter of position changes the picture's composition.
Also because of its super-short (2.2mm actual focal length) lens the iPhone's ultra-ultra wide 0.5× camera has almost limitless depth of field.
Likewise its autofocus always nails it. My Canon EOS R6 is awesome, but I can't see its tiny screen from arms length and it's always dim unless I brightened it manually, lacking the iPhone's automatic brightness control.
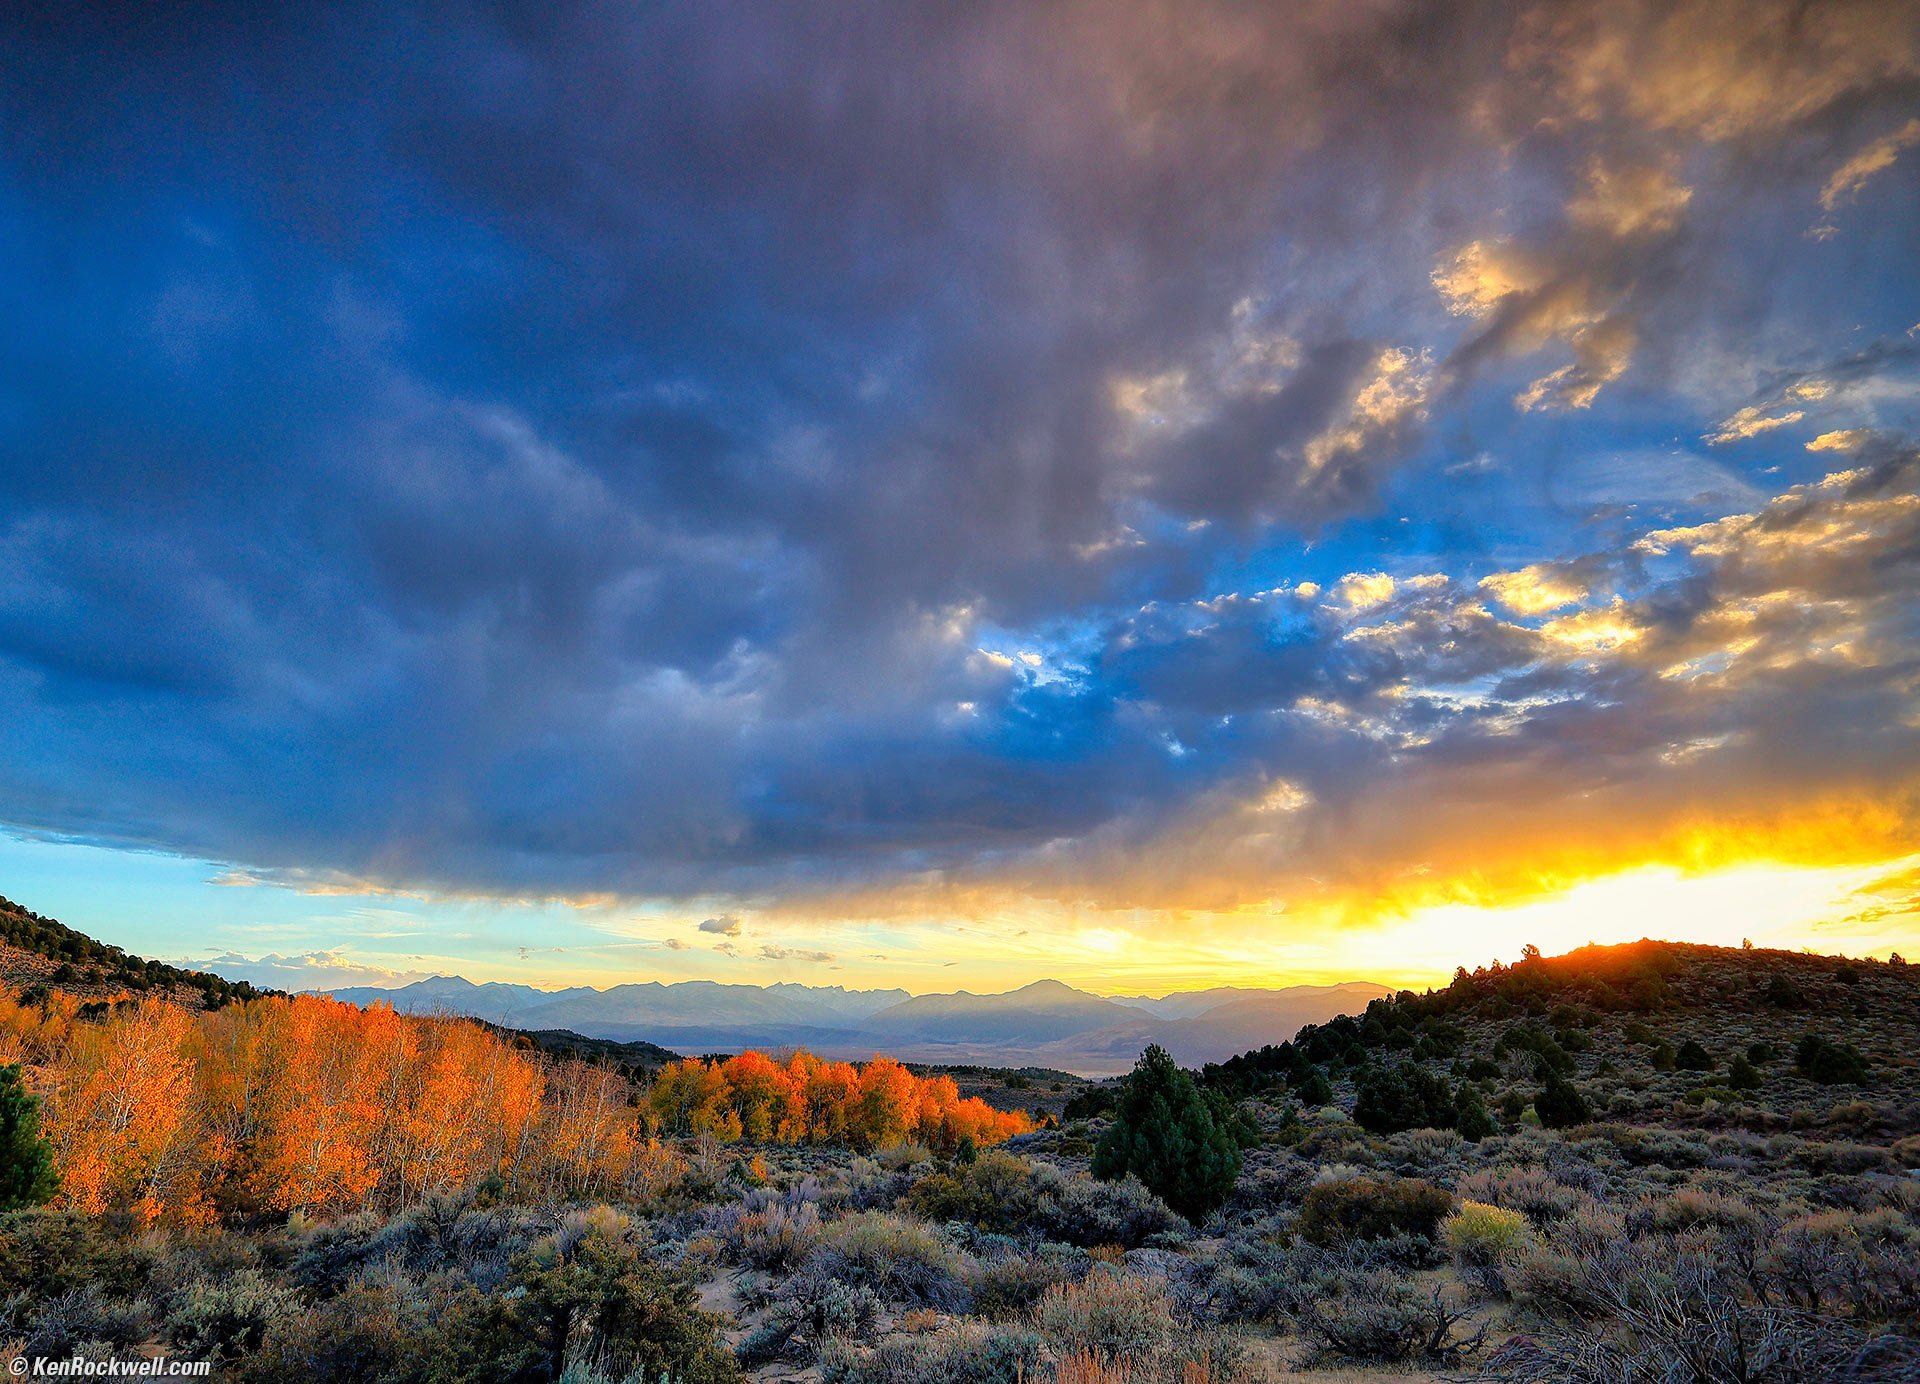
Sunset, East of Walker Lake, Bridgeport, California, 5:59 P.M. Canon EOS R6, RF 15-30mm IS STM at 17mm, f/6.3 at 1/100 at Auto ISO 100 (LV 12.0). More tech details. bigger or fit-to-screen.
I used Skylum Luminar Neo to amp this up from my as-shot image. Neo added detail to the dark foregrounds and the bright parts of the sky and exploded the fall color on the left. Bravo! Here's what came out of my R6, and this is with its saturation cranked to +4:
As shot. bigger.
A minute later I shot this on my iPhone:
Sunset, East of Walker Lake, Bridgeport, California, 6:01 P.M. Apple iPhone 14 Pro Max 0.5× (2.2mm actual or 13mm eq.) camera, f/2.2 at 1/369 at Auto ISO 40 (LV 12⅛). More tech details. bigger or fit-to-screen.
I did most of the jacking of this image with the free Snapseed app on my iPhone at the scene, and then worked it some more in Skylum Luminar Neo.
It's obvious that in general I get the same images from iPhone as I do with bigger cameras. This is because the image comes from my imagination, not the camera, and I work each until it looks as I previsualized it, which is the same for both images.
I'm intrigued at how similar they look, especially since I edited each about a month apart. Also intriguing is how they each use very different everything, but the exposures reported by each camera are within one-eighth of a stop of each other!
They look very close here. The differences become more apparent viewed on a very large monitor at full resolution, which I'm not sharing here. My desktop monitor is a 55" 4K TV seen from an arm's length away. Seen on a huge screen, images from my EOS R6 have more resolution, finer details and less noise than from the iPhone, but honestly people love the images from my iPhone at least as much as from my fancier cameras. The iPhone is a brilliant camera, and it's flexibility and portability means I use it a lot for everything and catch things I'd otherwise miss with my larger camera. At normal print sizes, they look the same to normal people who actually look at my pictures rather than just count pixels.
We returned to Bridgeport, touched base at the Redwood Motel, and then drove to dinner south of town:
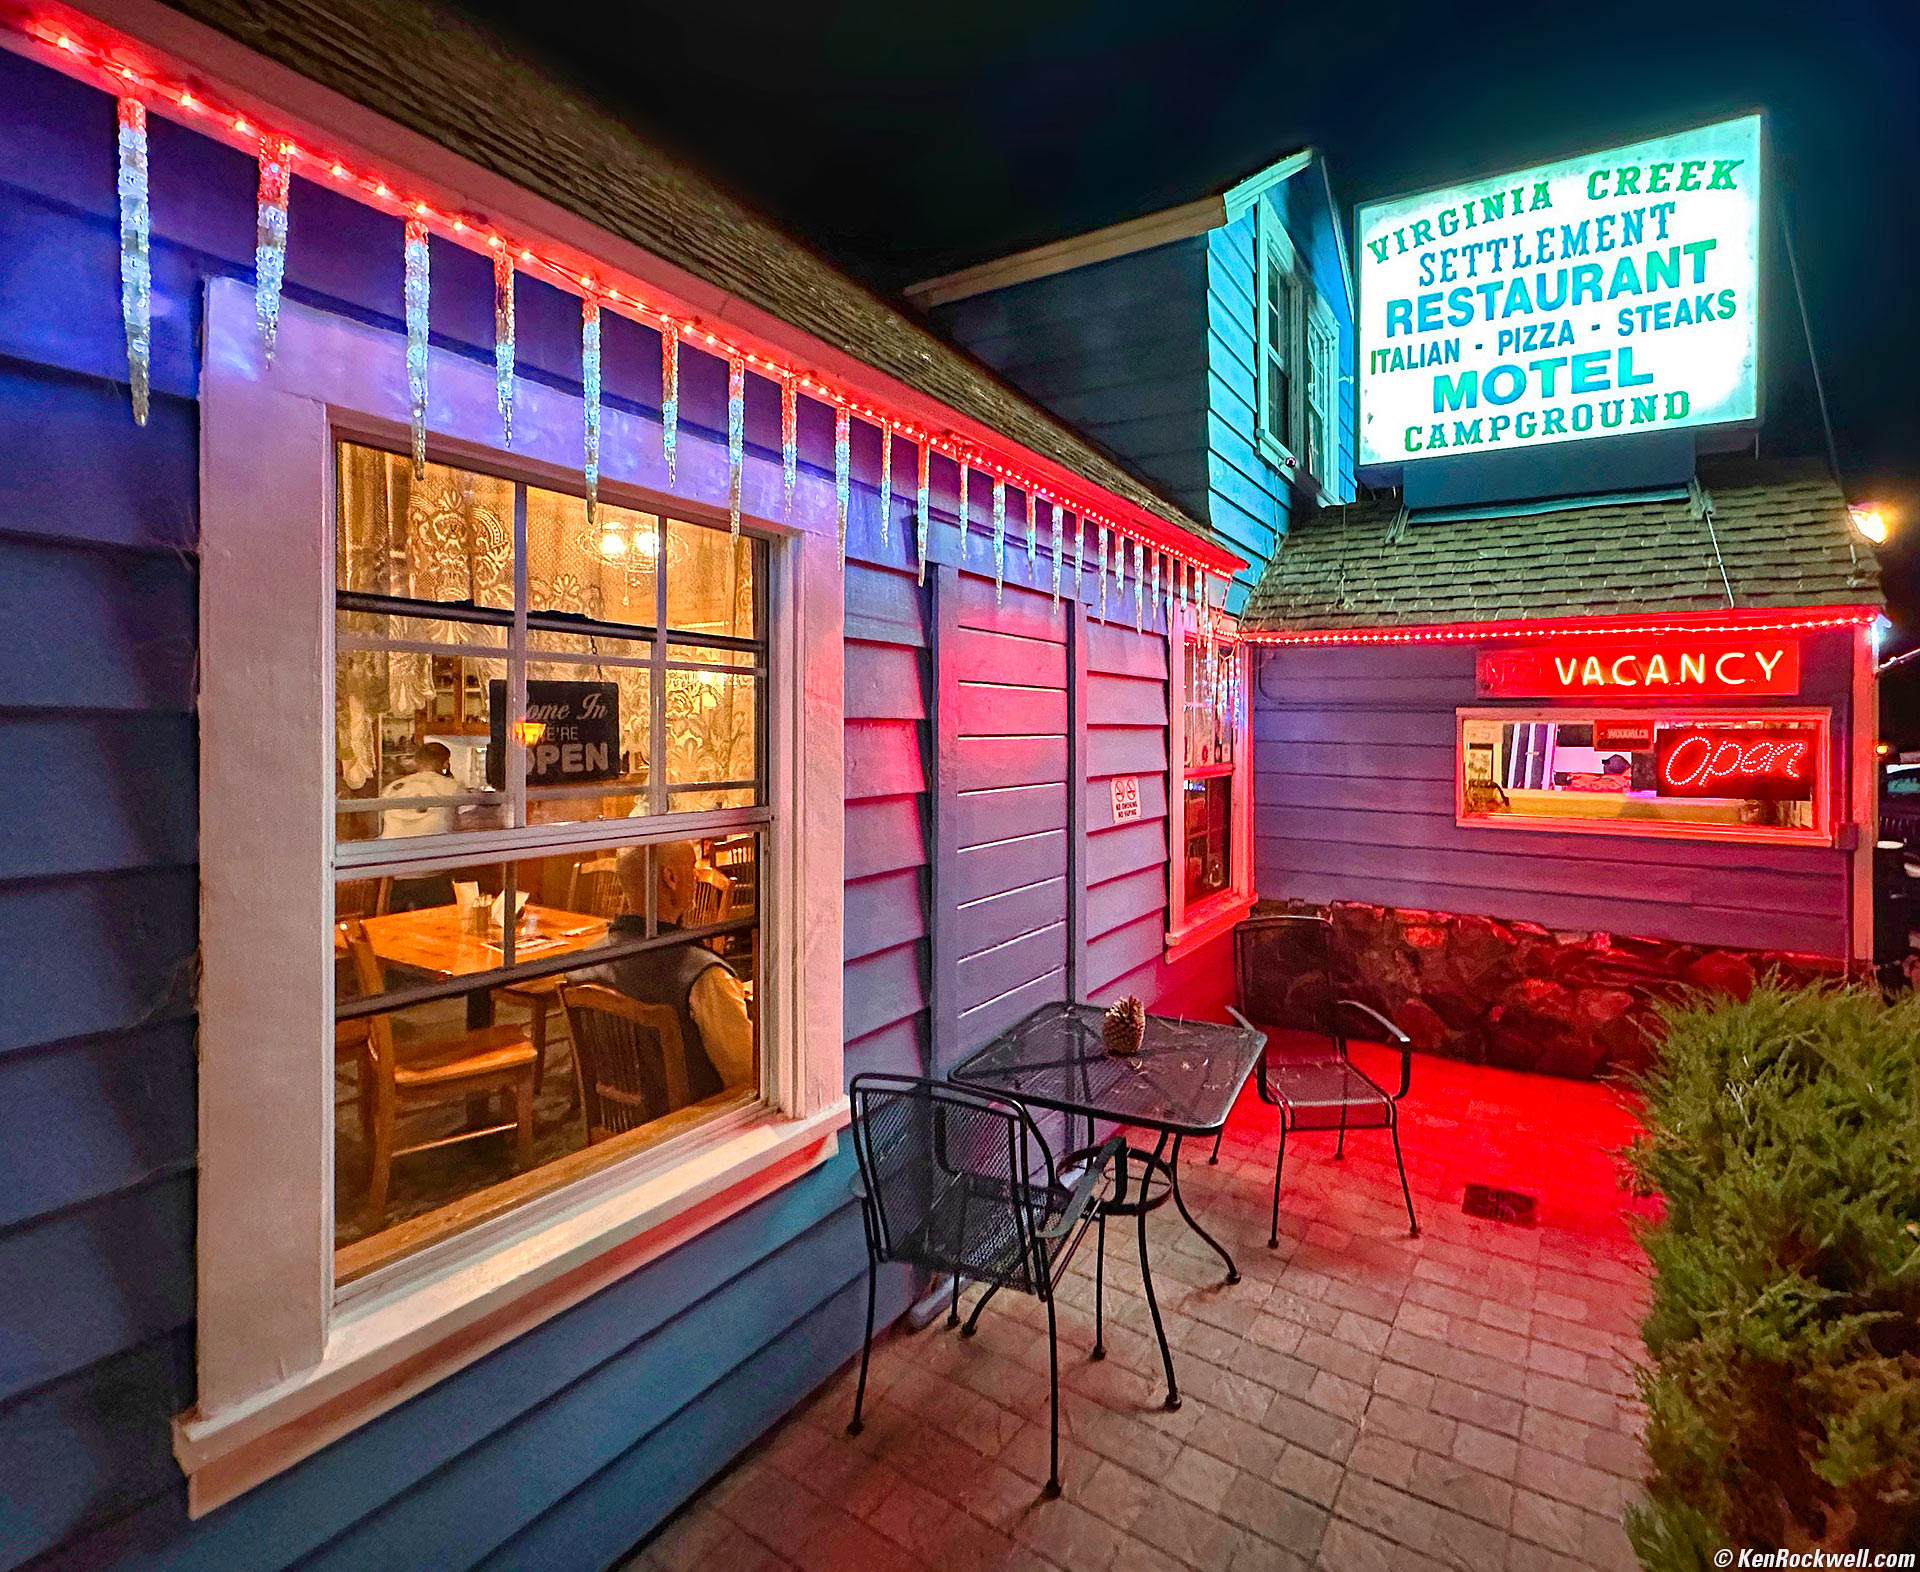
Virginia Creek Settlement Restaurant, Bridgeport, California, 7:19 P.M. Apple iPhone 14 Pro Max 0.5× (2.2mm actual or 13mm eq.) camera, f/2.2 at 1/40 at Auto ISO 1,250 (LV 4.0). More tech details. bigger or fit-to-screen.
I fiddled with this with the free Snapseed app on my iPhone at the location and then more back in my studio in Skylum Luminar Neo.
After dinner, bedtime. Tomorrow's call is 6:30 AM:
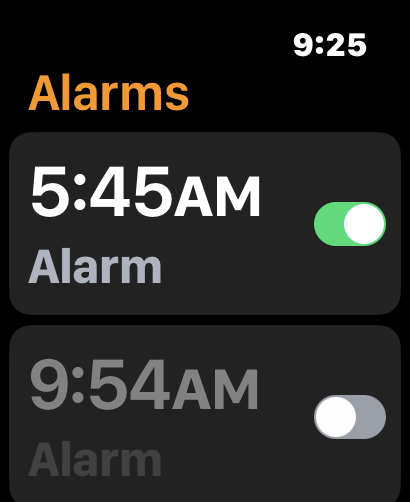
5:45 AM alarm. Screen grab from Apple Watch ULTRA.
18 October 2022, Tuesday top
17, 18, 19, 20, 21, 22 & 23 October 2022
Up at 5:30 AM, out at 6:30 AM to catch a 7:09 AM sunrise atop Conway Summit:
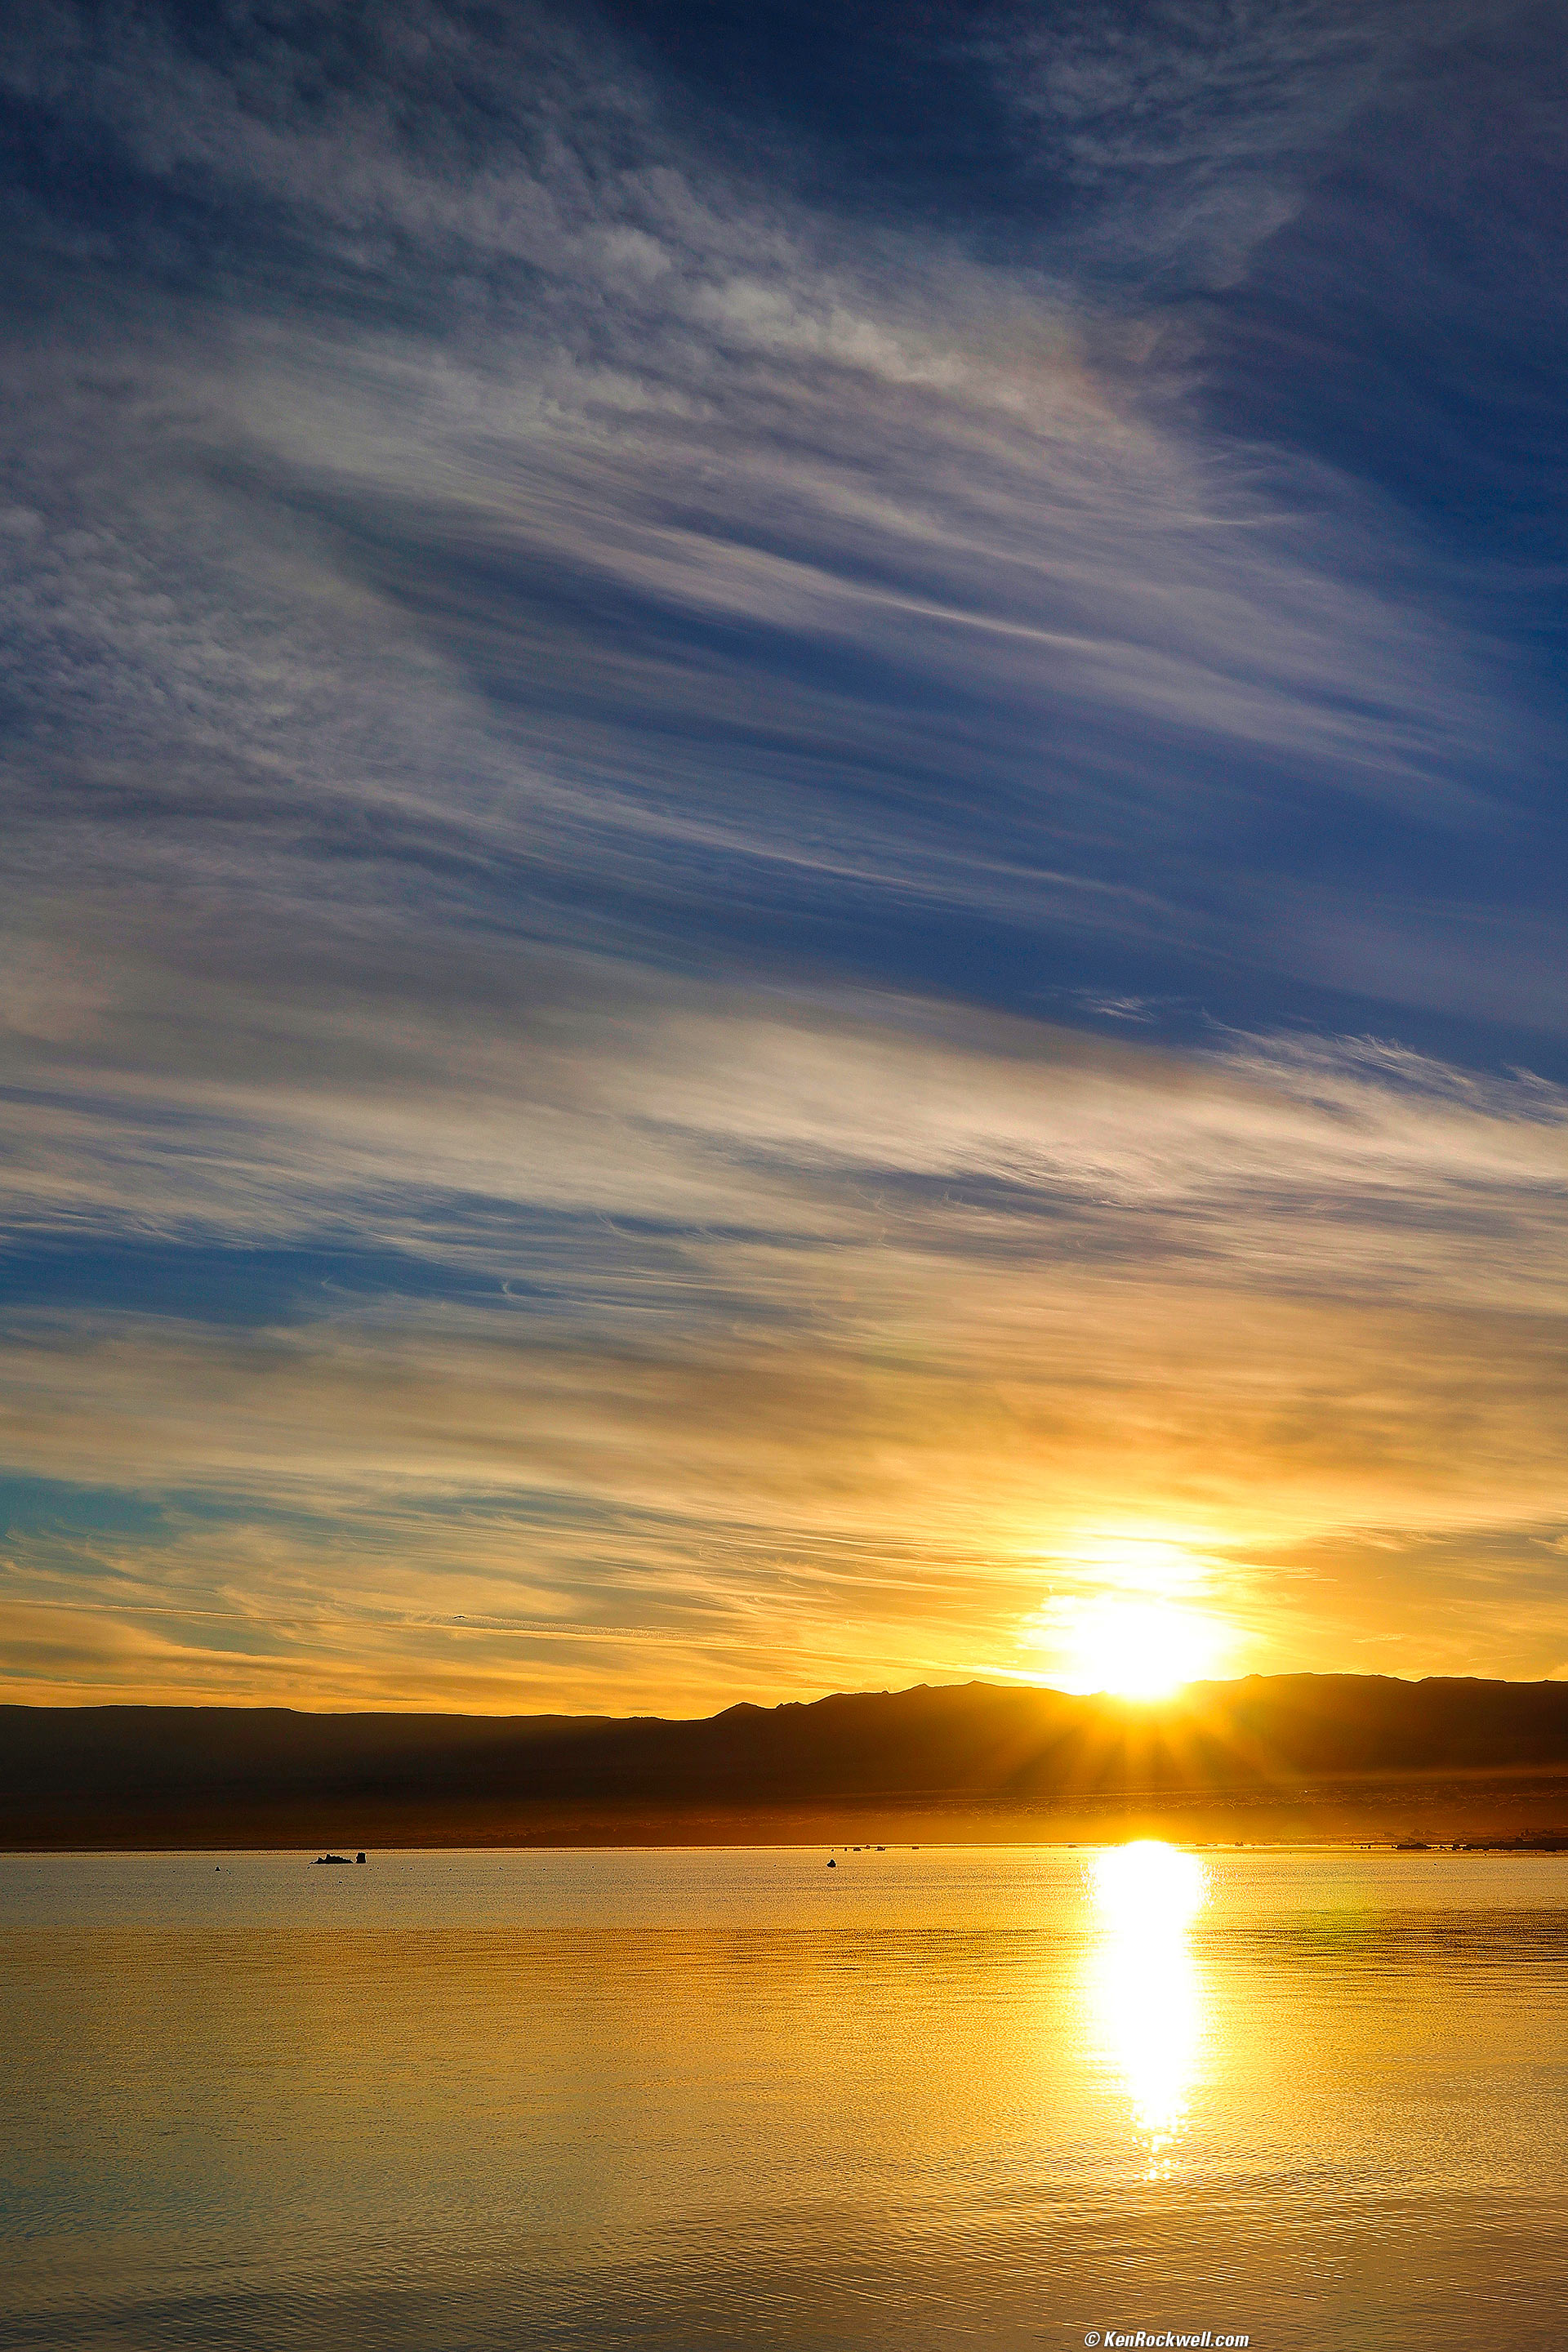
Sunrise over Mono Lake as Seen from Conway Summit, 6:49 A.M. Apple iPhone 14 Pro Max 3× (9mm actual or 77mm eq.) camera, f/2.8 at 1/99 at Auto ISO 125 (LV 9.3). More tech details. bigger or fit-to-screen.
I amped this one in Skylum Luminar Neo.

Sunrise over Mono Lake as Seen from Conway Summit, 6:53 A.M. Canon EOS R6, RF 24-240mm IS USM at 62mm, wide-open at f/5 at 1/50 at Auto ISO 100, (LV 10¼). More tech details. bigger or fit-to-screen.
Again, Skylum Luminar Neo was amazing, amping-up color and bringing highlights and shadows under control and rendering this nutty image the way I want it.
Just a few minutes later we have a very different picture as the sun rises and lights more clouds higher up (closer to me):
Sunrise over Mono Lake as Seen from Conway Summit, 7:05 A.M. Apple iPhone 14 Pro Max 3× (9mm actual or 77mm eq.) camera, f/2.8 at 1/247 at Auto ISO 32 (LV 12.6). More tech details. bigger or fit-to-screen.
Skylum Luminar Neo let me put colors back where God didn't quite put them. Bravo!
Yes, these are similar images, but they are also very different. My website, my rules.
Aspens Aflame, Poole Power Plant Road, Lee Vining, California, 10:59 A.M. Canon EOS R6, RF 24-240mm IS USM at 118mm, f/8 at 1/125 at Auto ISO 100, -1/3 stop exposure compensation (LV 13.0). More tech details. bigger or fit-to-screen.
I worked this in Skylum Luminar Neo, adding saturation and vignetting to bring the flaming trees forward and push back the background. Neo was also superb for painting-out various distractions.
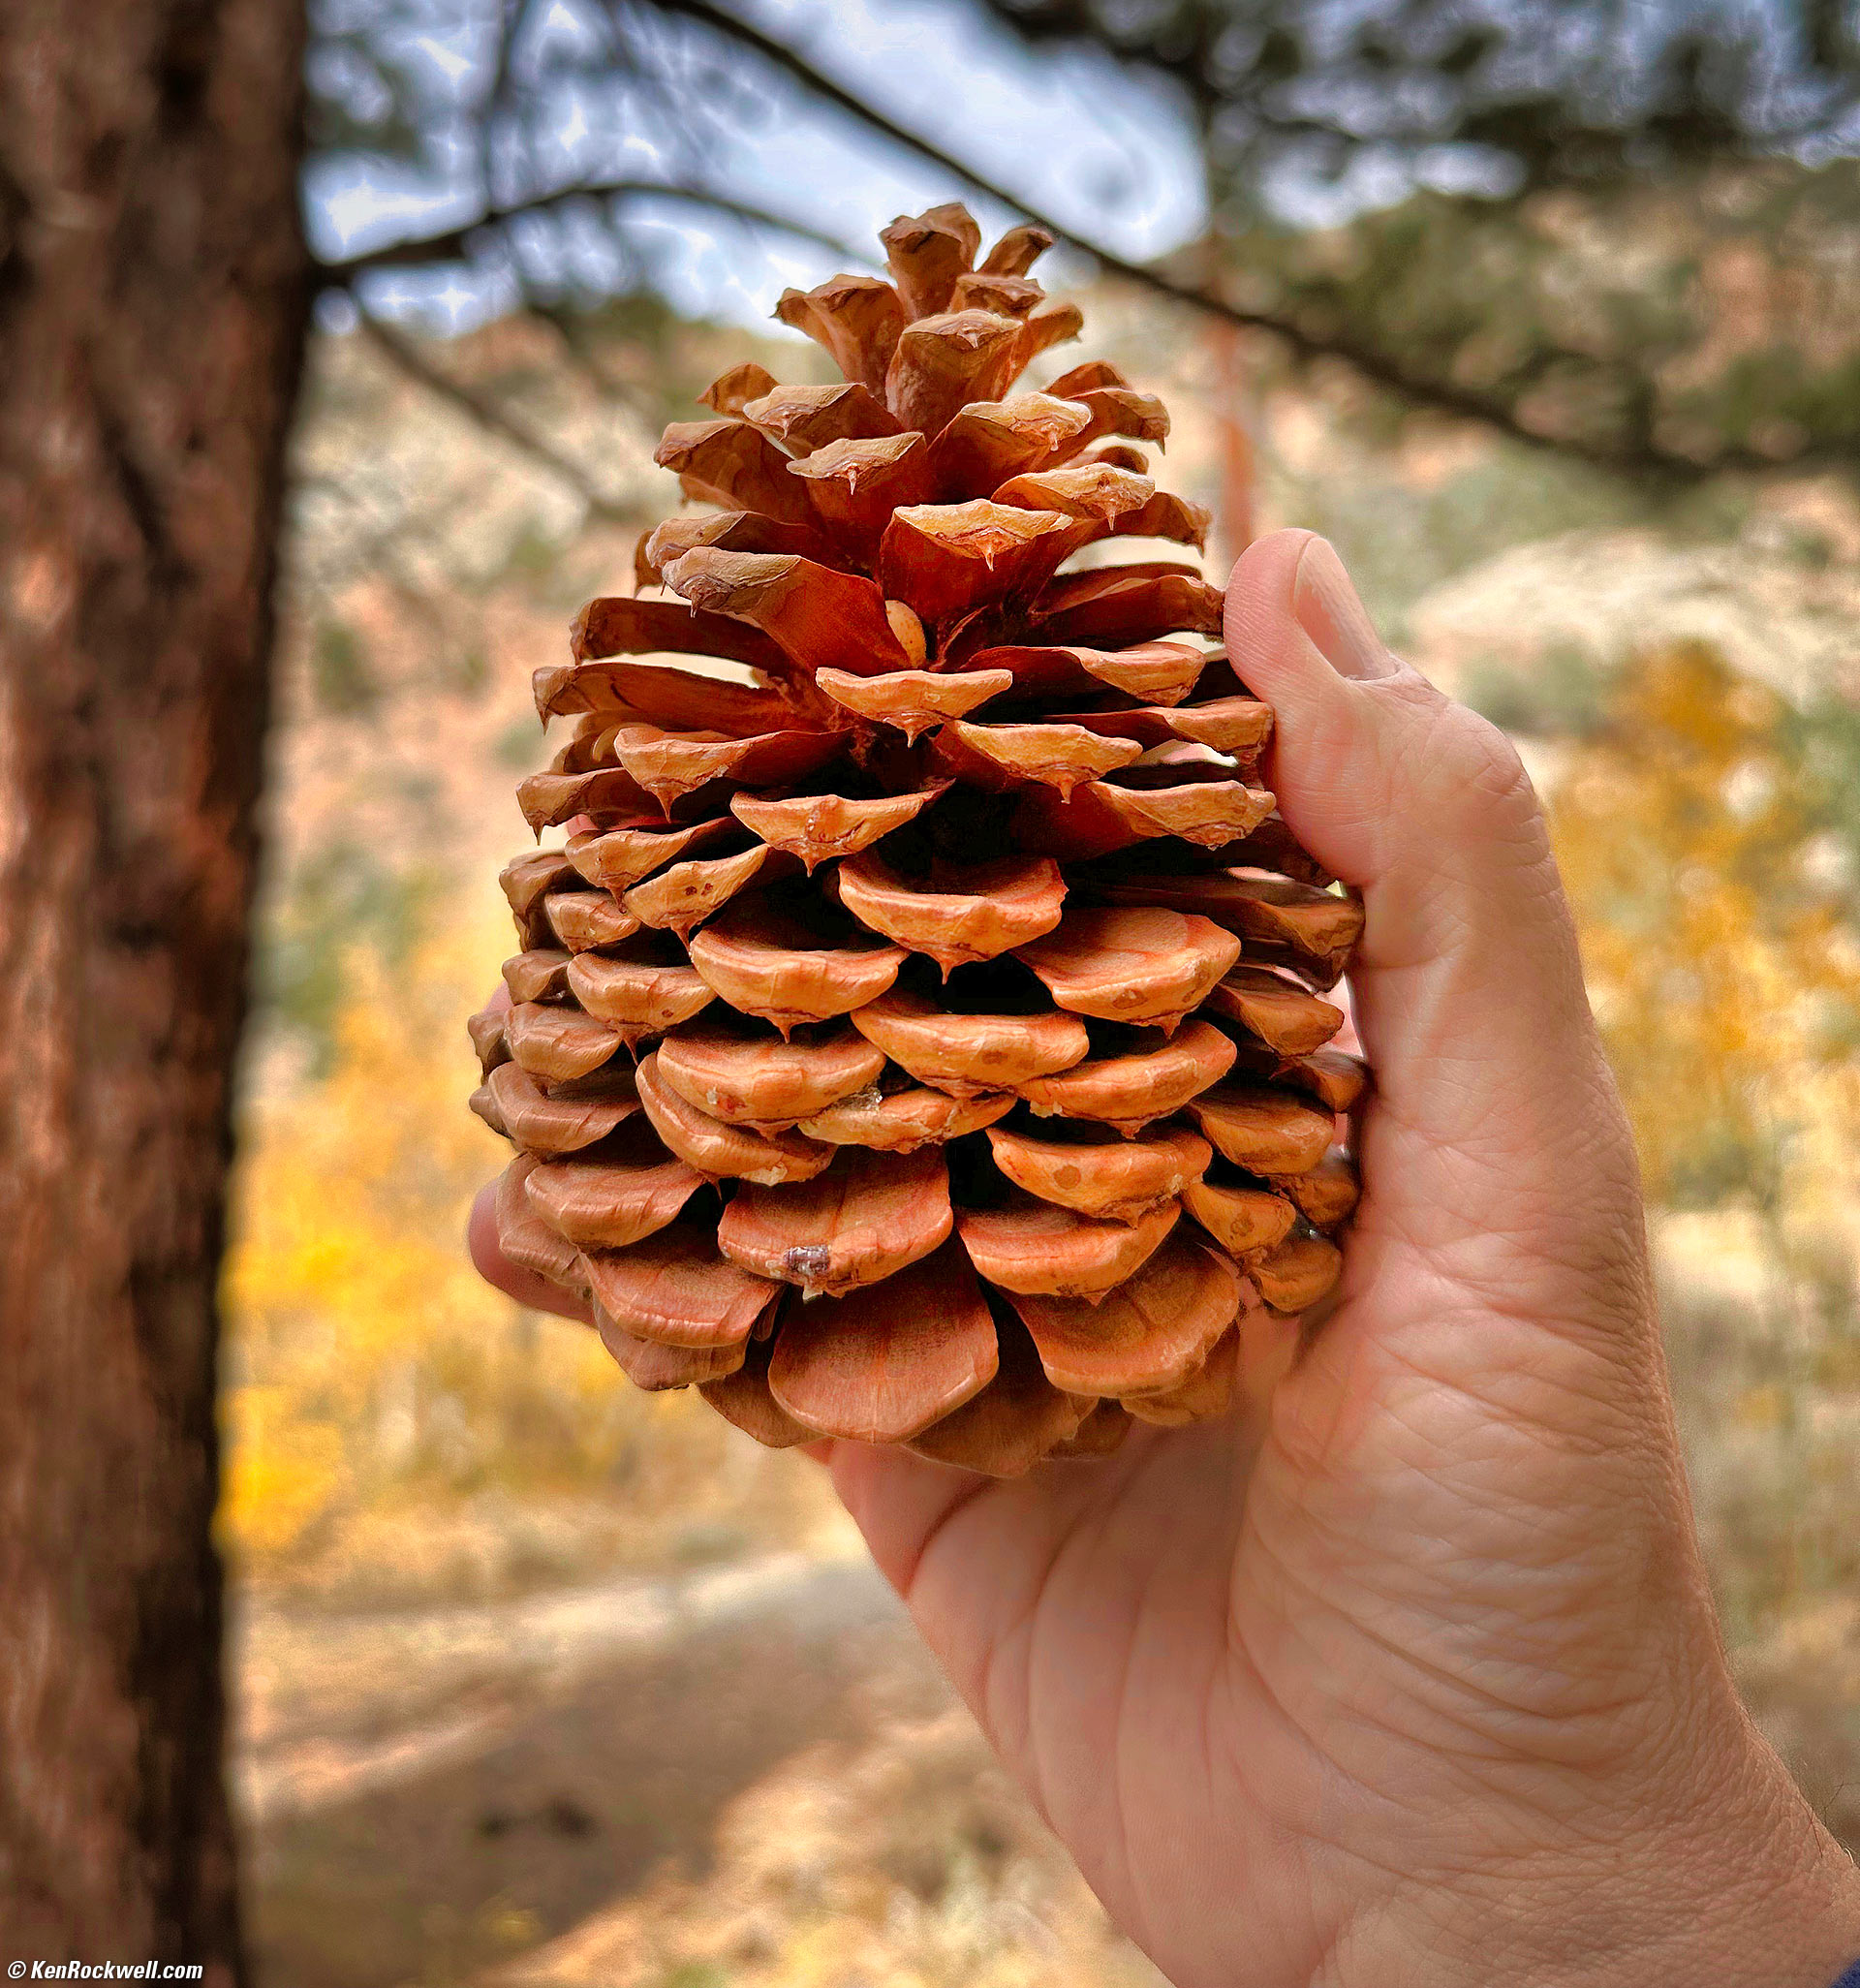
Pine Cone 4Doe, Poole Power Plant Road, Mammoth Lakes, California, 12:24 P.M. Apple iPhone 14 Pro Max 1× (6.9mm actual or 24mm eq.) camera, f/1.8 at 1/1,495 at Auto ISO 80 (LV 12½). More tech details. bigger or fit-to-screen.
I used Neo with vignetting and masking to lighten the pine cone, which was almost black in shadow.
With its larger 48 MP sensor the iPhone 14 Pro Max now also has a longer lens to retain the same 24mm equivalent angle of view. For the first time I often notice background optical defocus effects in regular shooting, as you can see here and at the dog closeup photos above and below. This defocus (bokeh) is what's coming from the lens; it's not an electronic portrait mode.
We headed back to Lee Vining:
Mono Market, Lee Vining, California, 1:09 P.M. Canon EOS R6, RF 15-30mm IS STM at 15mm, f/9 at 1/60 at Auto ISO 100 (LV 12.4). bigger or fit-to-screen.
All I edited in this was to change the saturation and use a curves adjustment layer in Photoshop CS6 (2012). I also used Skylum Luminar Neo's Erase tool to remove a car parked at the curb!
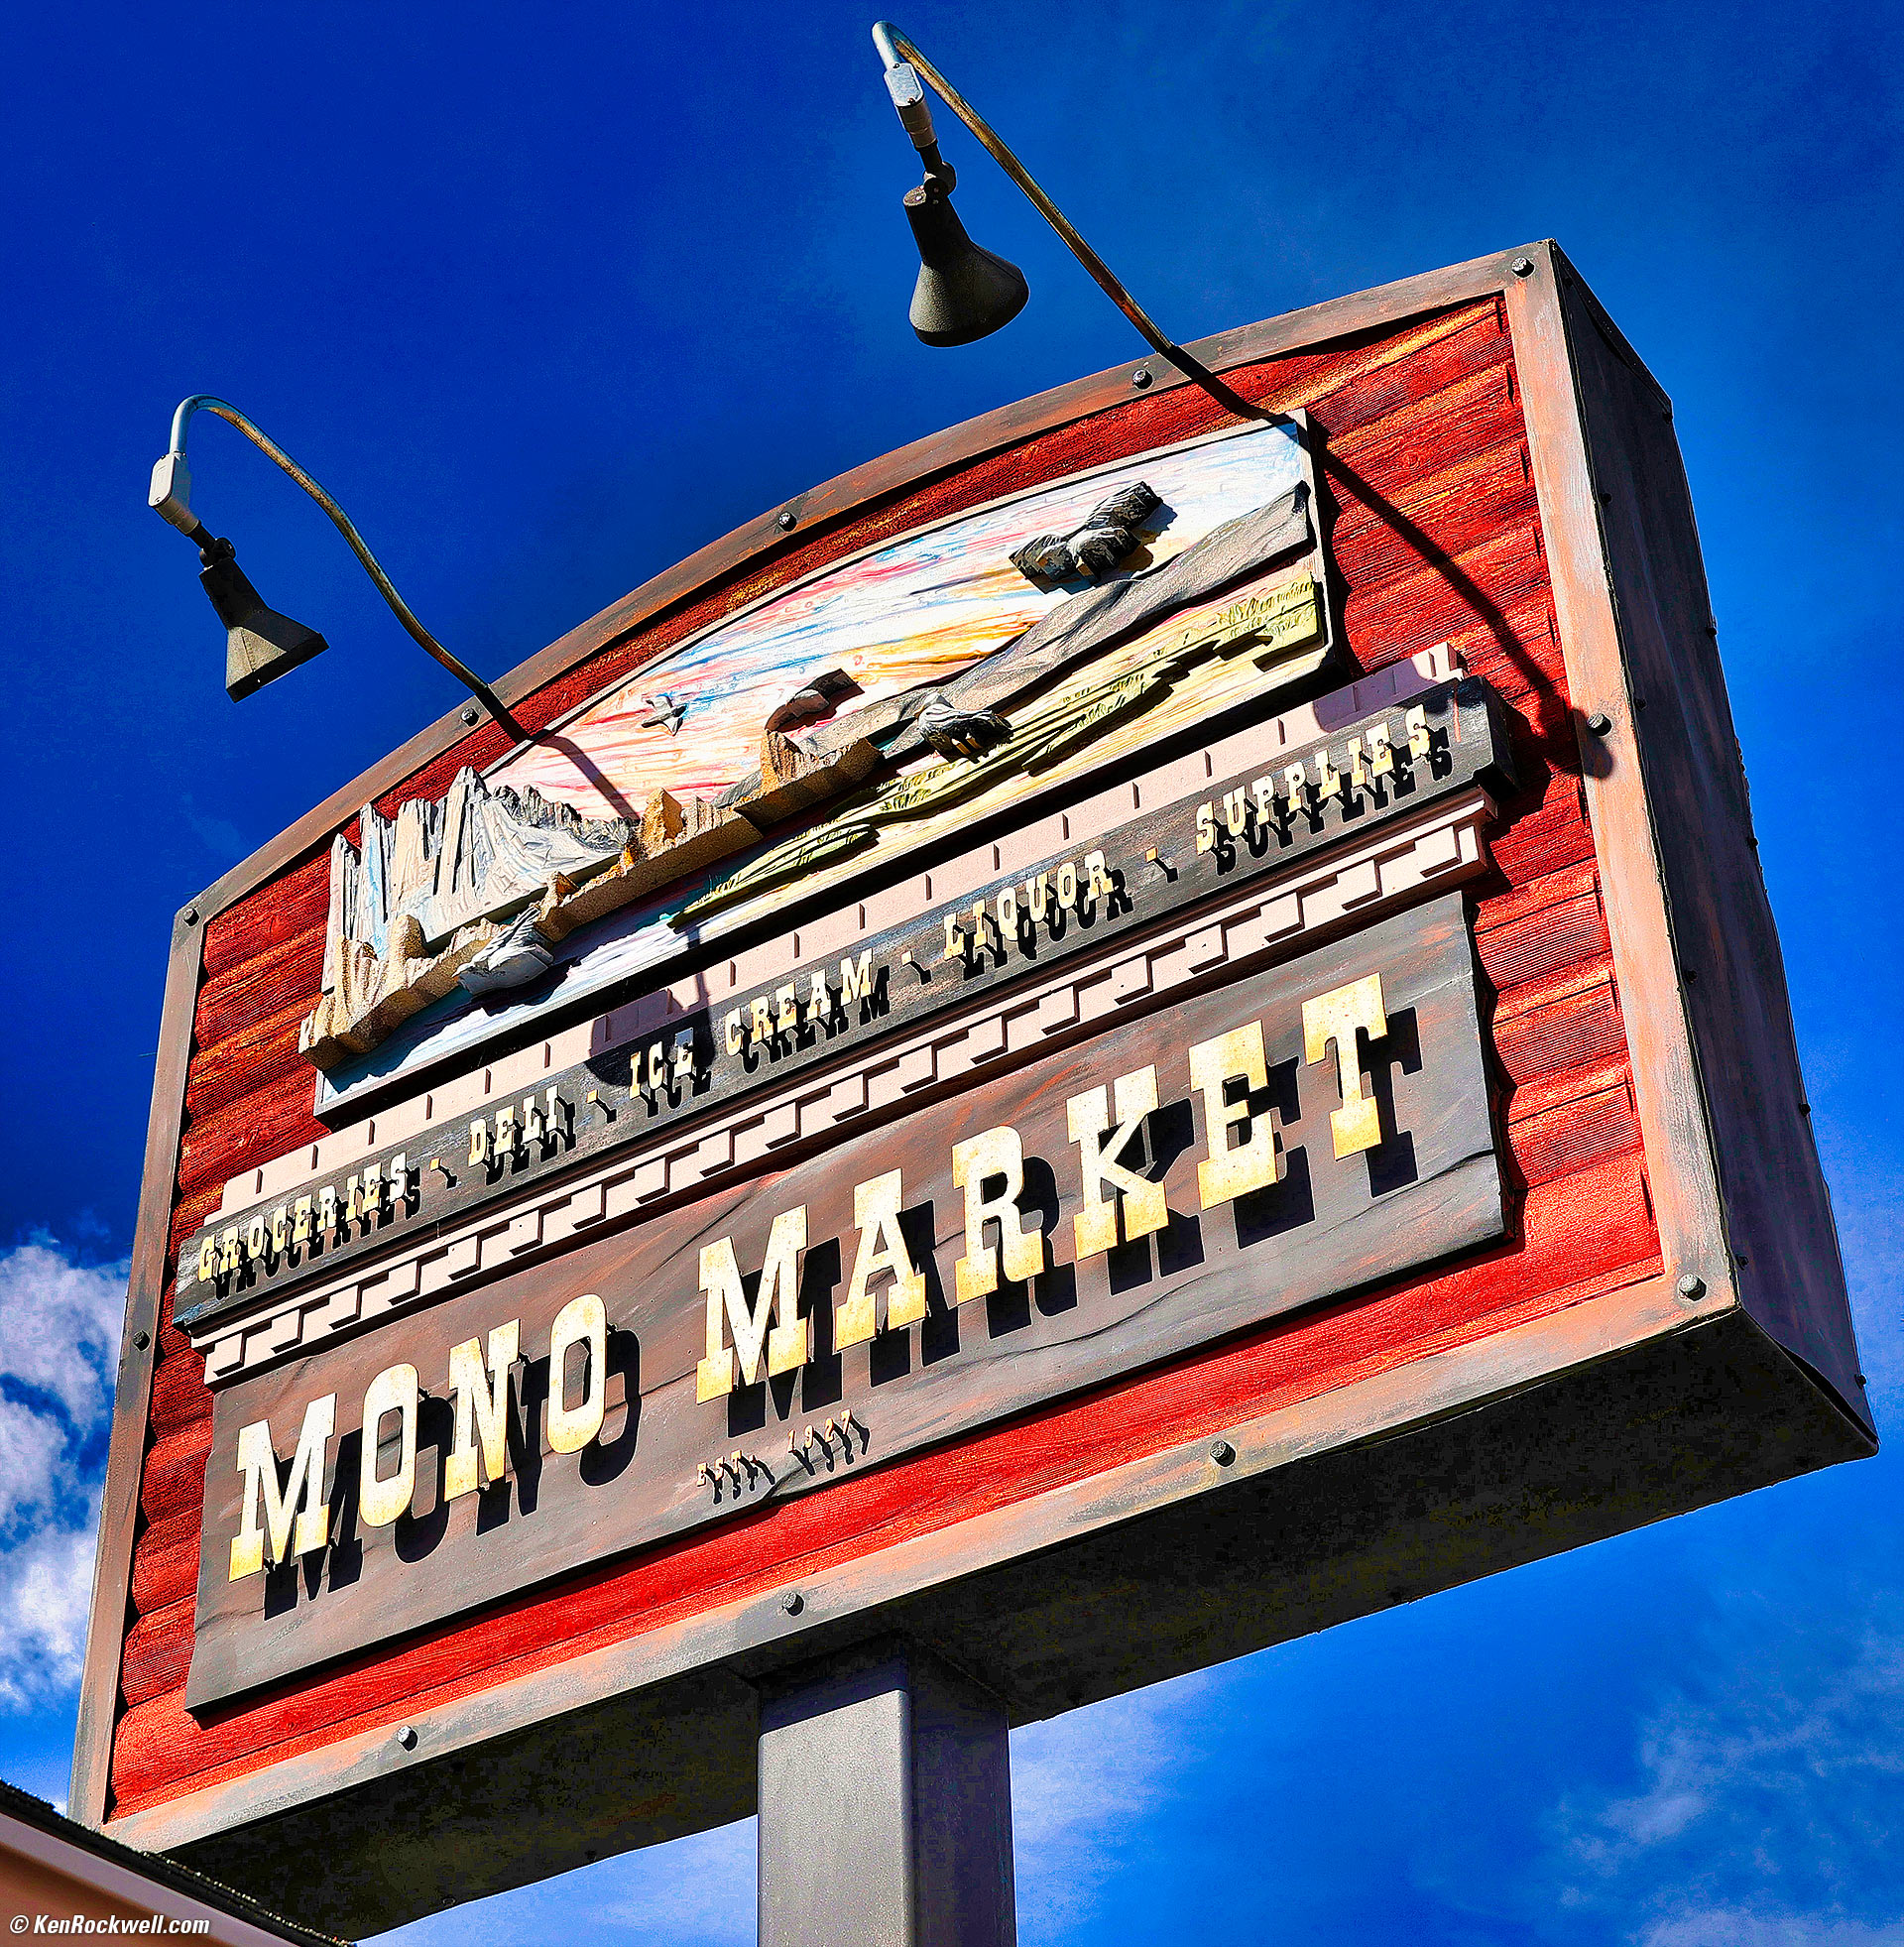
Mono Market, Lee Vining California, 1:21 P.M. Canon EOS R6 in square-crop mode, RF 24-240mm IS USM at 42mm (about equivalent to the normal ZEISS 80mm f/2.8 PLANAR lens on HASSELBLAD 6×6), f/11 at 1/200 at Auto ISO 100, -2/3 stops exposure compensation (LV 14.6). More tech details. bigger or fit-to-screen.
I used Skylum Luminar Neo to remove wires and power poles from the background, to amp-up the colors and add vignetting.
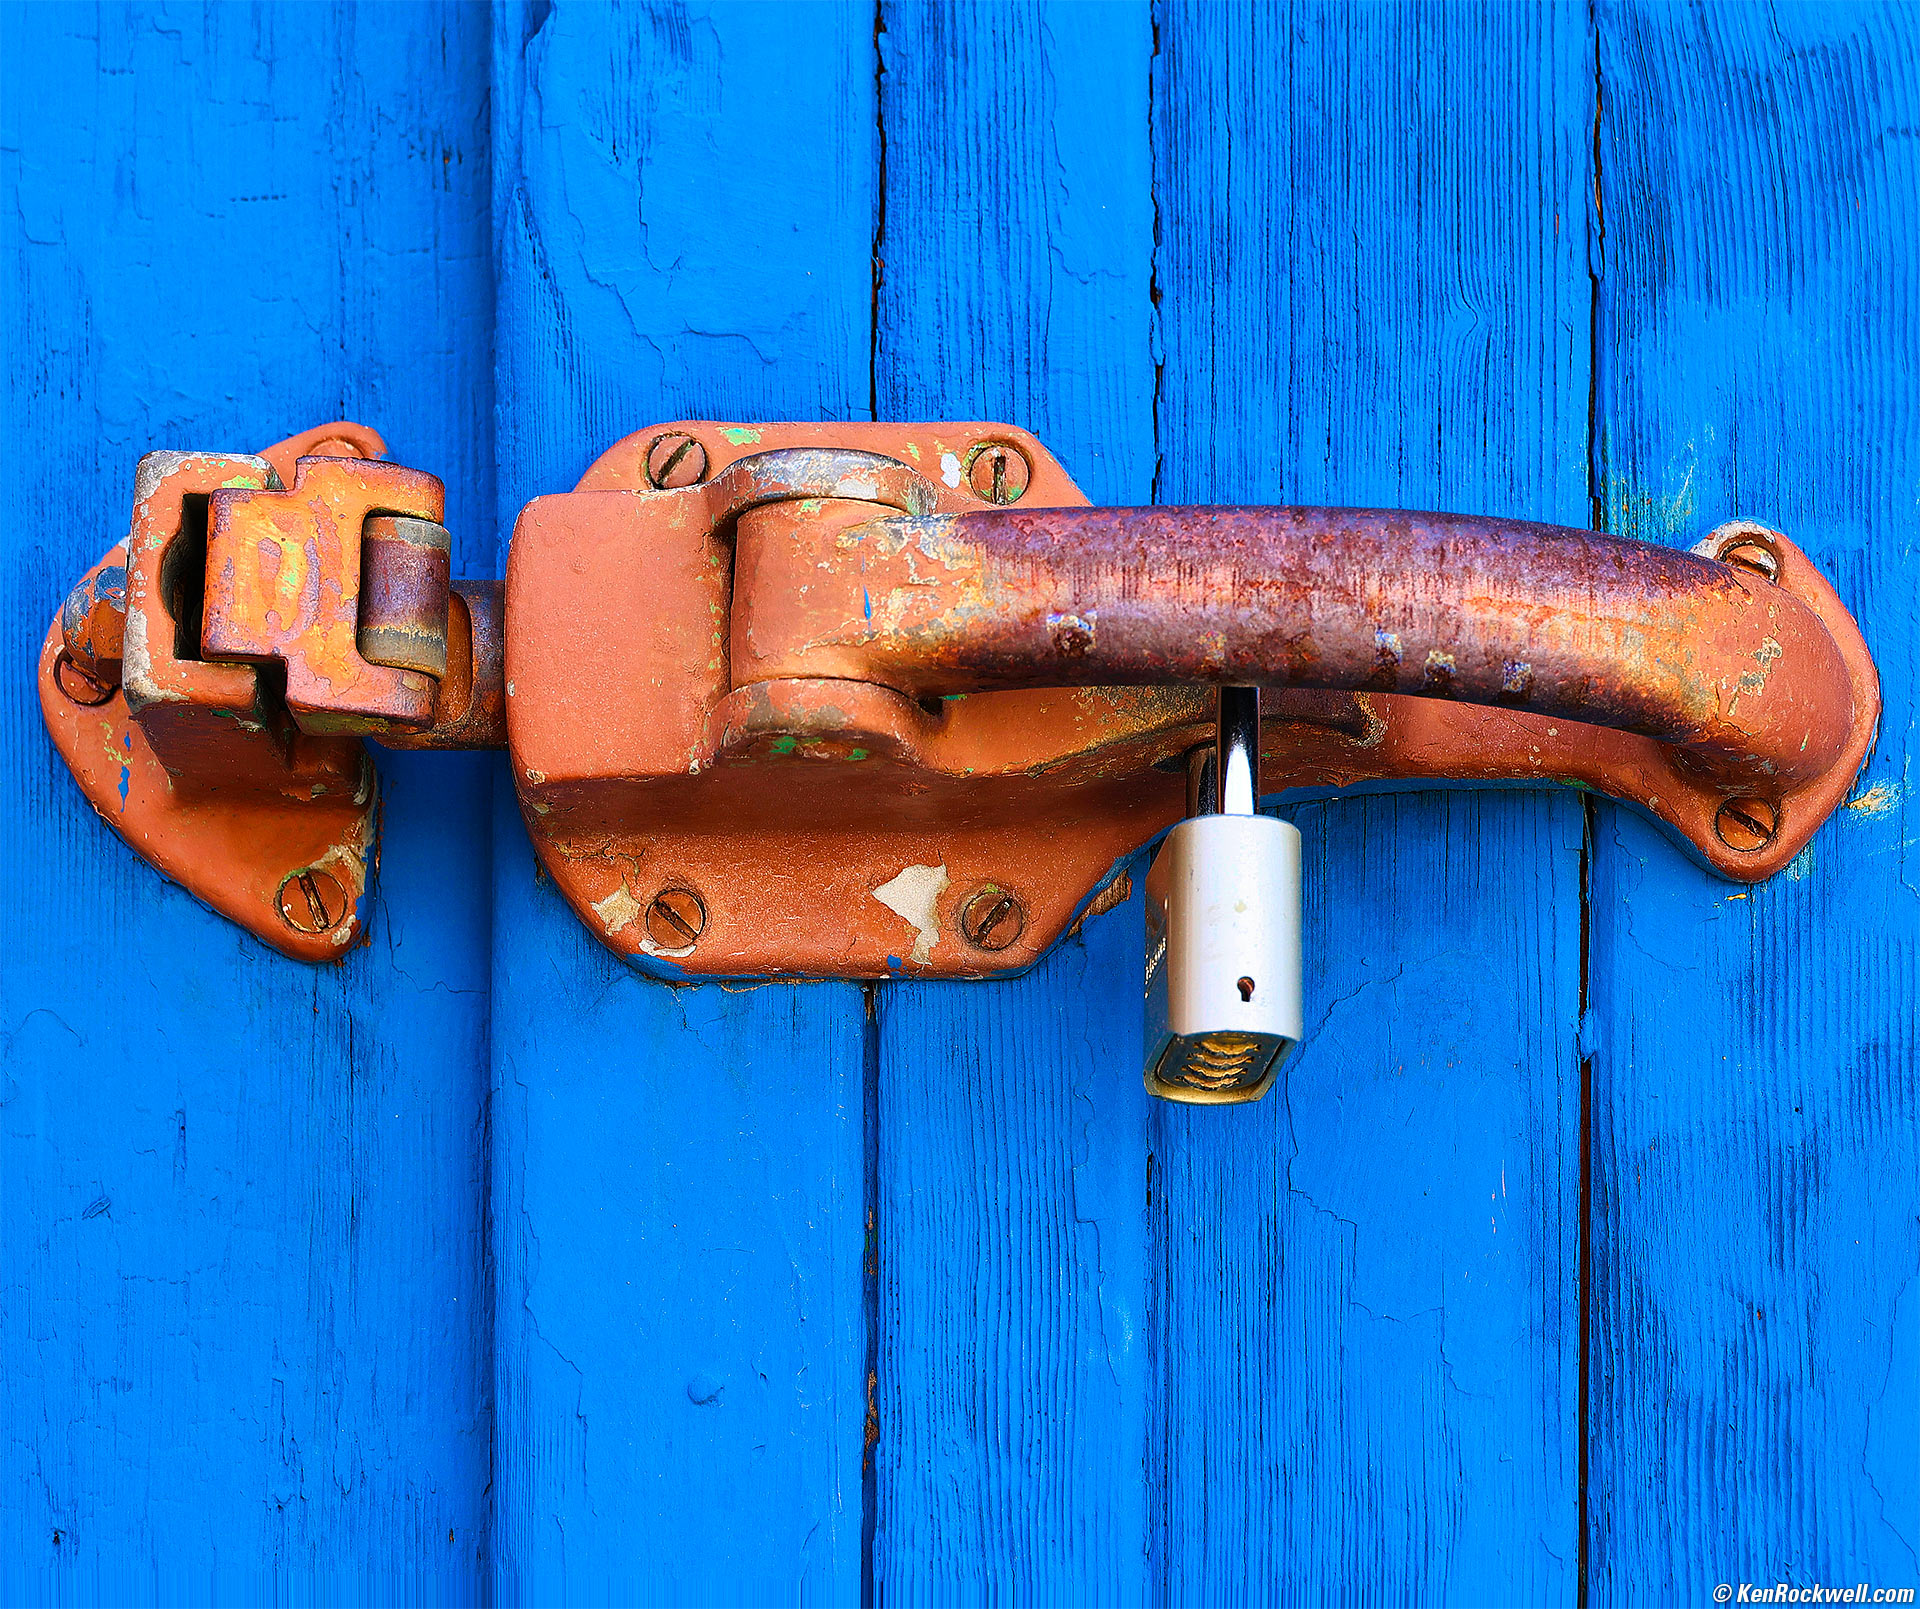
Orange Handle on Blue Door, Lee Vining, California, 1:24 P.M. Canon EOS R6, RF 24-240mm IS USM at 100mm, f/8 at 1/40 at Auto ISO 100, -1/3 stop exposure compensation (LV 13.4). More tech details. bigger or fit-to-screen.
Part of the handle isn't that sharp because depth-of-field goes away at distances this close. If I was paying more attention as we walked around looking for lunch I'd have shot at f/16 at 1/10 instead, but tough.
I used Skylum Luminar Neo to purify the colors.
After relaxing in Lee Vining for a little bit we trekked off to Bodie:
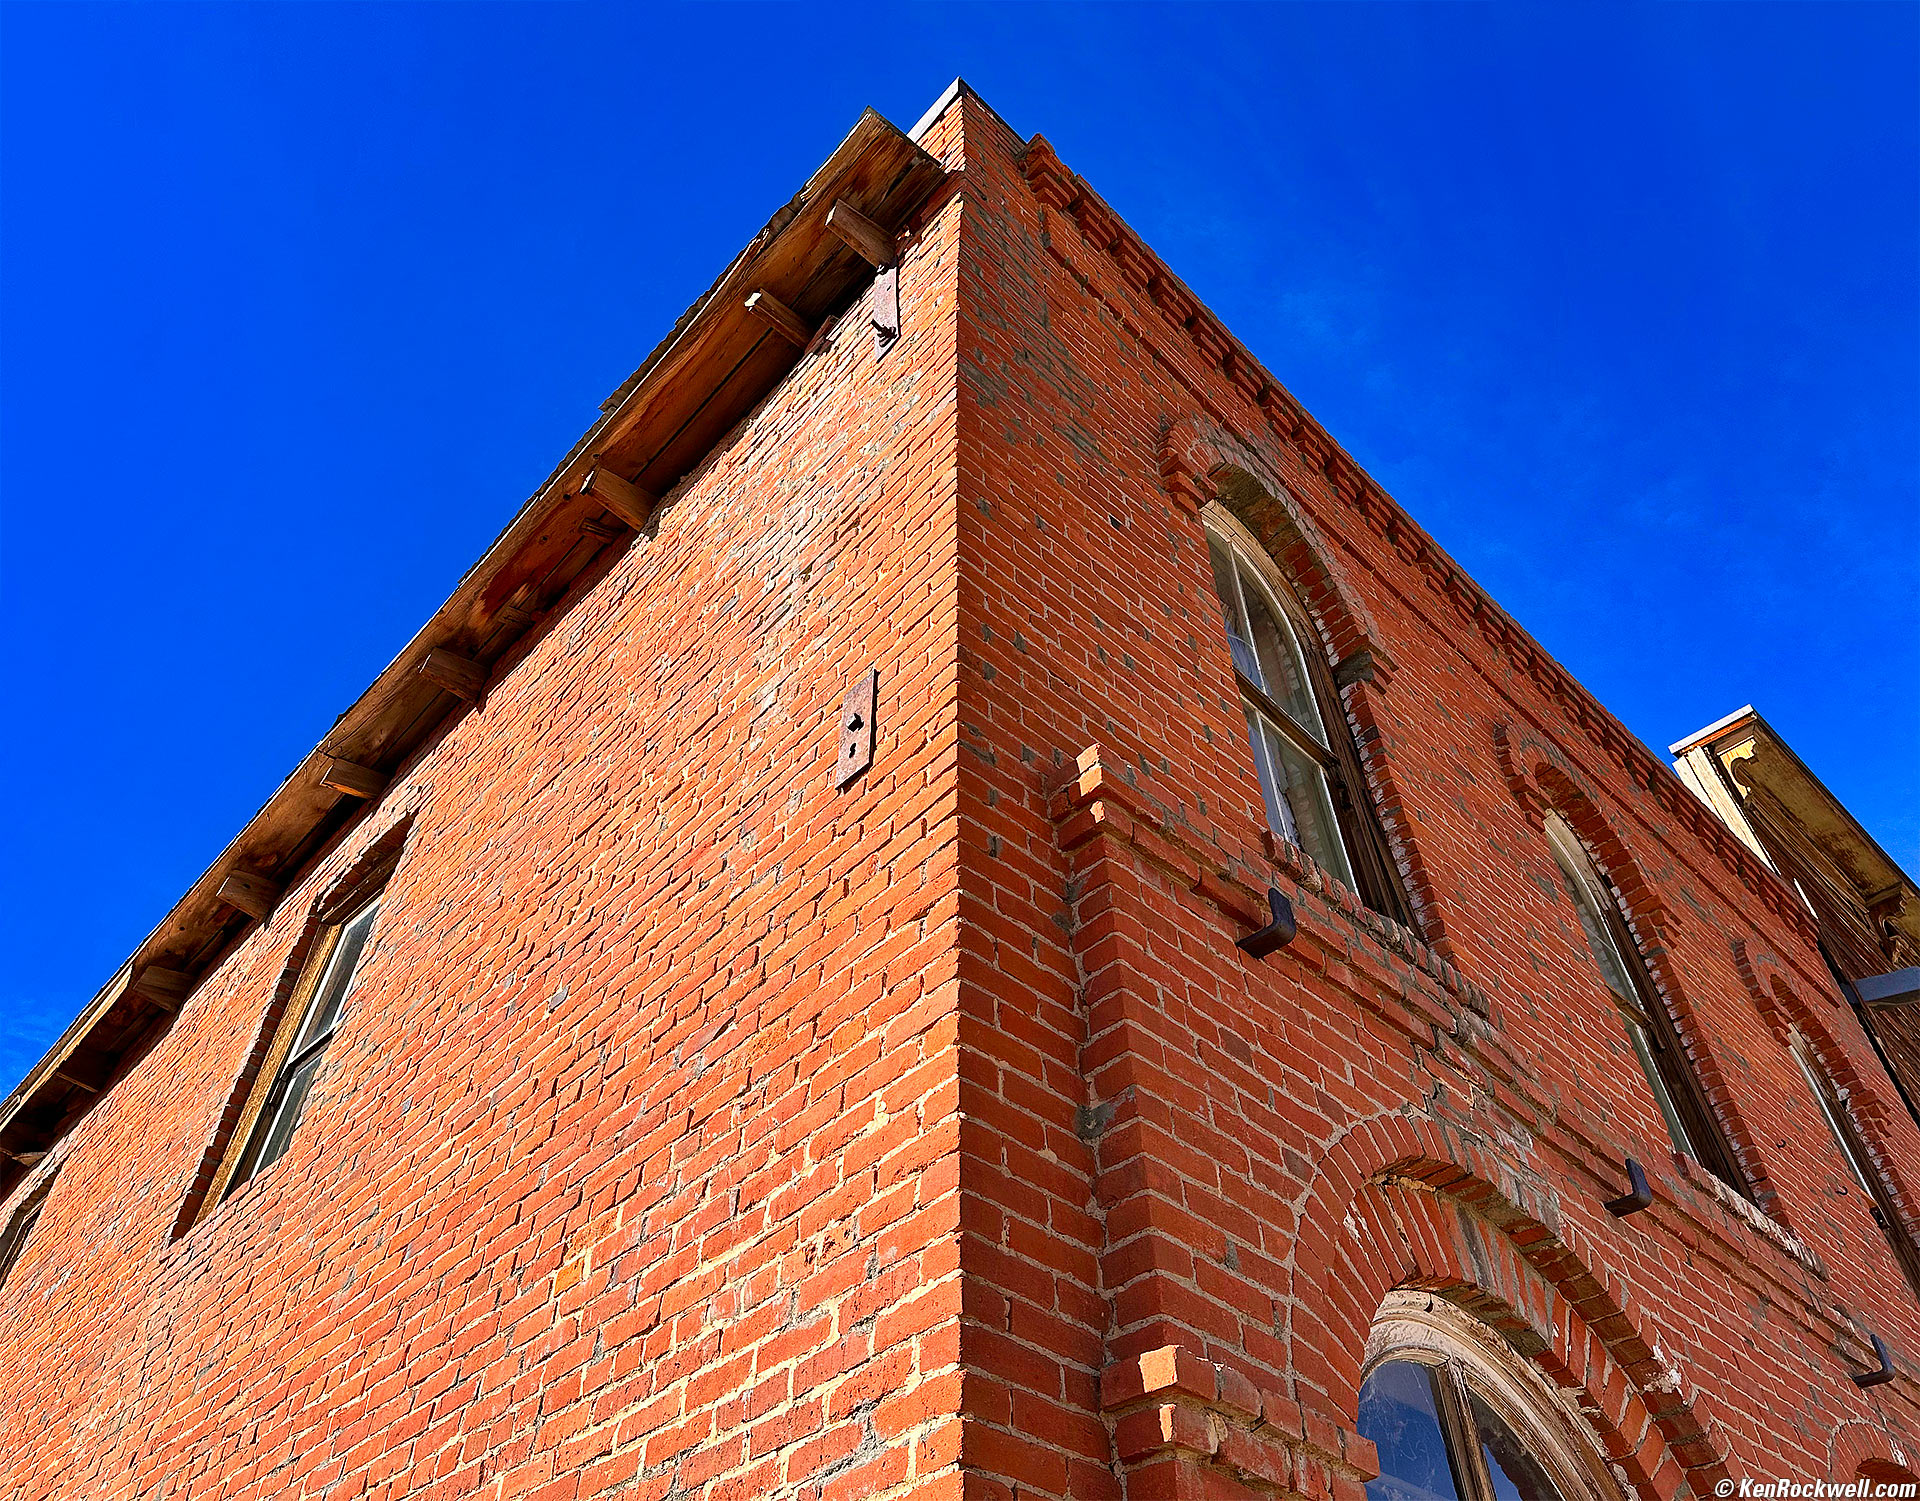
Brick Building, Bodie, California, 3:24 P.M. Apple iPhone 14 Pro Max 1× (6.9mm actual or 24mm eq.) camera, f/1.8 at 1/3,247 at Auto ISO 80 (LV 13⅔). More tech details. bigger or fit-to-screen.
I purified the colors and amplified the shadows in Skylum Luminar Neo and fixed a slightly tilted camera in Photoshop CS6 (2012).
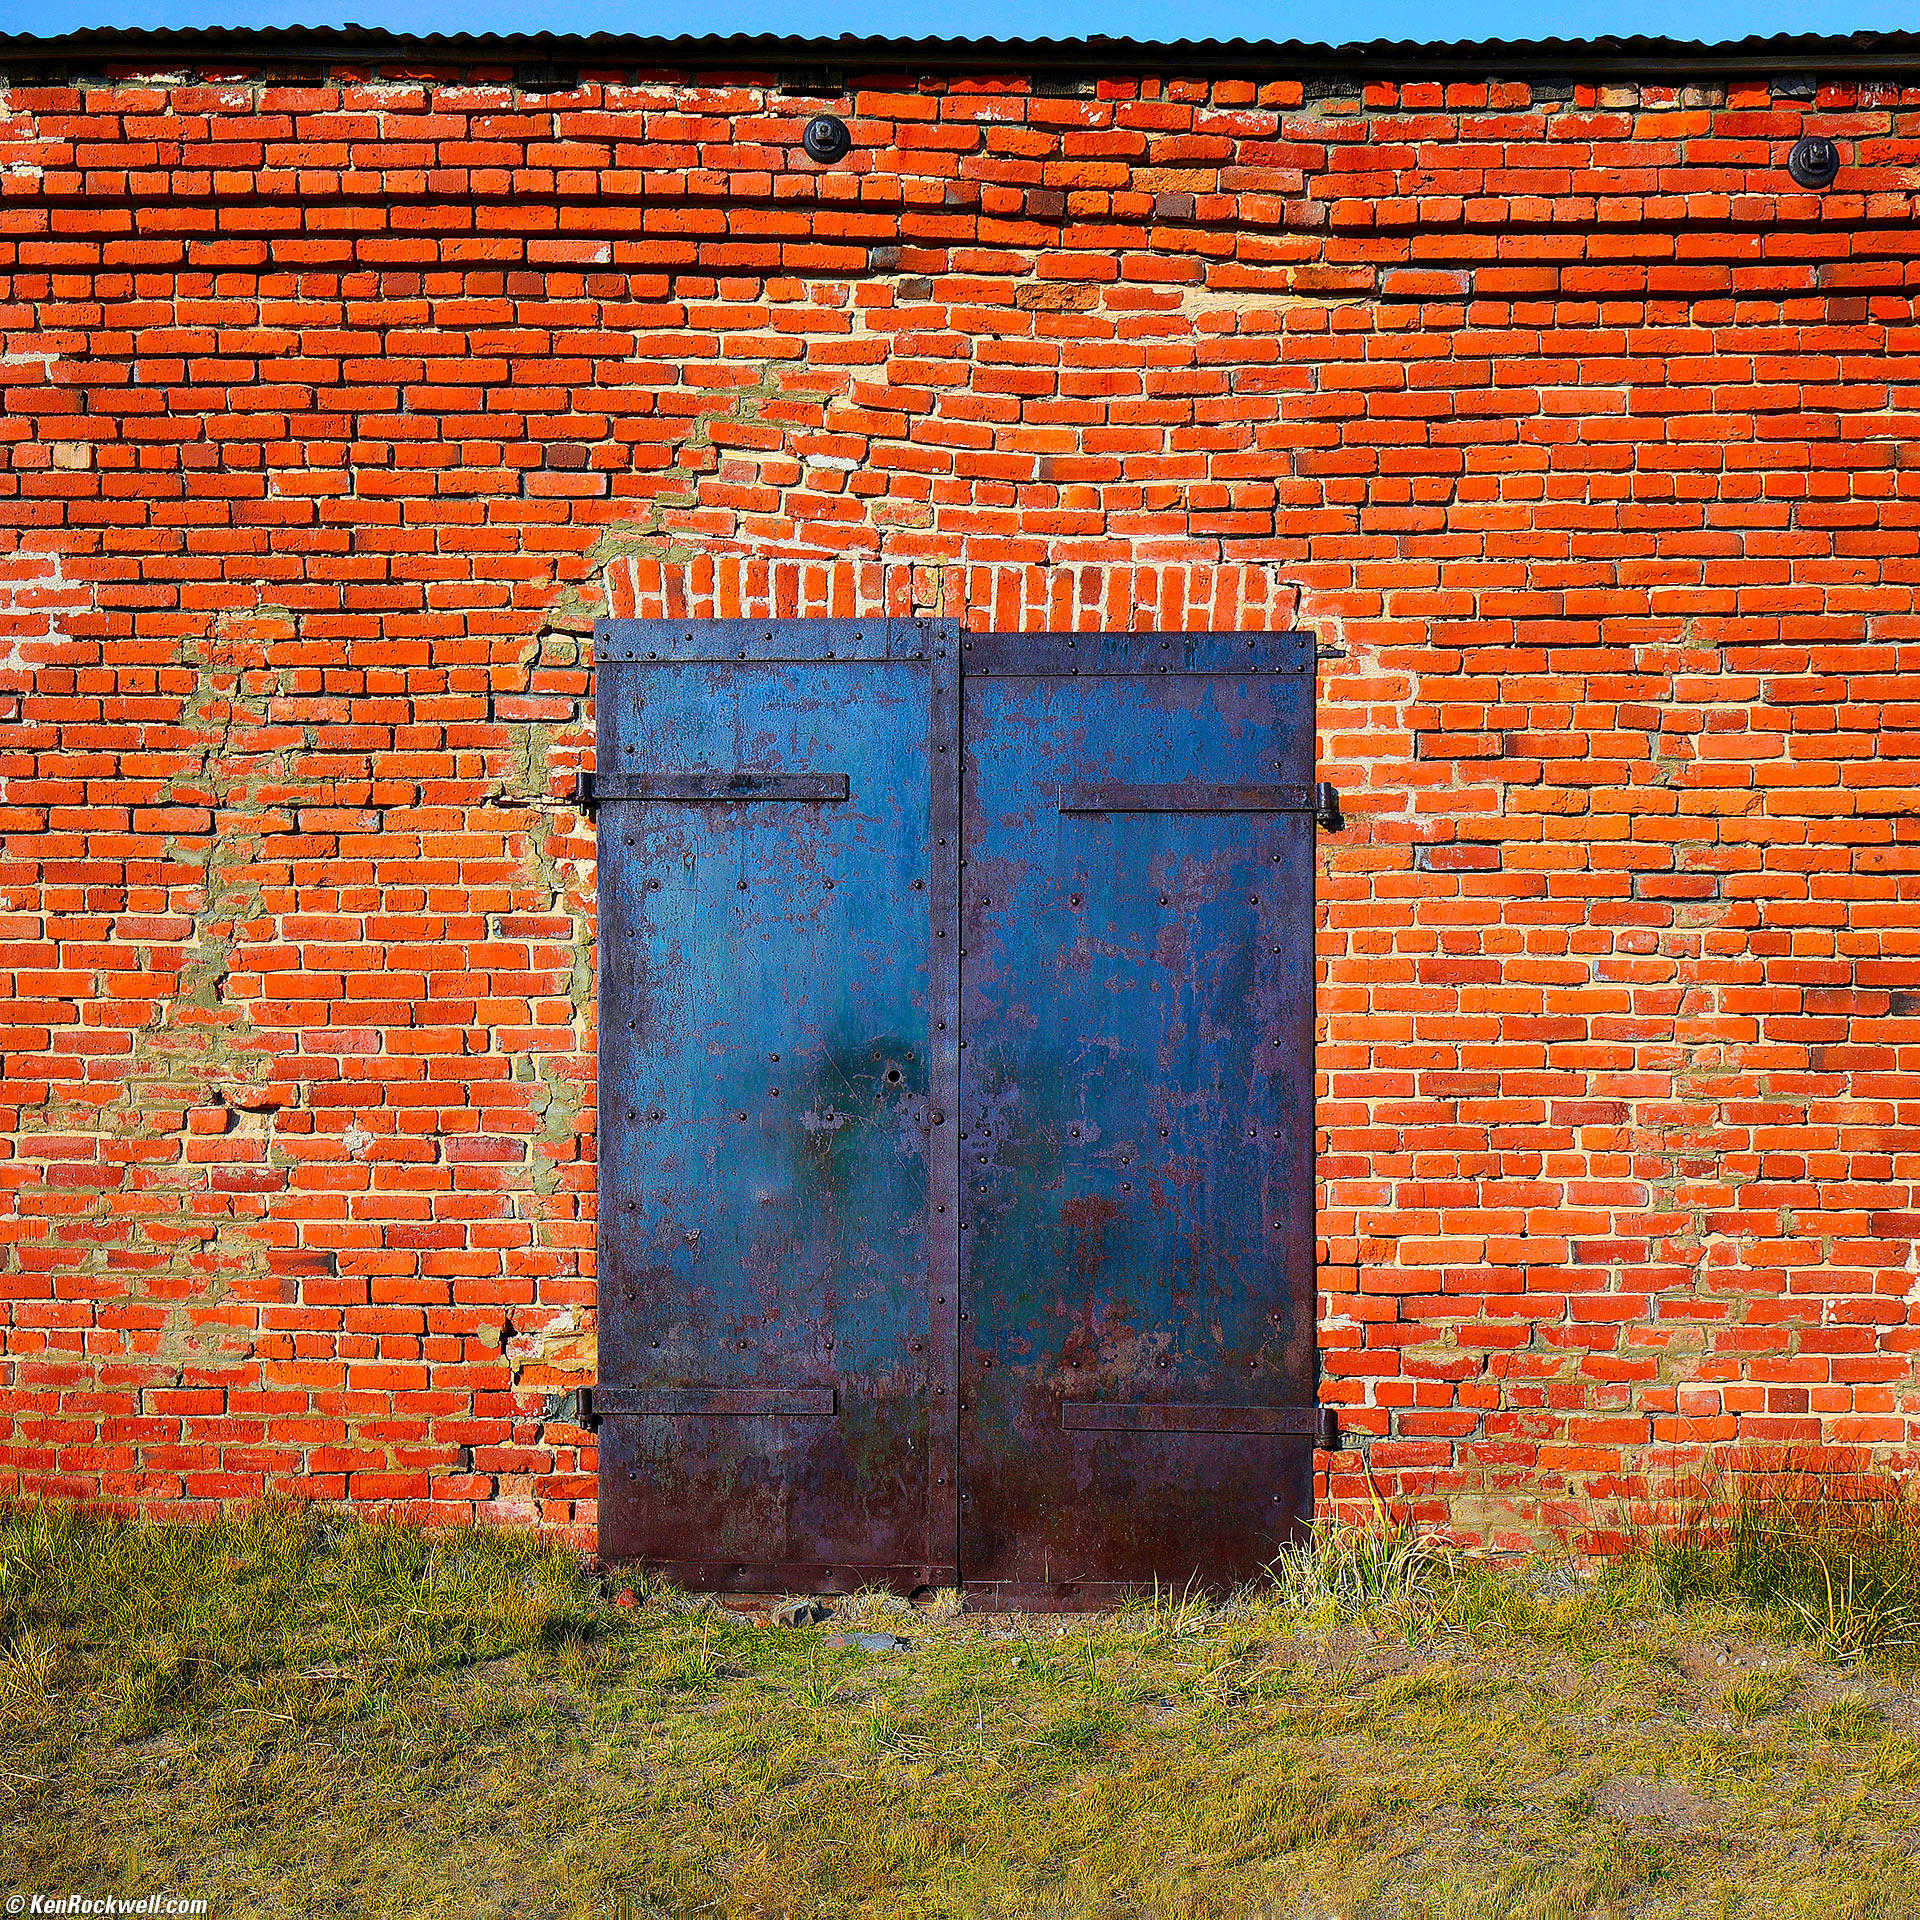
Blue Door on Red Brick Wall, Bodie, California, 4:20 P.M. Canon EOS R6, RF 15-30mm IS STM at 30mm, f/9 at 1/125 at Auto ISO 100, -2/3 stops exposure compensation (LV 13.4). More tech details. bigger or fit-to-screen.
I used Perfectly Clear to brighten the image, and then Skylum Luminar Neo to crank it up.
I cropped it later to a square, the equivalent of a normal ZEISS 80mm f/2.8 PLANAR lens on HASSELBLAD 6×6.
Coming back from Bodie I spied these little guys hanging out by their trailer:
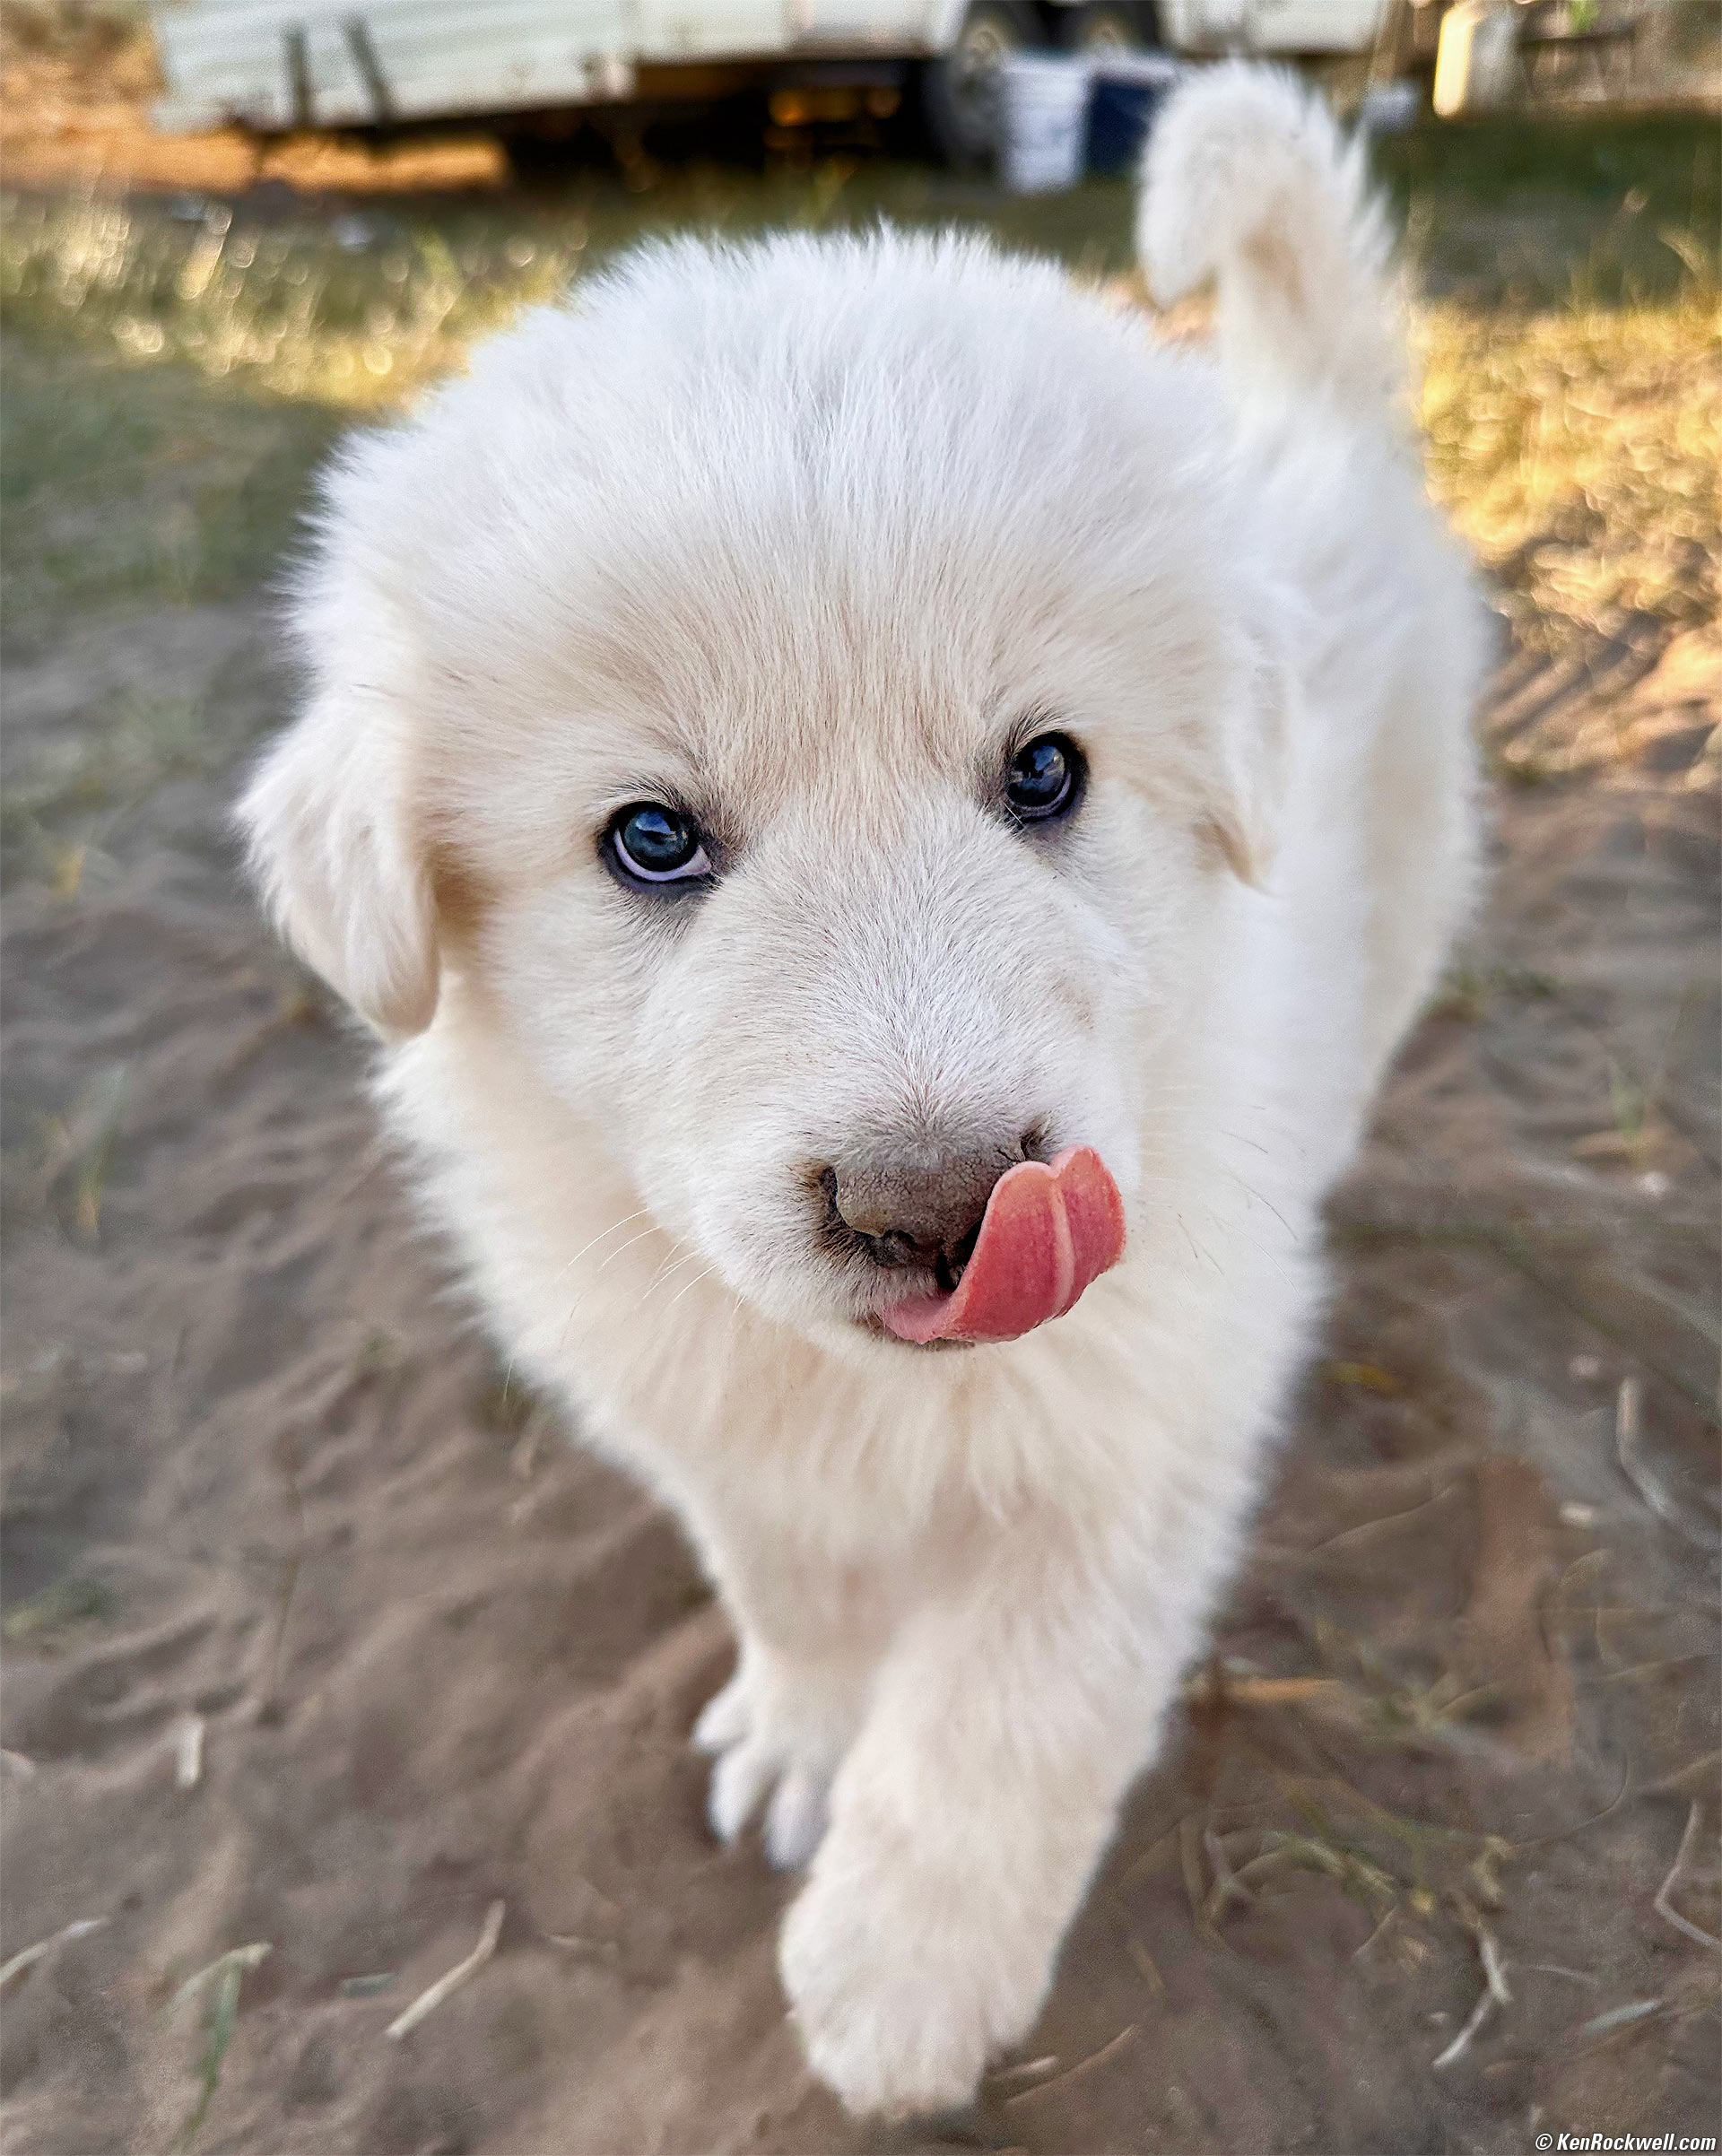
Very Cute Great Pyrenees Puppy with Tongue, Bridgeport, California, 5:14 P.M. Apple iPhone 14 Pro Max 1× (6.9mm actual or 24mm eq.) camera, f/1.8 at 1/810 at Auto ISO 80 (LV 11⅔). More tech details. bigger or fit-to-screen.
I used Perfectly Clear to clarify, and then lots of burning and dodging with adjustment layer masks in Photoshop CS6 (2012) to bring out the pup from the background.
These puppies were the highlight of both our trips this year. We were rolling back from Bodie and were passing a huge herd of sheep, watched by a grown-up Great Pyrenees. I noticed a bunch of puppies hanging around the shepherd's trailer. We stopped to play with the puppies, and they were the best puppies ever. They ran out and acted like we were their very best friends ever, jumping all over us and immediately rolling over and asking for tummy rubs.
It was insane! A slew of puppies was climbing all over us.
Again the iPhone rules for these sorts of photos, where I easily could see its huge screen and motor away at 10 FPS with the phone in one hand and petting the pups with the other. This could be my favorite photo from the week; while other shots are more colorful, this shot is the most unique compared to what I usually get up here.
Also notice how the iPhone nailed autofocus in this fast-paced peppy puppy pack pandemonium. It nailed the eyes and didn't get sidetracked with the nose or the background, like a Nikon Z would do!
The defocused background is a native optical phenomenon, not an electronic effect. The longer normal lens (6.9mm) in the 1× camera today shows definite background defocus in closeups.
Back to our motel to goof off a bit, and then walk to dinner:
Redwood Motel, Bridgeport, California, 6:34 P.M. — where everything changed in 2019. Apple iPhone 14 Pro Max 0.5× (2.2mm actual or 13mm eq.) camera, f/2.2 at 1/60 at Auto ISO 800 (LV 5.2). More tech details. bigger or fit-to-screen.
I worked this one in Skylum Luminar Neo.
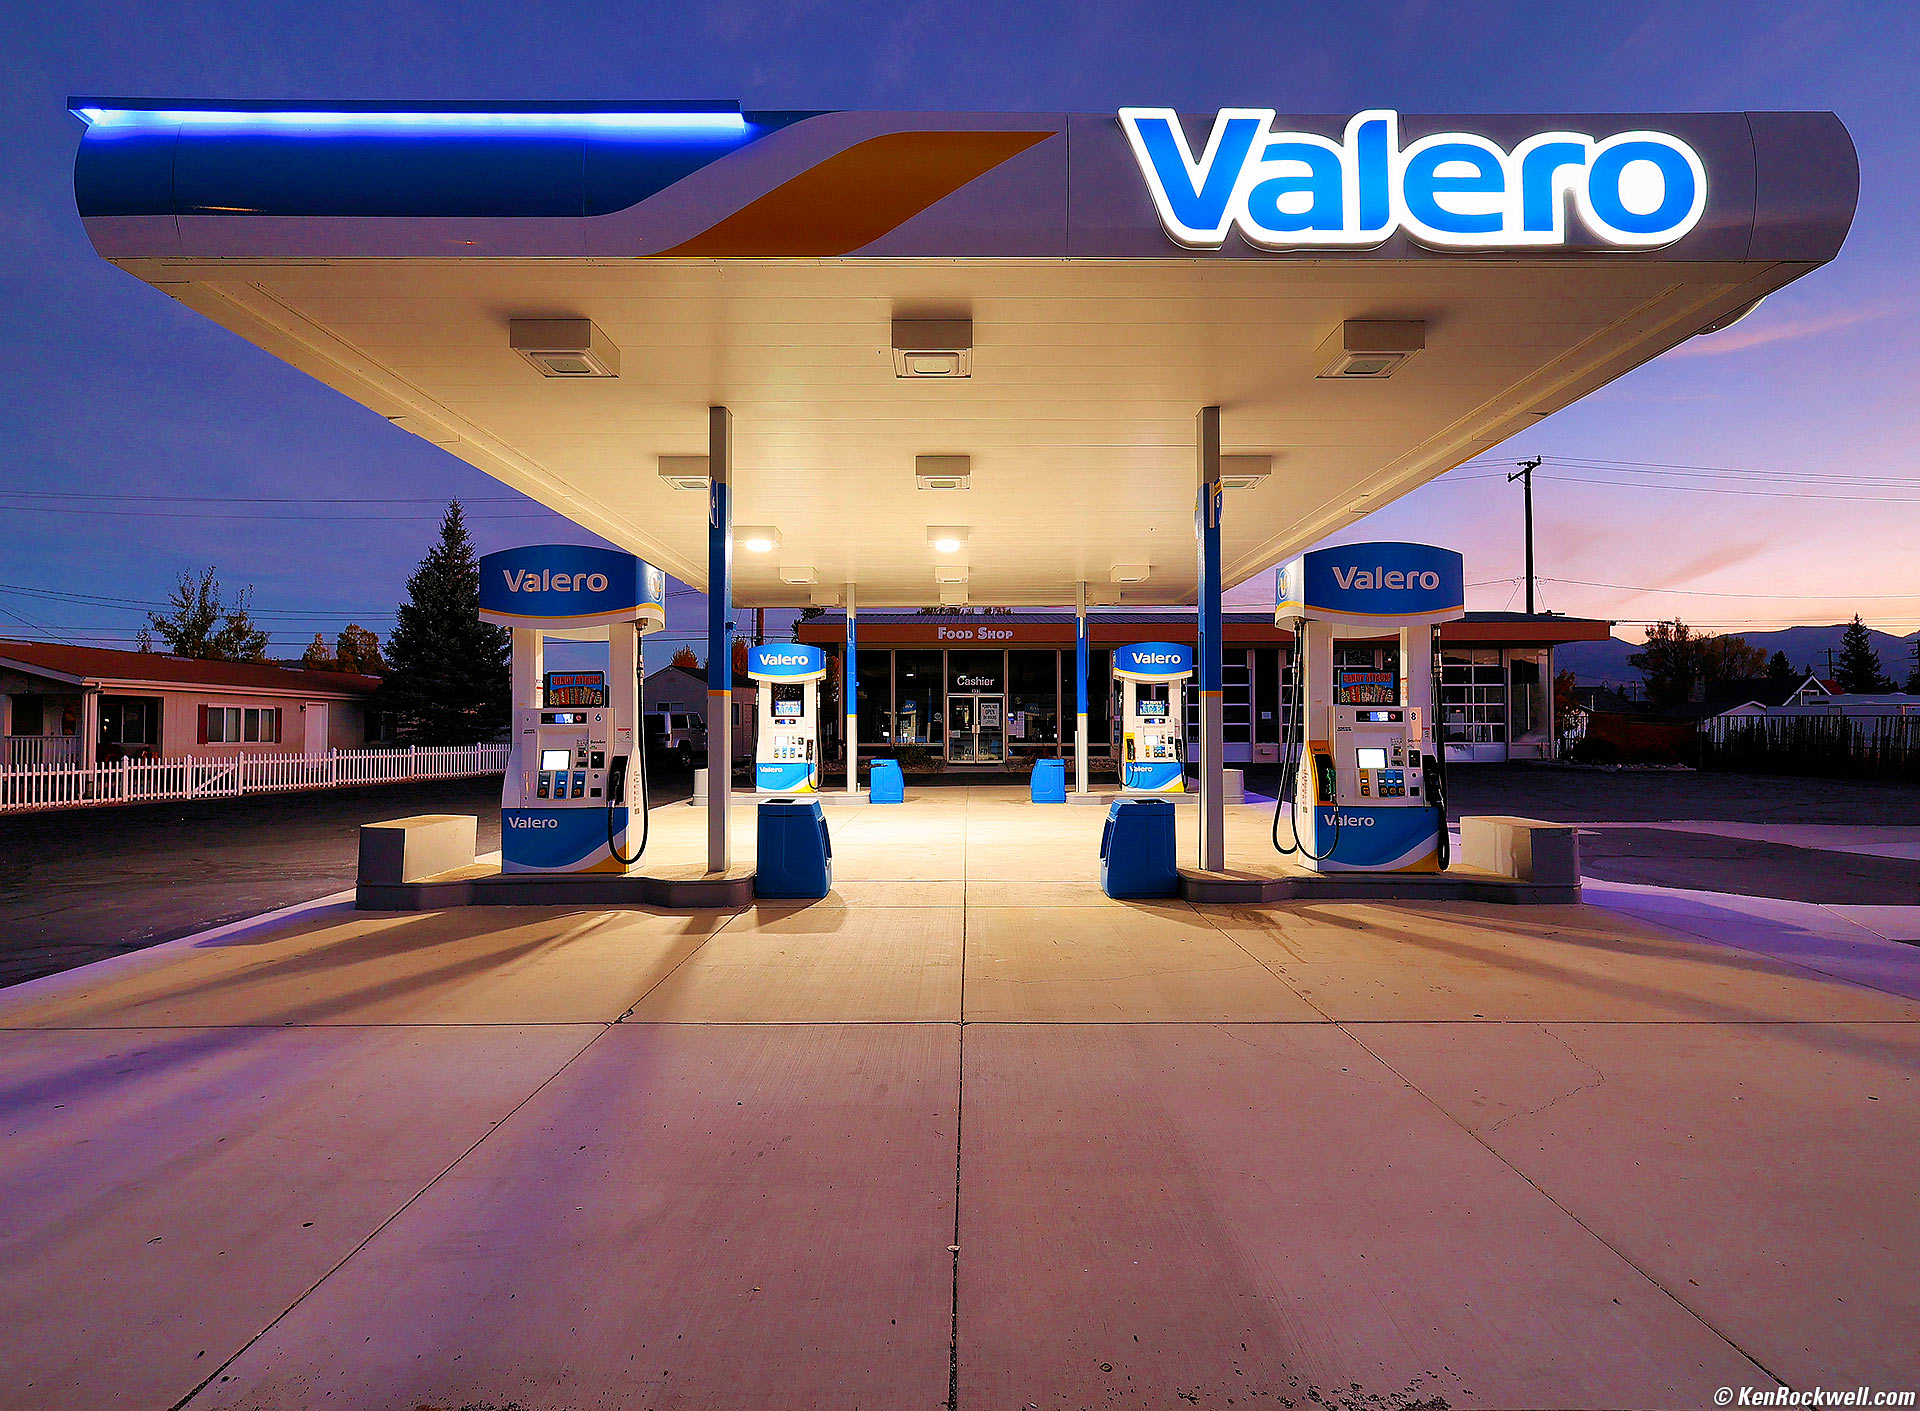
Valero Station, Bridgeport, California, 6:37 P.M. Canon EOS R6, RF 15-30mm IS STM at 15mm, wide-open at f/4.5 hand-held at 1/10 at Auto ISO 400 (LV 5¾). More tech details. bigger or fit-to-screen.
I used both the Perfectly Clear and Skylum Luminar Neo plug-ins. Neo was especially brilliant for removing the power lines, but it also removed hoses from the pumps and the expansion joints (lines) in the concrete until I ran it again and remembered to use a mask so it didn't do that! This version includes the power lines.
We kept walking down Main Street (Route 395) to dinner:
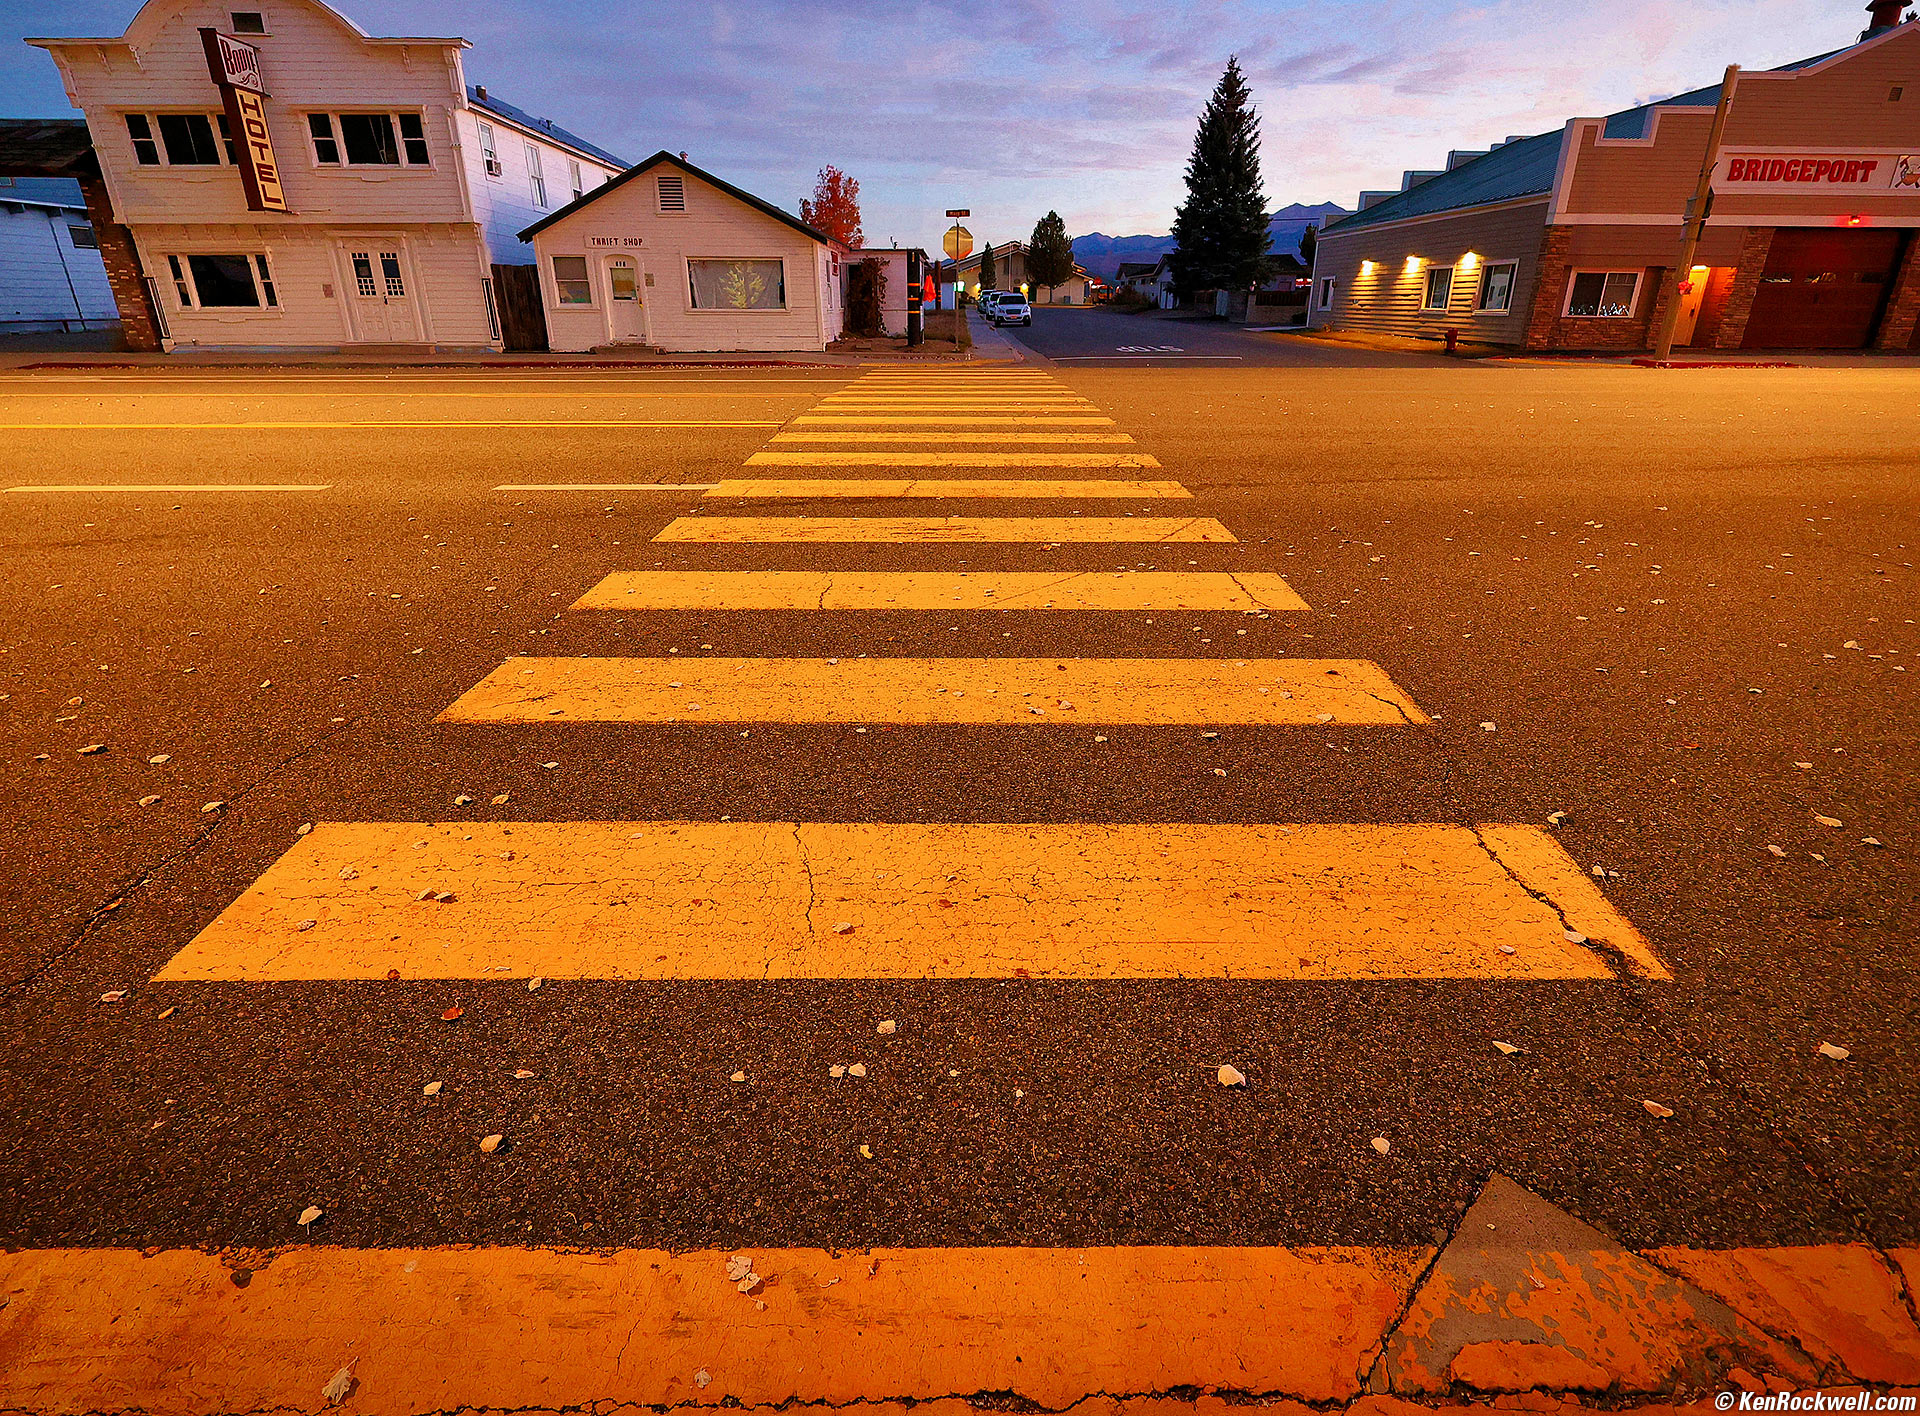
Crosswalk, Bridgeport, California, 6:40 P.M. Canon EOS R6, RF 15-30mm IS STM at 15mm, wide-open at f/4.5 hand-held at 1/10 at Auto ISO 2,500 (LV 3.1). More tech details. bigger or fit-to-screen.
Perfectly Clear clarified and brought up the shadows, while I used Skylum Luminar Neo to vignette and amp-up the colors. Neo was brilliant for removing all the power lines, poles and other distractions.
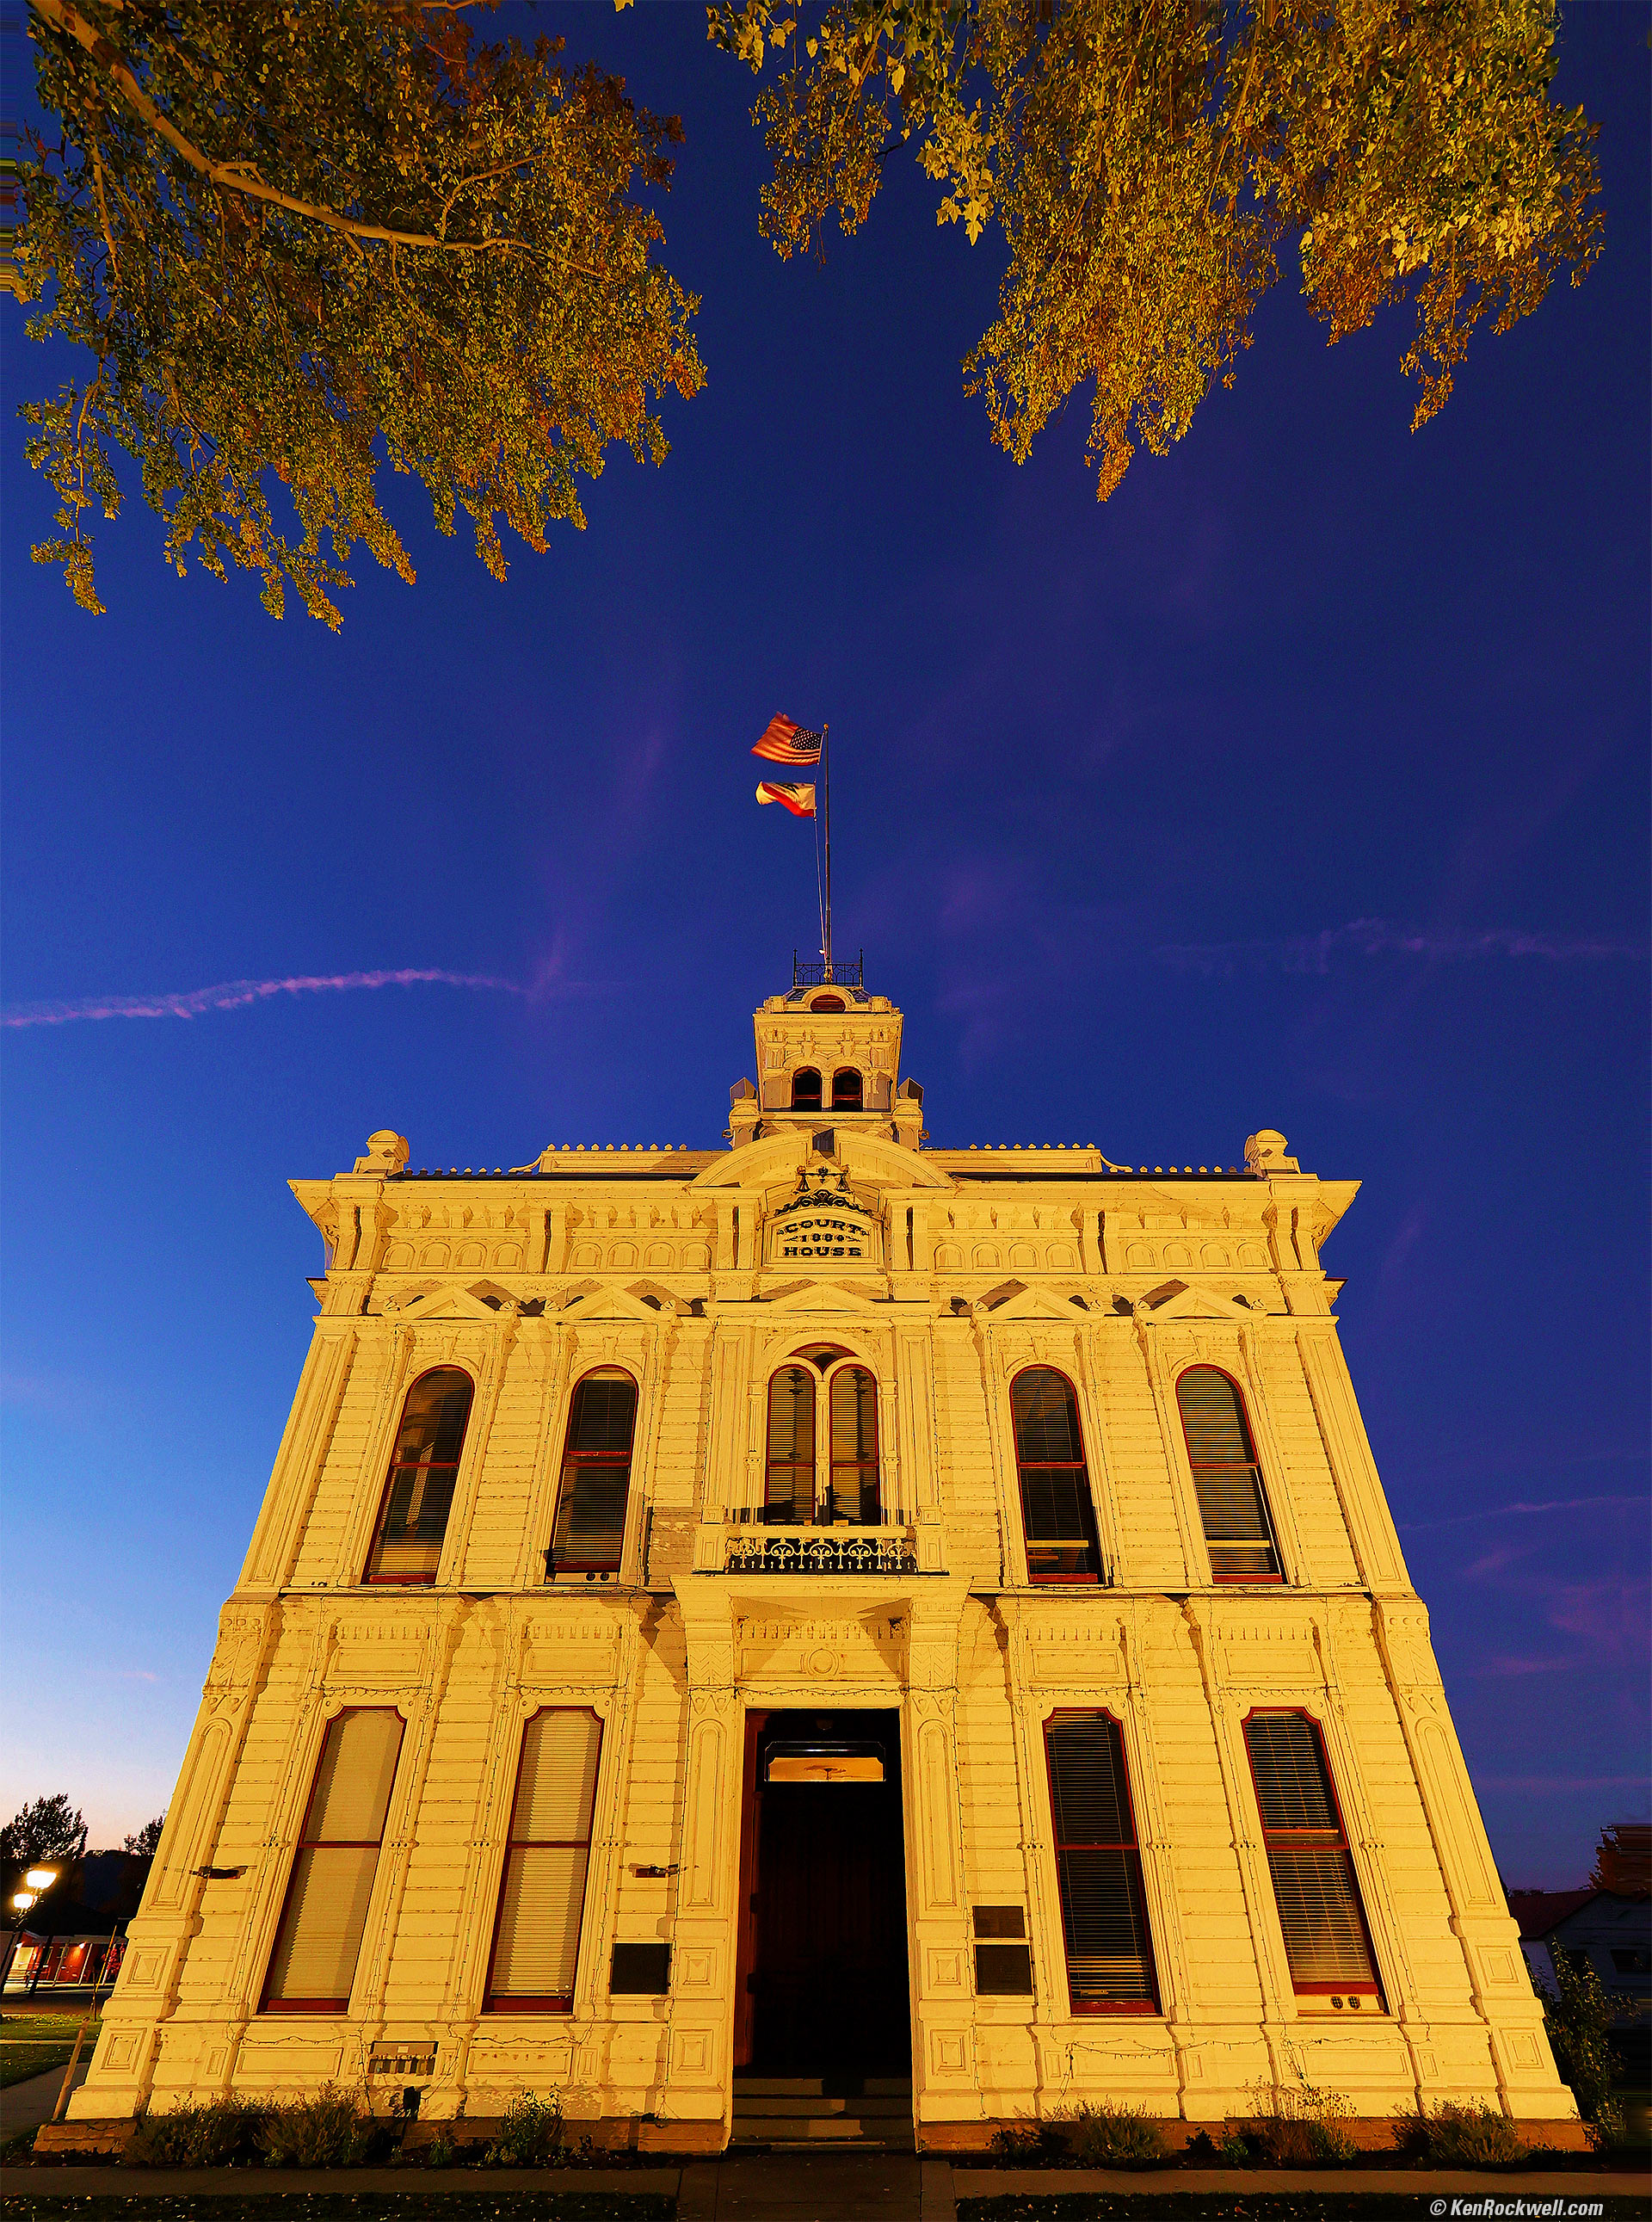
Mono County Courthouse, Bridgeport, California, 6:41 P.M. Canon EOS R6, RF 15-30mm IS STM at 15mm, wide-open at f/4.5 hand-held at 1/10 at Auto ISO 1,000 (LV 4.4). More tech details. bigger or fit-to-screen.
I corrected a slightly crooked camera in Photoshop CS6's Lens Correction filter, used Perfectly Clear to lighten the image, especially shadows, and used Skylum Luminar Neo to amplify colors and especially to clear-out all the power lines and telephone poles.
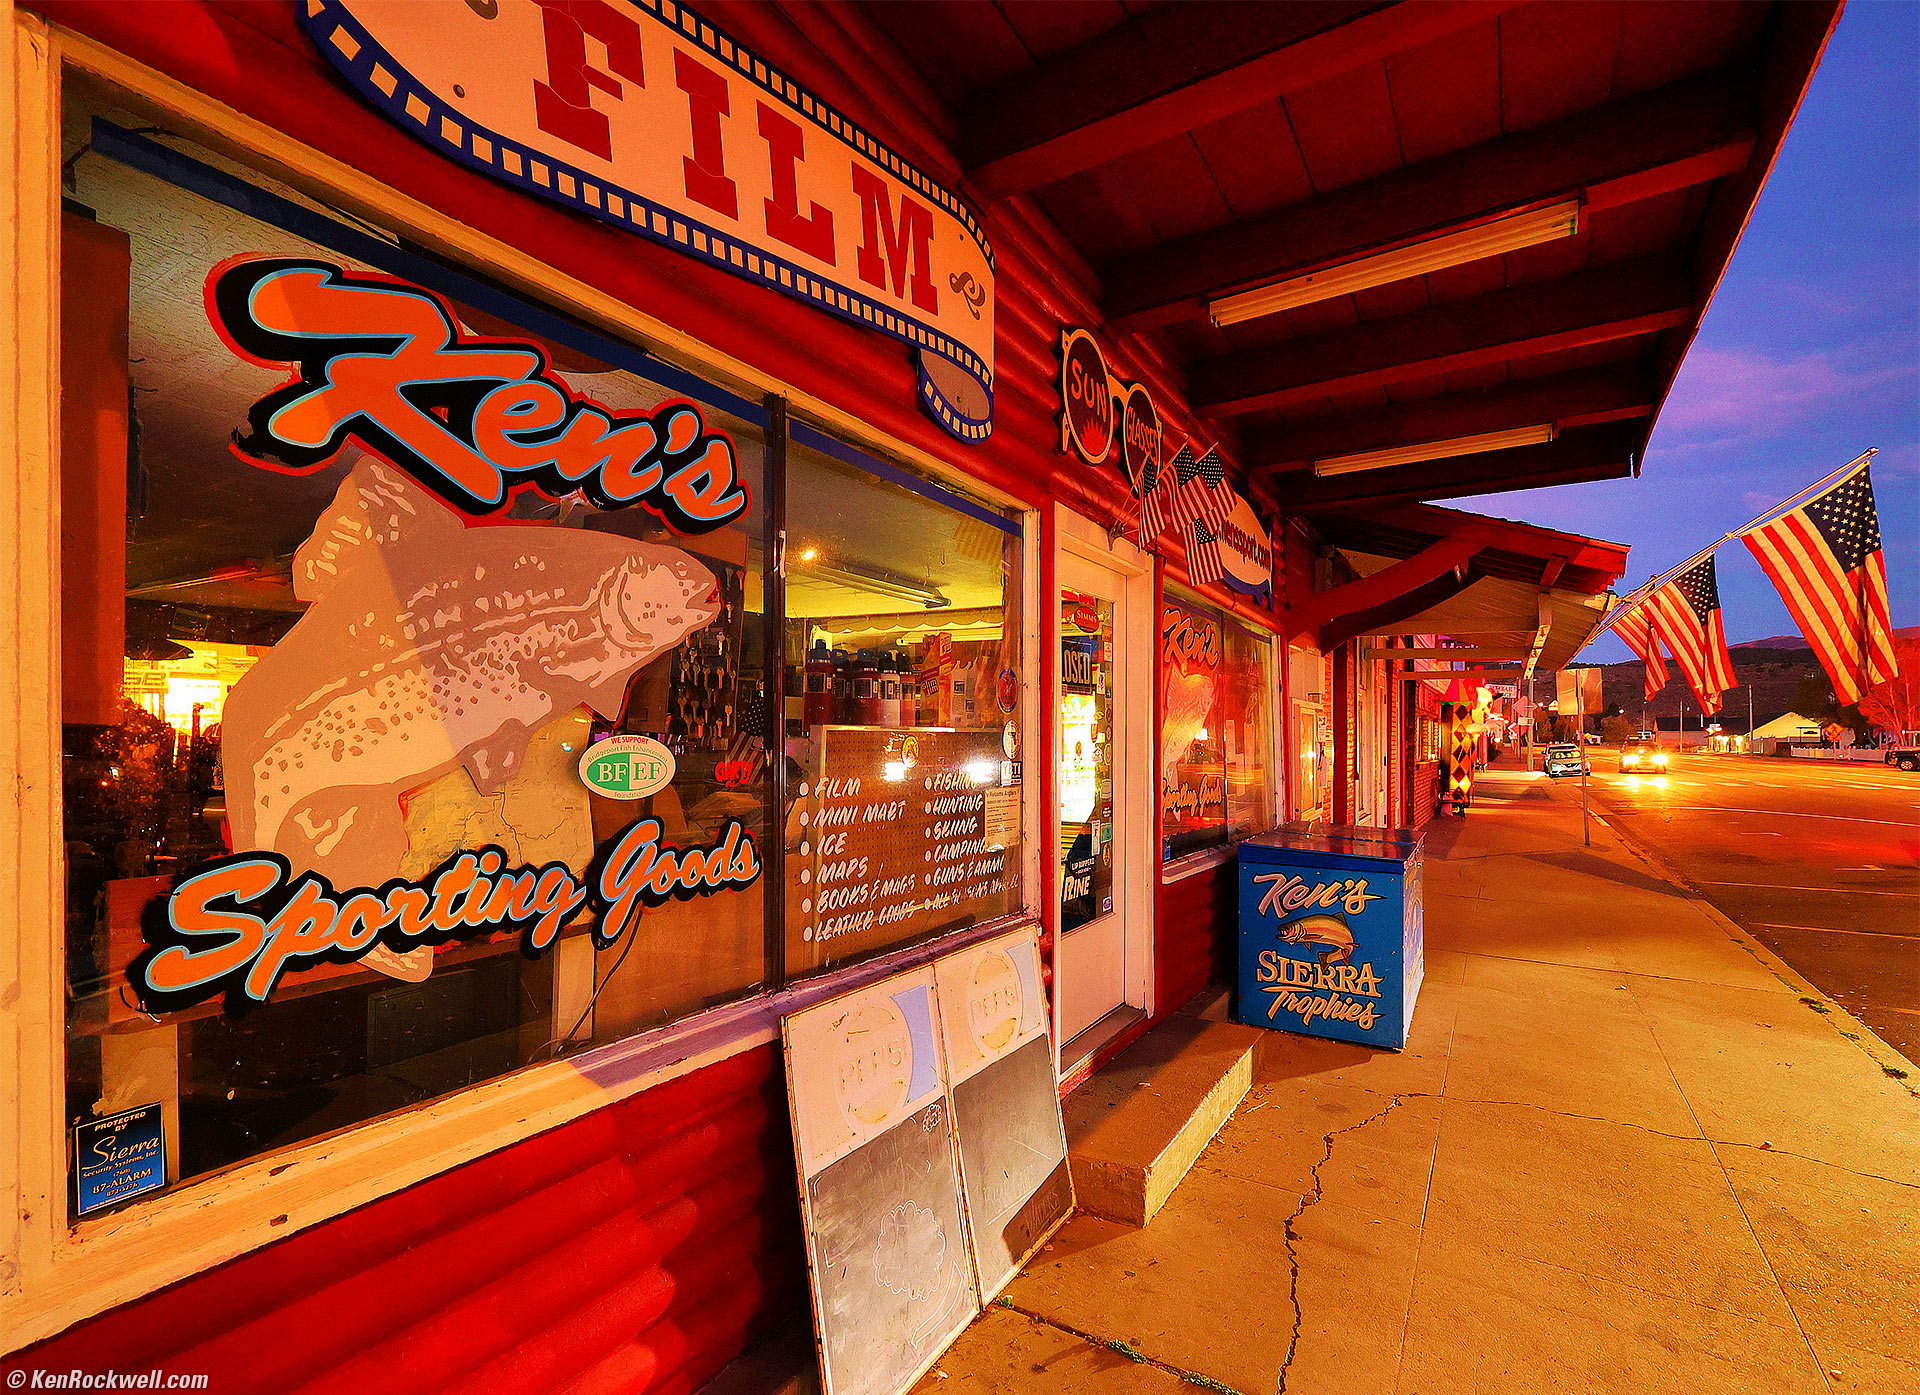
Ken's Sporting Goods, Bridgeport, California, 6:42 P.M. Canon EOS R6, RF 15-30mm IS STM at 15mm, wide-open at f/4.5 hand-held at 1/10 at Auto ISO 3,200 (LV 2¾). More tech details. bigger or fit-to-screen.
I used Perfectly Clear to lighten the image, and Skylum Luminar Neo to amplify and to remove wires.
We walked the rest of the way to Rhino's and enjoyed dinner with the group.
Today was easy. Tomorrow we have to get up over an hour earlier than we did today:

4:40 AM alarm. Screen grab from Apple Watch ULTRA.
I have no idea how I ever found the time to help people each night with their pictures last time (these trips never have any free time), but it was well worth it.
19 October 2022, Wednesday top
17, 18, 19, 20, 21, 22 & 23 October 2022
I got up at 4:40 AM and got ready. I went outside to meet our group, looked up and saw the moon over our motel!
I whip out my iPhone and make a snap, and it looks exactly as this scene looked to my eye! The iPhone 14 Pro Max is astonishing!!!
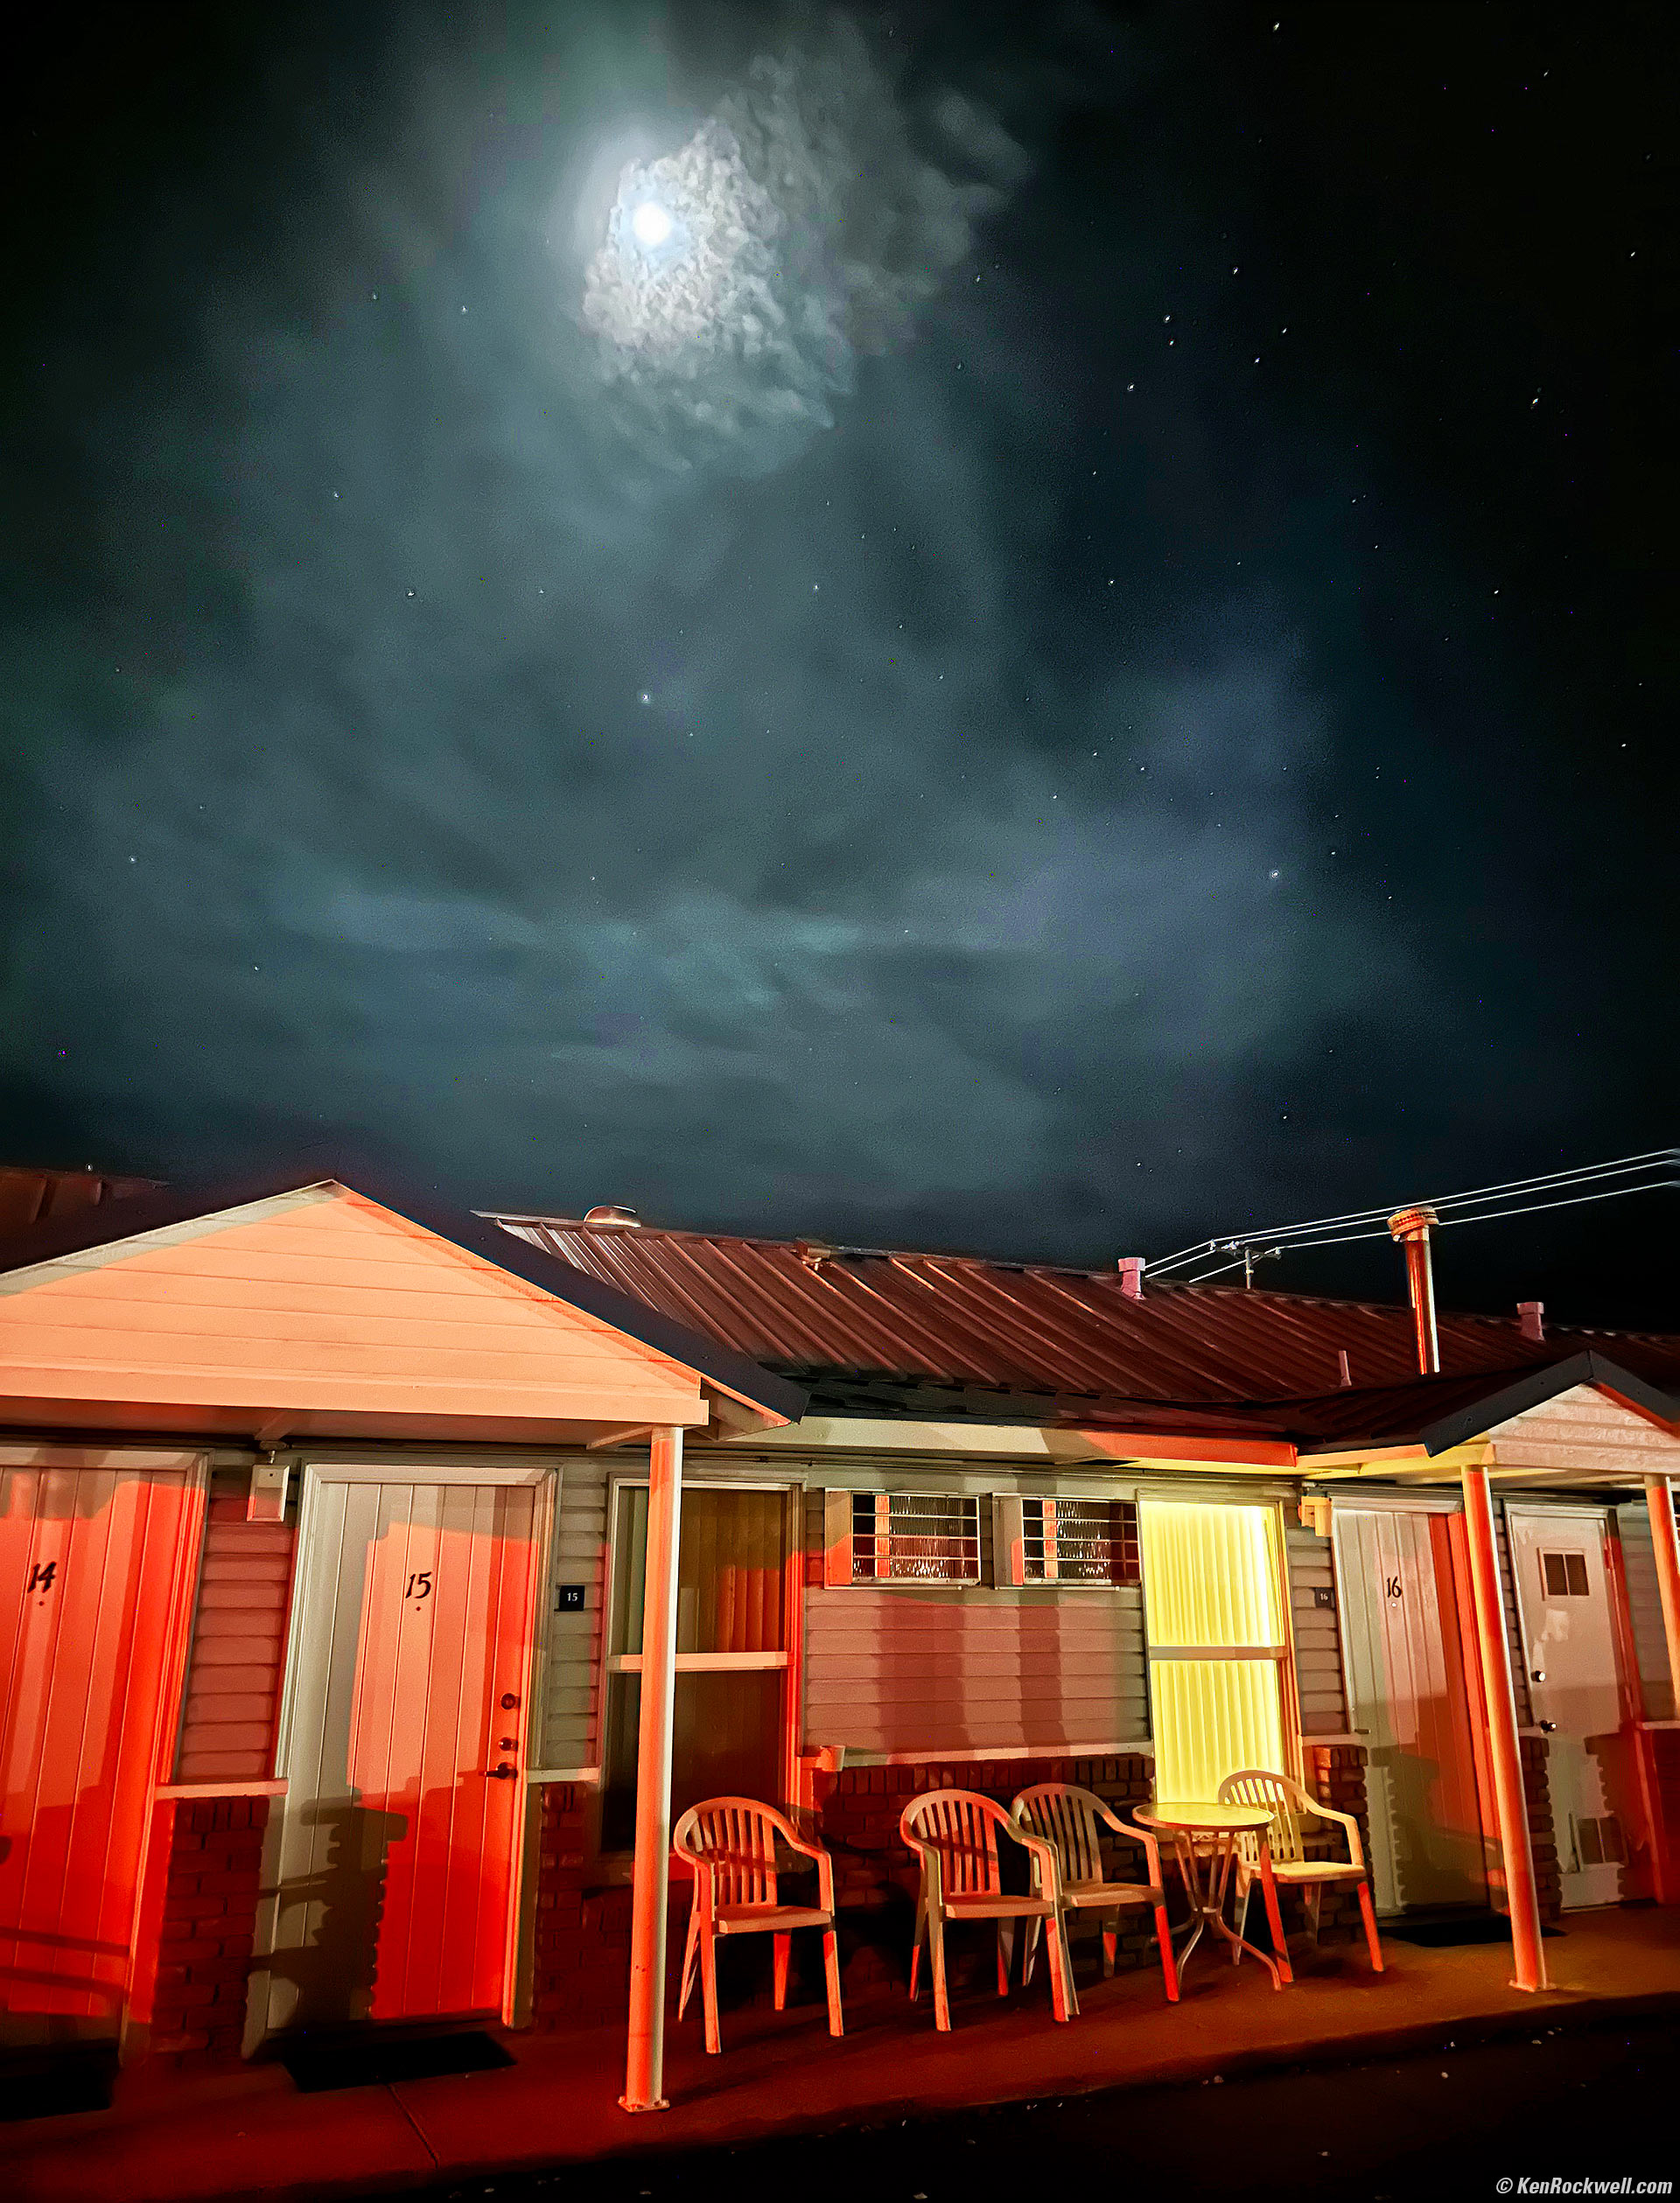
Moon and Stars over Redwood Motel Room 15, Bridgeport, California, 5:19 A.M. Apple iPhone 14 Pro Max 1× (6.9mm actual or 24mm eq.) camera, f/1.8 hand-held at 1/2 second at Auto ISO 8,000 (LV -3¾ IPS; that's LV minus 3¾!). More tech details. bigger or fit-to-screen.
My iPhone caught this scene exactly as it looked to my eyes, which was very dark, with an inky black sky. That's not how I want to show it, so I used the Perfectly Clear plug-in in Photoshop CS6 (2012) to lighten it up and make it much more exciting — exactly as I wanted it to look. The red light on the foreground is from car taillights of others in our group who were ready to head out.
More astonishing is that back in olden days I'd have needed a tripod to make a half-hour exposure at f/4.5 on Velvia 50 to get this same exposure (allowing for reciprocity failure), and even if I didn't have to set up a tripod I'd have missed the rest of the group because we all took off six minutes after this at 5:25 A.M. to catch the 7:10 A.M. sunrise down at Mono Lake's South Tufa.
Even with a half-hour exposure at f/4.5 it would have been tough to get both the sky and motel in focus at the same time. The iPhone has much more depth of field due to its much shorter 6.9mm actual focal length lens. Velvia also would turn very green with a long exposure, and other films are similarly difficult. With my iPhone I can shoot things like this that simply couldn't be caught on film under real-world time constraints like this; this was a hand-held grab shot as we headed out. Again, I have no idea how I ever found time to help people with their pictures afterwards on past trips (but I'm glad I did); there is no idle time. It's all Go! Go! Go! and no sitting around looking at computers.
We made it to South Tufa before dawn and hiked out to the action:
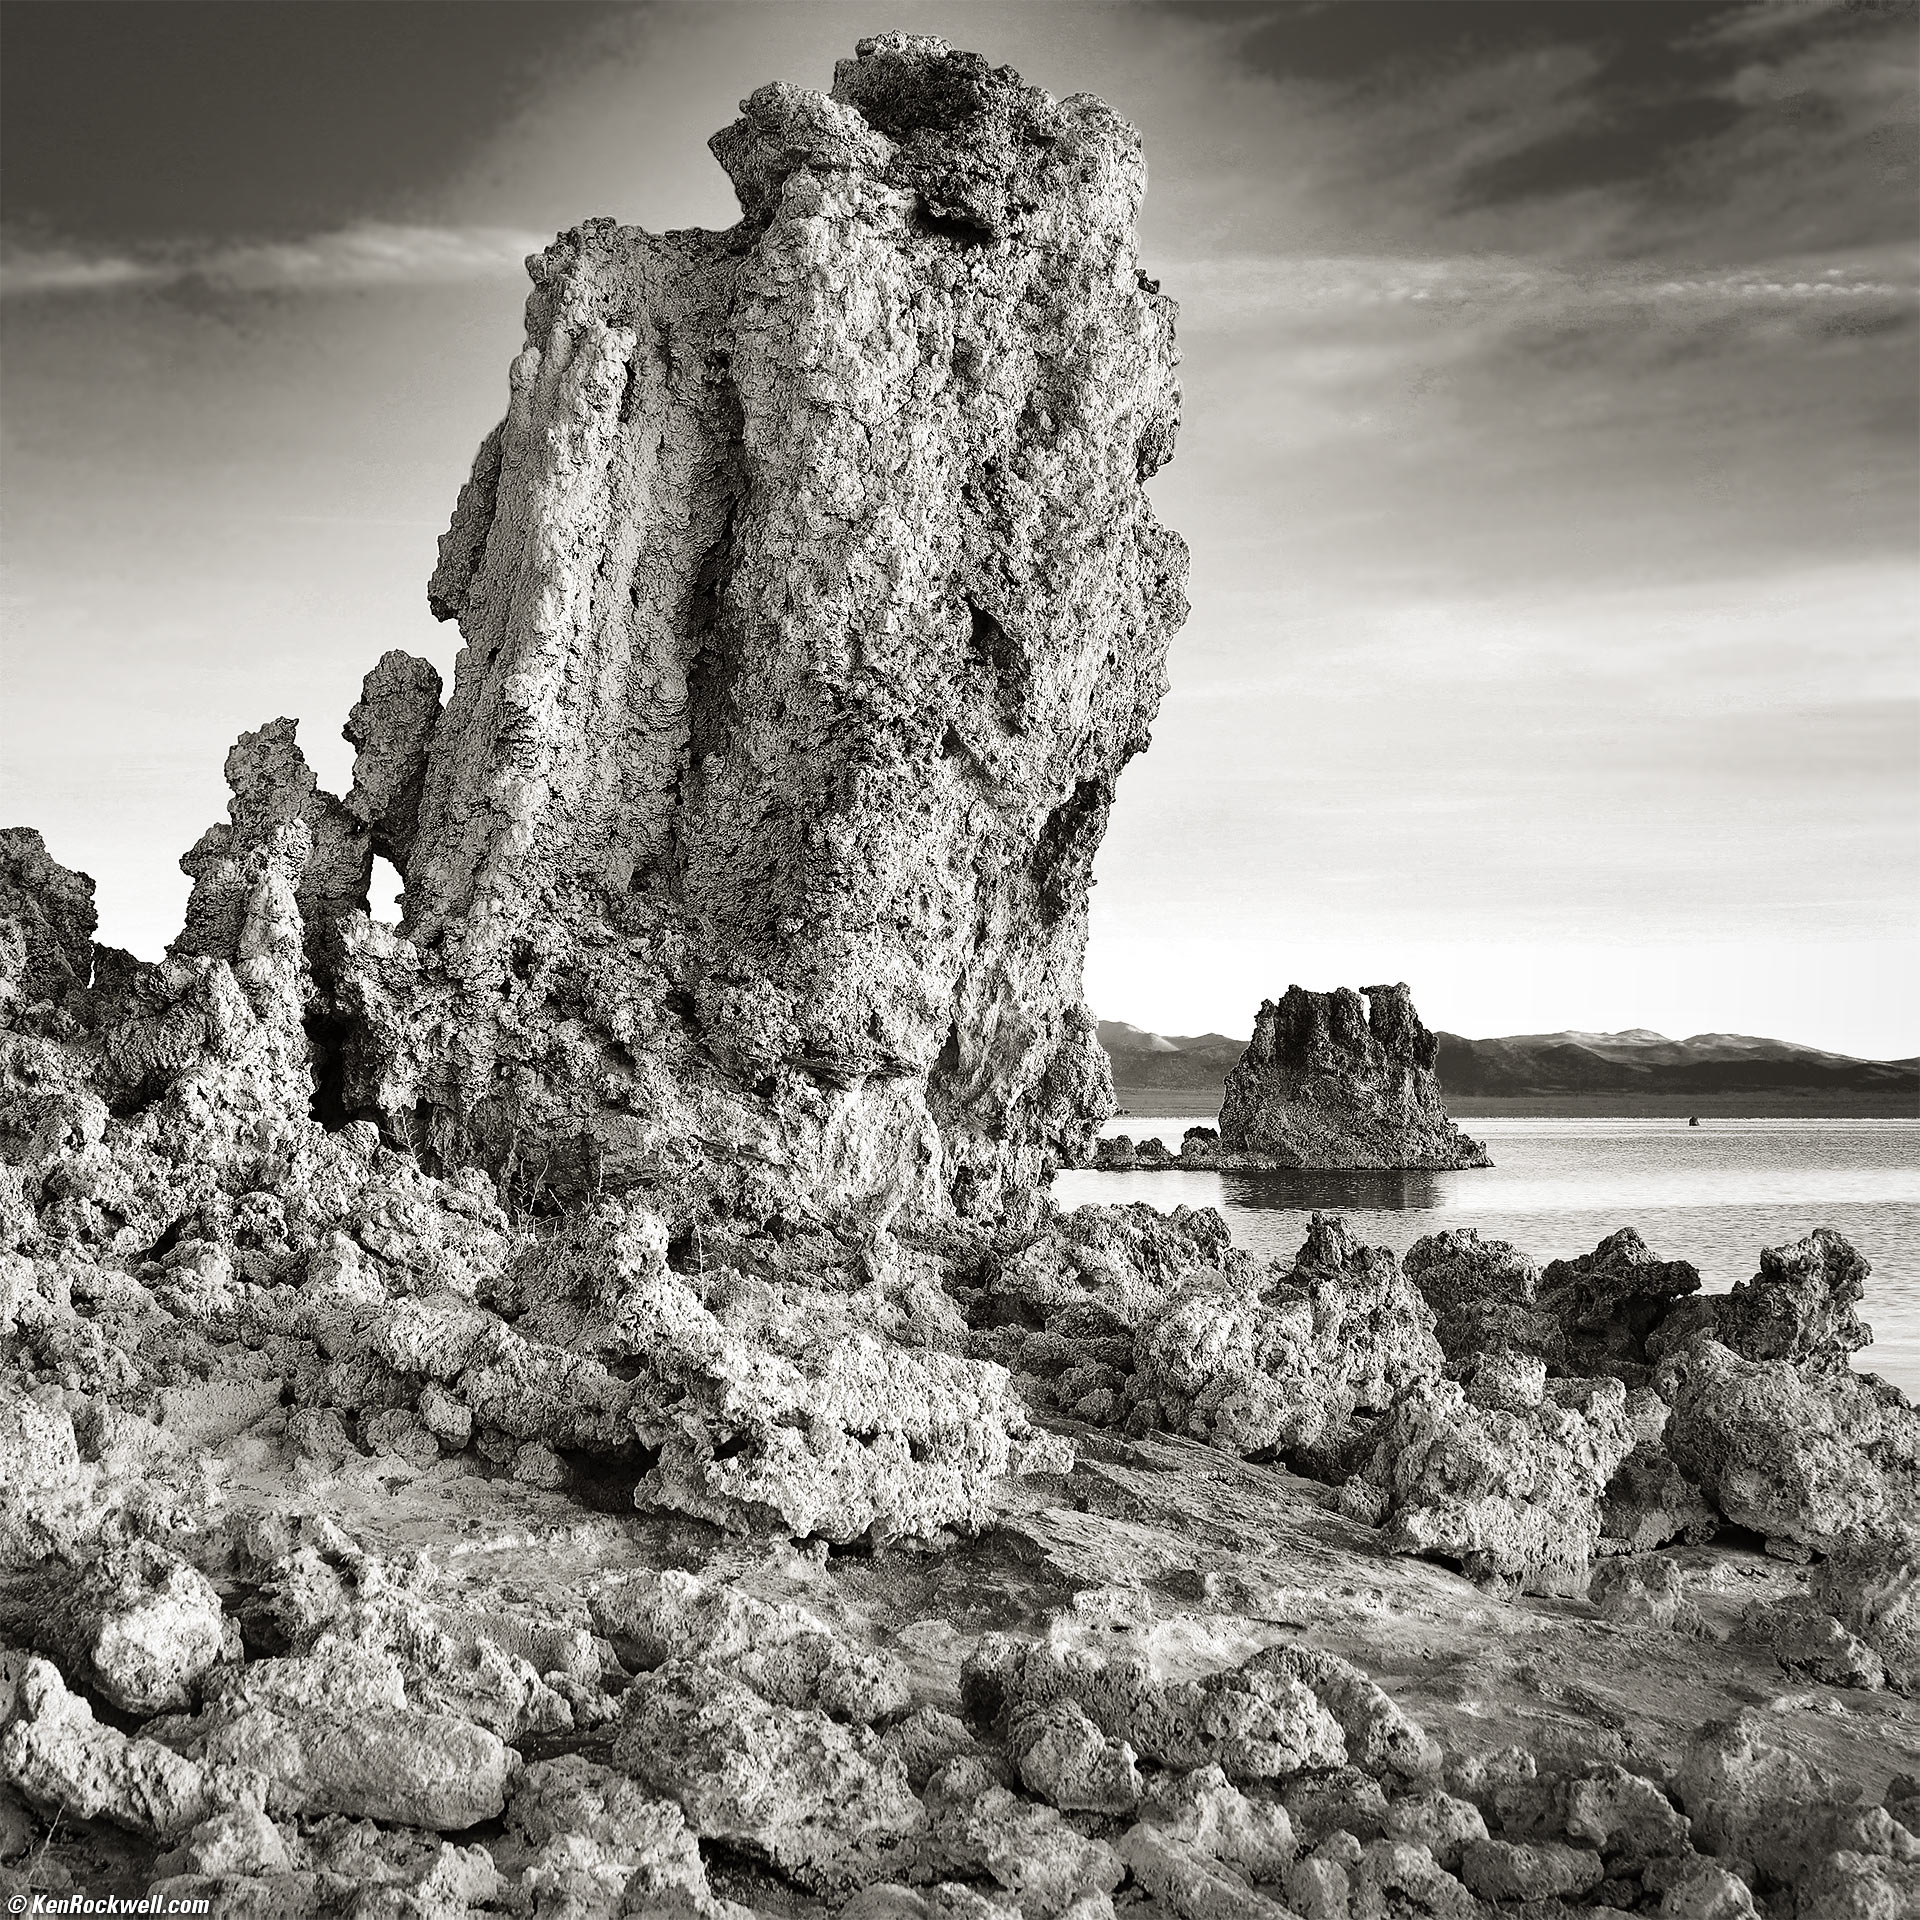
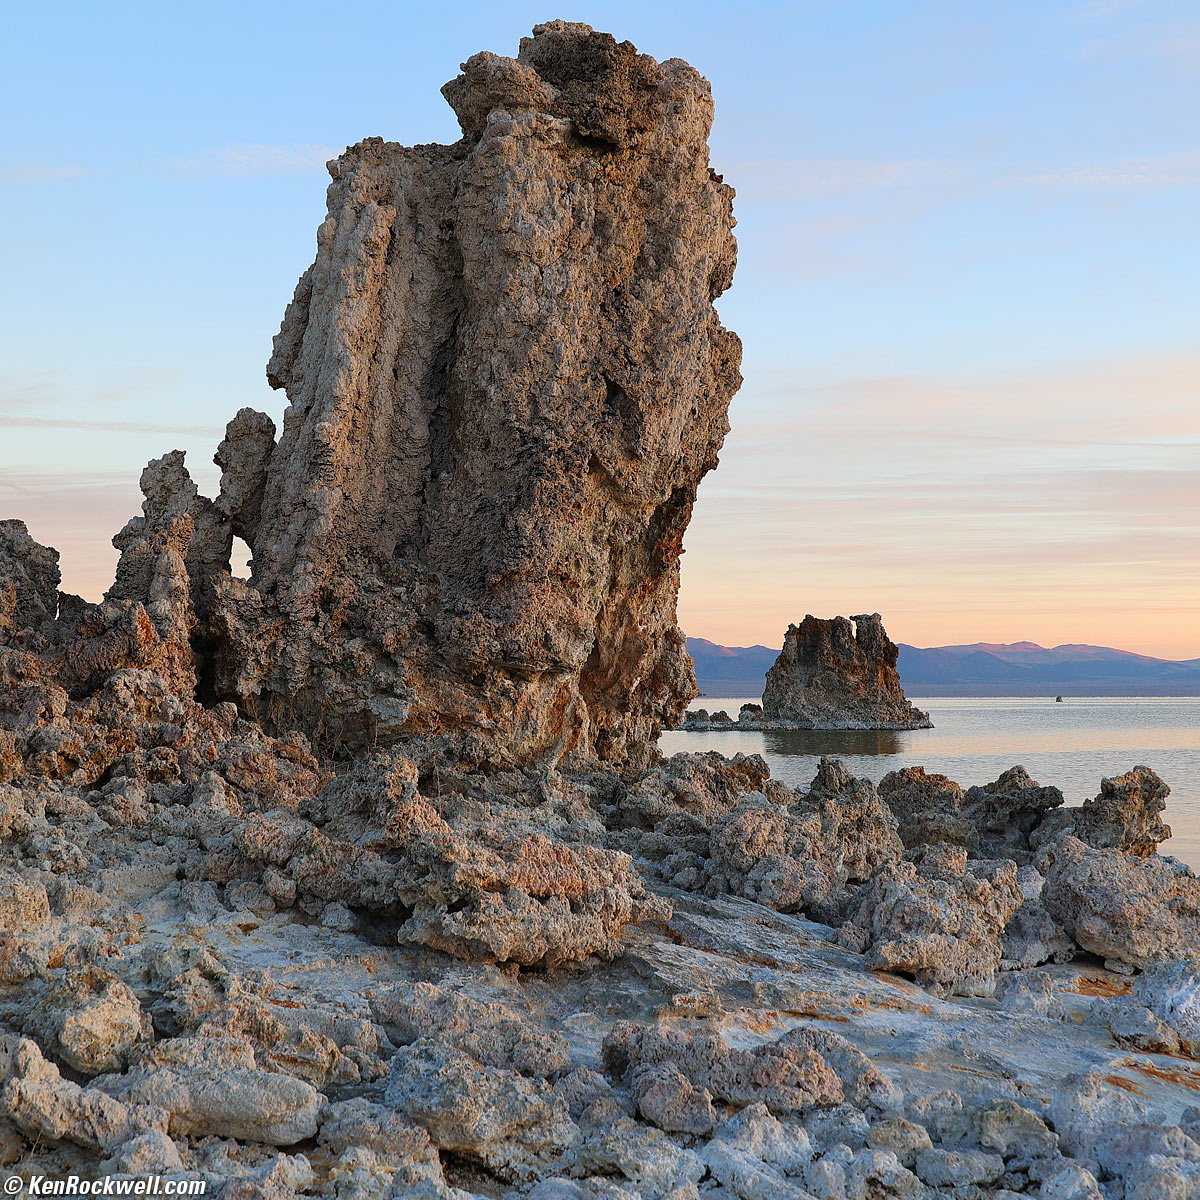
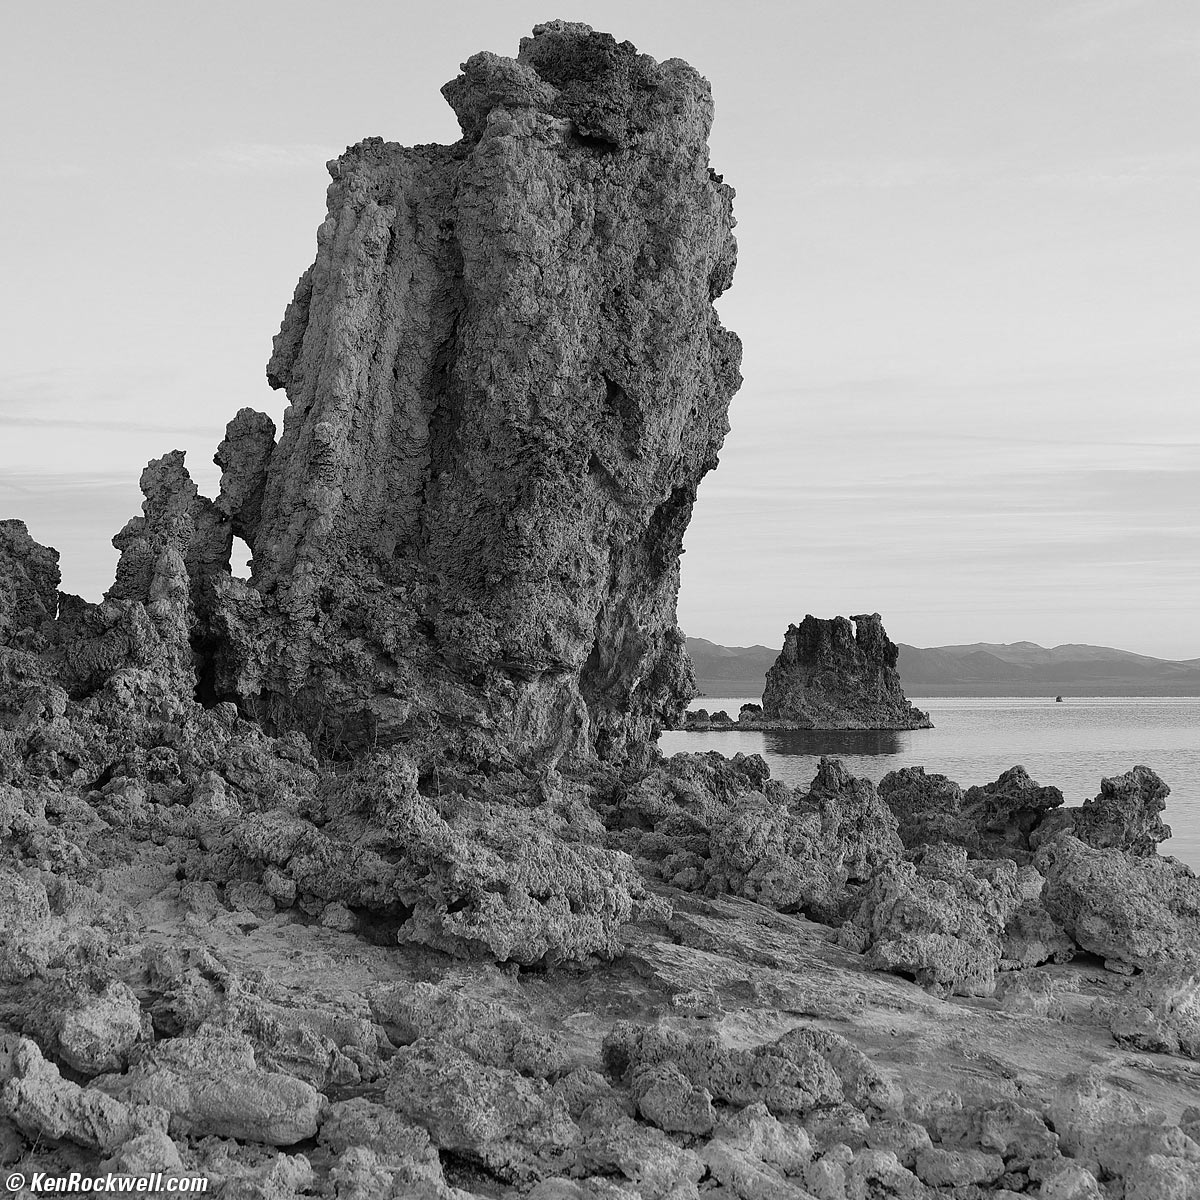
Proud Stone, South Tufa, Mono Lake, California, 7:11 A.M. Canon EOS R6 in square crop mode, RF 24-240mm IS USM at 38 mm (equivalent to the normal ZEISS 80mm f/2.8 PLANAR lens on HASSELBLAD 6×6), f/8 hand-held at 1/13 at ISO 100 (LV 9.6). More tech details. split-toned print. bigger or fit-to-screen.
I love the square format, which is the strongest form of composition. I love shooting my digital cameras set to their square crop modes. Not only do the final results shock with their force; the thumbnails are huge in all my my sorting software. It's funny in retrospect at how much effort HASSELBLAD had to put into defending their perfect square format. Even Ansel Adams loved 6×6 because it's so easy to crop any vertical or horizontal rectangle out of the square — without every having to rotate your camera for verticals!
Likewise I love that the stabilization of my RF 24-240mm IS USM is so great that 1/13 second exposures are trivial to hand-hold, so I can shoot this just before the sun peeked over the mountains at a nice, sharp, clean ISO 100 — and I can leave my tripod back in the car where it belongs.
Snapping this was easy after getting up 2½ hours ago just to be able to hike out here in the 25º F (-4º C) cold. I knew the magic would happen in editing; I saw this image in black & white before shooting it. Here's how it came out of the EOS R6, and this is with the camera set to +4 for saturation, still a real snoozer:
As shot. Boring. bigger.
A straight conversion to black-and-white is equally boring:
Simple B&W Conversion. At least as boring. bigger.
To get the result I originally envisioned, first I used Perfectly Clear to bring up overall contrast and put more detail in the shadows. Perfectly Clear also amplified the color a little, which as you'll see helps in making this a black-and-white photo.
The biggest secret trick specific to this shot is using the "Channel Mixer" in Photoshop's black-and-white conversion tool. Lightroom and other programs may have similar tools, usually hidden inside a black-and-white command. The Channel Mixer lets you set the relative contribution (the "mix") of each color to the brightness of each pixel in the final black-and-white image. The Channel Mixer gives us far more control and precision than using colored glass filters over the lens with black-and-white film or with monochrom digital cameras to select which colors will render as lighter or darker.
You can get to Photoshop's Channel Mixer several ways, and it may be in different places in different versions of the program. I do it by adding a B&W adjustment layer, which allows me to edit and re-edit my preferences for the sliders. More simply you can get to this at IMAGE > ADJUSTMENTS > BLACK & WHITE, but once you do it without using an adjustment layer, it's done and you can't tweak it later.
I increased the levels (lightened) the contributions of reds and yellows, since I wanted to exaggerate the stone's highlights lit by orange clouds lit by the rising sun, and decrease (darken) the sky by reducing the sliders for Blue and Cyan. This also brought out the clouds from the sky, since they're also lit by the warm light of the rising sun. Sneaky, huh?
Channel Mixer |
I used |
Default |
Reds |
116 |
40 |
Yellows |
108 |
60 |
Greens |
40 |
40 |
Cyans |
46 |
60 |
Blues |
17 |
20 |
Magentas |
80 |
80 |
I offer these settings for reference, but I won't use them again. Use whatever gives you the look you want. There is no right or wrong; play with the sliders until it looks the way you want. I increased the contributions of the Reds and Yellows to lighten the highlights, and reduced the contributions of the Cyans and Blues until the sky looked as I wanted. This is art and art is done by eye, never by formula. Do this right and you'll be amazed how the image comes alive as you lift the Red and Yellow sliders.
One gotcha of using a color digital source image rather than using colored glass filters over the lens with black-and-white film or with monochrom digital cameras to select which colors will render as lighter or darker is that due to sharpening and other edge effects, the color saturation may be lower a few pixels away from where the sky meets the stone. Lowered saturation means that when I select the sky to darken based on color, it won't darken as much very close to the stone, and this can appear as an additional very fine halo around the stone.
I fixed this halo by copying the image to a new layer, blurring the copy layer by several pixels to eliminate the halo, and then used a mask to select the blurred, but not haloed, edge instead just for the edge itself. In other words, I revealed the blurred halo-free layer only where the halo appeared by using a tiny brush on the layer mask only a pixel or two in diameter. This took a while to trace the edge the hard way at 200% magnification, and got rid of what looked like an oversharpening halo.
Not to worry; you never need to remember this since I just wrote it down. What is helpful is knowing the concepts of layers and masks, and then applying them as you need to to make your image look the way you want it. I follow no set actions and especially never use anyone's "presets," I sit down and just start painting and manipulating until my image matches how it looked in my imagination that frigid morning.
I split-toned the print so it was slightly warmer and not simply gray.
Of course the real fun started after I converted it to black-and-white. I typically add a levels adjustment layer to increase contrast with a sideways S-curve (leave 0%, 50% and 100% where they are, reduce the 25% level and increase the 75% level).
More at Getting Great Black-and-White.
I used Skylum Luminar Neo to add more emphasis to everything, and add vignetting. Vignetting is crucial in many pictures because it keeps your eyes from getting distracted and going off the corners and instead keeps your attention focussed in the center of the image.
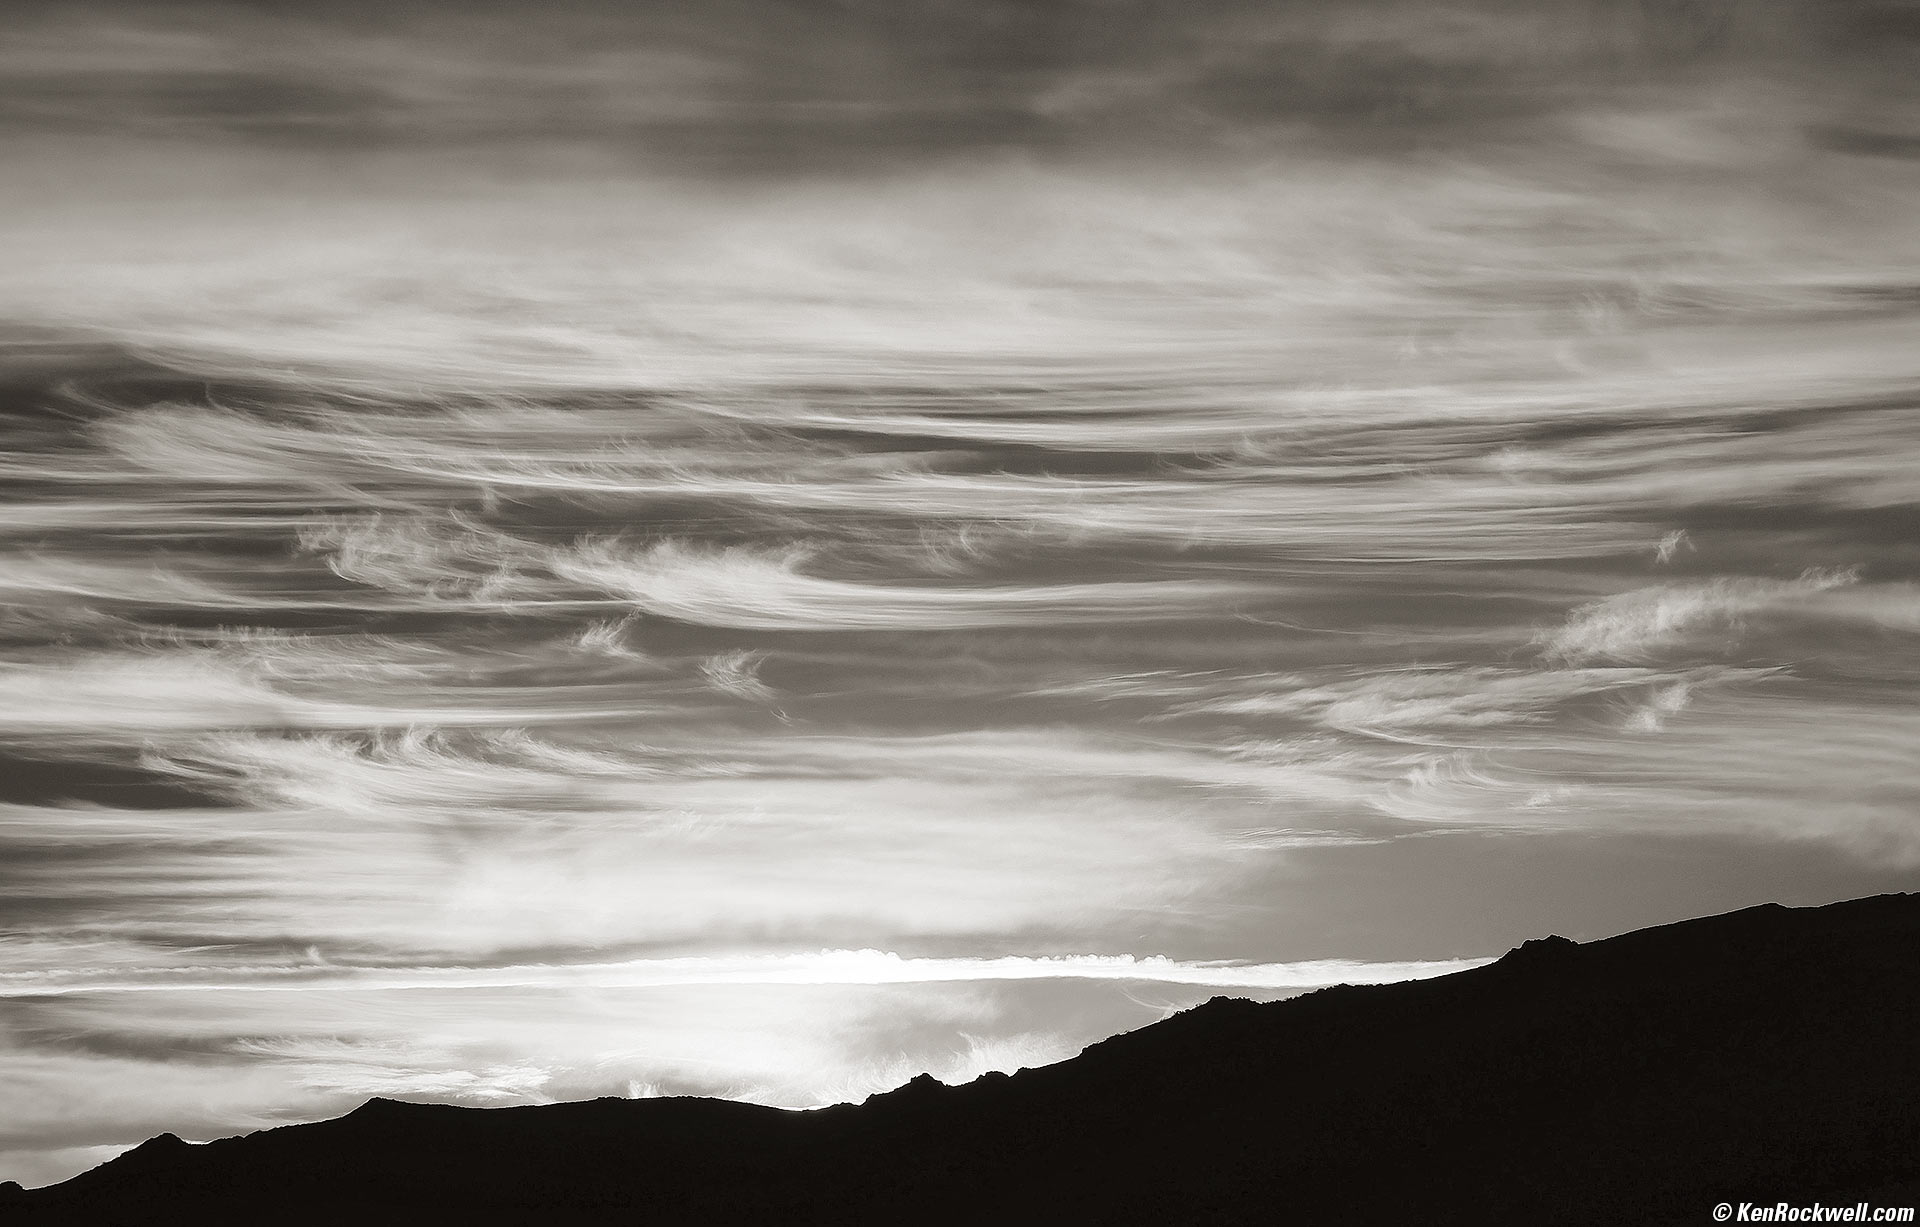
Whispy Dawn as seen from South Tufa, Mono Lake, California, 7:19 A.M. Canon EOS R6, RF 24-240mm IS USM at 240mm, f/14 at 1/1,250 at Auto ISO 200, -2/3 stops exposure compensation (LV 17.0), split-toned print. More tech details. bigger or fit-to-screen.
I used Skylum Luminar Neo to control the highlights, shadows and tones, and then split-toned the print.
I didn't need any Channel Mixer hijinx here because the subject, and thus the original color image, was monochrome: it was all white, shades of orange, and black. I show it in monochrome here because color adds nothing to the photo; it's all about the whispy shapes of the clouds as well as highlights and shadows; nothing to do with color. If any element, like color or a stray beer can, doesn't add to your piece, take it out.
I can't recall why this is at ISO 200; for all I know I may have set my EOS R6 to Highlight Tone Priority to retain detail in the extreme pointed-at-the-sun highlights, and Highlight Tone Priority has a lowest ISO of 200.
Sunrise, Mono Lake, California, 7:27 A.M. Canon EOS R6, RF 24-240mm IS USM at 50mm, f/16 at 1/320 at Auto ISO 100 (LV 16.4). More tech details. bigger or fit-to-screen.
I used a little bit of Skylum Luminar Neo to get this image as I want it. This is a much weaker image compared to my Whispy Dawn image above, which does a better job of showing what's special here: the whispy clouds. This image is weaker because it's trying to show a bunch of smaller things rather than one larger idea. This is the same shot as above, just that this one is at 50mm in color and the previous shot is at 240mm in monochrome.
Color makes this pop, with warm orange in the center and cool blue at the top, as well as I love the rainbow effect in the ice crystals directly above the sun towards the top of this image.
Sunrise, South Tufa, Mono Lake, California, 7:35 A.M. Apple iPhone 14 Pro Max 0.5× (2.2mm actual or 13mm eq.) camera, f/2.2 at 1/445 at Auto ISO 40 (LV 12.4). More tech details. bigger or fit-to-screen.
First I ran this through Perfectly Clear for overall improvement (like adding detail to the darkest foreground shadows), and then cropped it and fixed some residual rotation from my random hand-holding.
Then I used Skylum Luminar Neo to make it explode. I also used Neo's superb "Erase" tool to remove contrails, add color and vignetting.
Important is to use little enough vignetting that you can't see it. This way it's much stronger in keeping our eyes in the image rather than having people's eyes wander out of the image.
While I had my EOS R6 and RF 15-30mm IS STM around my neck, I wasn't about to climb down on my belly on these rocks, and I certainly wasn't going to try to look at the R6's dinky screen compared how easy it is to drop my arm down with my iPhone, whose brilliant huge screen makes this all easy. I'm very close to the rocks; the ultra-ultrawide lens makes it seem like I'm much higher, but my iPhone is actually pretty far down in the rocks to bring the foreground much closer.
Just for laughs here's how it looked on my iPhone 14 Pro Max screen as I shot it:
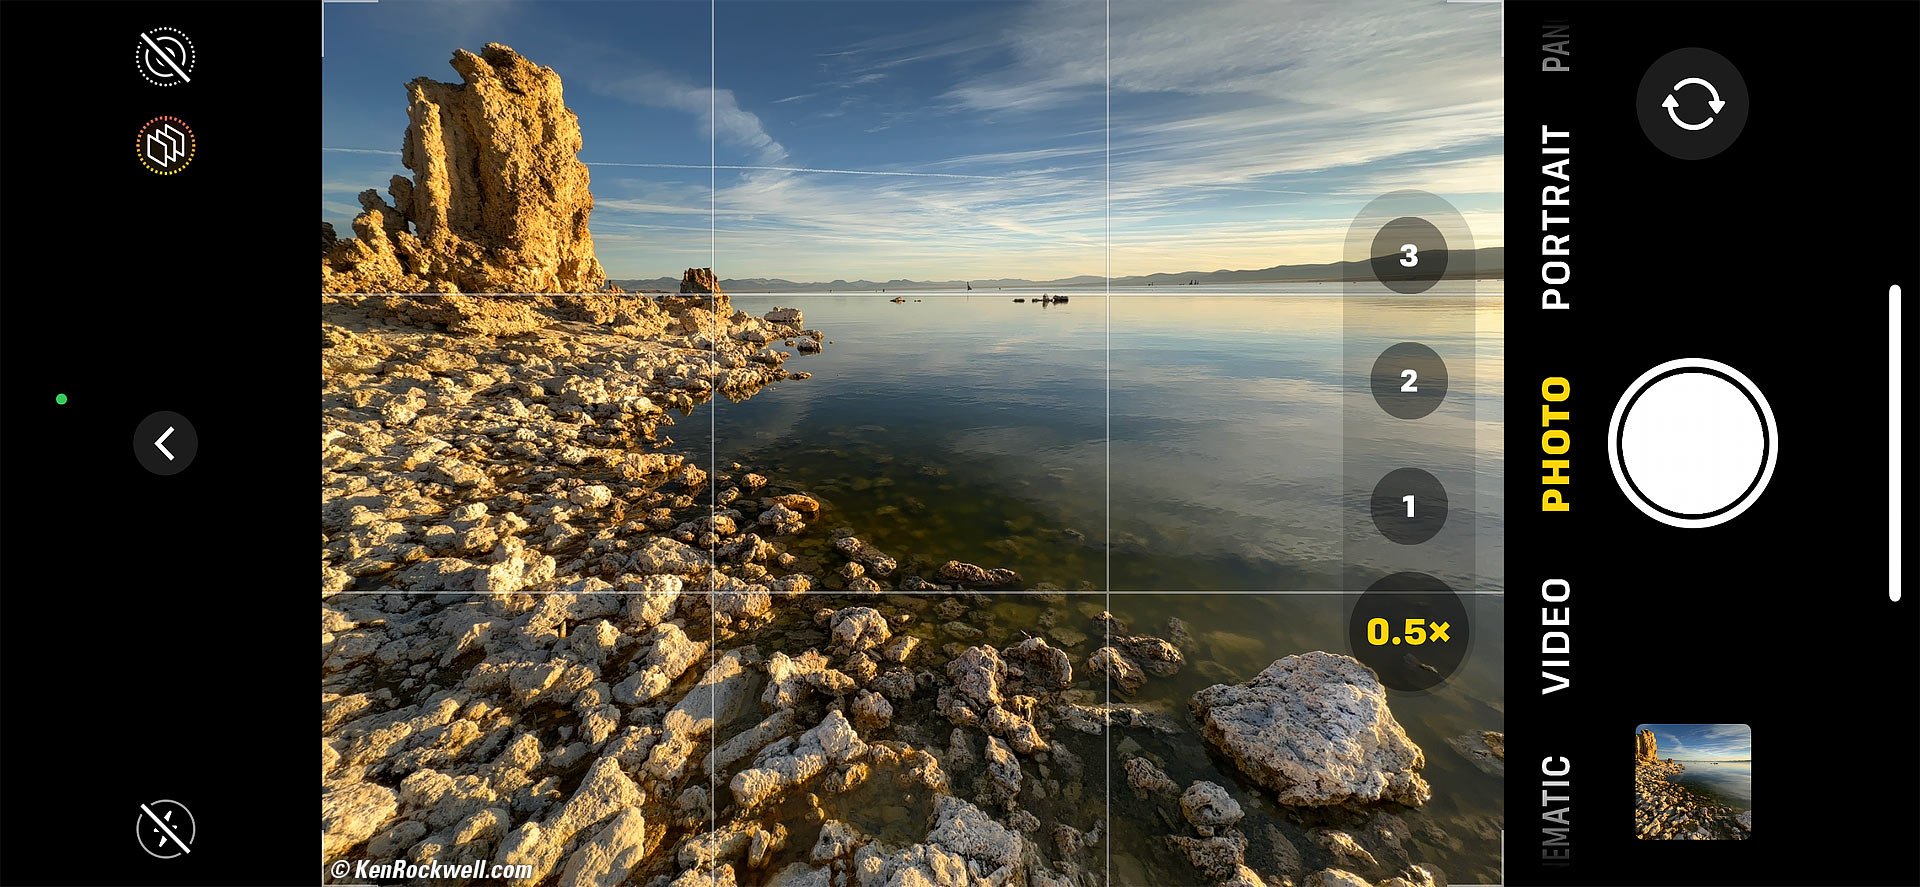
Screenshot, Apple iPhone 14 Pro Max. bigger or fit-to-screen.
We headed to the Whoa Nellie Deli for breakfast, and then headed out at 9:15 A.M. along June Lake Loop:
Dancing Inferno off Parker Lake Road, Mammoth Lakes, California, 9:52 A.M. Apple iPhone 14 Pro Max 0.5× (2.2mm actual or 13mm eq.) camera, f/2.2 at 1/972 at Auto ISO 50 (LV 13.2). More tech details. bigger or fit-to-screen.
Most of the magic here came from adding saturation and vignetting in the free Snapseed app on my iPhone while I was shooting and sending the images to friends back home.
Once back in my studio (never the motel; when I'm in the field I'm shooting, not staring at a computer) I played more in Skylum Luminar Neo and cleaned-out brush in the top left corner so we can see the sky, and removed bright distractions at the bottom, and filled in some dark areas at the bottom with more leaves. This is art and working in this software is painting: painting over things until they match my vision. Again Neo's Erase tool is amazing, making it easy to clean up the sky.
Here's what came out of my iPhone, which looked awesome before I went and started to jack it up. The important thing about shooting is to get the composition correct, meaning the position of the camera and the resulting placement of objects in the frame. I deliberately put the two main trees where I wanted them, knowing I'd clean up the distracting junk at the top left and the bright branches at the bottom later:
As shot. bigger.

Colorful Aspens off Parker Lake Road, Mammoth Lakes, California, 10:00:01 A.M. Canon EOS R6, RF 15-30mm IS STM at 15mm, f/22 at 1/30 at Auto ISO 100, -1/3 stop exposure compensation (LV 14.0). More tech details. bigger or fit-to-screen.
I used f/22 for deliberate sunstars. The iPhone can't do that, unless you synthesize it in an app.
I first used Perfectly Clear for general brightening, and then used Skylum Luminar Neo to explode colors, erase distractions and add vignetting.
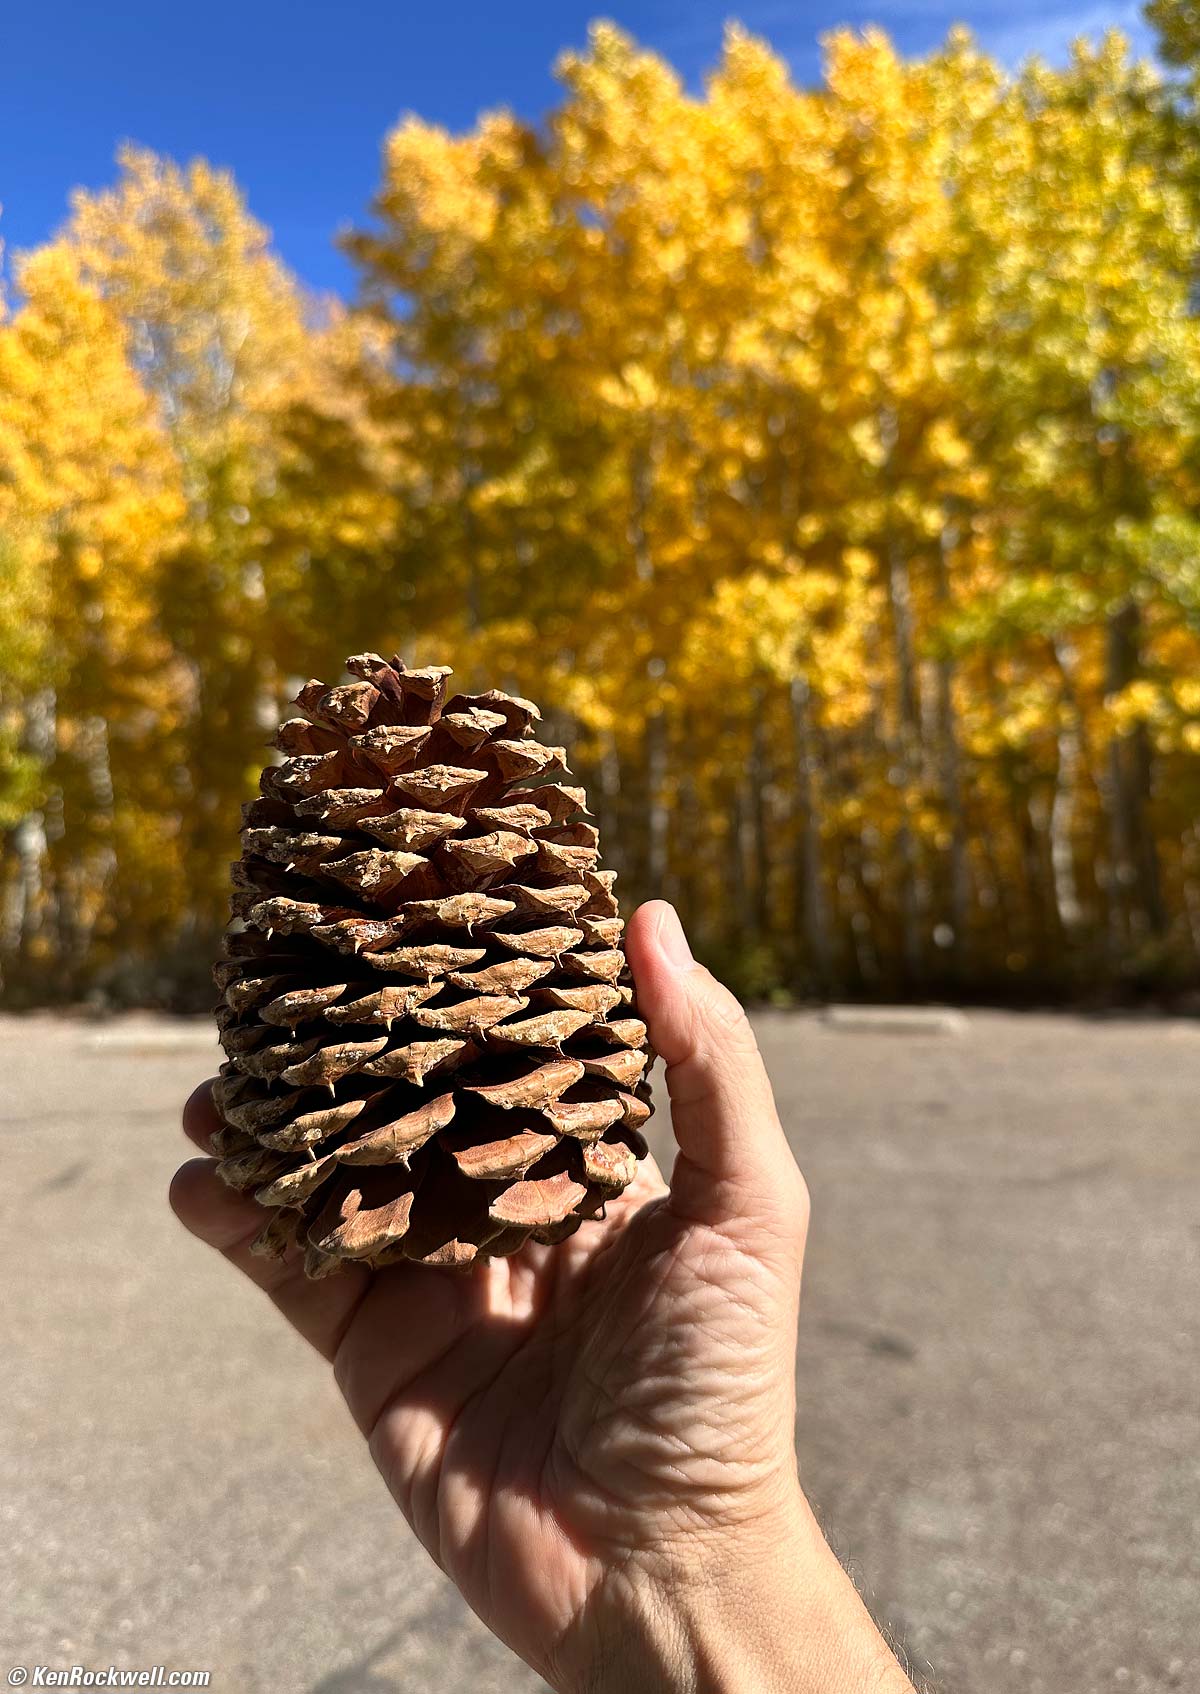
We cruised more of the June Lake Loop around 11 A.M. and visited the spot along the river and Route 158 between Grant and Silver Lakes where we took a group photo in 2019 (that I'm still hoping to see some day). We parked at Silver Lake and walked around, where I collected a great pine cone at 12:20 P.M.
This brought us up to lunch, where I enjoyed an unusually delicious "Rojo Raven" sandwich at Latte Da Coffee in Lee Vining around 1 P.M.
After lunch we headed up Lundy Canyon to Lundy Lake, and saw the famous Indian Head around 2 P.M.
We returned to our rooms in Bridgeport around 3:30 P.M., and then headed north on 395 to Little Walker River Road:
Aspens, Little Walker River Road, Bridgeport, California, 5:18 P.M. Apple iPhone 14 Pro Max 1× (6.9mm actual or 24mm eq.) camera, f/1.8 at 1/2,070 at Auto ISO 80 (LV 13.0). More tech details. bigger or fit-to-screen.
Most of this I did in the free Snapseed app on my iPhone, and later brought up the shadows in Skylum Luminar Neo.
The sun set behind the mountains right after this, even though the computed sunset at the horizon was at 6:15 P.M.
We headed back and touched base at the Redwood Motel in Bridgeport at 6:15 P.M., and shortly afterwards walked down towards Rhino's for diner again.
Right across from the Motel we met our new friend Will, who was working in his backyard:
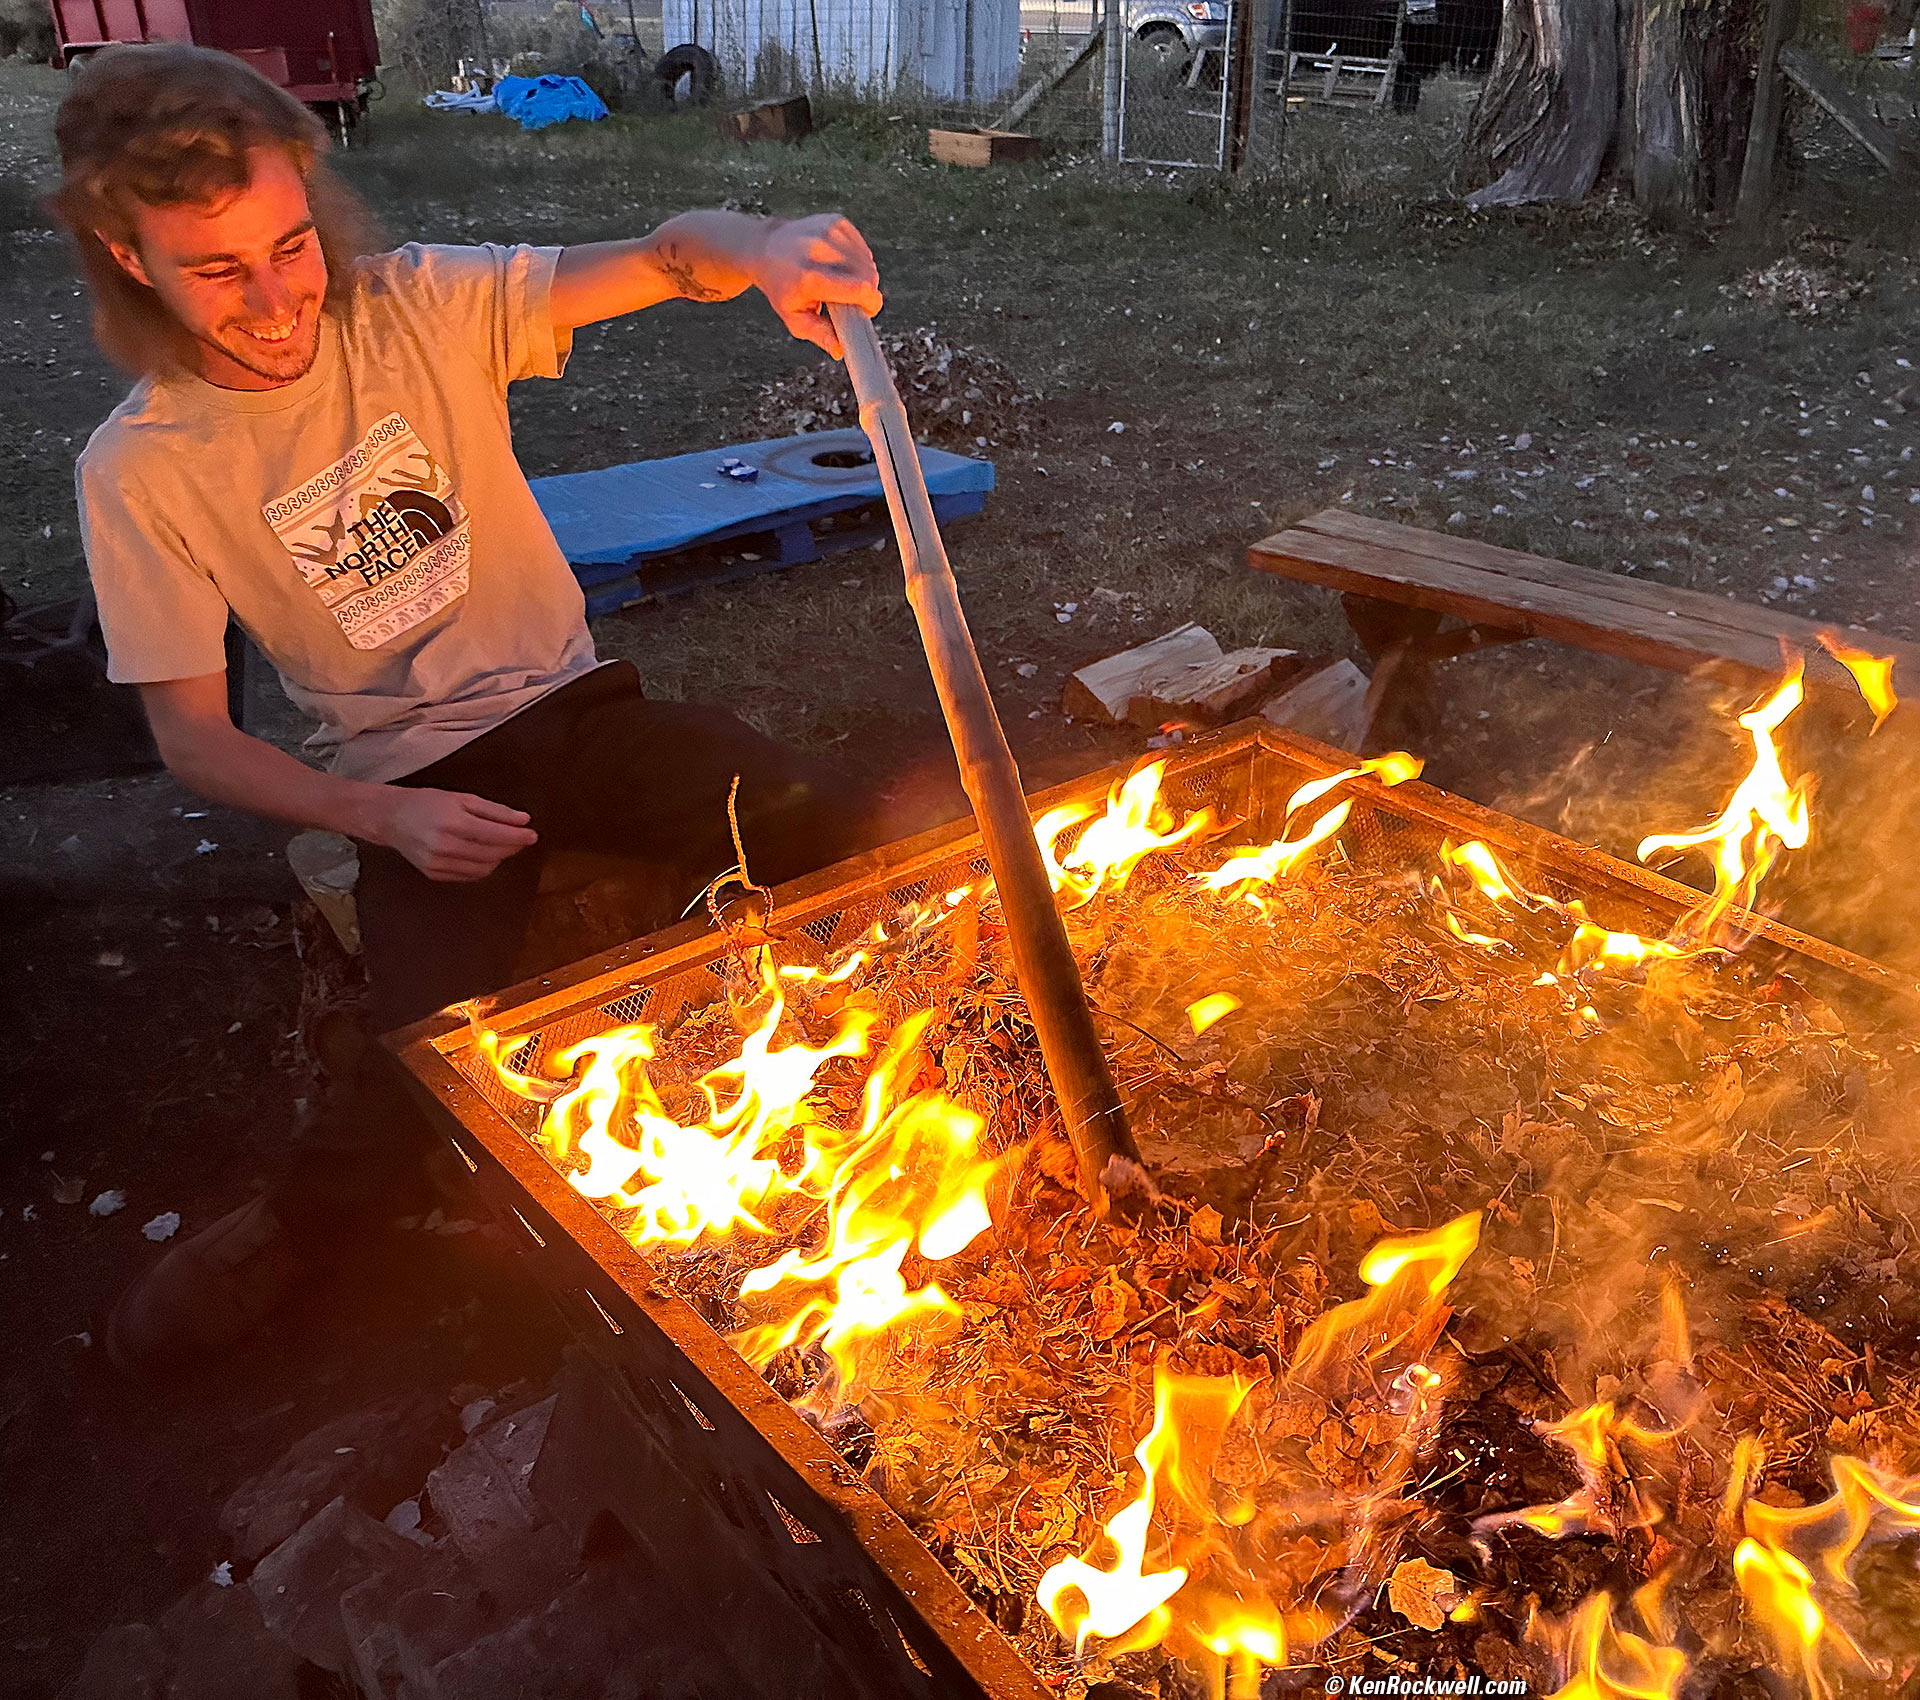
Will Works His Fire, Bridgeport, California, 6:32 P.M. Apple iPhone 14 Pro Max 1× (6.9mm actual or 24mm eq.) camera, f/1.8 at 1/60 at Auto ISO 640 (LV 4.9). More tech details. bigger or fit-to-screen.
This is mostly as shot, save for cropping and using Skylum Luminar Neo's Erase tool to remove some distractions.
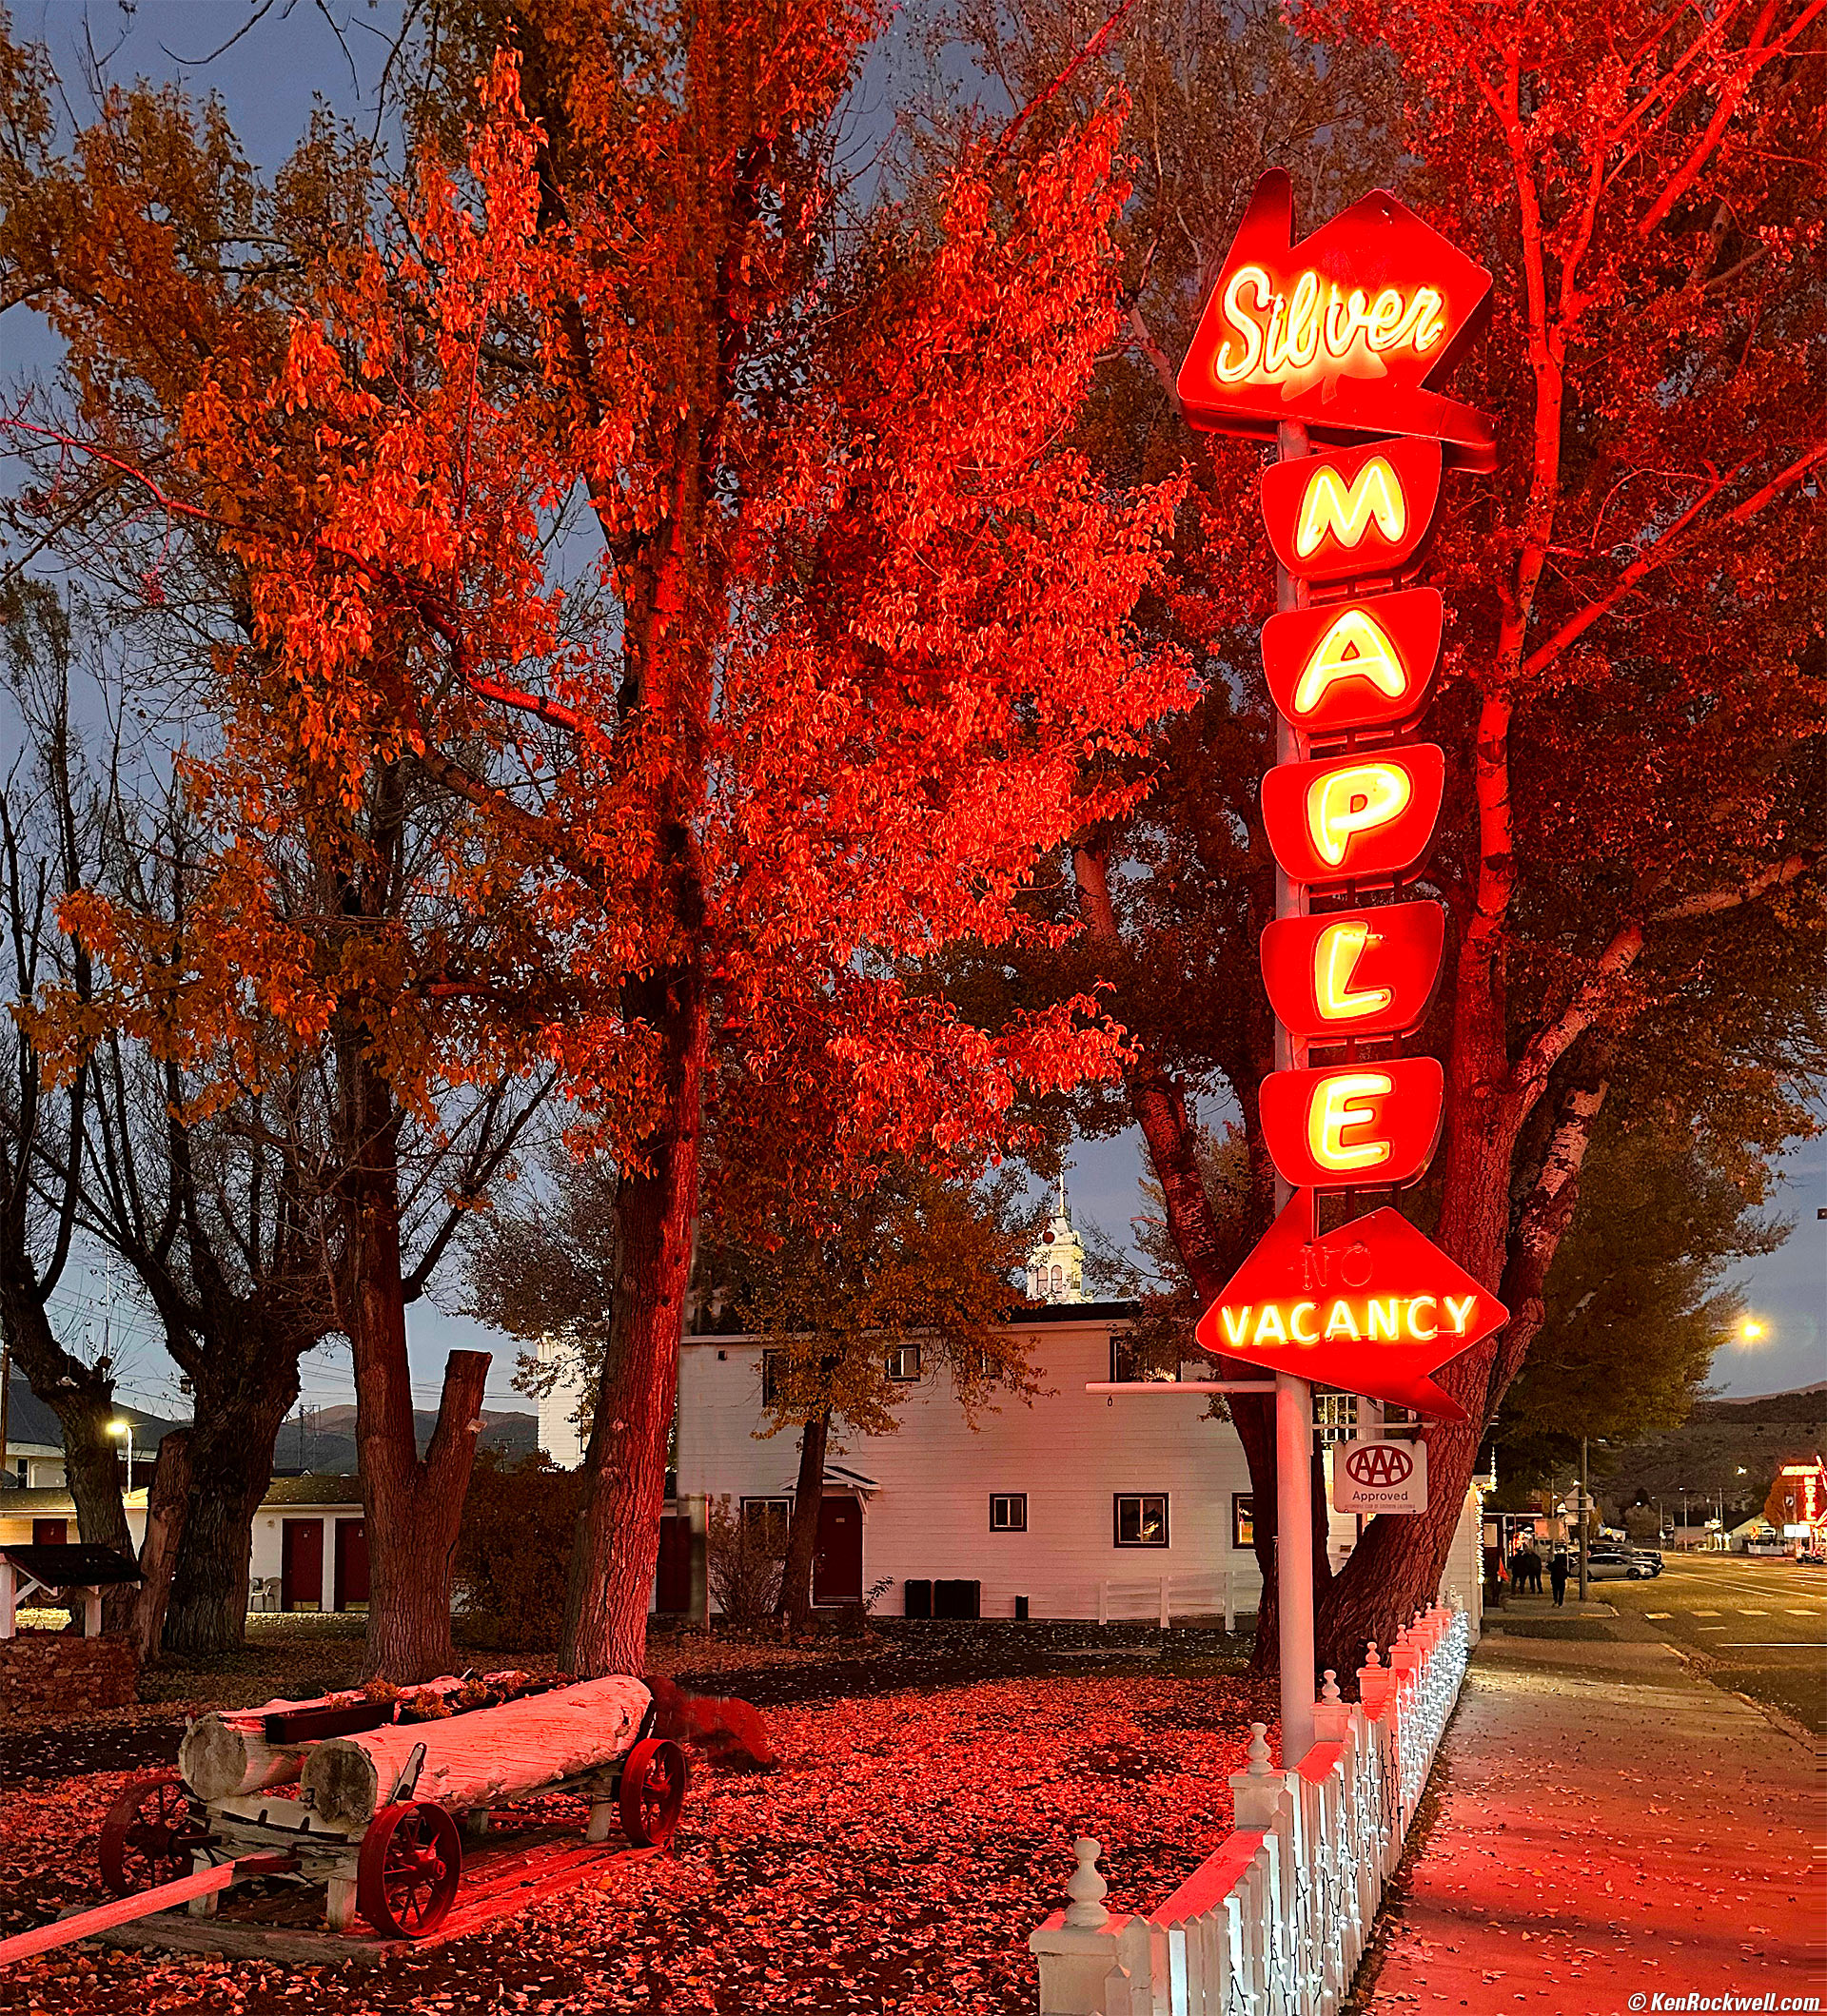
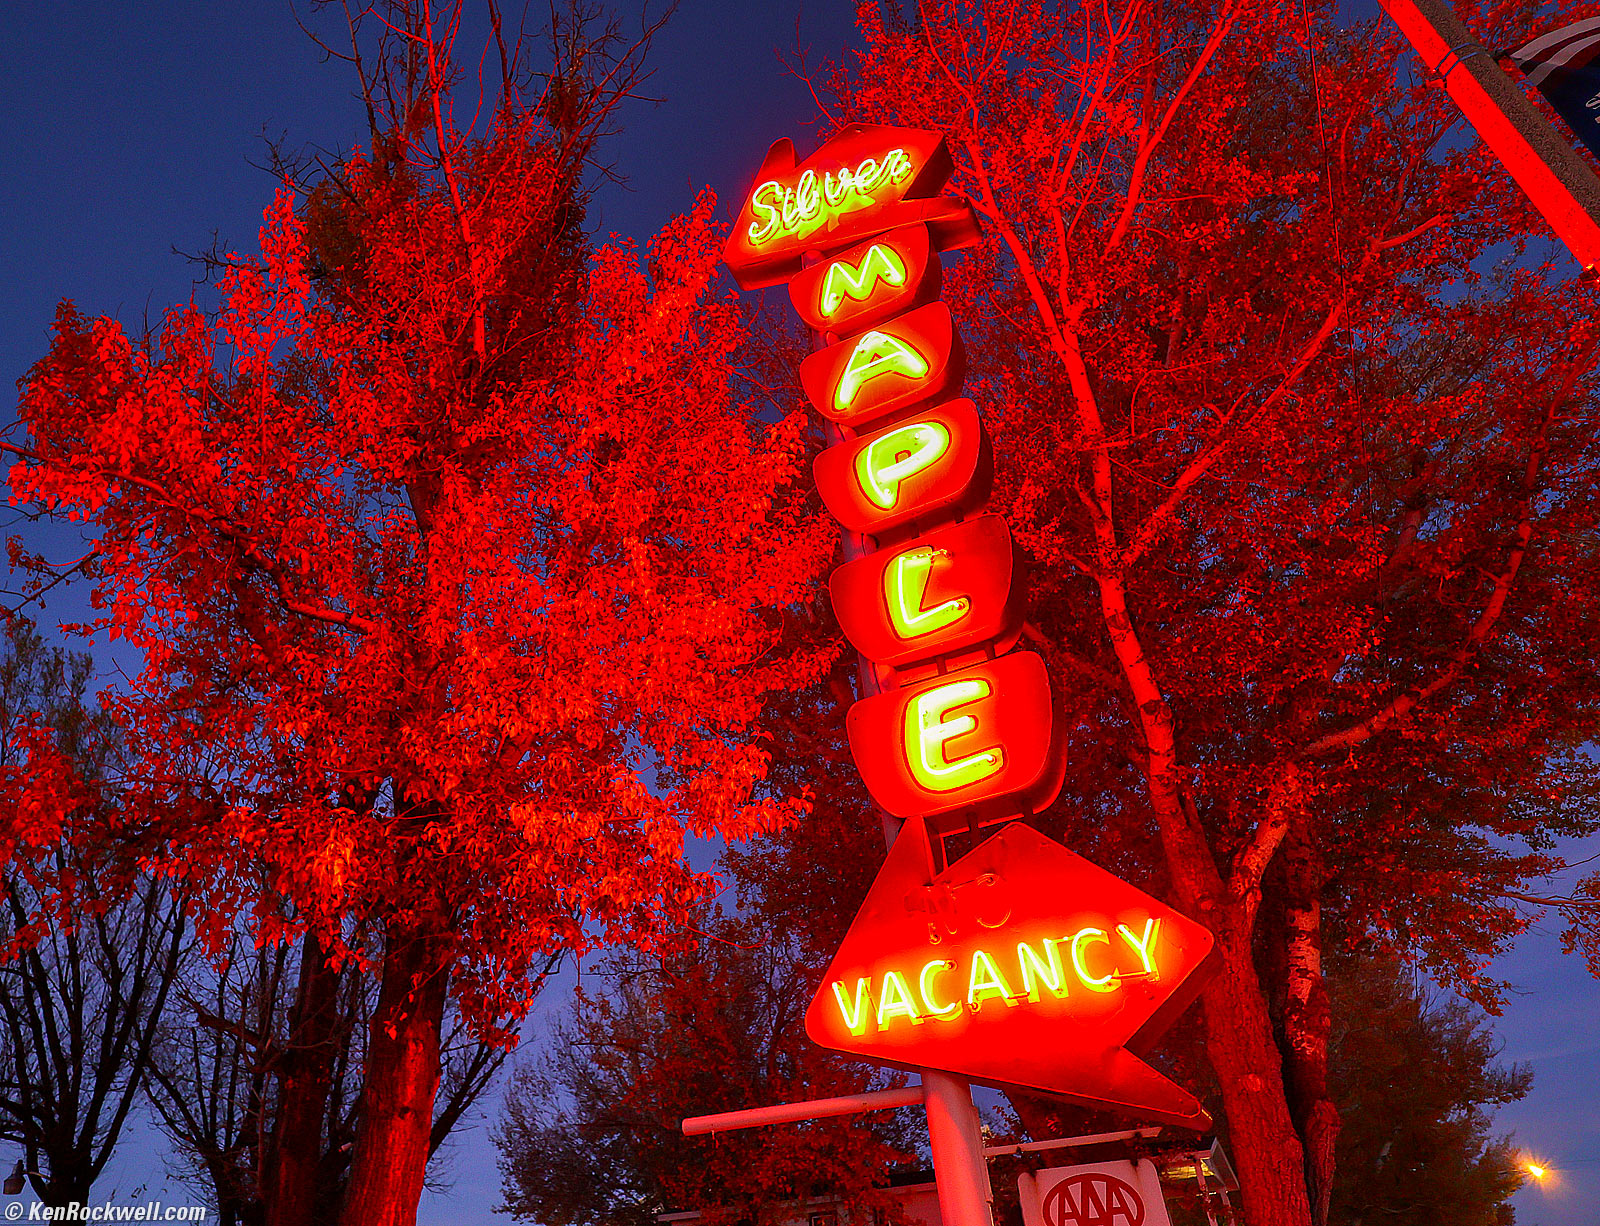
Silver Maple Inn, Bridgeport, California, 6:38 P.M. Apple iPhone 14 Pro Max 1× (6.9mm actual or 24mm eq.) camera, f/1.8 at 1/30 at Auto ISO 1,000 (LV 3¼). More tech details. bigger or fit-to-screen.
I used Skylum Luminar Neo's Erase tool to remove a flagpole running up the middle of the entire image, and to add some brightness and life.
Silver Maple Inn, Bridgeport, California, 6:39 P.M. Canon EOS R6, RF 15-30mm IS STM at 21mm, wide-open at f/5 hand-held at 1/10 at Auto ISO 1,000 (LV 4⅔). More tech details. bigger or fit-to-screen.
Busted! I forgot how I edited this photo, other than knowing that this published result has had the darker areas brightened in either Perfectly Clear and/or Skylum Luminar Neo.
General Store, Bridgeport, California, 6:42 P.M. Canon EOS R6, RF 15-30mm IS STM at 15mm wide-open at f/4.5 hand-held at 1/10 at Auto ISO 800, -2/3 stops exposure compensation (LV 4¾). More tech details. bigger or fit-to-screen.
I used Perfectly Clear to add detail in the shadows, and then lots of Skylum Luminar Neo's Supercontrast tool to put the highlights and shadows exactly where I want them, and especially used Neo's Erase tool to remove a bunch of mungdungus from the right hand side.
Here's how it came directly from my R6:

As shot. bigger.
Of course I could have added exposure as-shot, but that would have blown-out the highlights. Exactly as we shoot transparency (slide) film like Velvia 50, we protect the highlights from overexposure and bring up the shadows with supplemental lighting (film) or software (digital capture).
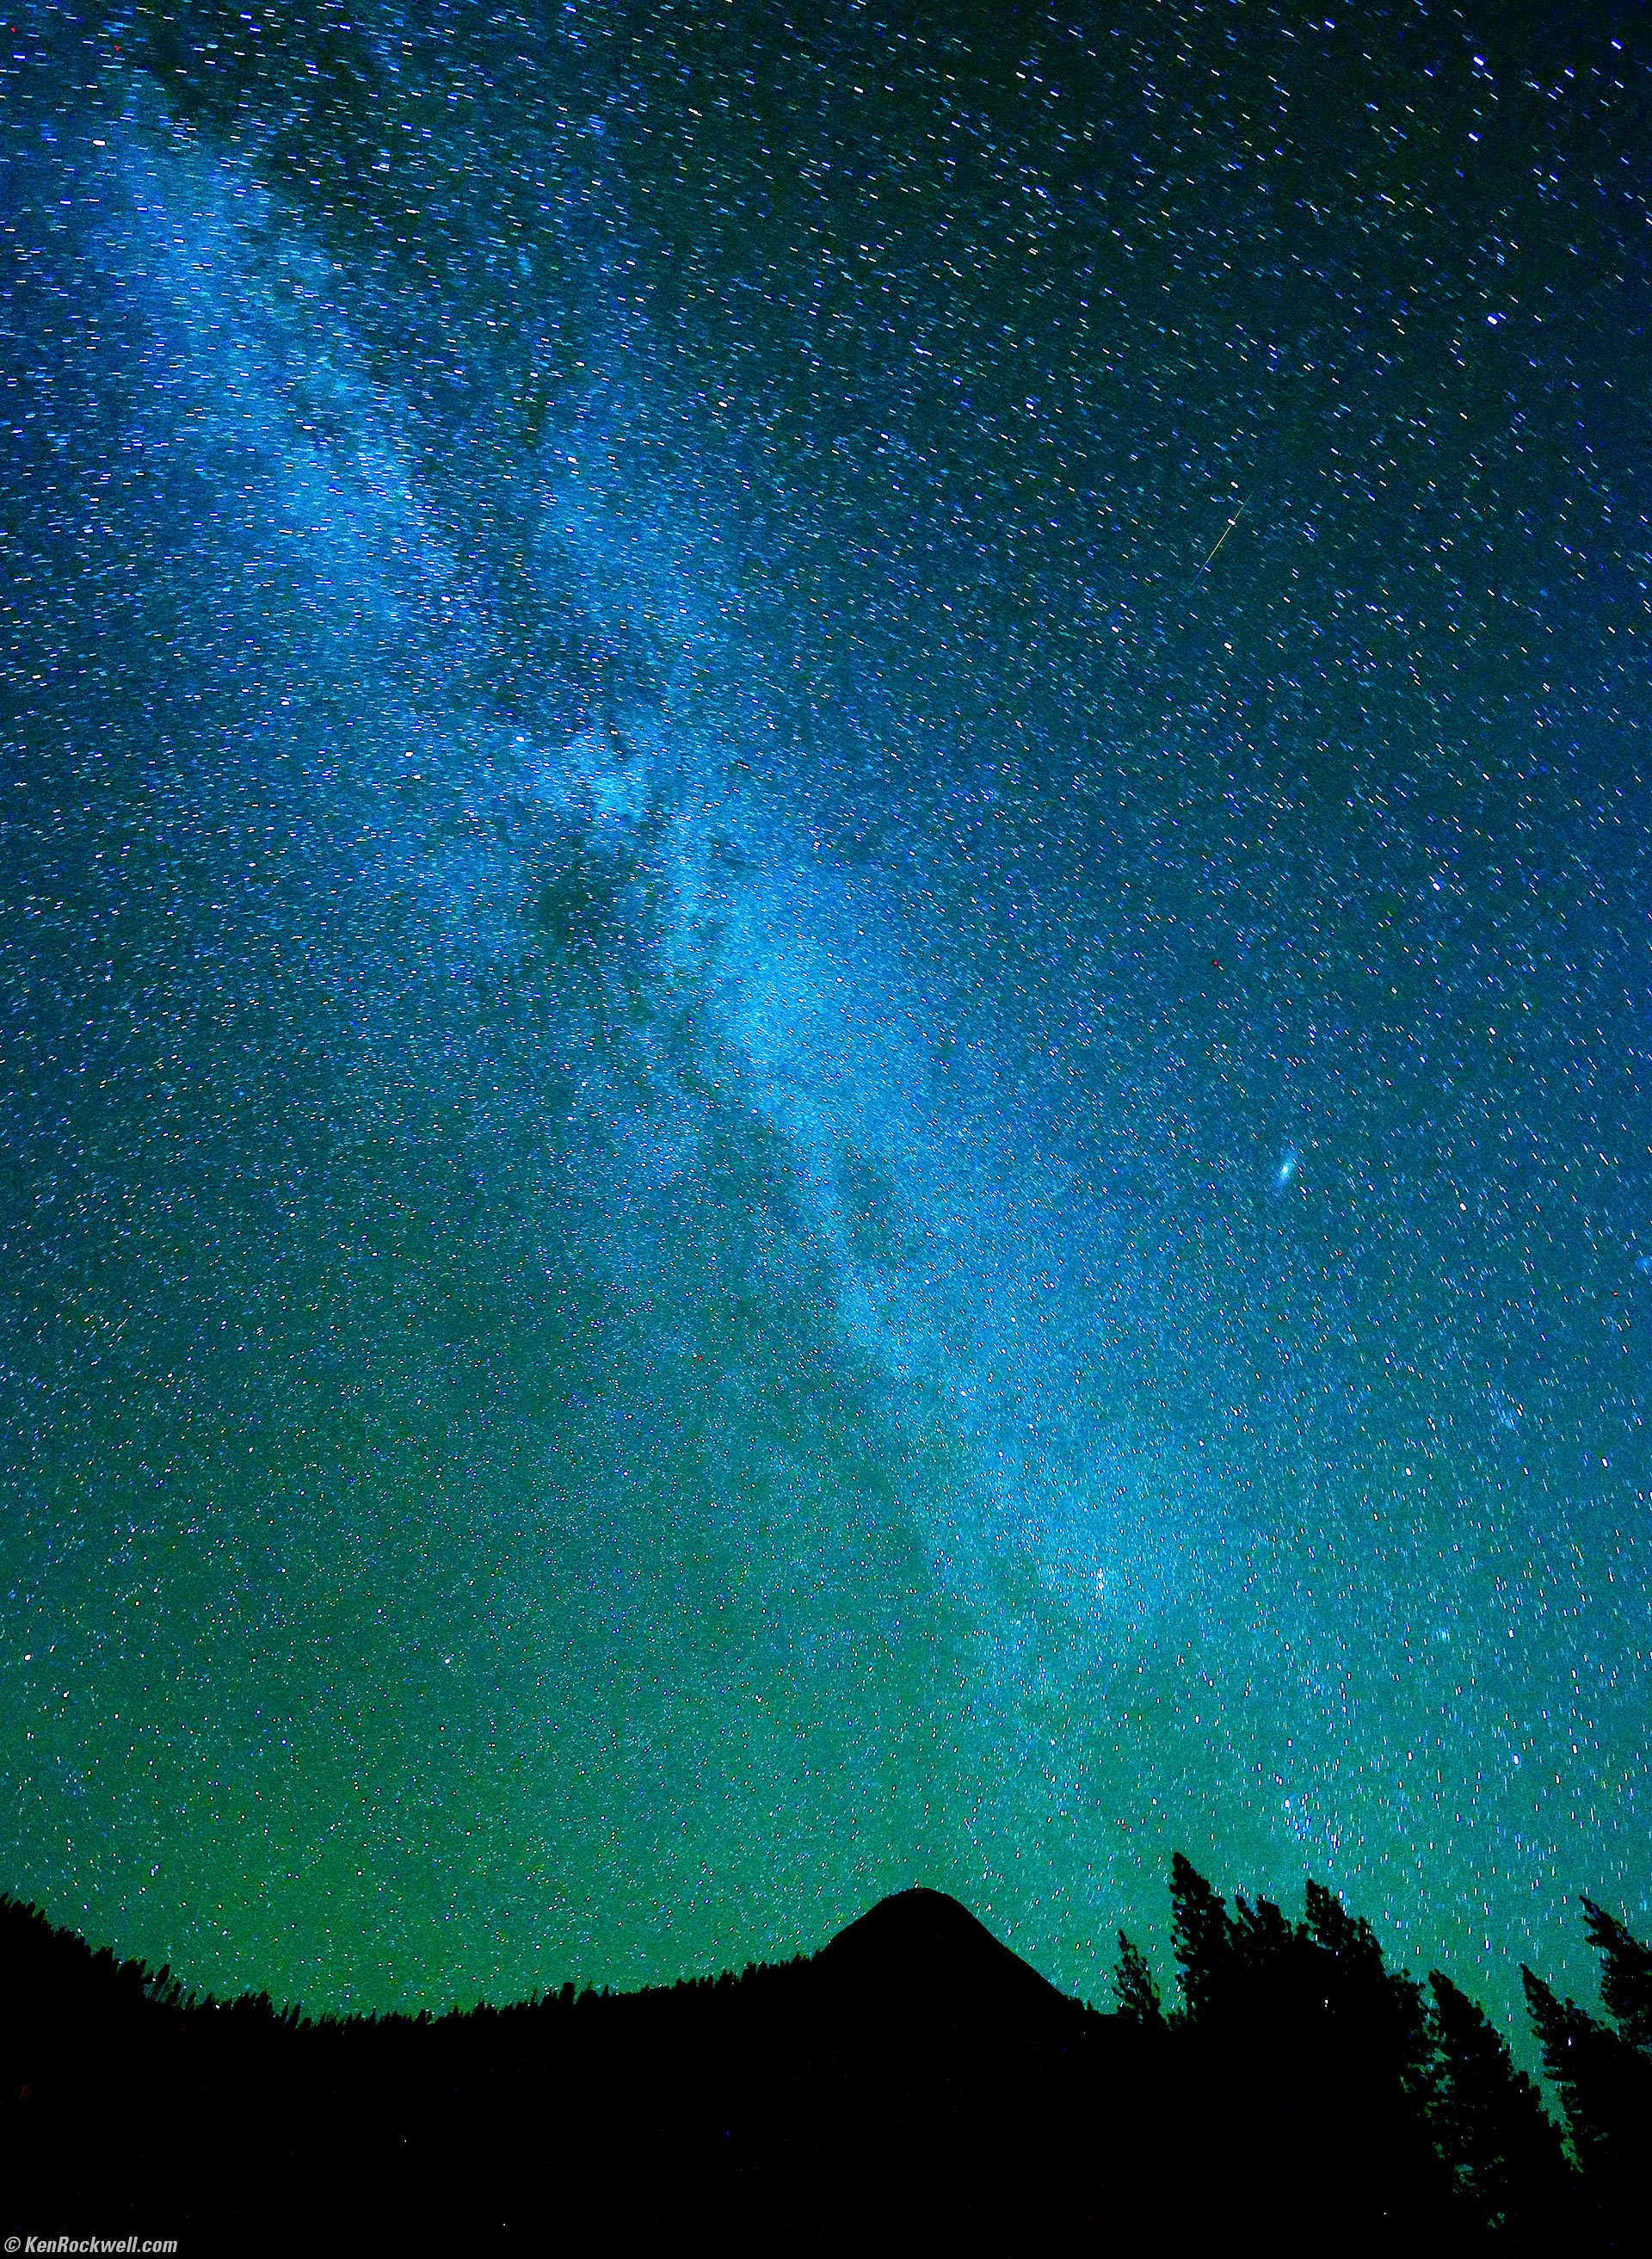
We had dinner at Rhino's from about 6:45 to 8P.M., and then headed out to the dark expanses of Twin Lakes Road to Photograph The Milky Way:
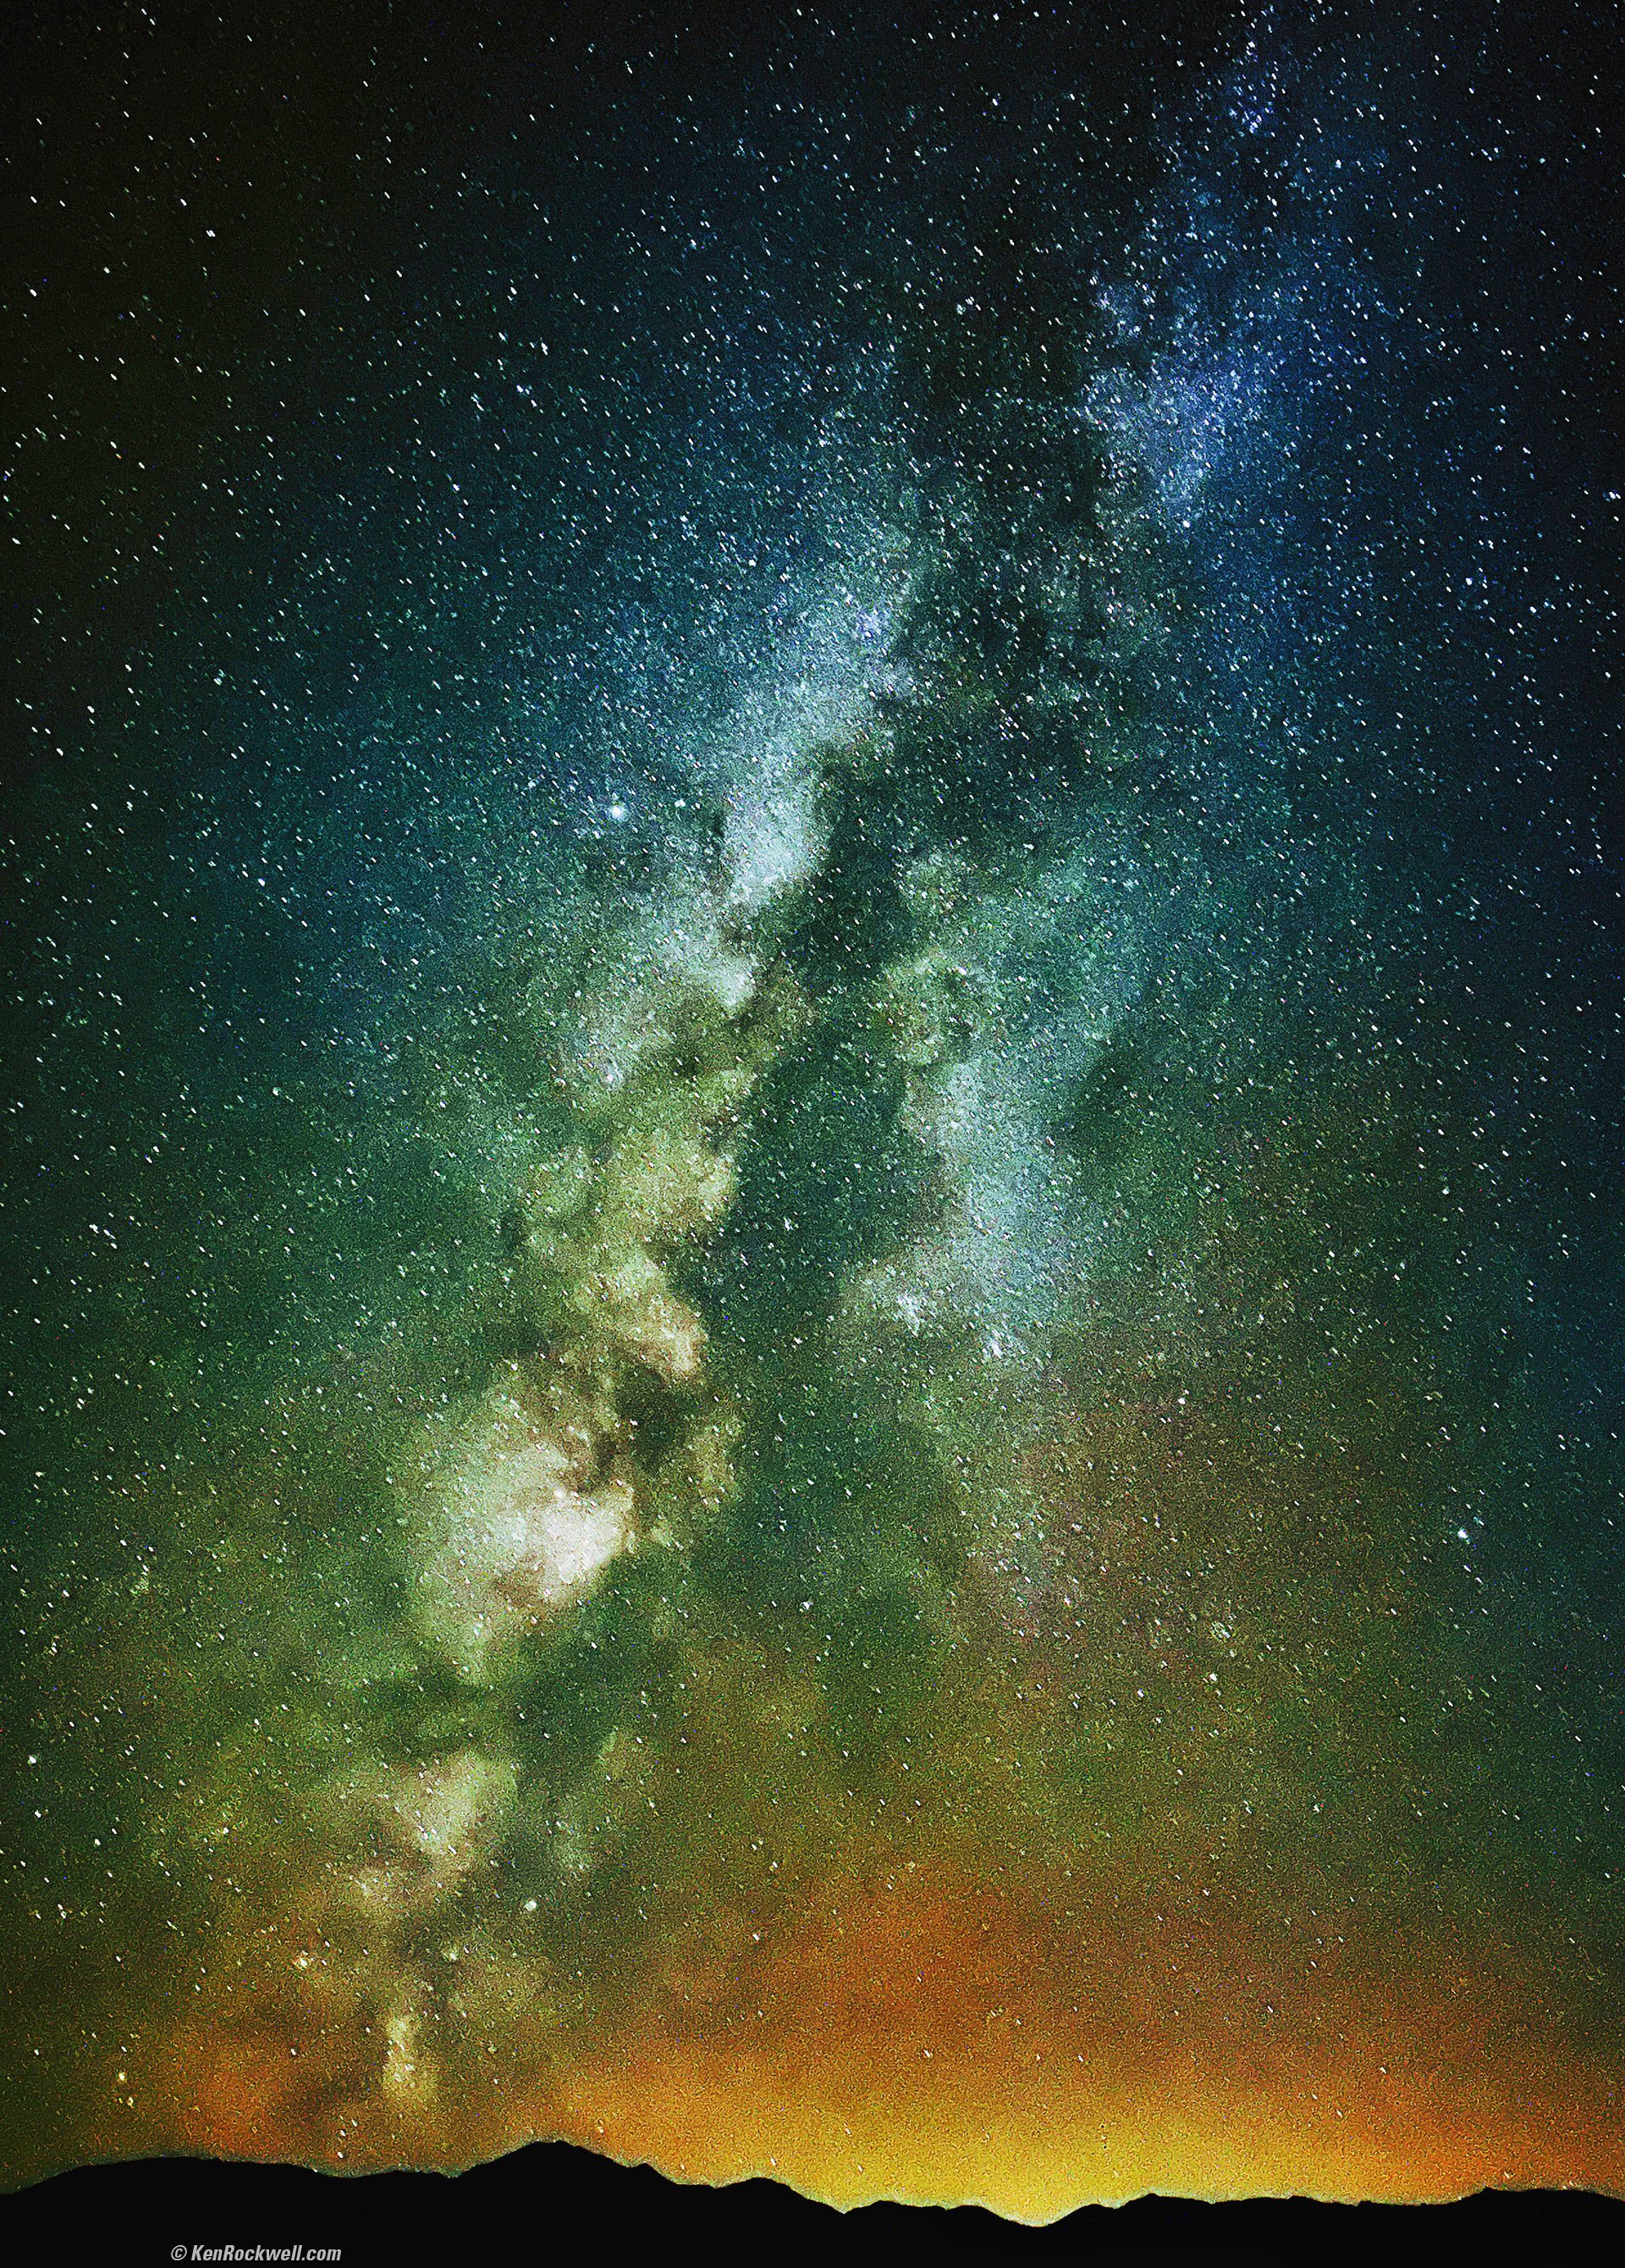
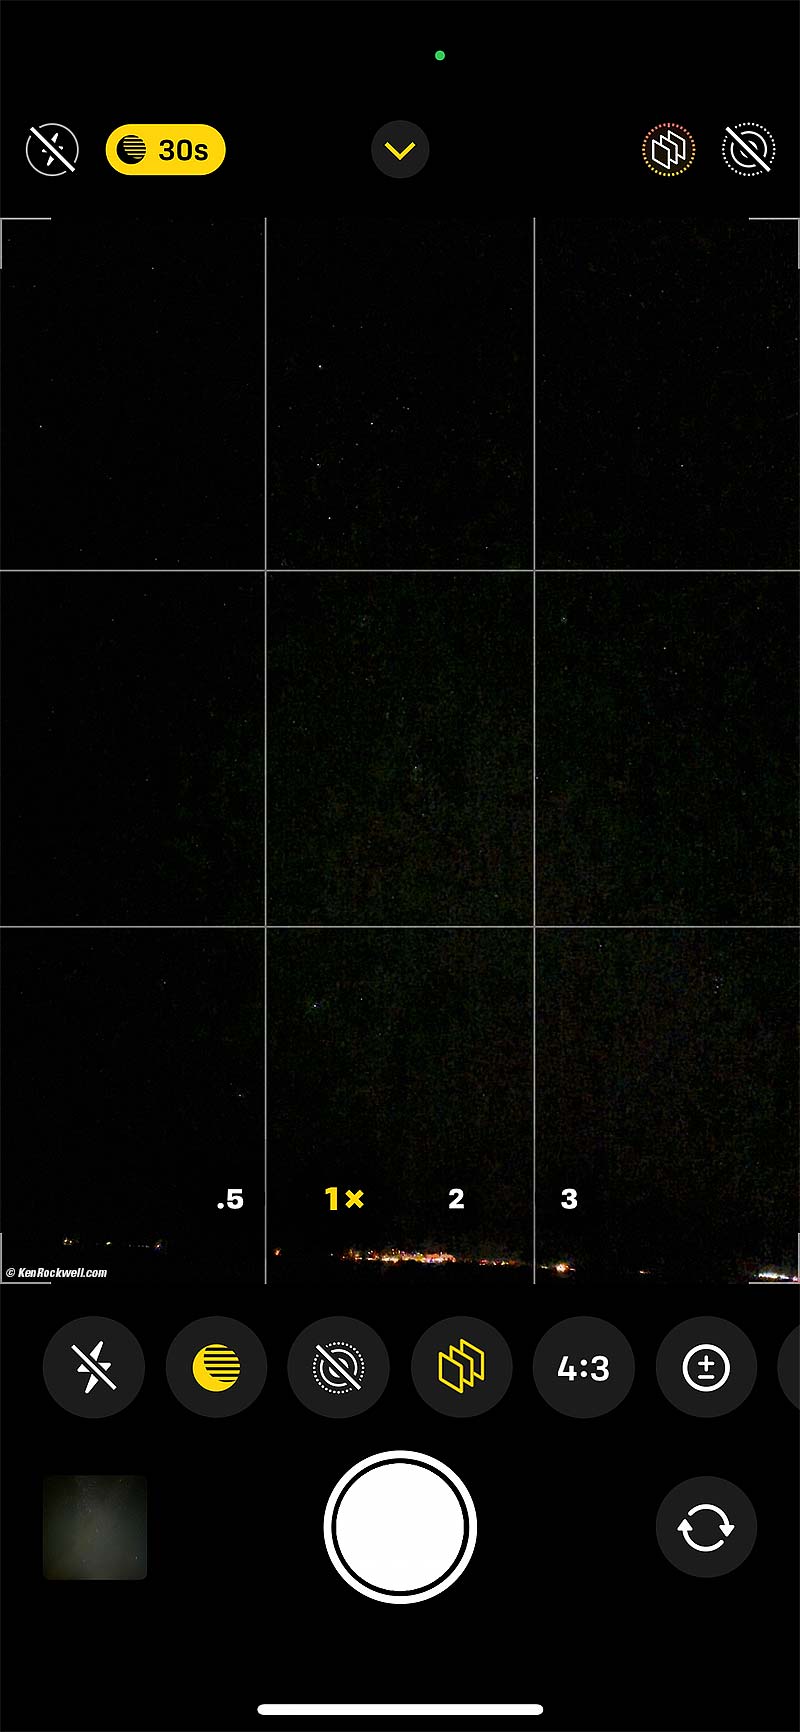
The Milky Way as seen from Twin Lakes Road, Bridgeport, California, 9:35 P.M. Apple iPhone 14 Pro Max 1× (6.9mm actual or 24mm eq.) camera, f/1.8 for 10 seconds at Auto ISO 12,500 (LV -8.6, that's LV minus 8.6!). More tech details. bigger or fit-to-screen.
To Shoot The Milky Way with an iPhone, I used my Oben CT-2491 Carbon-Fibre Tripod with my Manfrotto 410 (née Bogen 3275) Geared Head and Oben SPA-1000 iPhone adapter to hold it still, but it also works simply hand-holding it braced against something. By default the iPhone will try to use flash, so turn that off by tapping the flash icon. Now that the flash is off, you'll see "☽ 3s" at the top (held vertically, see below). For the cleanest image we want the longest exposure, so tap the little " ^ " symbol at the center top (held vertically) then along the bottom tap the ☽ moon (time exposure) icon and slide the time all the way to 30 seconds. Tap and release the ◉shutter button, wait for 30 seconds to count down, and you've got your shot. If you hand-hold, the default exposure is about 2 seconds and the maximum time is about only 10 seconds.
The iPhone knows from its acceleration sensors if it's on a tripod or not, and only allows times longer than 10 seconds if you're on a tripod. It's also brilliant in knowing that the longest any normal person will hold an iPhone for a long exposure is only a few seconds, and adjusts accordingly hand-held. Even though you'll get something even handheld for just a few seconds, longer exposures collect more light and result in more detail and less noise.
While the indicated exposure times on the time exposure scale refer to the total time iPhone is exposing and counting down (like 30 seconds maximum in the shot above), the effective exposure time recorded in EXIF data is less (10 seconds in the shot above). This is because iPhone is using magic to capture and combine many, many separate shorter, sharper shots into the one file it saves.
Most of this I edited in the free Snapseed app on my iPhone while we had breakfast the next morning at the Bridgeport Inn. Back at my studio I amped it even further in Skylum Luminar Neo.
I tried Neo's Noise AI noise reduction, but all it did was blur the sky. I prefer the noise, which for all I know are a zillion other stars that add to this picture.
My newest Apple iPhone 14 Pro Max is vastly superior to my iPhone 11 Pro Max I used to make a similar shot back in 2019. My 2019 shot was astounding back in 2019 when I'd never seen a phone catch the Milky May before, but to be honest it was a very flat image that I forced into monochrome and then colorized to blue for effect — still a monochrome image, but oh the memories of that spot.
Now the Apple iPhone 14 Pro Max sees in color under starlight - which is something even our eyes can't do.
The Apple iPhone 14 Pro Max shot this as it looked to our eyes: dim and monochrome. I used Snapseed and Skylum Luminar Neo to make it brilliant like this, the way I wanted it to look. It certainly didn't look like this when we were there! The actual Milky Way is very dim to our eyes, against a sea of stars.
Here's something Nikon Z cameras can't do:
Screen Shot: You can see the stars live! bigger.
The finders of Nikon Z cameras, at least as of 2023, work very poorly in the dark. They become extremely noisy and nearly useless even in ordinary backyard nighttime light, while the iPhone is still amazingly clean and clear, showing us individual stars, even under starlight!
We got back to our rooms just after 10 P.M. after an extremely a long day that started at 4:40 A.M. How did any of us ever find the time for looking at photos back at the motel afterwards back in the day? Such energy when you get on a roll!
20 October 2022, Thursday top
17, 18, 19, 20, 21, 22 & 23 October 2022
Today I slept-in until 7:15 A.M. We left the Redwood Motel about 8 A.M. and walked to The Bridgeport Inn for a group breakfast.
We packed up after breakfast and headed out at 10:05 A.M. to photograph the Hot Springs at 10:20 A.M. We said goodbye to some of the group, and the other half drove with us to our next outing in Yosemite.
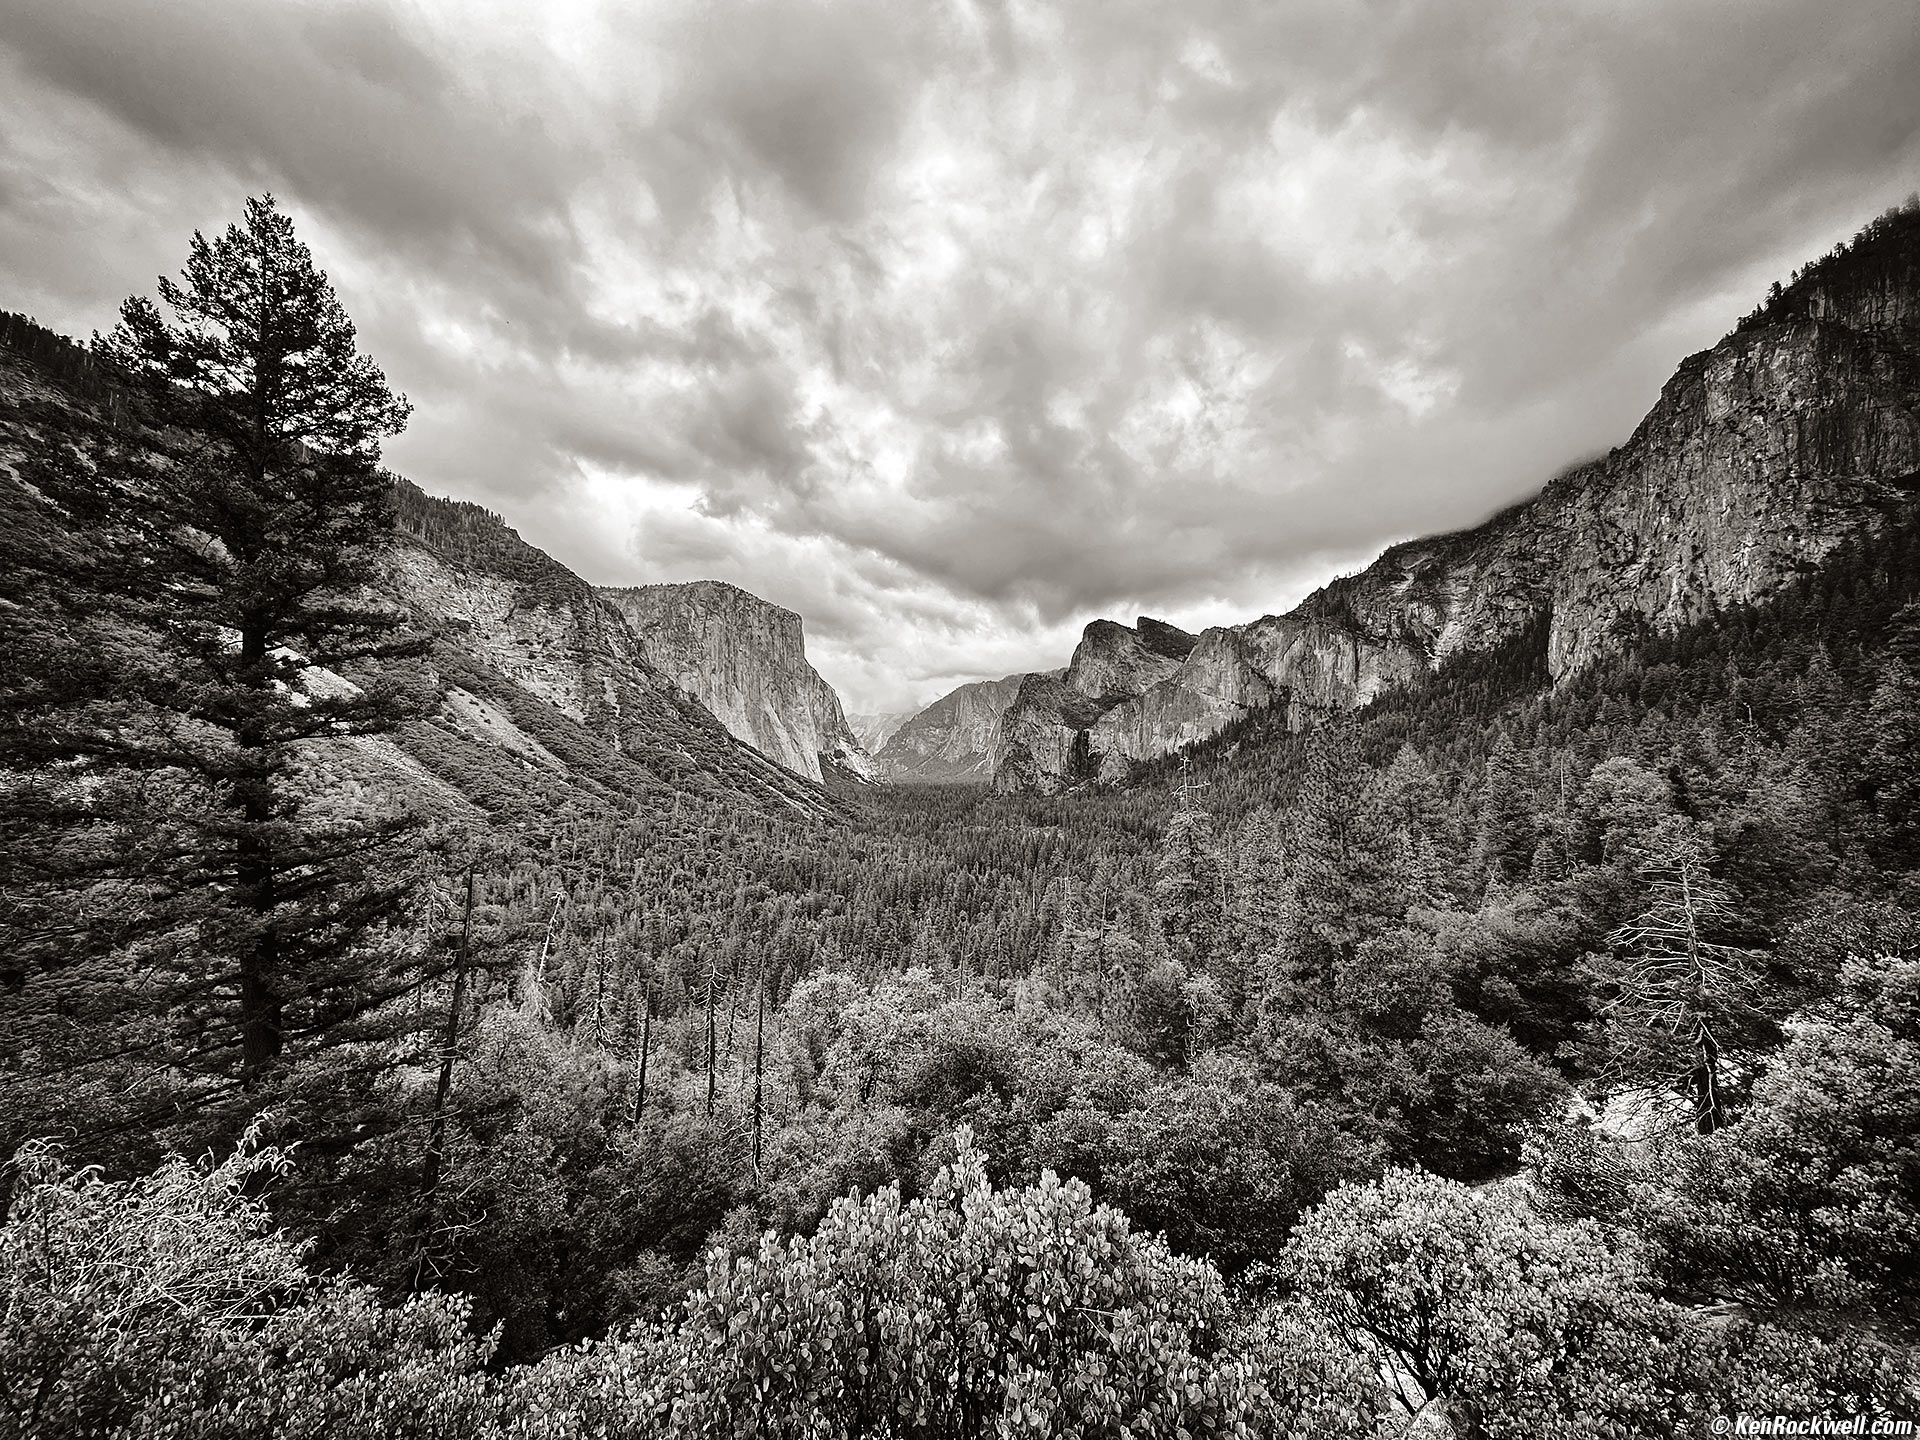
We took on fuel in Lee Vining at 12:20 P.M. We entered Yosemite at Tioga Pass at 12:43 P.M. and stopped shortly at Olmstead Point at 1:30 P.M. Sorry, no photos exciting enough to drop in between the Milky Way above and Half Dome below.
We arrived at The Yosemite Valley Lodge (at the Falls) at 3:17 P.M. and checked in.
We met the group at 5:30 P.M. and walked to:
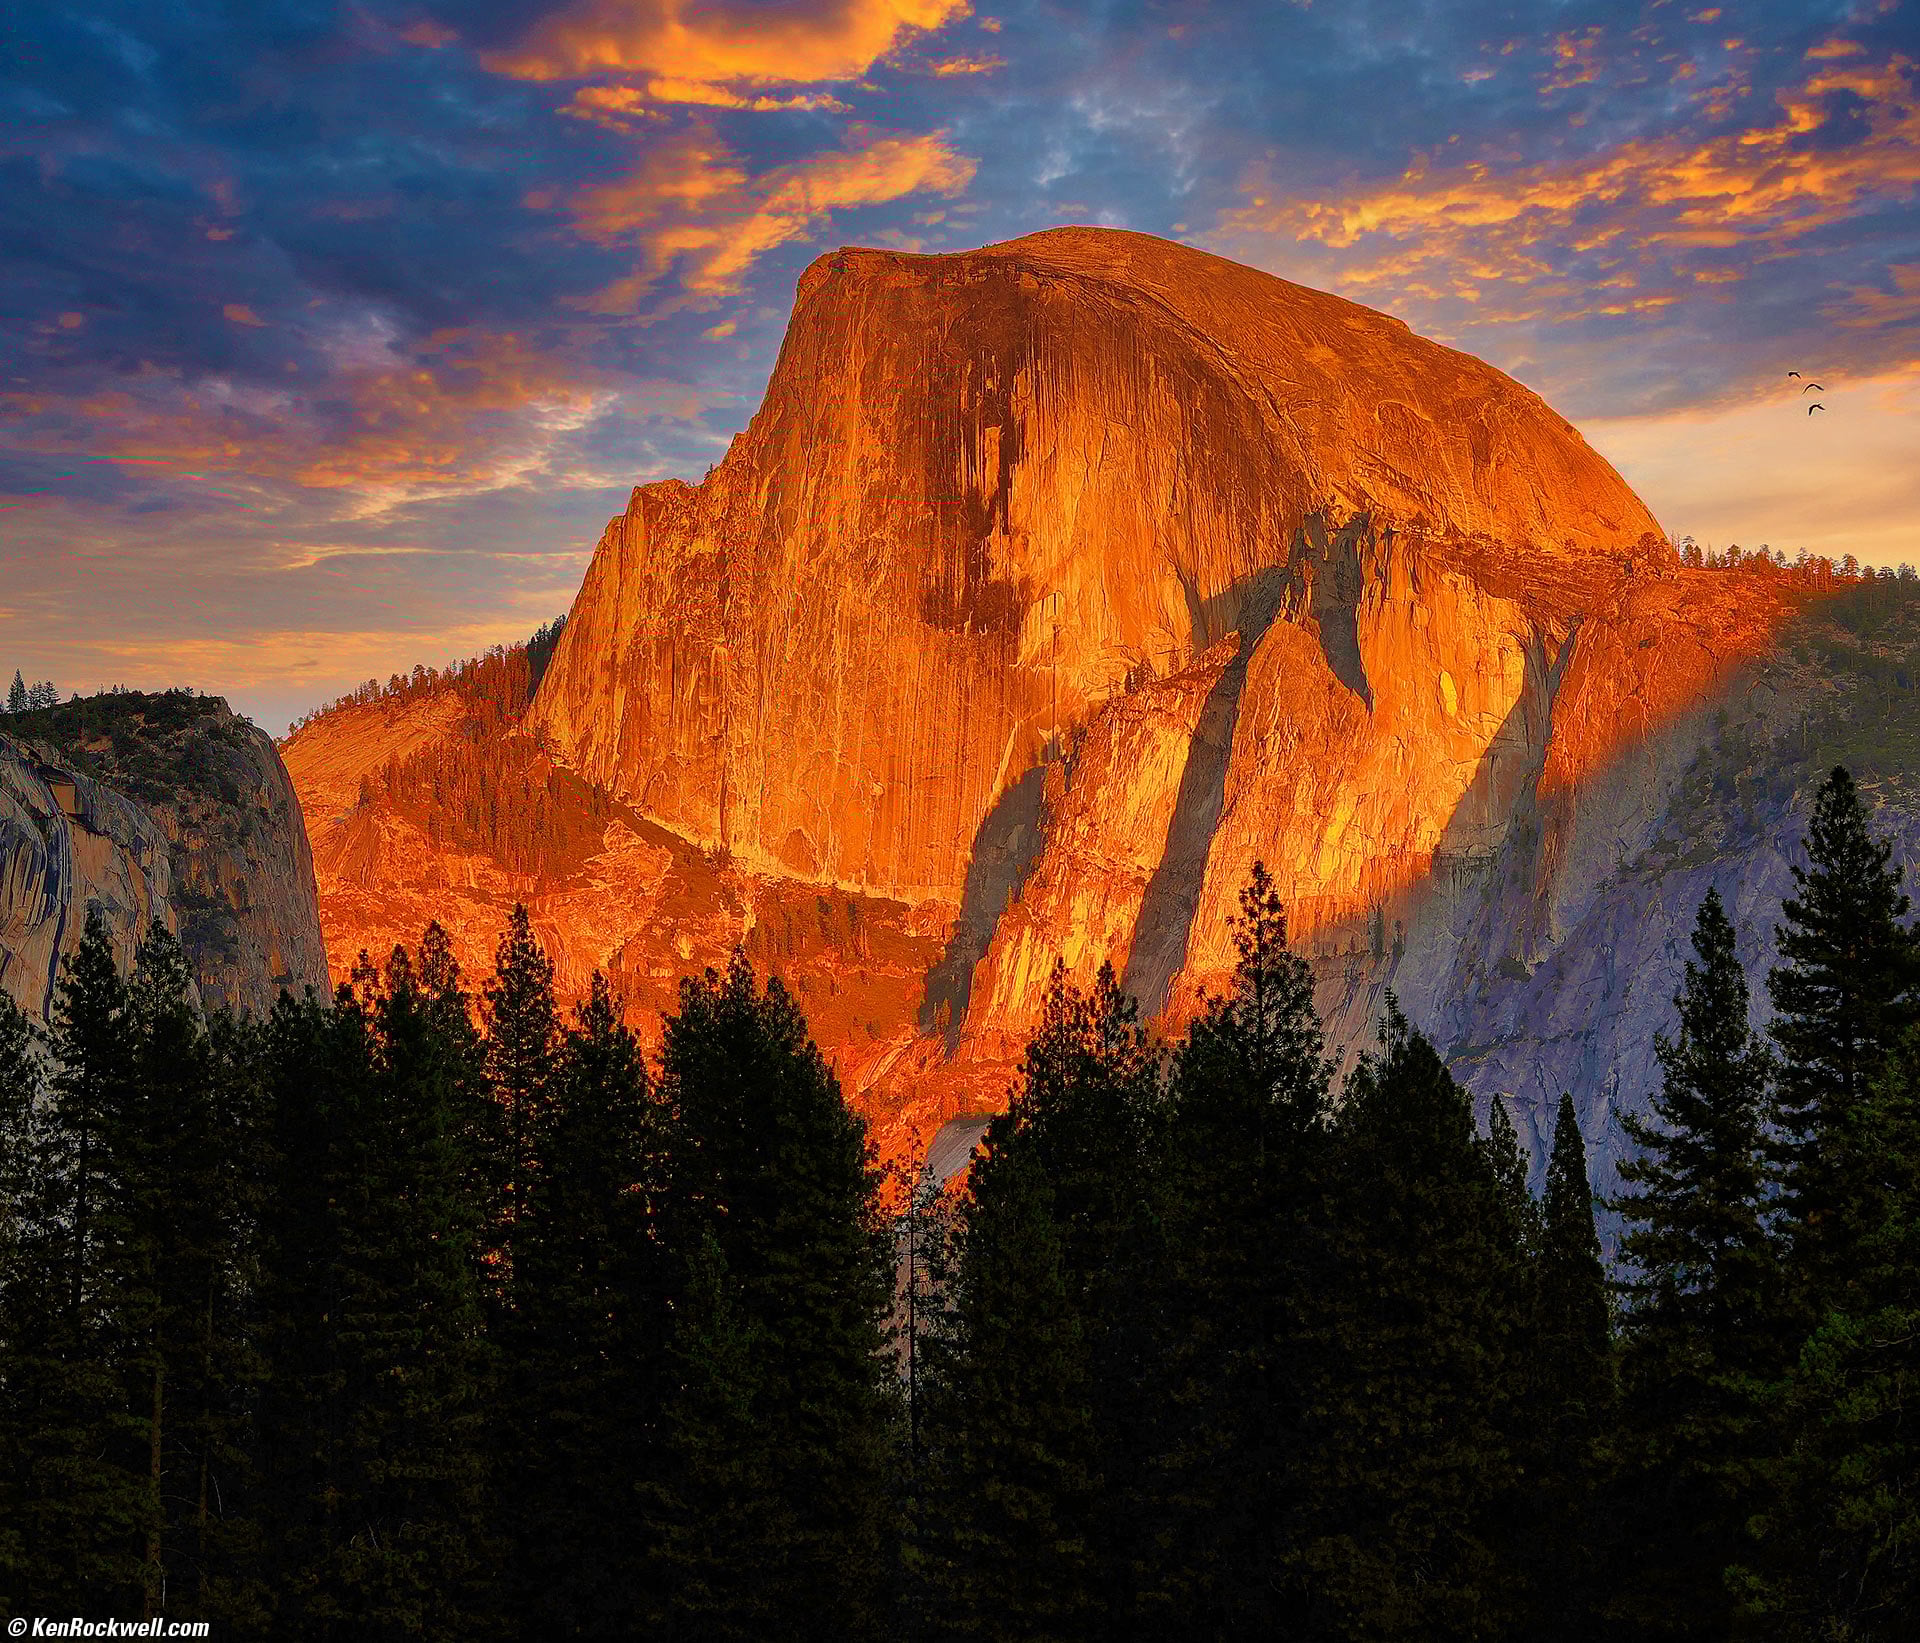
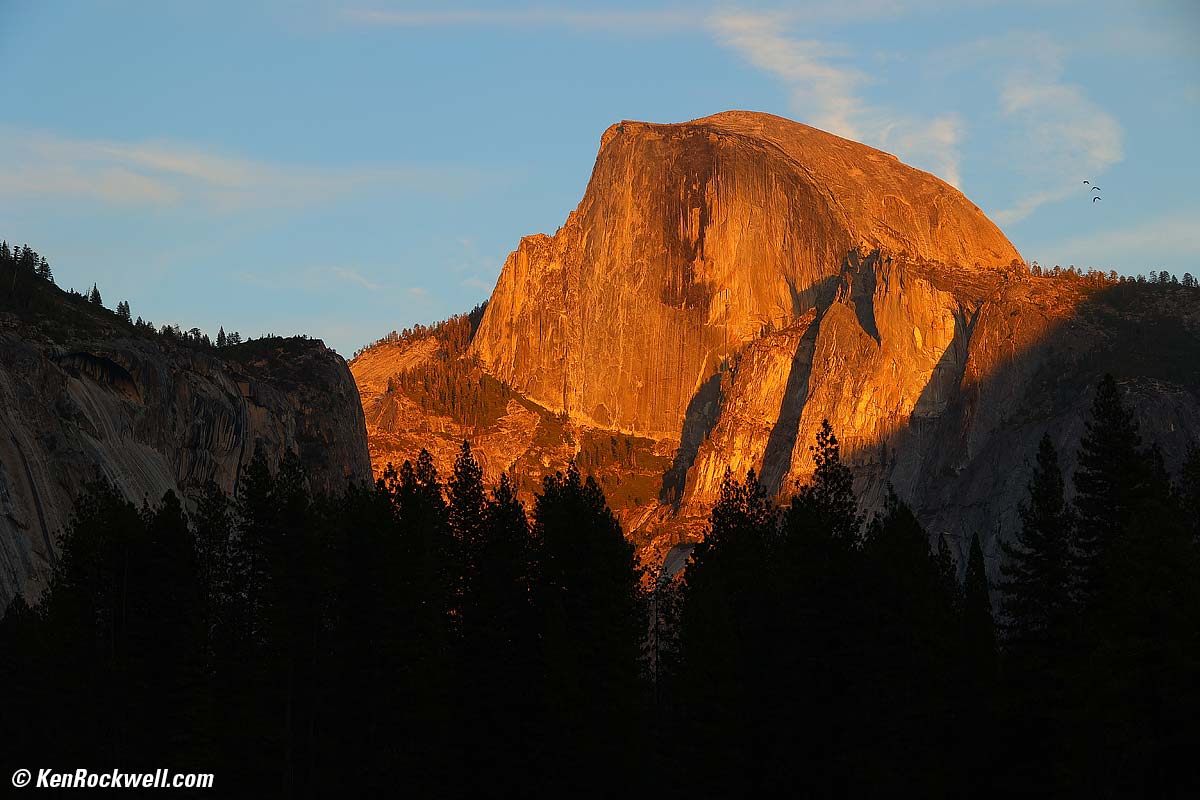
Half Dome in Last Light, Cook's Meadow, Yosemite National Park, California, 5:59 P.M. Canon EOS R6, RF 24-240mm IS USM at 83mm, f/8 at 1/60 at Auto ISO 100, -2/3 stops exposure compensation (LV 12.0). More tech details. bigger or fit-to-screen.
This is more of a painting than a photo with all the work I put into it. I started with a snap from my R6, and in addition the to the usual magic I create with Perfectly Clear and Skylum Luminar Neo, like highlighting the warm reflections of Half Dome as seen on the outcropping on the left, I also added dramatic sunset clouds to an otherwise empty sky with Skylum Luminar Neo. Neo makes it easy to add clouds; they're already in the program and it's smart enough to put the sky behind the three birds on the right who really were in the photo!
As shot. bigger.
See how critical simple cropping can be? By removing most of the left side and some of the right where there was nothing, the image becomes more square and grows in size when displayed at the same width as I'm showing the images on this page, as well as we see in Instagram, Facebook and Twitter. In other words, including the dull area on the left means that the entire image has to be displayed smaller to fit inside the same width. By removing what's not helping, what is interesting fills much more of the active image area and creates a far more powerful image. F.A.R.T.: show me what's important.
That was it for the evening. We hit the sack.
21 October 2022, Friday top
17, 18, 19, 20, 21, 22 & 23 October 2022
We met our group at 7 A.M. outside between the Lodge at the Falls lobby and the mess hall, and walked out along the Merced River.
We came back, enjoyed breakfast at the Basecamp Eatery at 9:17 A.M., went back to our rooms to brush our teeth and then went out to Stoneman Meadow at 11 A.M., then headed past the Yosemite Chapel and found this just south of it:

Chromatic Grass, Sentinel Meadow Just South of the Chapel, Yosemite National Park, California, 11:45 A.M. Canon EOS R6 in square crop mode, RF 24-240mm IS USM at 109mm (equivalent to the ZEISS 250mm f/5.6 SONNAR lens on HASSELBLAD 6×6), f/20 hand-held at 1/8 second at ISO 200, -1/3 stop exposure compensation (LV 10.6). More tech details. bigger or fit-to-screen.
I used Perfectly Clear to brighten it a bit, and then Skylum Luminar Neo to amplify the colors, remove spurious weeds and add vignetting to keep your eyes in the picture.
We had lunch, and then drove out to El Capitan Meadow. Here's what I saw on a tree at the south side of the meadow:
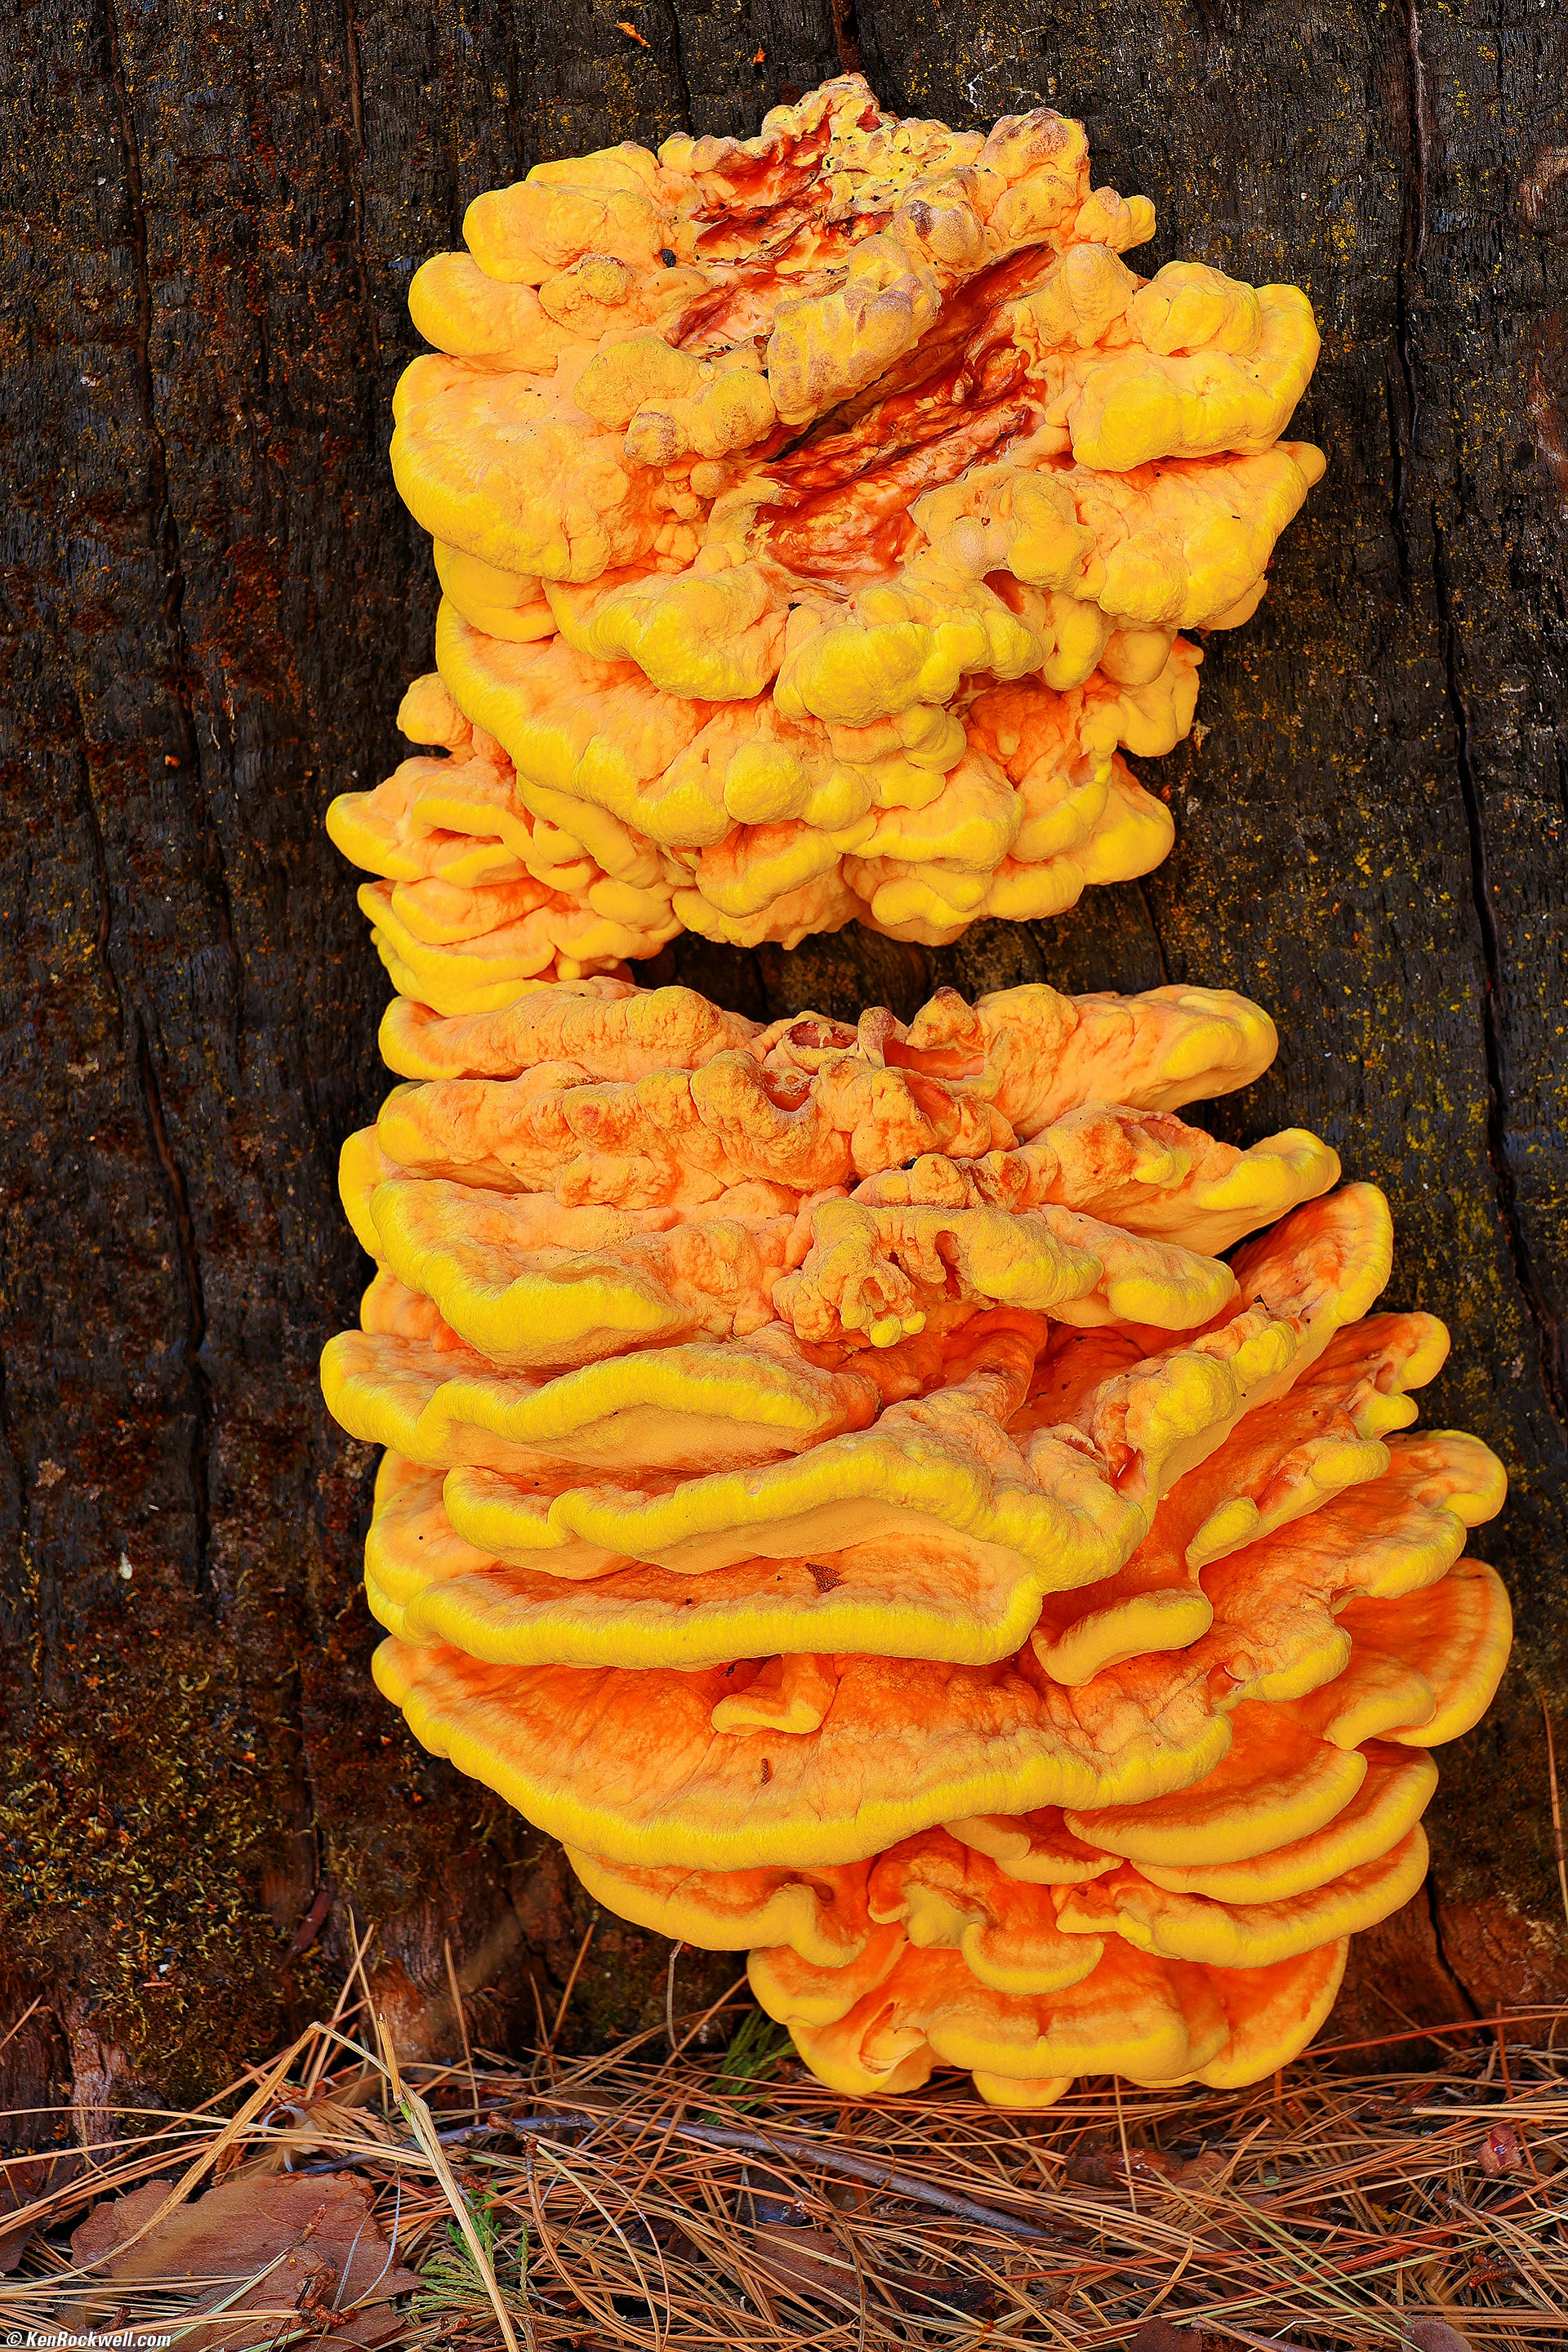
Gigantic "Chicken of the Forest" (Laetiporus sulphureus) fungus, El Capitan Meadow, Yosemite National Park, California, 3:28 P.M. Canon EOS R6, RF 24-240mm IS USM at 70mm, f/8 hand-held at 1/15 at Auto ISO 100, -1/3 stop exposure compensation (LV 10.0). More tech details. bigger or fit-to-screen.
As usual, shooting at 1/15 hand-held at 70mm is perfectly sharp. I love image stabilization!
I used Perfectly Clear to bring up the dark wood, otherwise this is pretty much as shot.
When we found it, the brainier among us remarked "Chicken of the Woods, but of course!" While I thought they were kidding, I tapped the plant identifier (leaf) icon my iPhone put over the image after I tapped ⓘ (photo info) icon, and I kid you not, up popped a dissertation with detailed text and other photos from Wikipedia all about it!
While my iPhone shot can't touch this because the iPhone didn't retain this saturation because it overexposed trying to keep detail in the dark wood, what is absolutely astonishing is that my iPhone knew exactly what this was, as well as tagged the location that my R6 does not!
Hint: When you see little sparkles on the ⓘ (photo info) icon, that means our smarty-pants iPhone wants to tell us all about what sort of plant or animal or thing it is.
I looked back as we walked to our cars parked along the north side of the meadow, and saw this:
Backlit Tree Couple, El Capitan Meadow, Yosemite National Park, California, 3:45 P.M. Canon EOS R6, RF 24-240mm IS USM at 40mm, f/6.3 at 1/125 at Auto ISO 100 (LV 12.4). More tech details. bigger or fit-to-screen.
I used Perfectly Clear to add detail and color in the backlit trunks, and Skylum Luminar Neo to Erase distractions and see precise vignetting. Otherwise the original file looked pretty good.
We drove over to Valley View, parked, and saw this:
Valley View with Dramatic Sunset Clouds, Yosemite National Park, California, 4:16 P.M. Apple iPhone 14 Pro Max 1× (6.9mm actual or 24mm eq.) camera (equivalent to a little cropping from the ZEISS 50mm f/4 DISTAGON on HASSELBLAD 6×6), f/1.8 at 1/1,062 at Auto ISO 80 (LV 12.0). More tech details. bigger or fit-to-screen.
I'm so bad. Artists know the only rule is that there are no rules. First I fiddled with this in the free Snapseed app in my iPhone right as I made the image. I amped it up, but the sky today was blank.
No problem; Skylum Luminar Neo made it trivially easy to add a sky that came from inside the Neo program itself. Of course I played with highlights and shadows in Neo's Supercontrast tool, which made it easy to use a mask to control the slightly blown-out highlights on the right. I added vignetting for emphasis and removed the boring left side and empty bottom and cropped it into a tighter square.
Here's what came out of the iPhone, which is exactly as it looked to my eye — but not to my imagination:
As shot. bigger.
It's not just the crazy clouds and colors I added; cropping what's not needed both horizontally and vertically let what is important grow and make for a much stronger image.
Laugh all you want, but artists have been adding skies to landscapes forever, and photographers have been adding clouds to photos since the 1800's using different optically-printed negatives on different masked sections of printing paper. This is nothing new; back in olden days plates and film were only sensitive to blue and ultraviolet light and it was nearly impossible to get a sky to appear in the same image as the foreground.
We went up to Tunnel View, and then Curry Village for dinner before the sunset. We walked out to Stoneman Meadow for sunset, and I made the same image I made there last year.
We went back out to shoot The Milky Way at Stoneman Meadow later that night:
The Milky Way and the Andromeda Galaxy as seen from Stoneman Meadow, Yosemite National Park, California, 8:39 P.M. Canon EOS R6, Tungsten white balance to make it blueish, RF 15-30mm IS STM at 15mm, f/6.3 for 80 seconds at ISO 6,400 (LV -7.0, or minus 7.0!). More tech details. bigger or fit-to-screen.
See the flat diagonal blob in the middle right? That's M31, the Andromeda Galaxy. It's much brighter in this photo than it looked to the eye.
I simply adding a curves adjustment layer in Photoshop CS6 (2012) to lighten everything and add color.
I should have used f/4.5 for 40 seconds rather than f/6.3 for 80 seconds, but tough; i was helping the other workshop participants set their cameras out in the dark. We had also met in a room to get as much as we could set where we could see our cameras.
While the R6 was sharp, it can't compensate for the Earth's motion so you see star trails rather than dots on the top right. Ideally use a motorized astronomical clock-drive tripod head system that tracks stars so you can make very long exposures and keep the stars sharp.
My Apple iPhone 14 Pro Max uses very crafty compensation as it makes multiple time exposures and corrects for this magically:
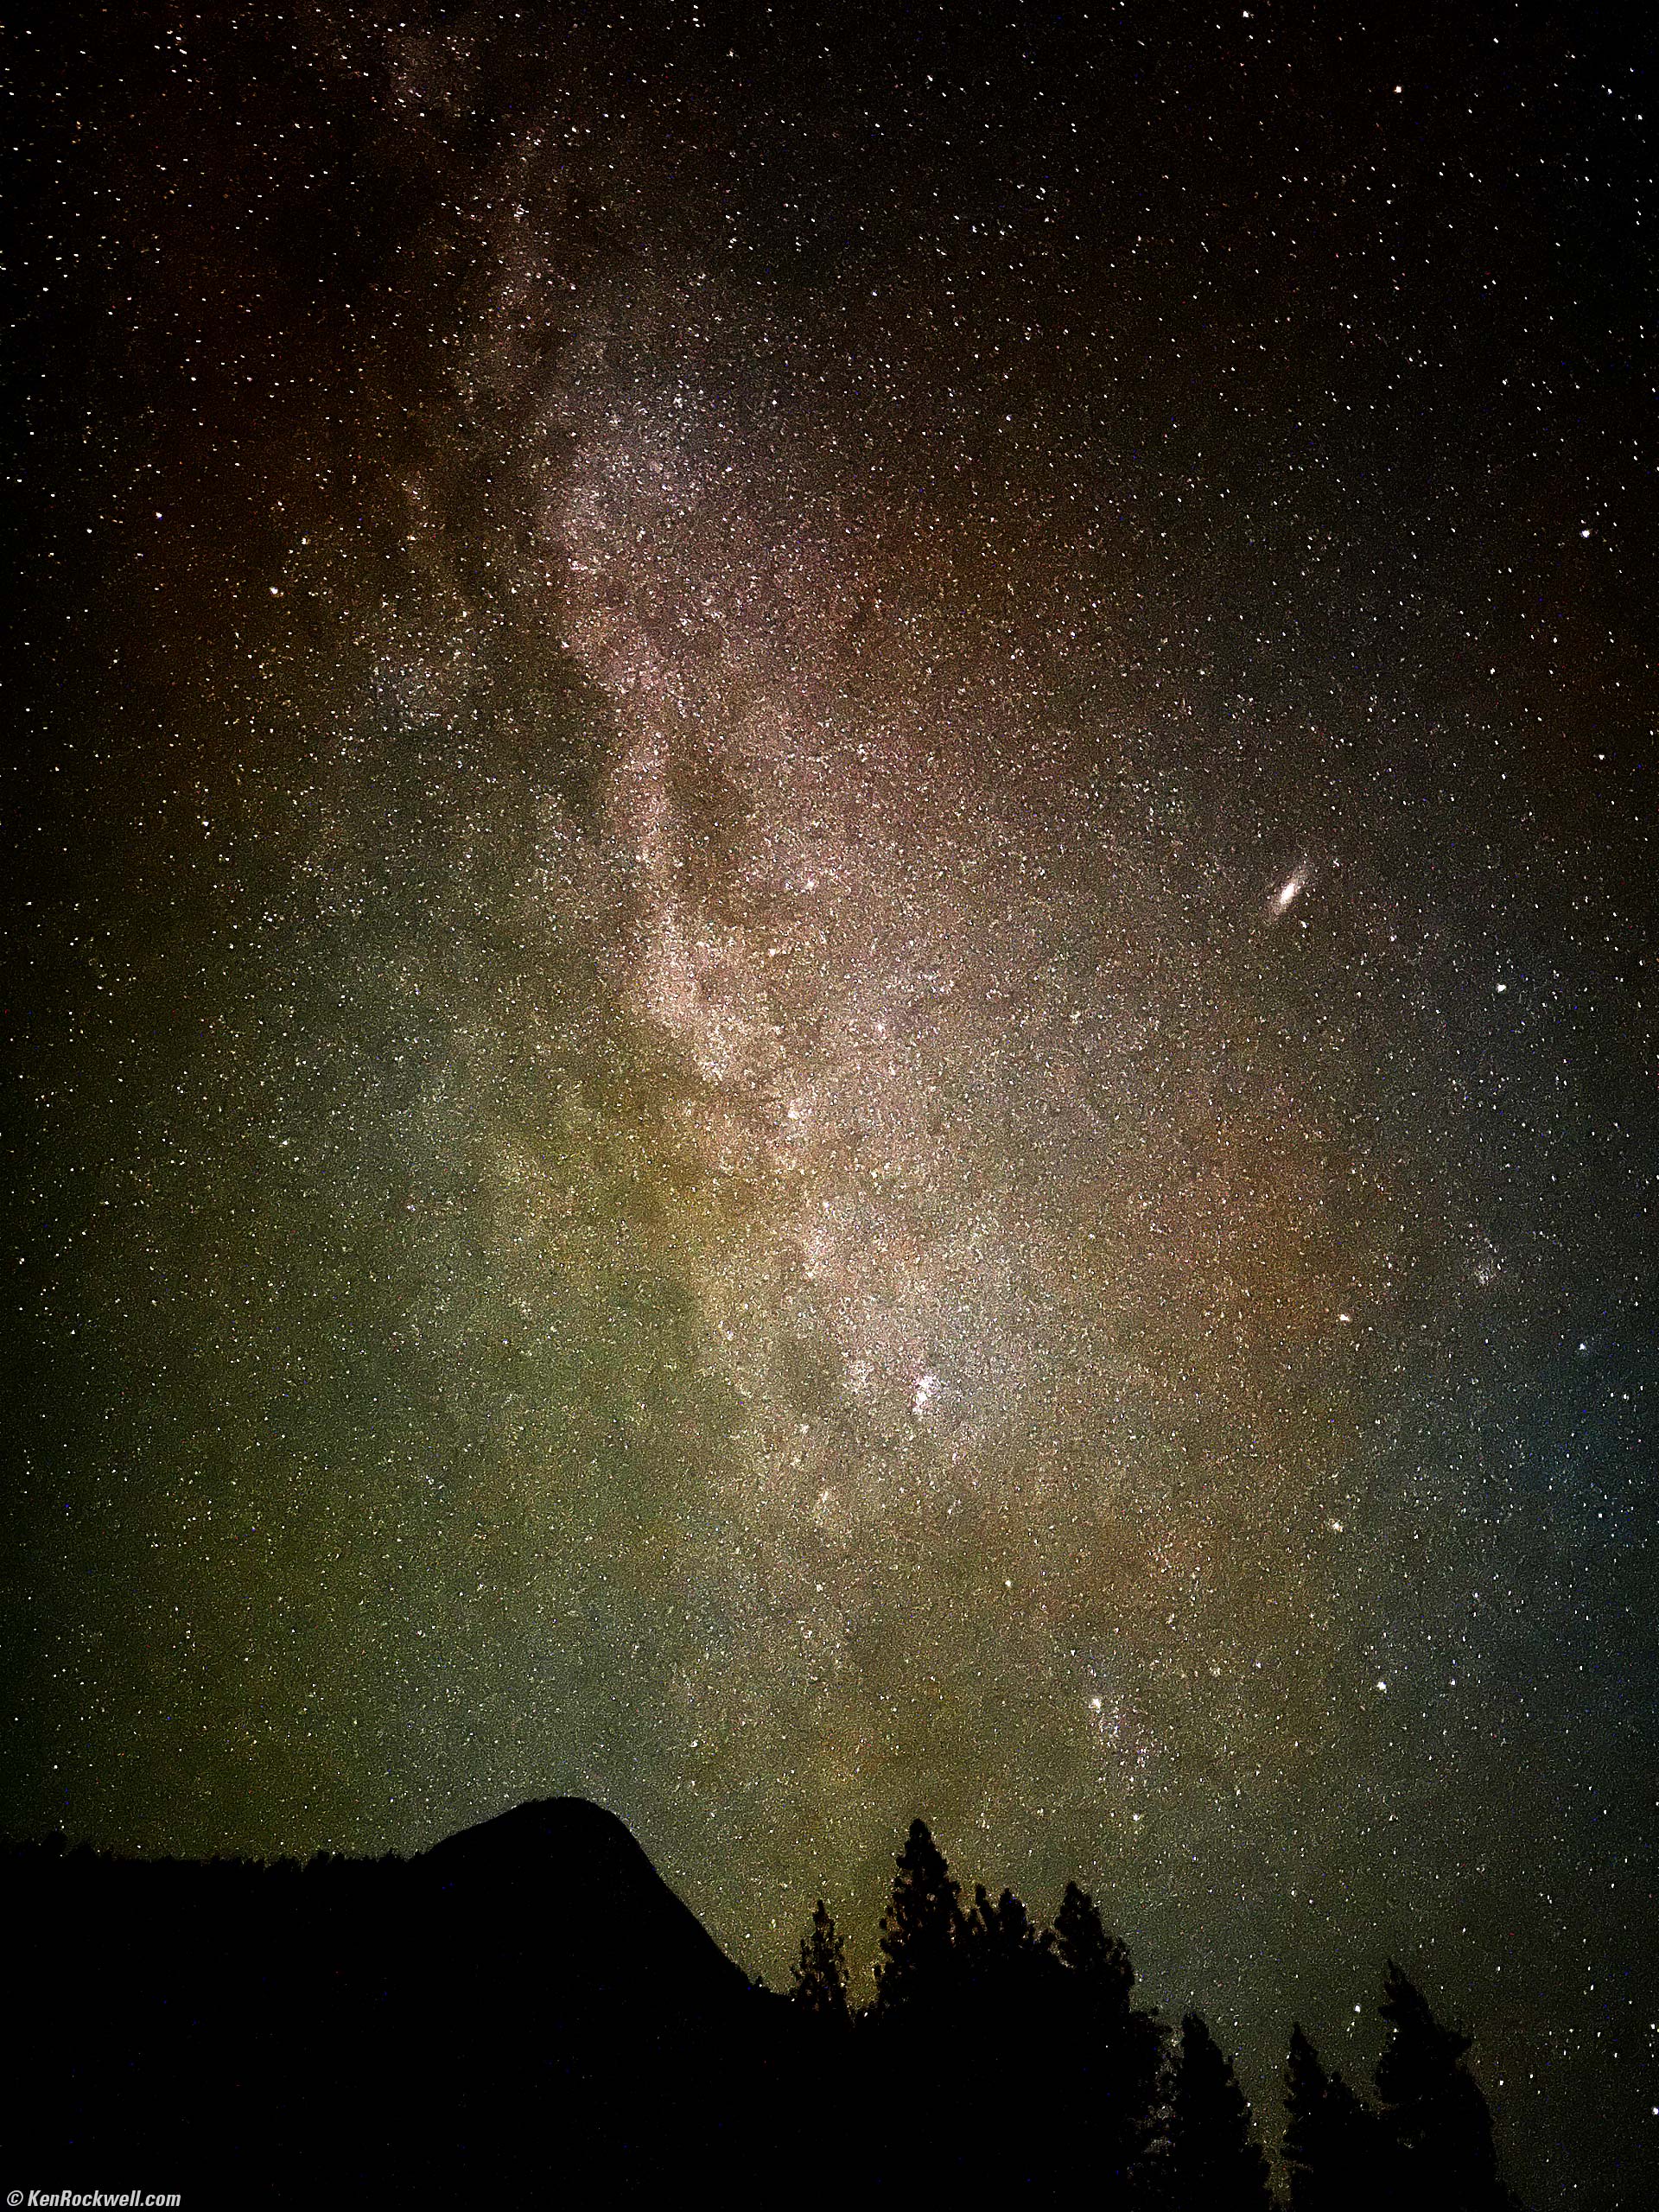
The Milky Way and the Andromeda Galaxy as seen from Stoneman Meadow, Yosemite National Park, California, 8:56 P.M. Apple iPhone 14 Pro Max 1× (6.9mm actual or 24mm eq.) camera, f/1.8 at 10 seconds at Auto ISO 12,500 (LV -8⅔, or minus 8⅔. That's dark!). More tech details. bigger or fit-to-screen.
Again I simply used a curves adjustment layer to taste in Photoshop CS6 (2012). The original iPhone image was rather dark and flat, sort of as it all looked to our eyes.
I was astonished that my iPhone is able to photograph the Andromeda Galaxy (the diagonal blob center right). I've never see a phone do that all by itself.
That's it for the night.
22 October 2022, Saturday top
17, 18, 19, 20, 21, 22 & 23 October 2022
We got up and headed to Tunnel View to see if anything was happening, arriving at 7:40 A.M. It was mostly overcast, so we shot some selfies and poked around, and then headed over to the Three Brothers.
We headed back for breakfast and then drove over to the barns.
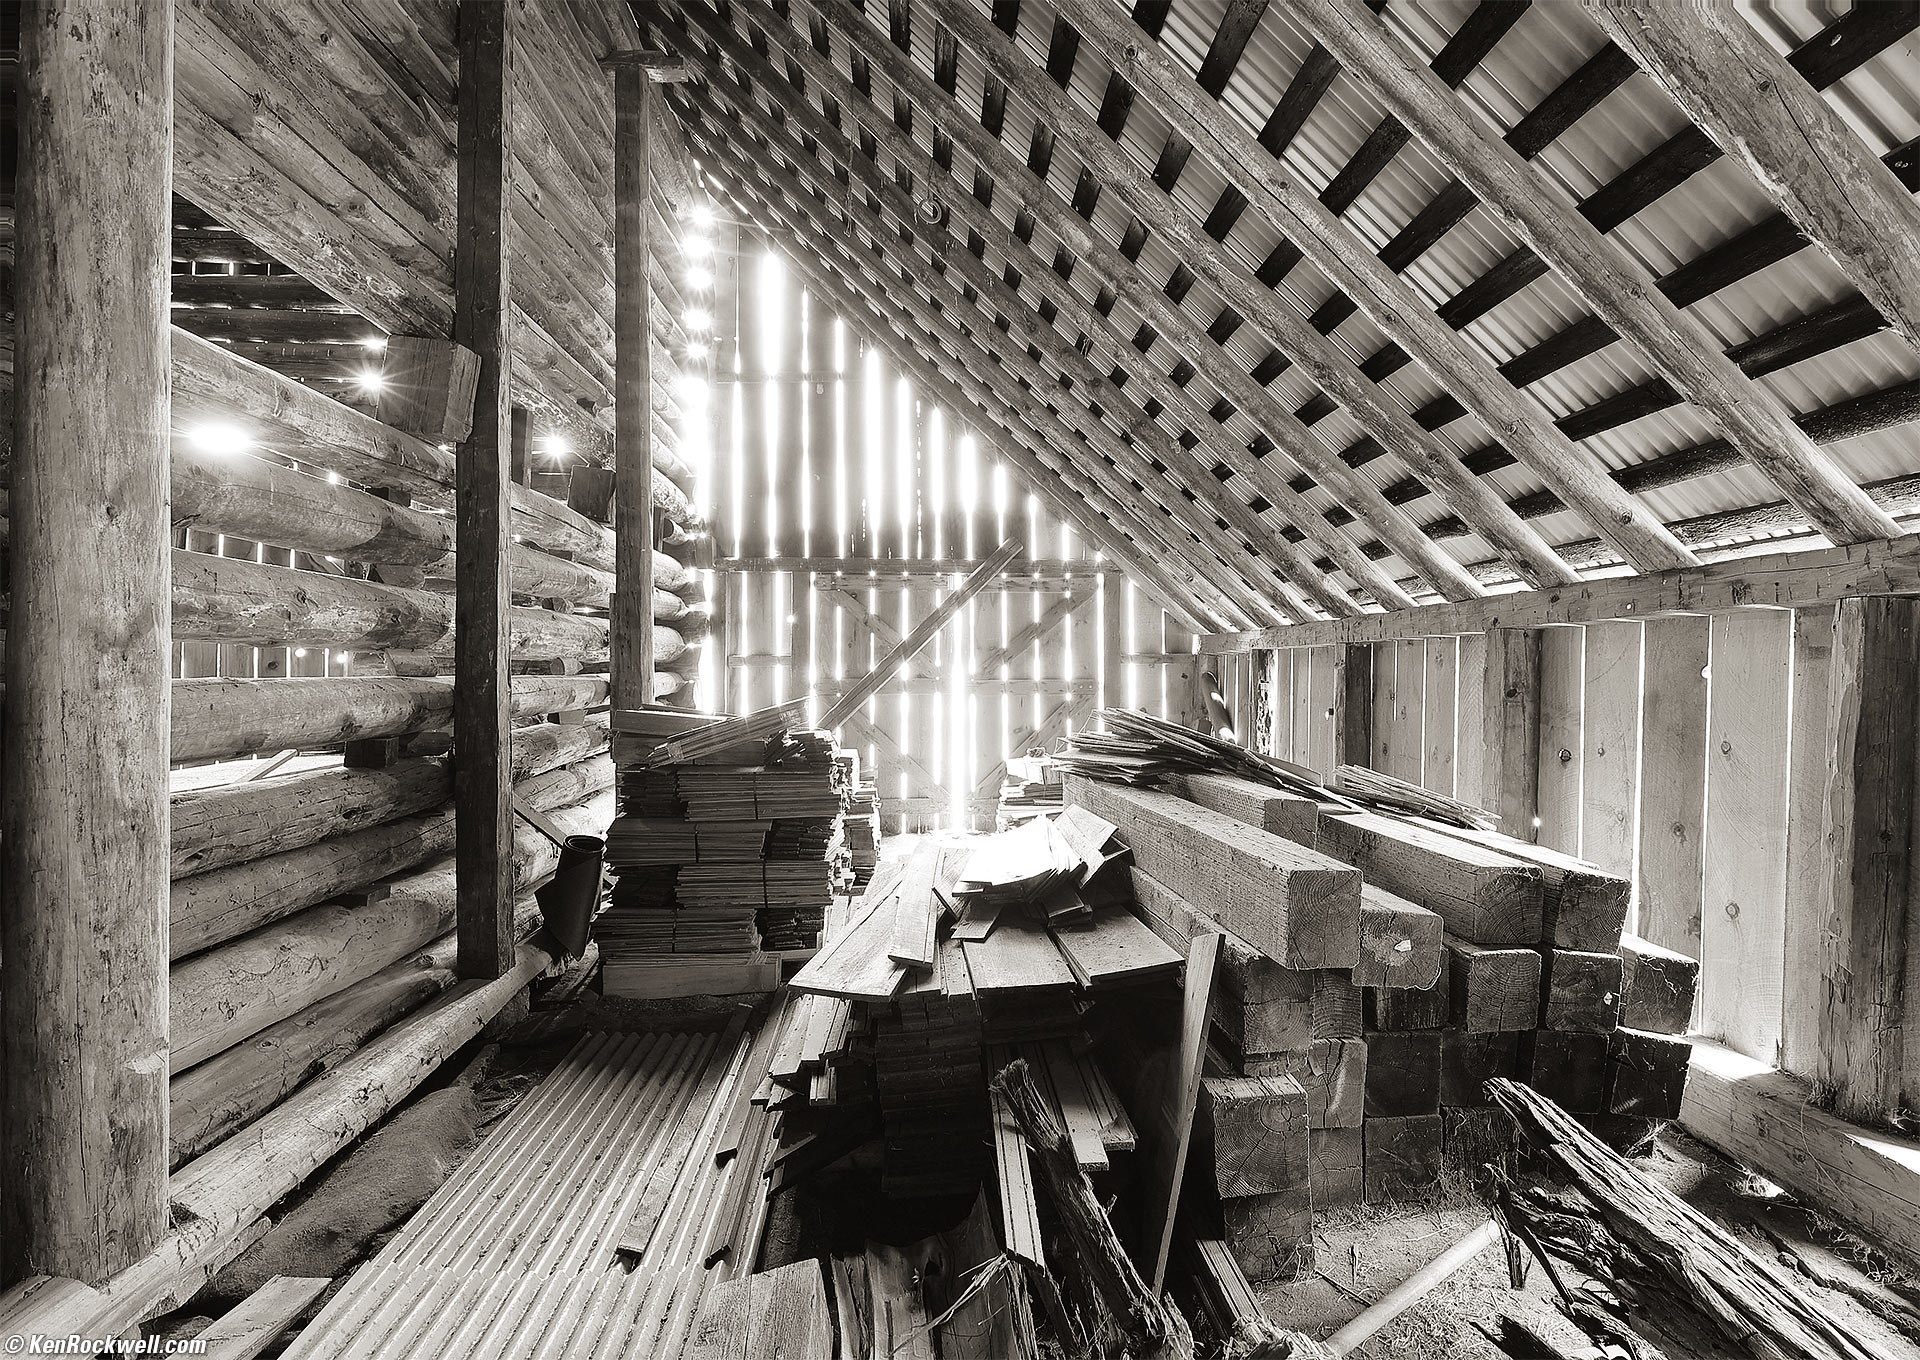
Barn Interior, Yosemite National Park, California, 10:57 A.M. Canon EOS R6, RF 15-30mm IS STM at 15mm, f/8 at 30 seconds at ISO 100, +2/3 stops exposure compensation (LV 1.0), split-toned print. More tech details. bigger or fit-to-screen.
I worked this in Skylum Luminar Neo to show my highlights and shadows as I saw them, and add just the right amount of vignetting, then split-toned my print.
We stopped at Tunnel View on our way back to Yosemite Valley, and I snapped this on my iPhone:
Tunnel View, Yosemite National Park, California, 12:32 P.M. Apple iPhone 14 Pro Max 1× (6.9mm actual or 24mm eq.) camera, f/1.8 at 1/569 at Auto ISO 40 (LV 12¾), split-toned print. More tech details. bigger or fit-to-screen.
I used the free Snapseed app on my iPhone to tweak and send this to my friends while I was still there, and then fine-tuned it further with Skylum Luminar Neo.
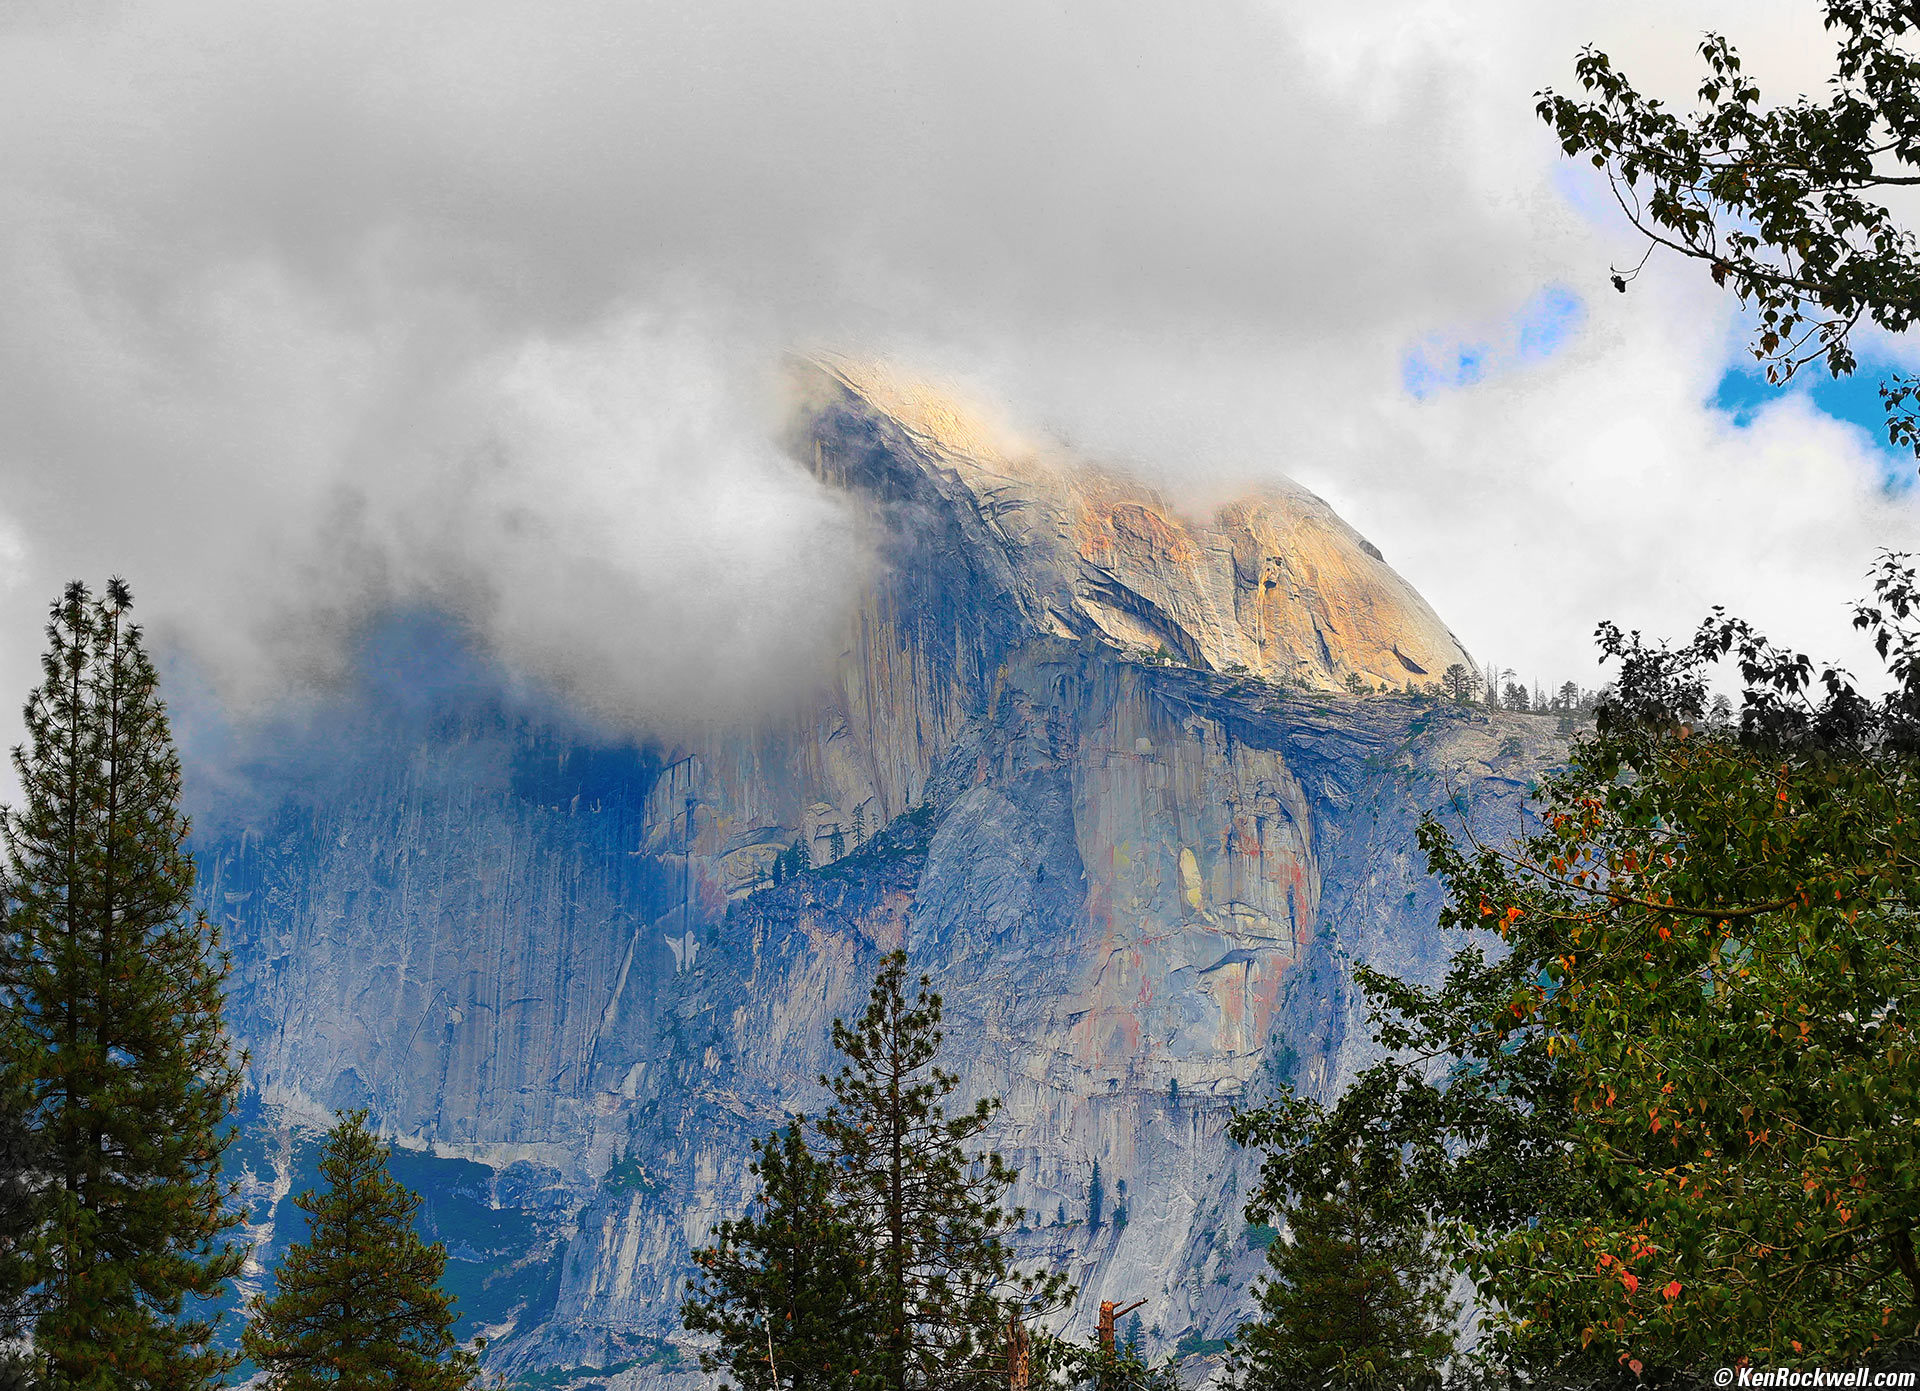
A Touch of Cloud, Half Dome, Yosemite National Park, California, 1:16 P.M. Canon EOS R6, RF 24-240mm IS USM at 118mm, f/11 at 1/100 at Auto ISO 100 -1/3 stop exposure compensation (LV 13.6). More tech details. bigger or fit-to-screen.
I added color and details to the highlights and shadows with Skylum Luminar Neo.
This was shot from the Sentinel Drive bridge over the Merced River, another very popular photo spot.
From the bridge we headed over to The Ansel Adams Gallery, and holy cow, for the first time ever in all my years of visiting, Ansel Adams was actually there sitting on the bench outside!!!
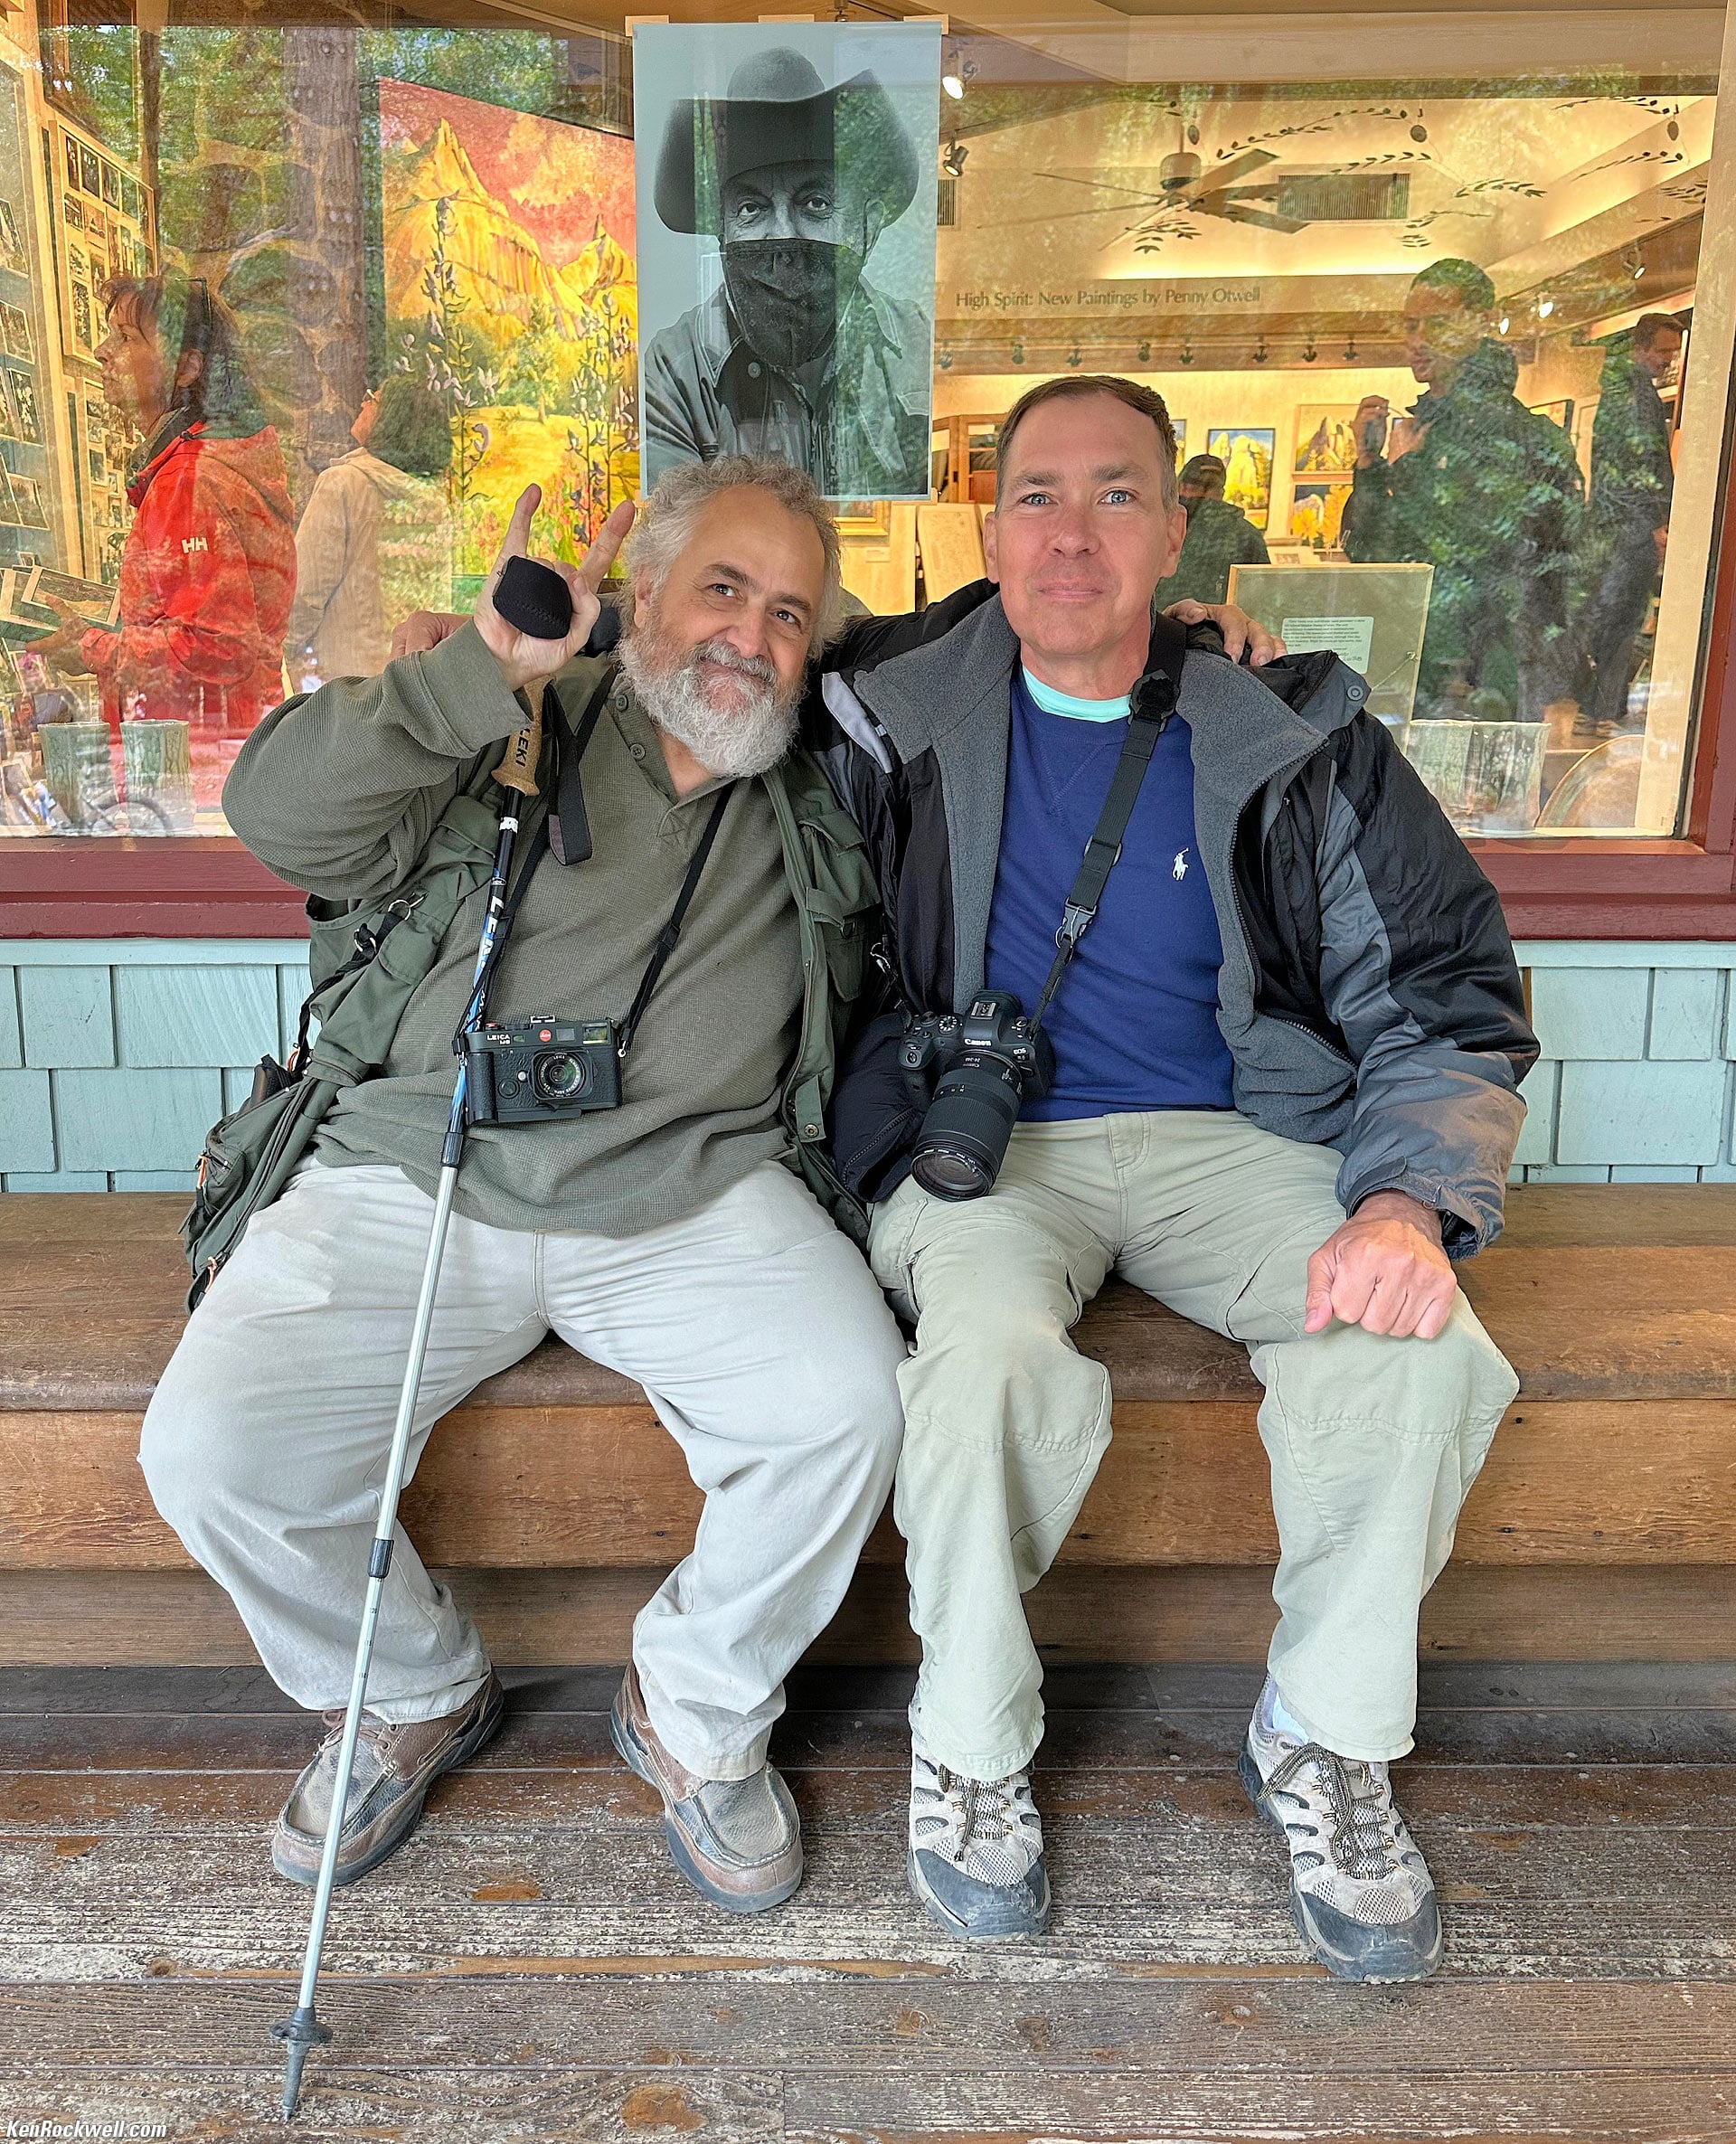
Ansel Adams with Ken Rockwell, Yosemite National Park, California, 2:20:02 P.M. Apple iPhone 14 Pro Max 1× (6.9mm actual or 24mm eq.) camera, f/1.8 at 1/60 at Auto ISO 160 (LV 6.9). bigger or fit-to-screen.
Ansel Adams is packing his LEICA M6 mit 28mm f/2.8 ELMARIT-M ASPH.
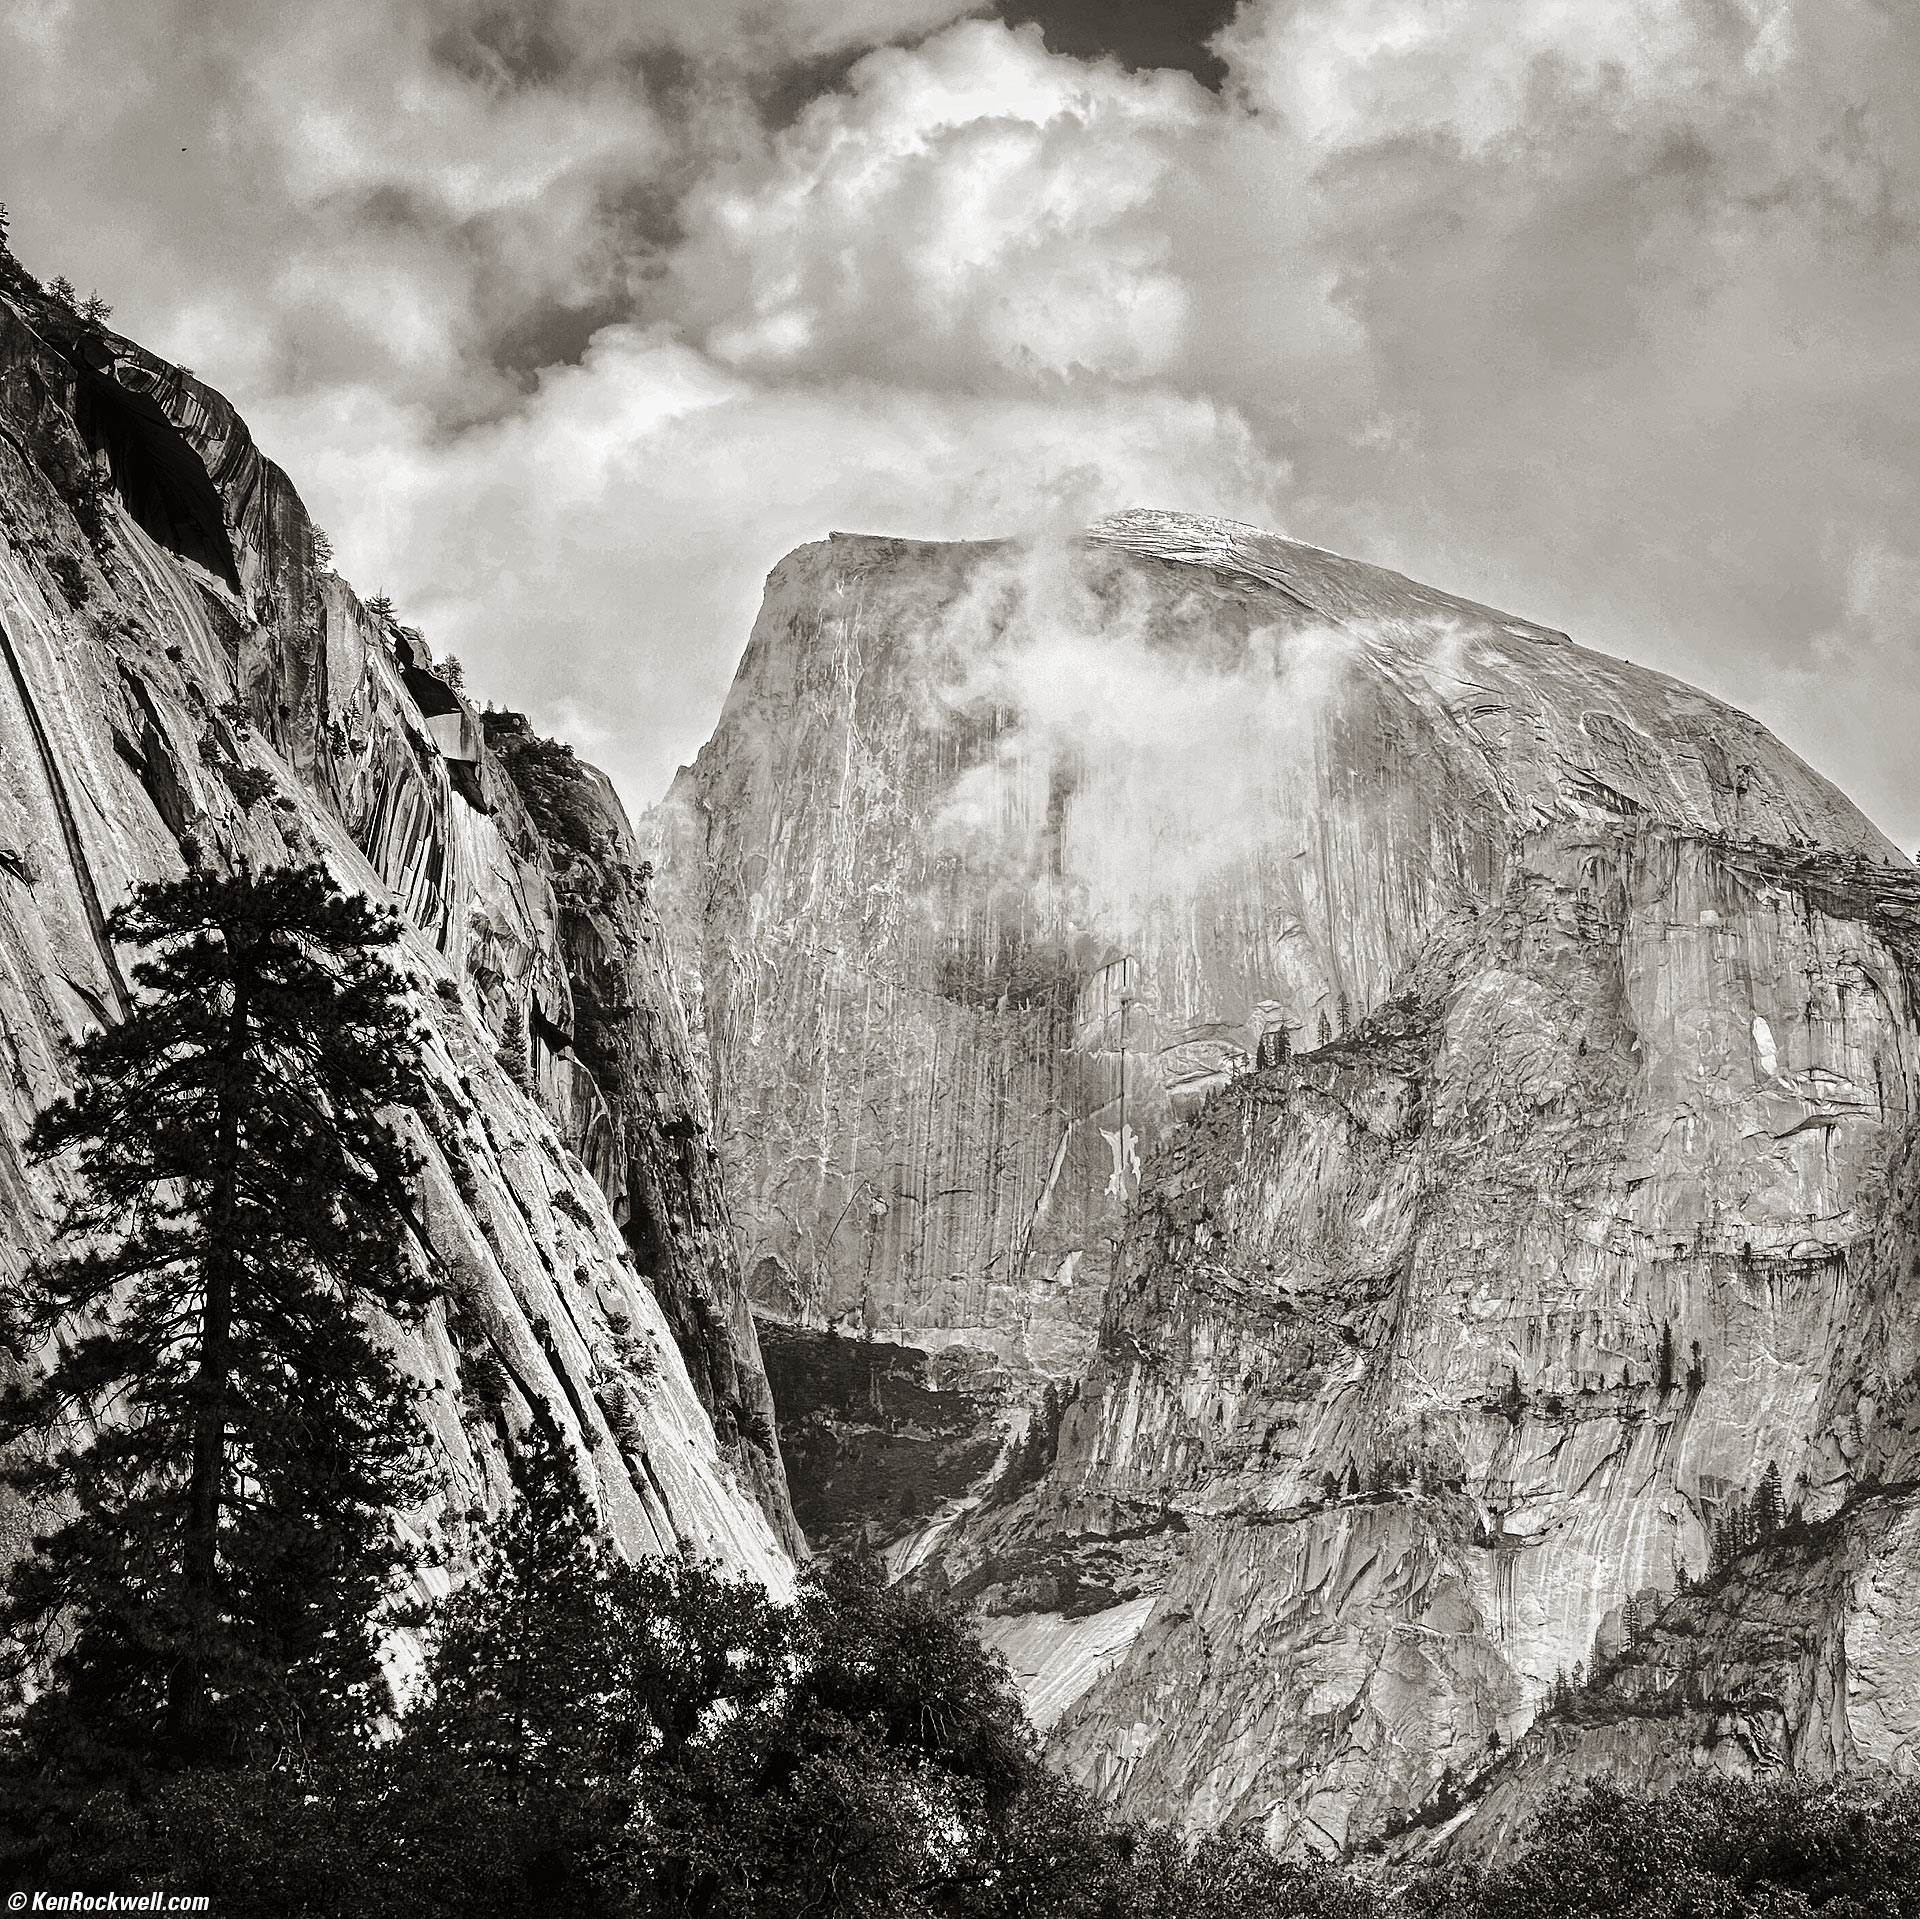
The Half Dome in Clouds as Seen across Ahwahnee Meadow, Yosemite National Park, California, 3:18 P.M. Apple iPhone 14 Pro Max 3× (9mm actual or 77mm eq.) camera, f/2.8 at 1/840 at Auto ISO 32 (LV 14⅓), split-toned print. More tech details. bigger or fit-to-screen.
I first worked this in the free Snapseed app on my iPhone while at the location, and then later in Skylum Luminar Neo.
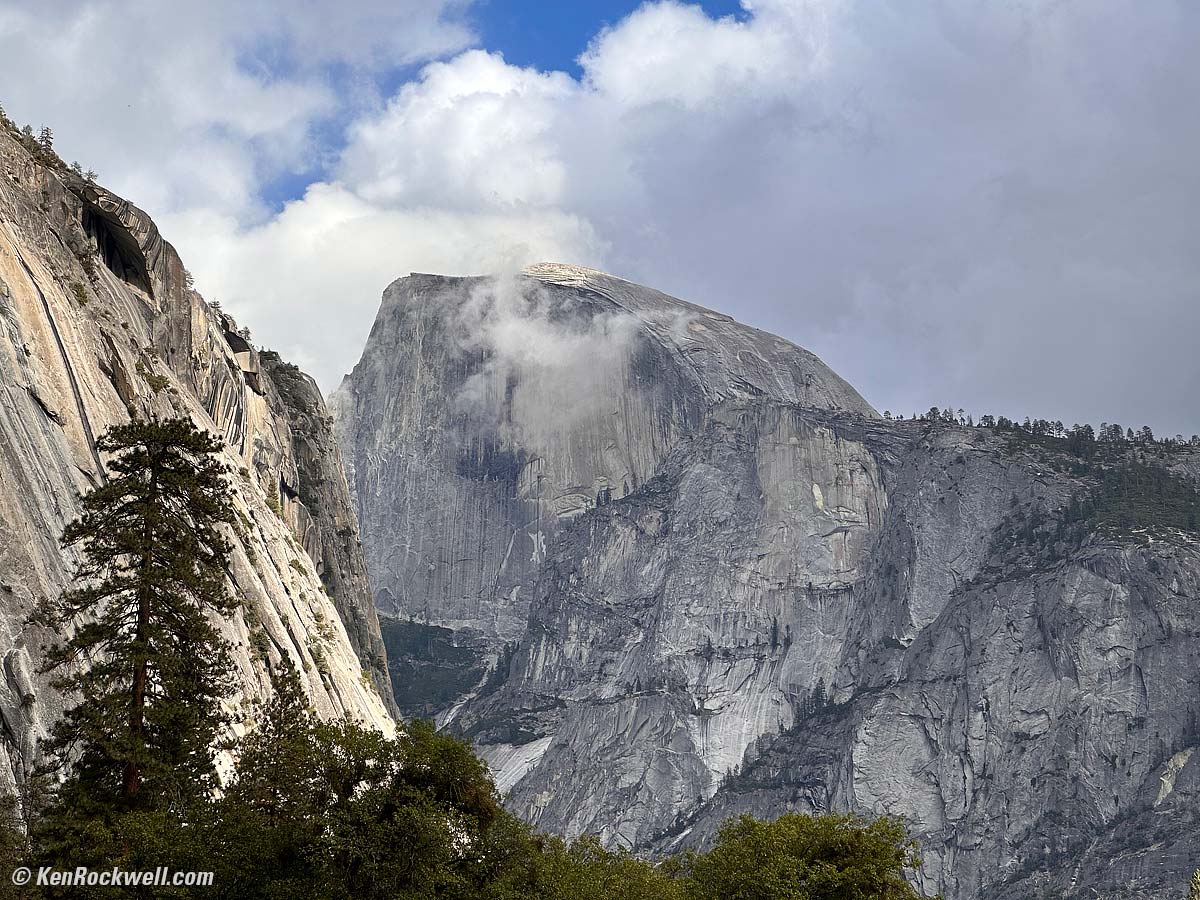
As shot. bigger.
As I keep saying, photography is all about showing us what's actually interesting. Extra stone on the left and right? Who cares? For me it's all about the cloud in front of Half Dome, and cropping to a square is a huge help. Also a huge help is getting rid of color and showing this in black-and-white to emphasize the textures of the soft clouds and hard stone. Color has no place in this piece of artwork; it's not relevant so I take it out.
The crop is equivalent to a minor crop from the common ZEISS 150mm f/4 SONNAR on HASSELBLAD 6×6. Sitting in my armchair I realize that a 180mm f/4 SONNAR would actually be more equivalent to this crop, but Ansel or I never carry the 180mm lens. Everything in HASSELBLAD is so sharp that one simply carries the 150mm f/4 SONNAR and crops a little if needed, rather than carry an extra "in between" lens "just in case." All Ansel every carried were his 50mm, 80mm, 150mm and maybe 250mm, and he was all set for everything.
From here we went to the Ahwahnee.
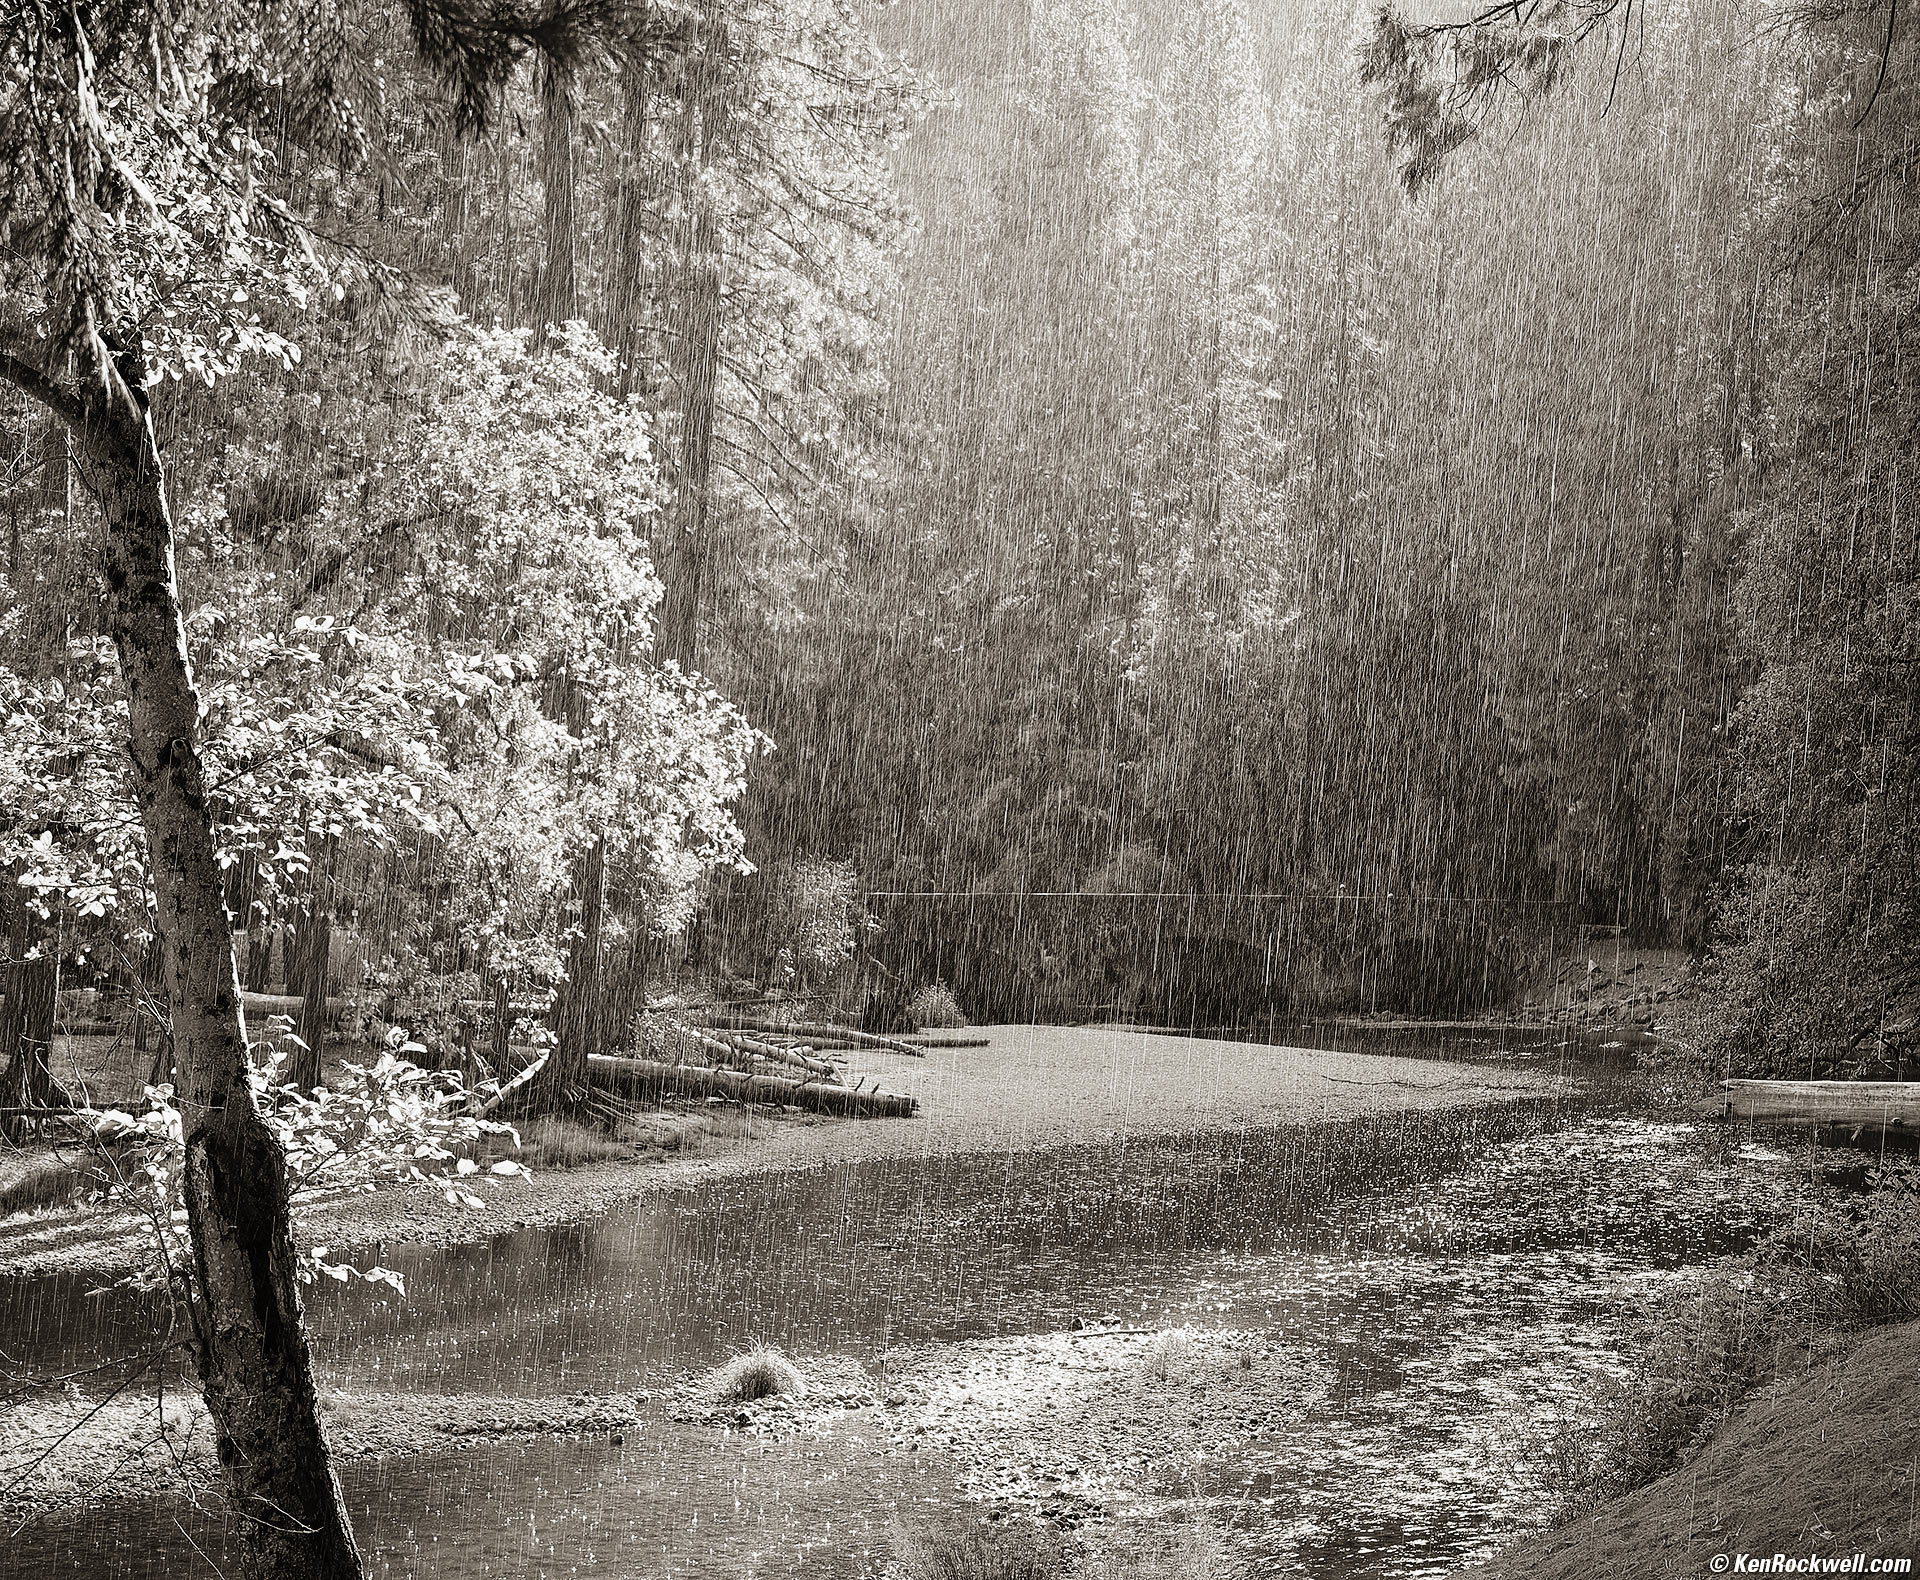
Rain falls over the Merced River near the Ahwahnee, Yosemite National Park, California, 3:56 P.M. Canon EOS R6, RF 24-240mm IS USM at 47mm, f/8 at 1/40 at Auto ISO 100, -1/3 stop exposure compensation (LV 11.4) split-toned print. More tech details. bigger or fit-to-screen.
I used Perfectly Clear to add life and light to the shadows, and then Skylum Luminar Neo to fine-tune the highlights and shadows.
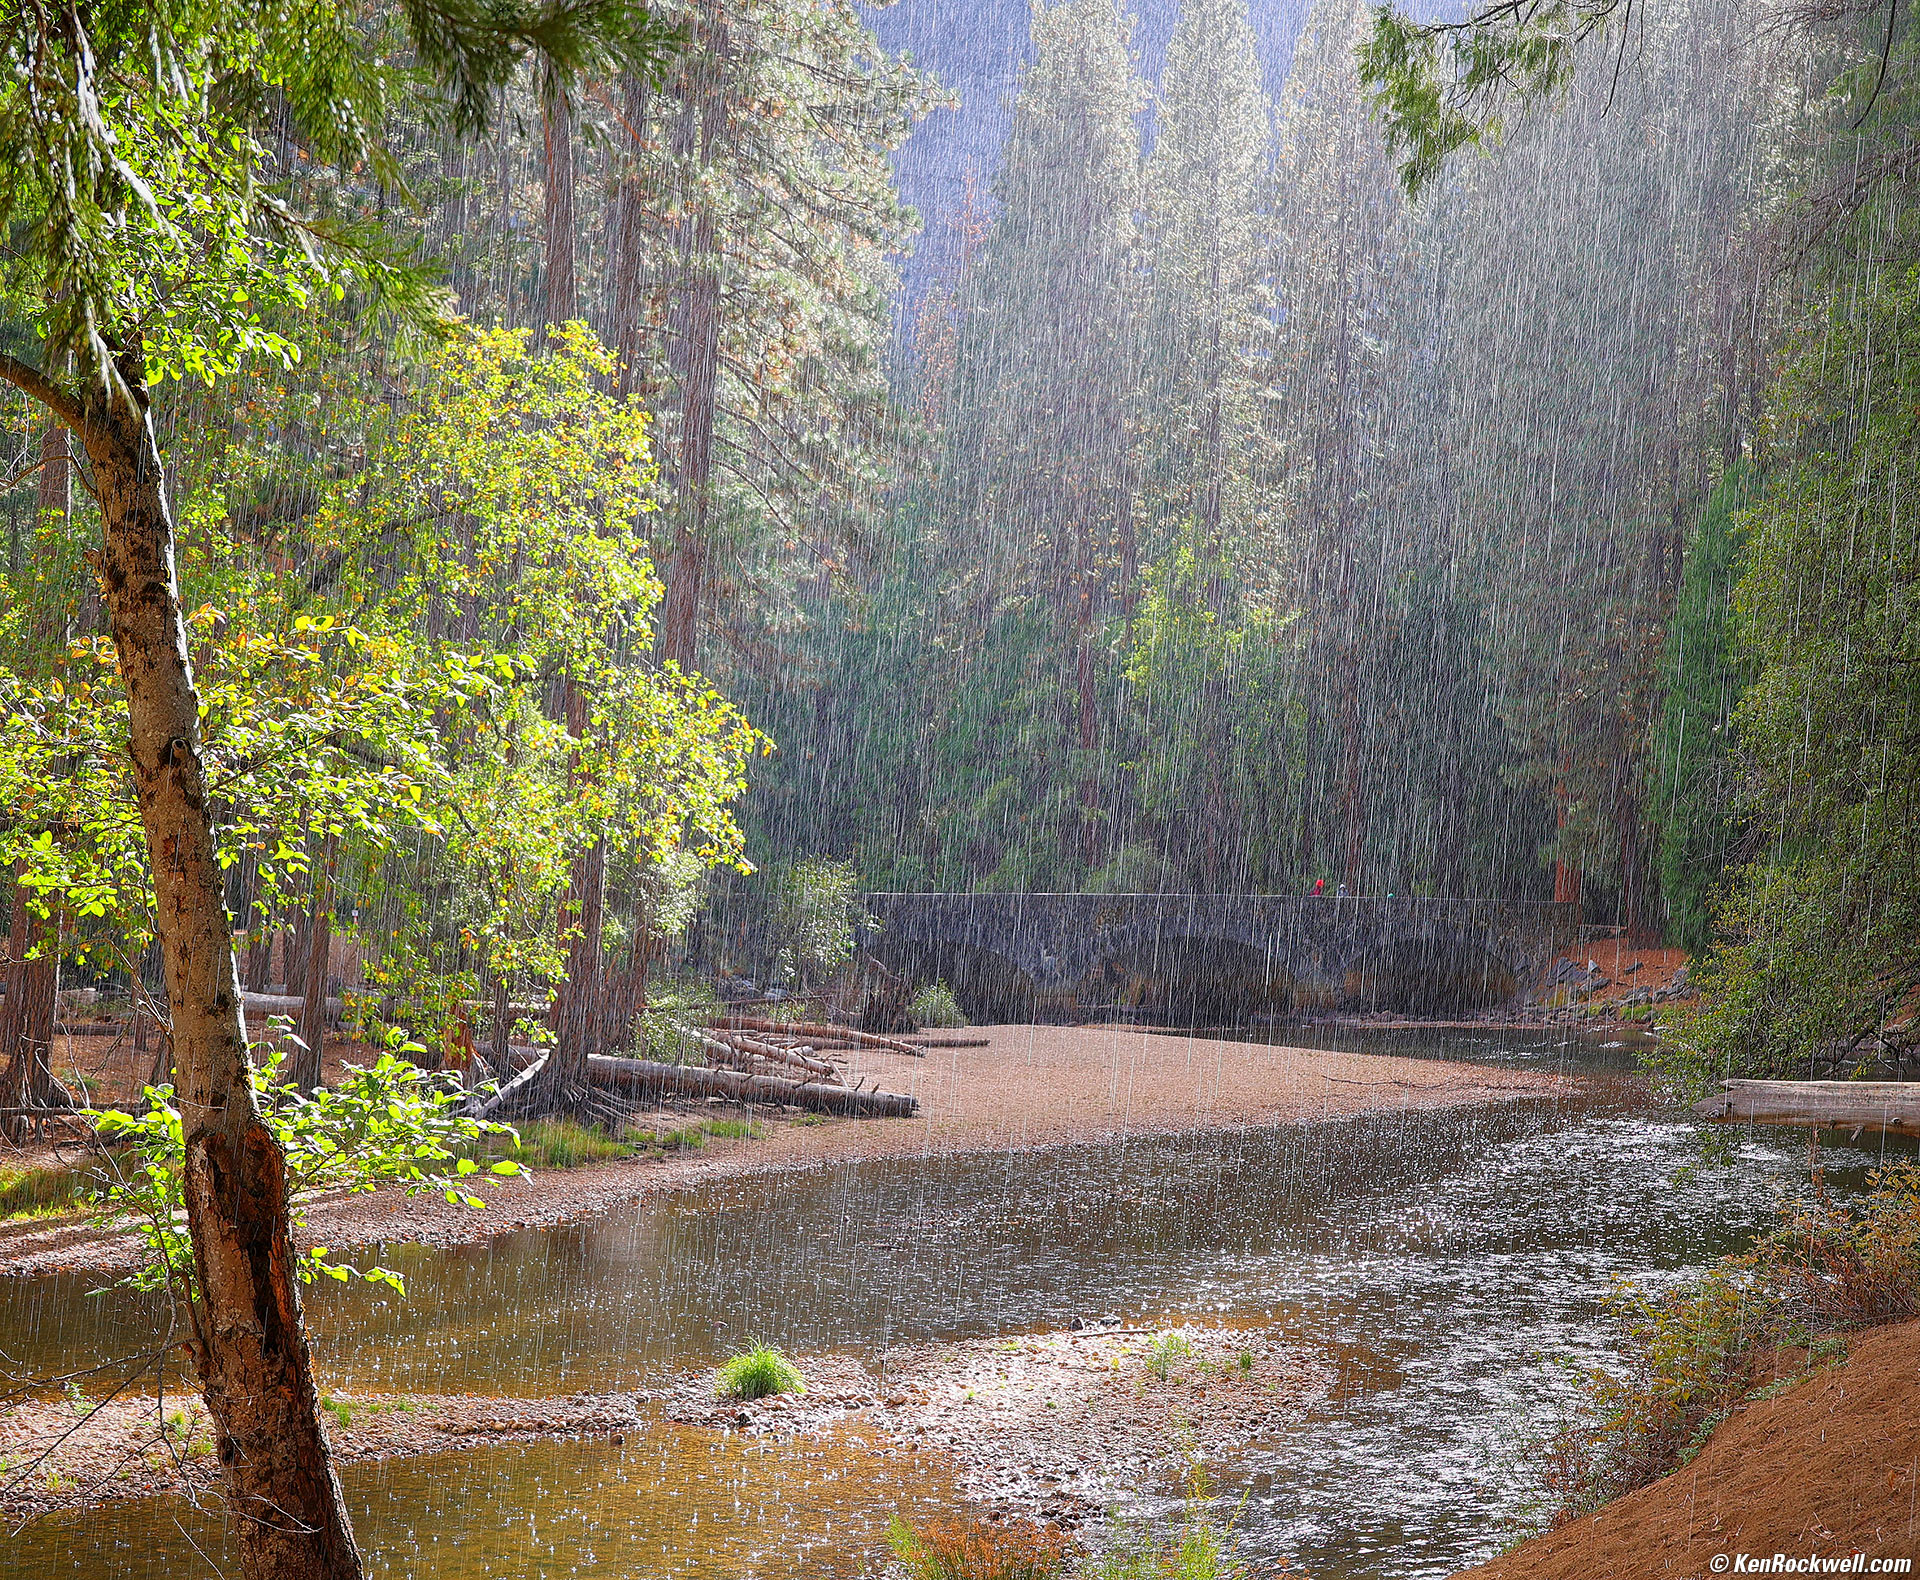
Rain falls over the Merced River near the Ahwahnee, Yosemite National Park, California, 3:56 P.M. Canon EOS R6, RF 24-240mm IS USM at 47mm, f/8 at 1/40 at Auto ISO 100, -1/3 stop exposure compensation (LV 11.4). More tech details. bigger or fit-to-screen.
This is the same image as above, but before I split-toned the print. I prefer the abstraction of black-and-white; color here just makes it look more like a photograph than bringing one into the magic of the brief rainshower.
In this color shot I liked the visual reward of the red jacket on the bridge. It was tiny in the original image, so I copied it to a new layer in Photoshop CS6 (2012) and enlarged that layer to make the red spot more visible.
Then we walked into the Ahwahnee:
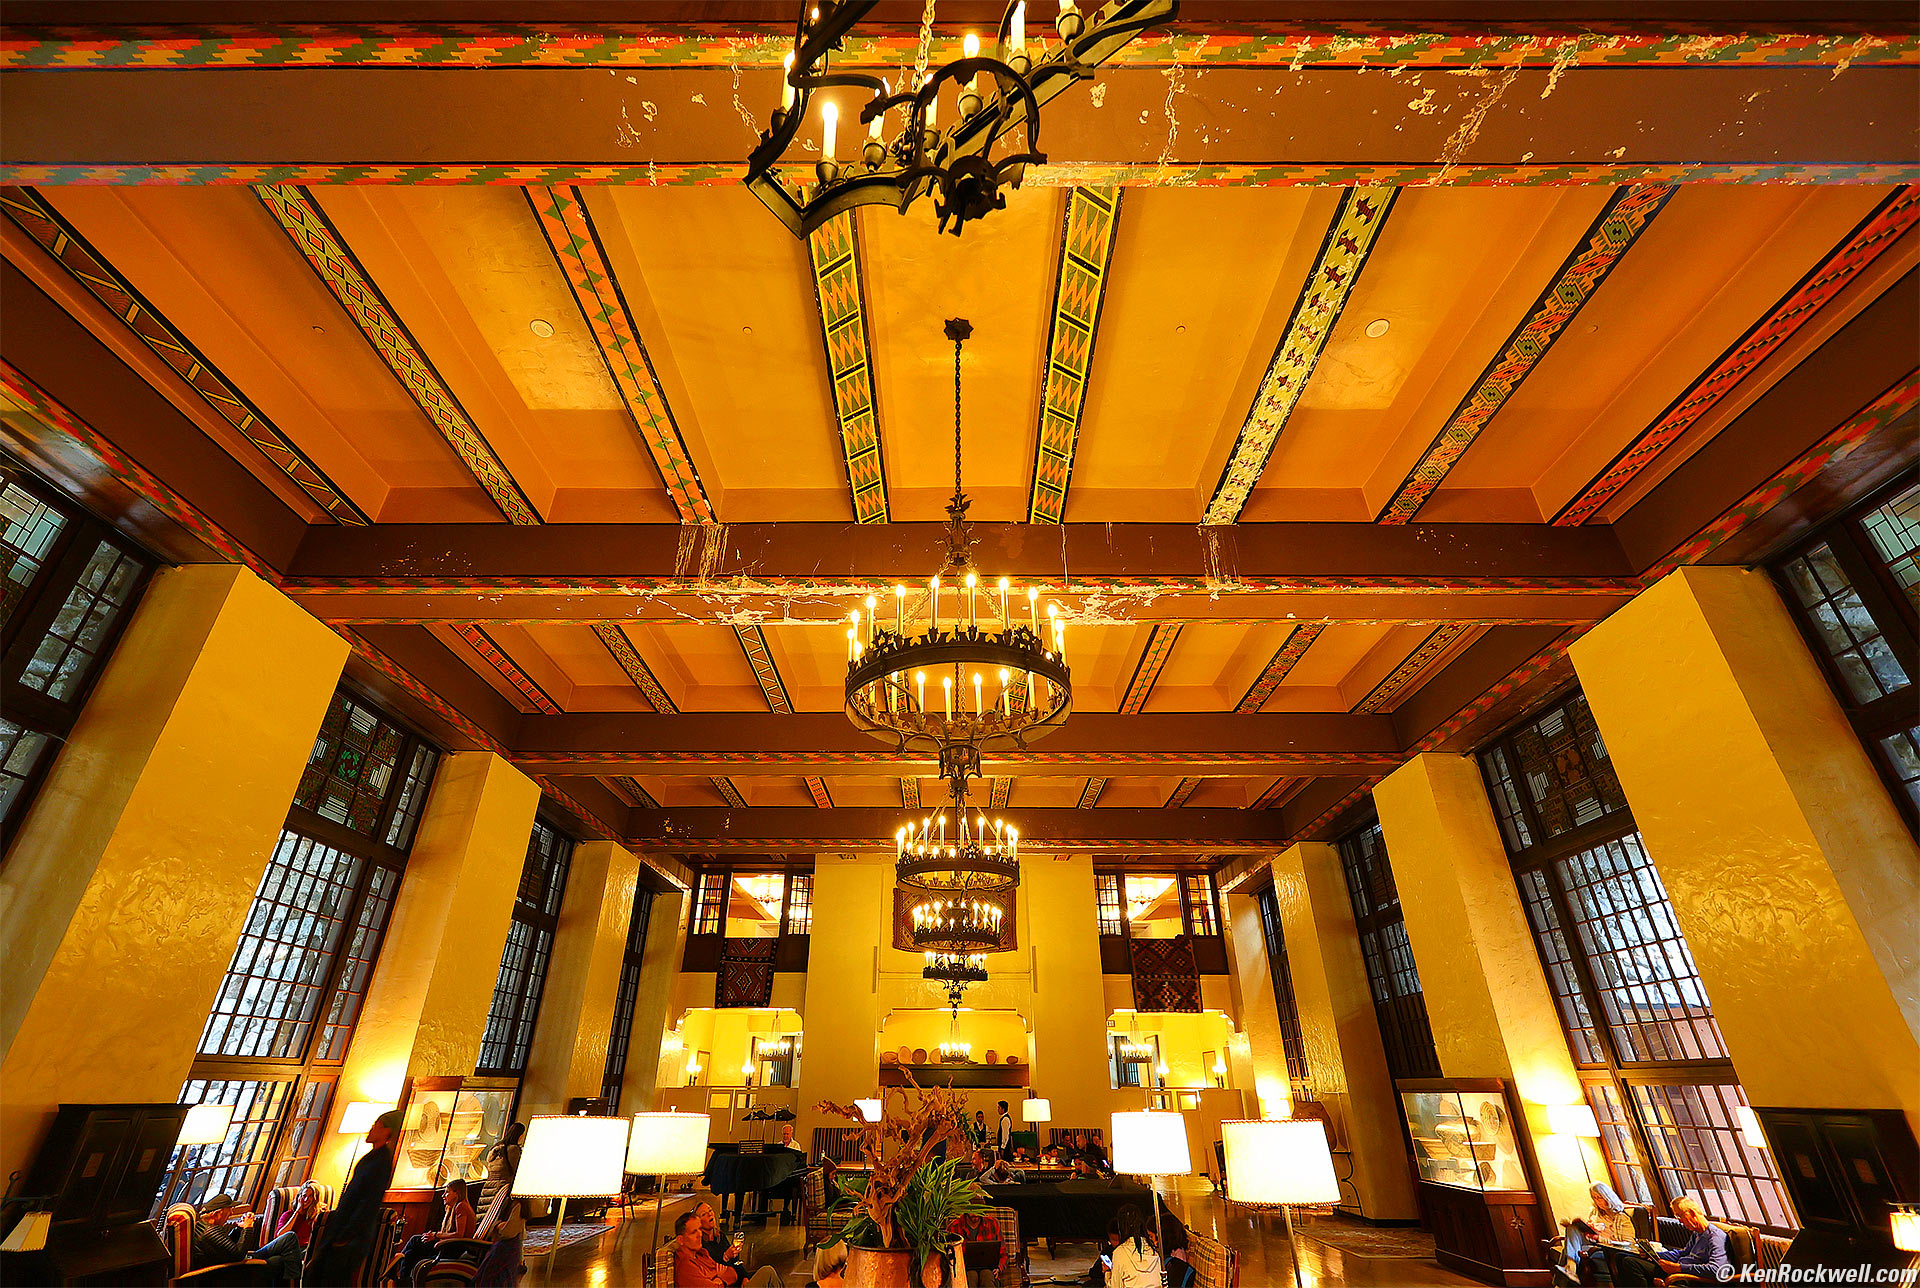
Interior, The Ahwahnee, Yosemite National Park, California, 4:47 P.M. Canon EOS R6, RF 15-30mm IS STM at 15mm, wide-open at f/4.5 hand-held at 1/8 at Auto ISO 1,250, +2/3 stops exposure compensation (LV 3¾ IPS). More tech details. bigger or fit-to-screen.
I corrected a slightly crooked handheld camera in Photoshop CS6 (2012)'s Lens Correction Tool and used Skylum Luminar Neo to wow this up a little bit with a little saturation, brightening the center and vignetting the sides.
For dinner we figured we'd drop into the happy hour at the bar, but we were told something like we'd need reservations and then maybe they could squeeze us in tomorrow. Not to ignore a challenge, Lauren used her "getting stuff done" skills, talked to the hostess, and our group was seated immediately Bravo, Lauren!
23 October 2022, Sunday top
17, 18, 19, 20, 21, 22 & 23 October 2022
Sunday morning we met the group at 7A.M. outside between the Lodge at the Falls lobby and the mess hall.
As we waited, I spied these vivid maple leaves:
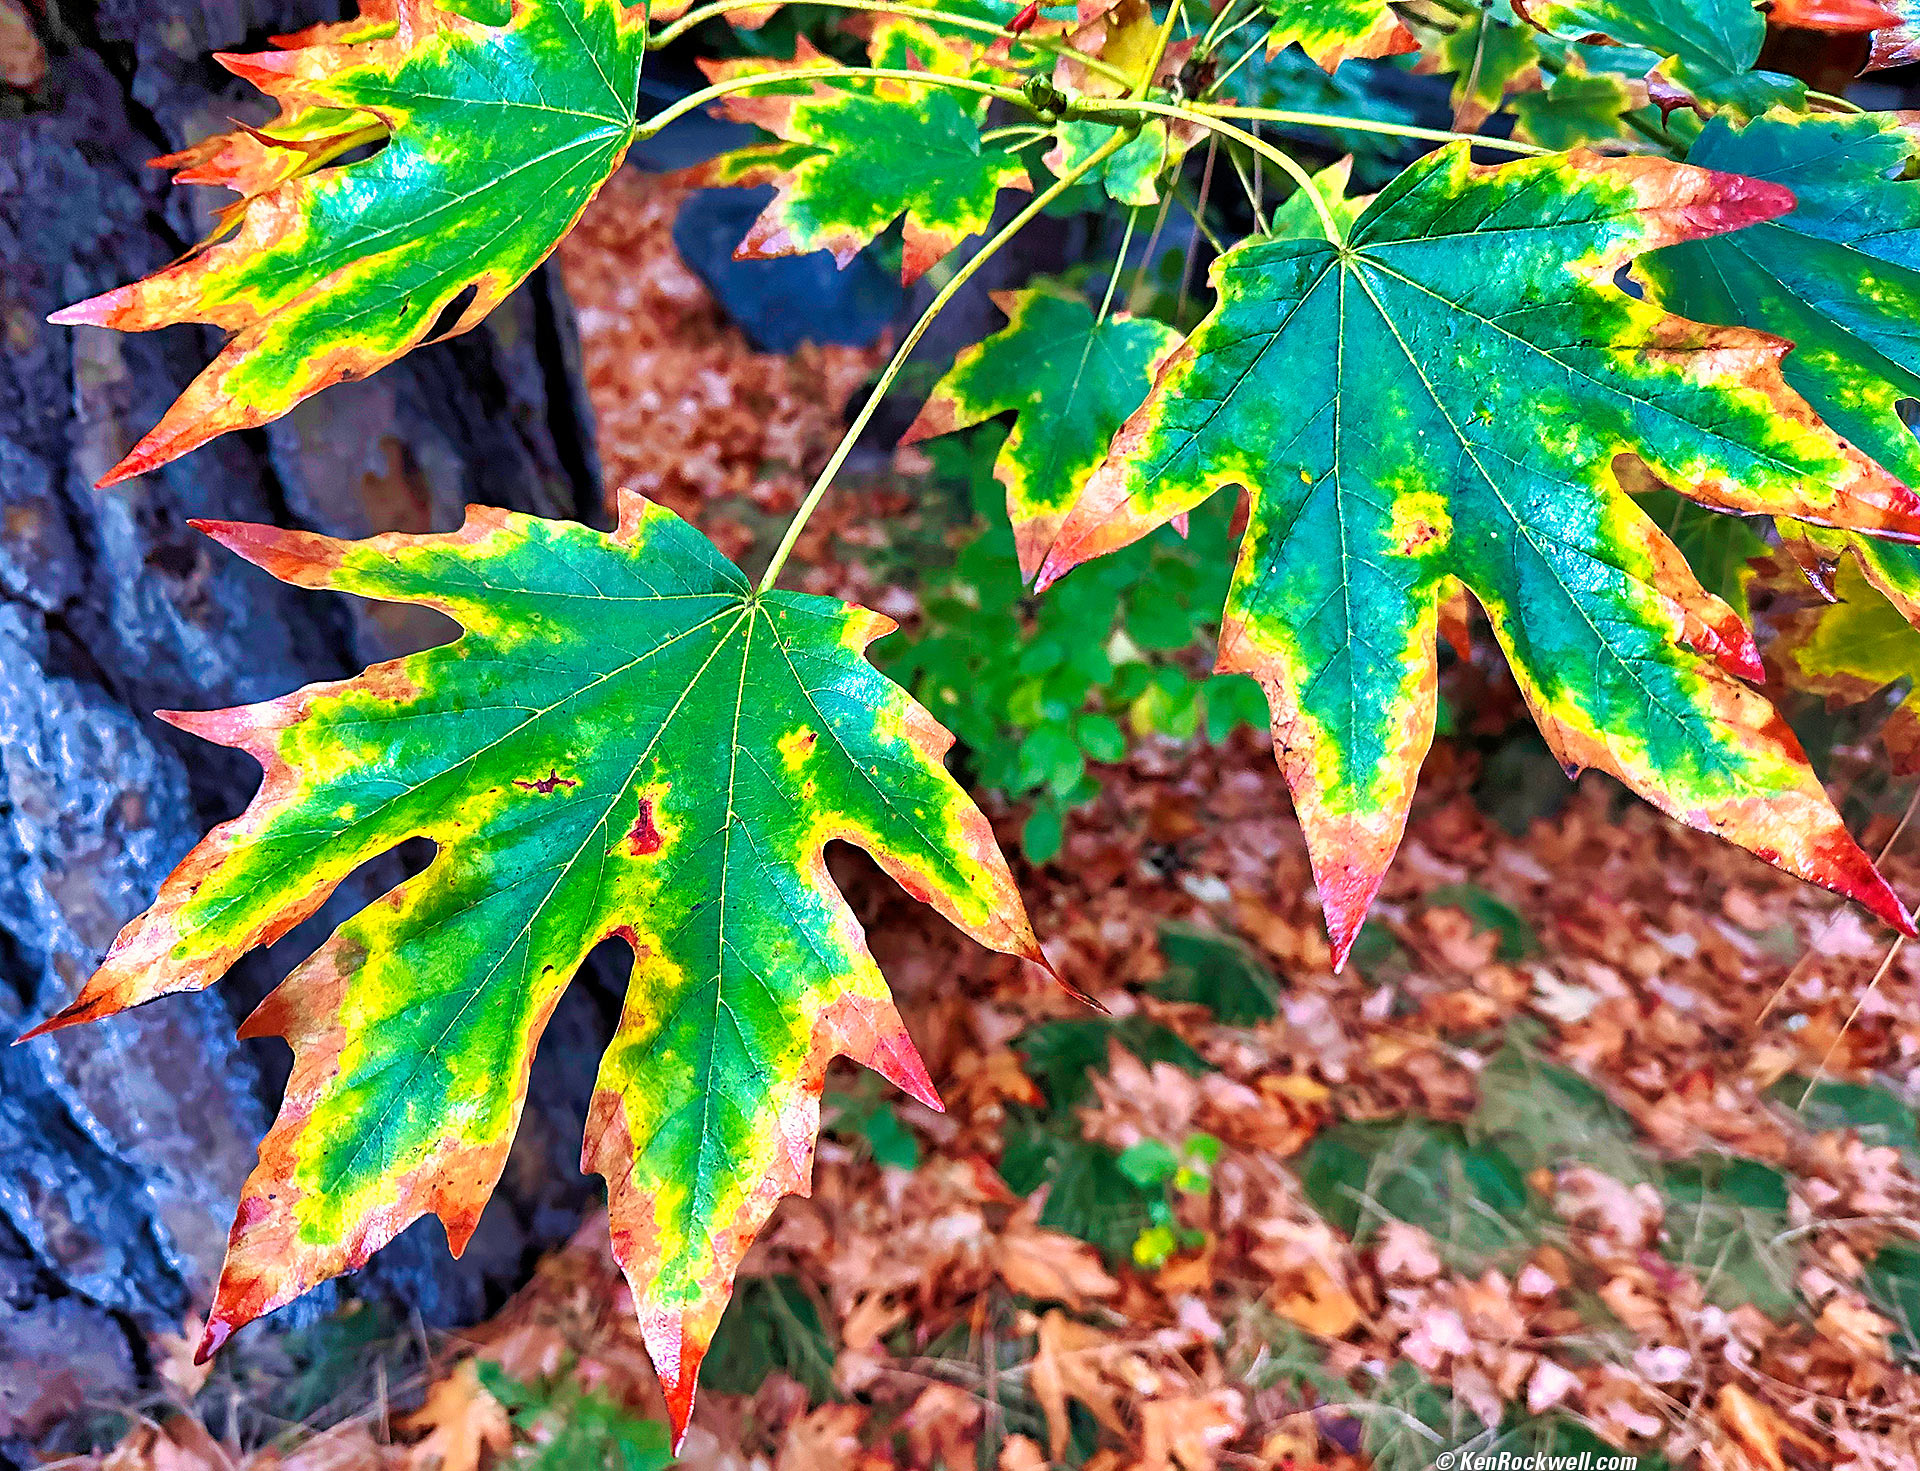
Maple Leaves, Yosemite Valley Lodge at the Falls, Yosemite National Park, California, 7:16 A.M. Apple iPhone 14 Pro Max 1× (6.9mm actual or 24mm eq.) camera, f/1.8 at 1/60 at Auto ISO 800 (LV 4.6). More tech details. bigger or fit-to-screen.
I used Perfectly Clear to add life and then Skylum Luminar Neo to bring this to wow!
We drove out as a group around the valley, and stopped at Leidig Meadow west of The Lodge:

Yellow Dawn, Leidig Meadow at Sunrise, Yosemite National Park, California, 7:36 A.M. Apple iPhone 14 Pro Max 1× (6.9mm actual or 24mm eq.) camera, f/1.8 at 1/121 at Auto ISO 100 (LV 8.6). More tech details. bigger or fit-to-screen.
I may have tried to hand-hold my Tiffen 0.9 gradiated neutral-density filter in front of my iPhone; I forget. I did use a grad filter on my EOS R6 and RF 15-30mm IS STM which needed it for this shot, but generally the iPhone weaves such magic with its always-active HDR that I doubt I did.
I shot this with both my EOS R6 and RF 15-30mm IS STM and iPhone 14 Pro Max. I preferred the image I got from the iPhone as its aspect ratio was better for this subject and I just happened to find a better compositional location to hold the iPhone than I did with my R6, so the iPhone image won. Everything about this shot (and most shots) is the composition of where each of the elements are placed in the image, which varies wildly with changes of just millimeters of position when you're as close as I was. Tripods never would have worked here; I don't have a 3D micro head to let me place the camera precisely in three dimensions as I can with my arm.
I used Skylum Luminar Neo to add wow, especially adding punch to the yellow leaves and to adjust the shadows and highlights and add emphasis with vignetting. I also used Perfectly Clear since it helped as well with levels.
There were no clouds and no detail in the sky, so I added a sky with Neo, which was trivially easy. Neo also made it easy to remove distracting leaves and twigs in the foreground.
Here's what came out of my iPhone, which looked awesome at the time on the iPhone itself and how the scene looked to our eyes:
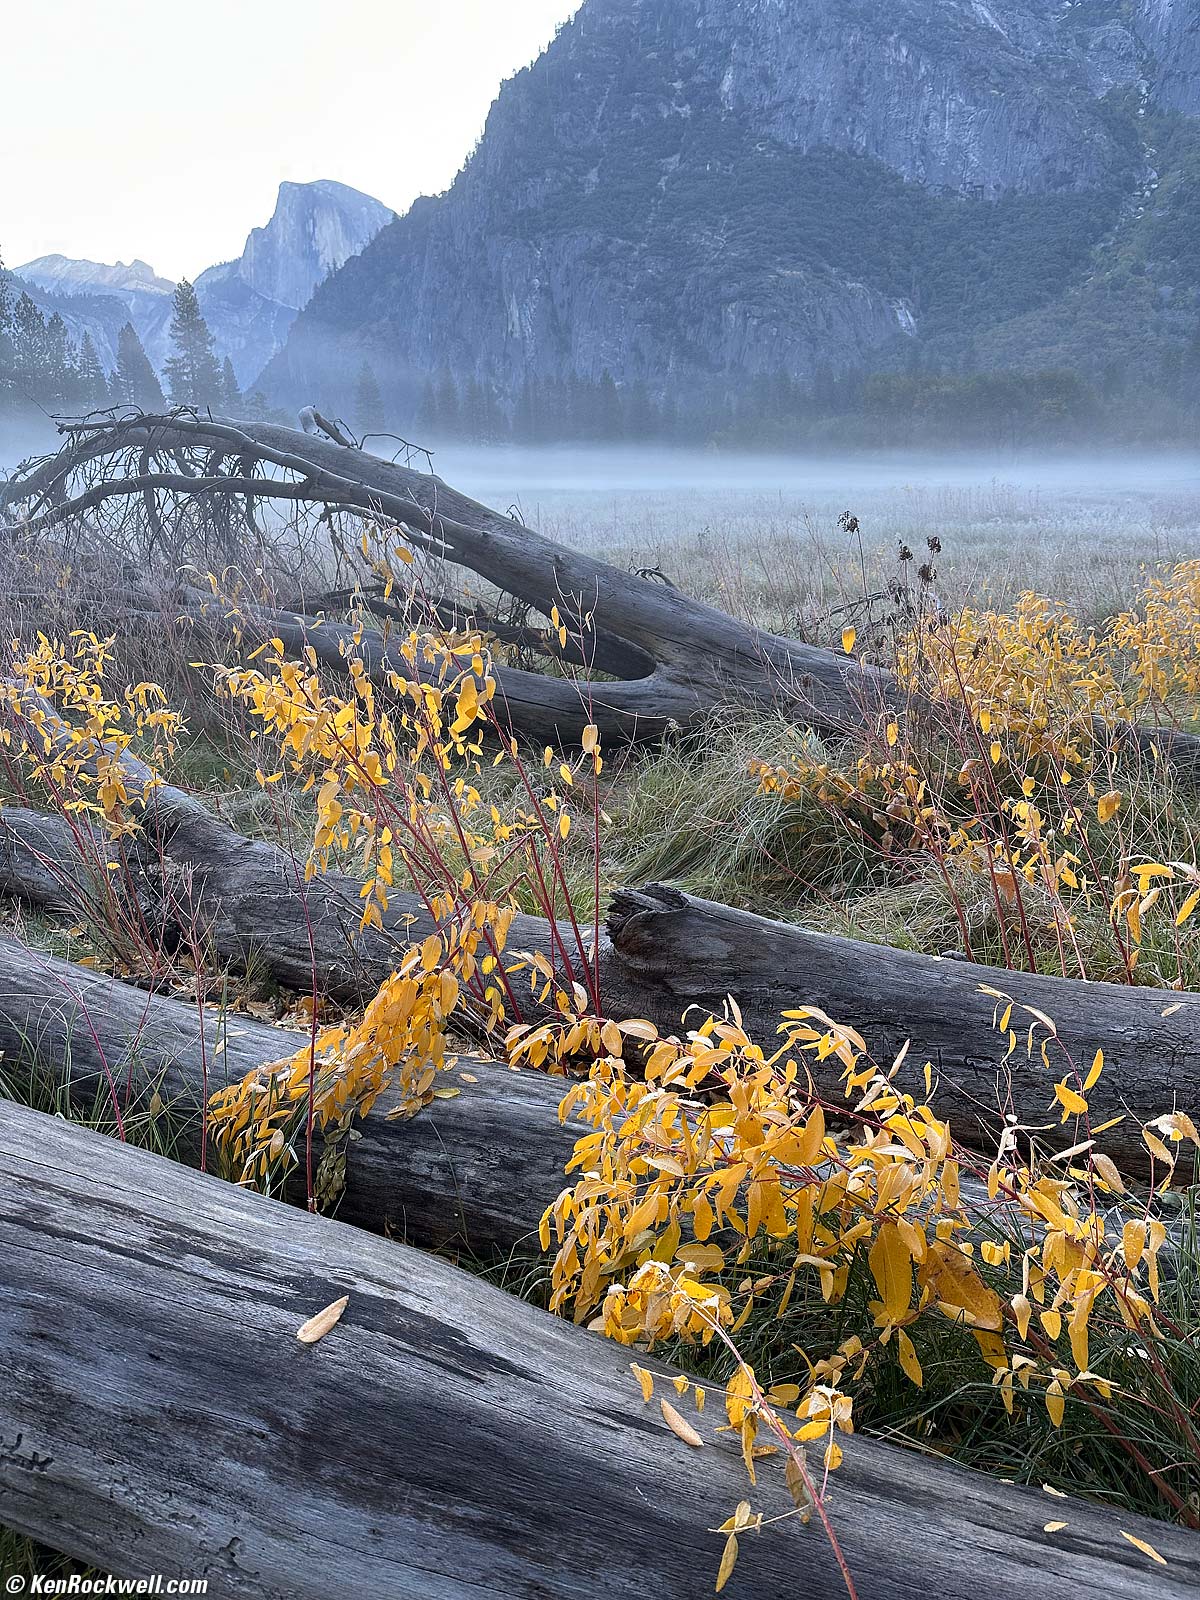
As shot. bigger.
The software let me achieve my vision for how this piece should look, rather than how the scene actually looked at the time. This is art; I'm not trying to copy nature.
We drove over to another spot, pulled out, and hiked down to the Merced River:
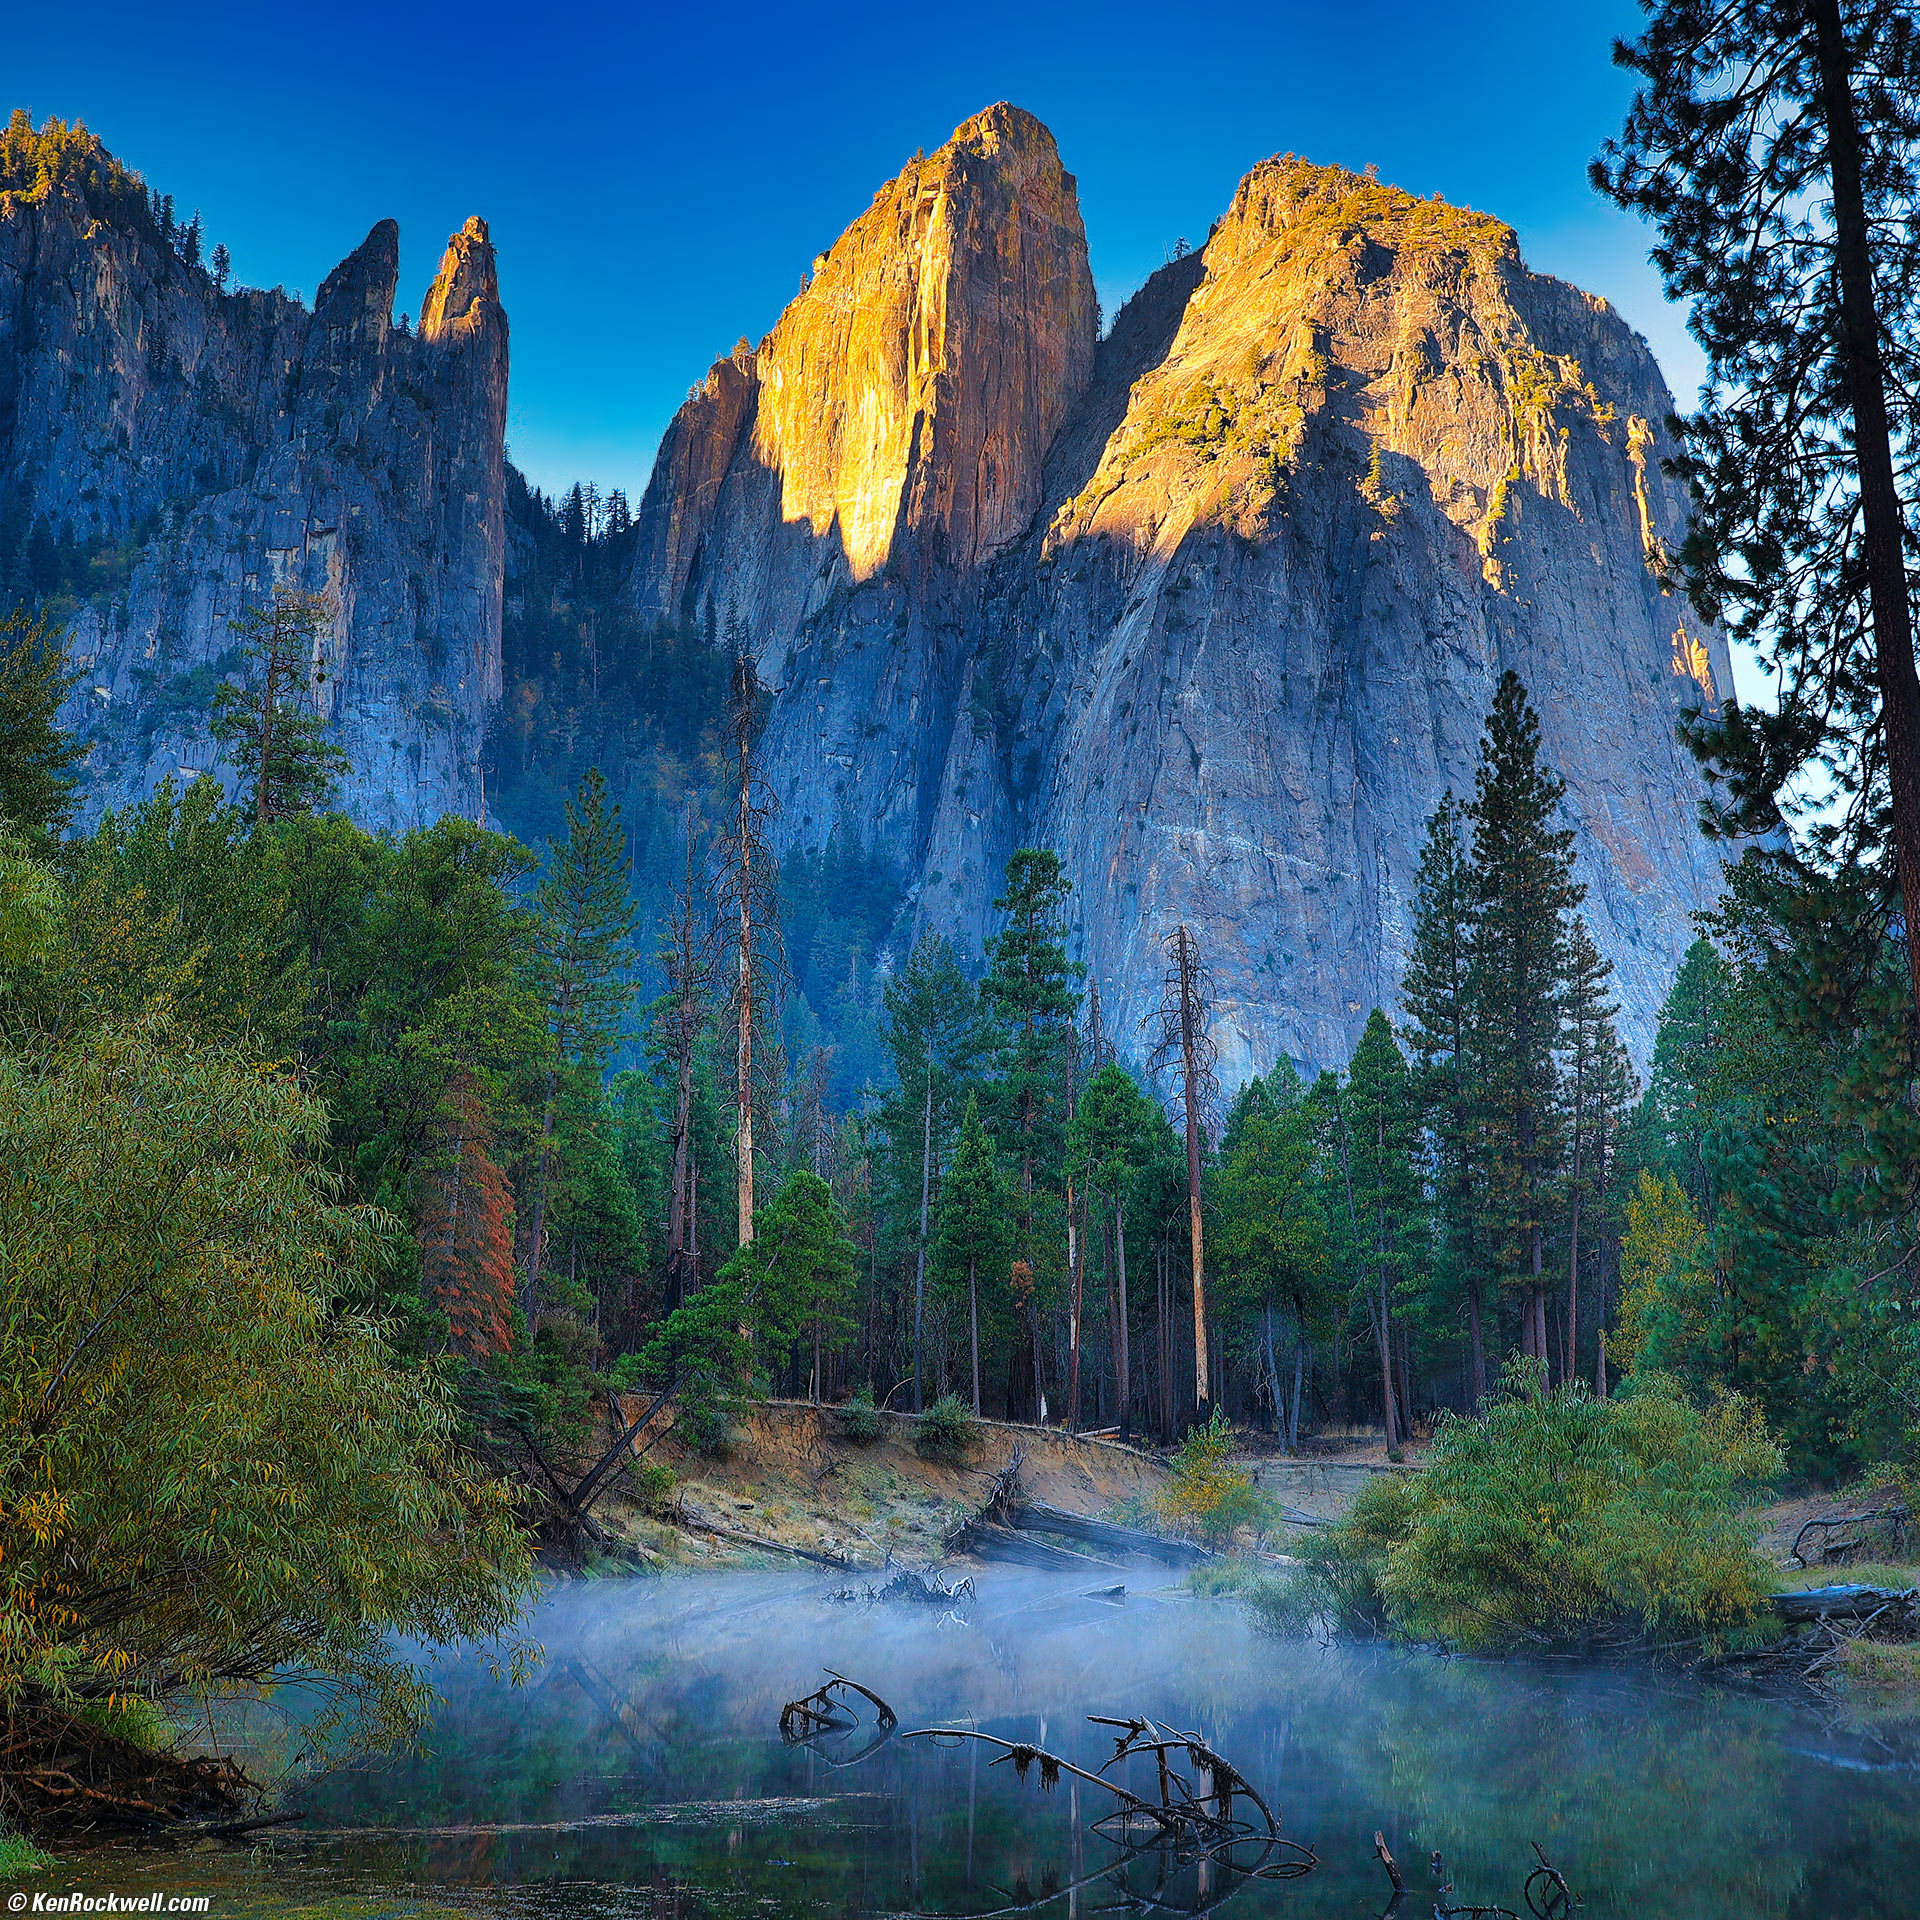
Cathedral Rocks and Merced River Fog at Dawn, Yosemite National Park, California, 8:34 A.M. Canon EOS R6 in square-crop mode, RF 24-240mm IS USM at 37mm (equivalent to the normal ZEISS 80mm f/2.8 PLANAR lens on HASSELBLAD 6×6), f/8 at 1/25 at Auto ISO 100, -1 stop exposure compensation (LV 10.6). More tech details. bigger or fit-to-screen.
I worked this entirely with Skylum Luminar Neo, with which just a few sliders allowed me to realize my original vision above. Here's the original file; this is how it looked to our eyes at the time:
As shot. bigger.
As always, this is art; I'm not trying to copy nature. Nature usually doesn't look as exciting as I imagine it.
Yes, Neo let me put detail back into what look like blown highlights as you see in the before and after photos above.
Here's the very next frame as shot on my R6:
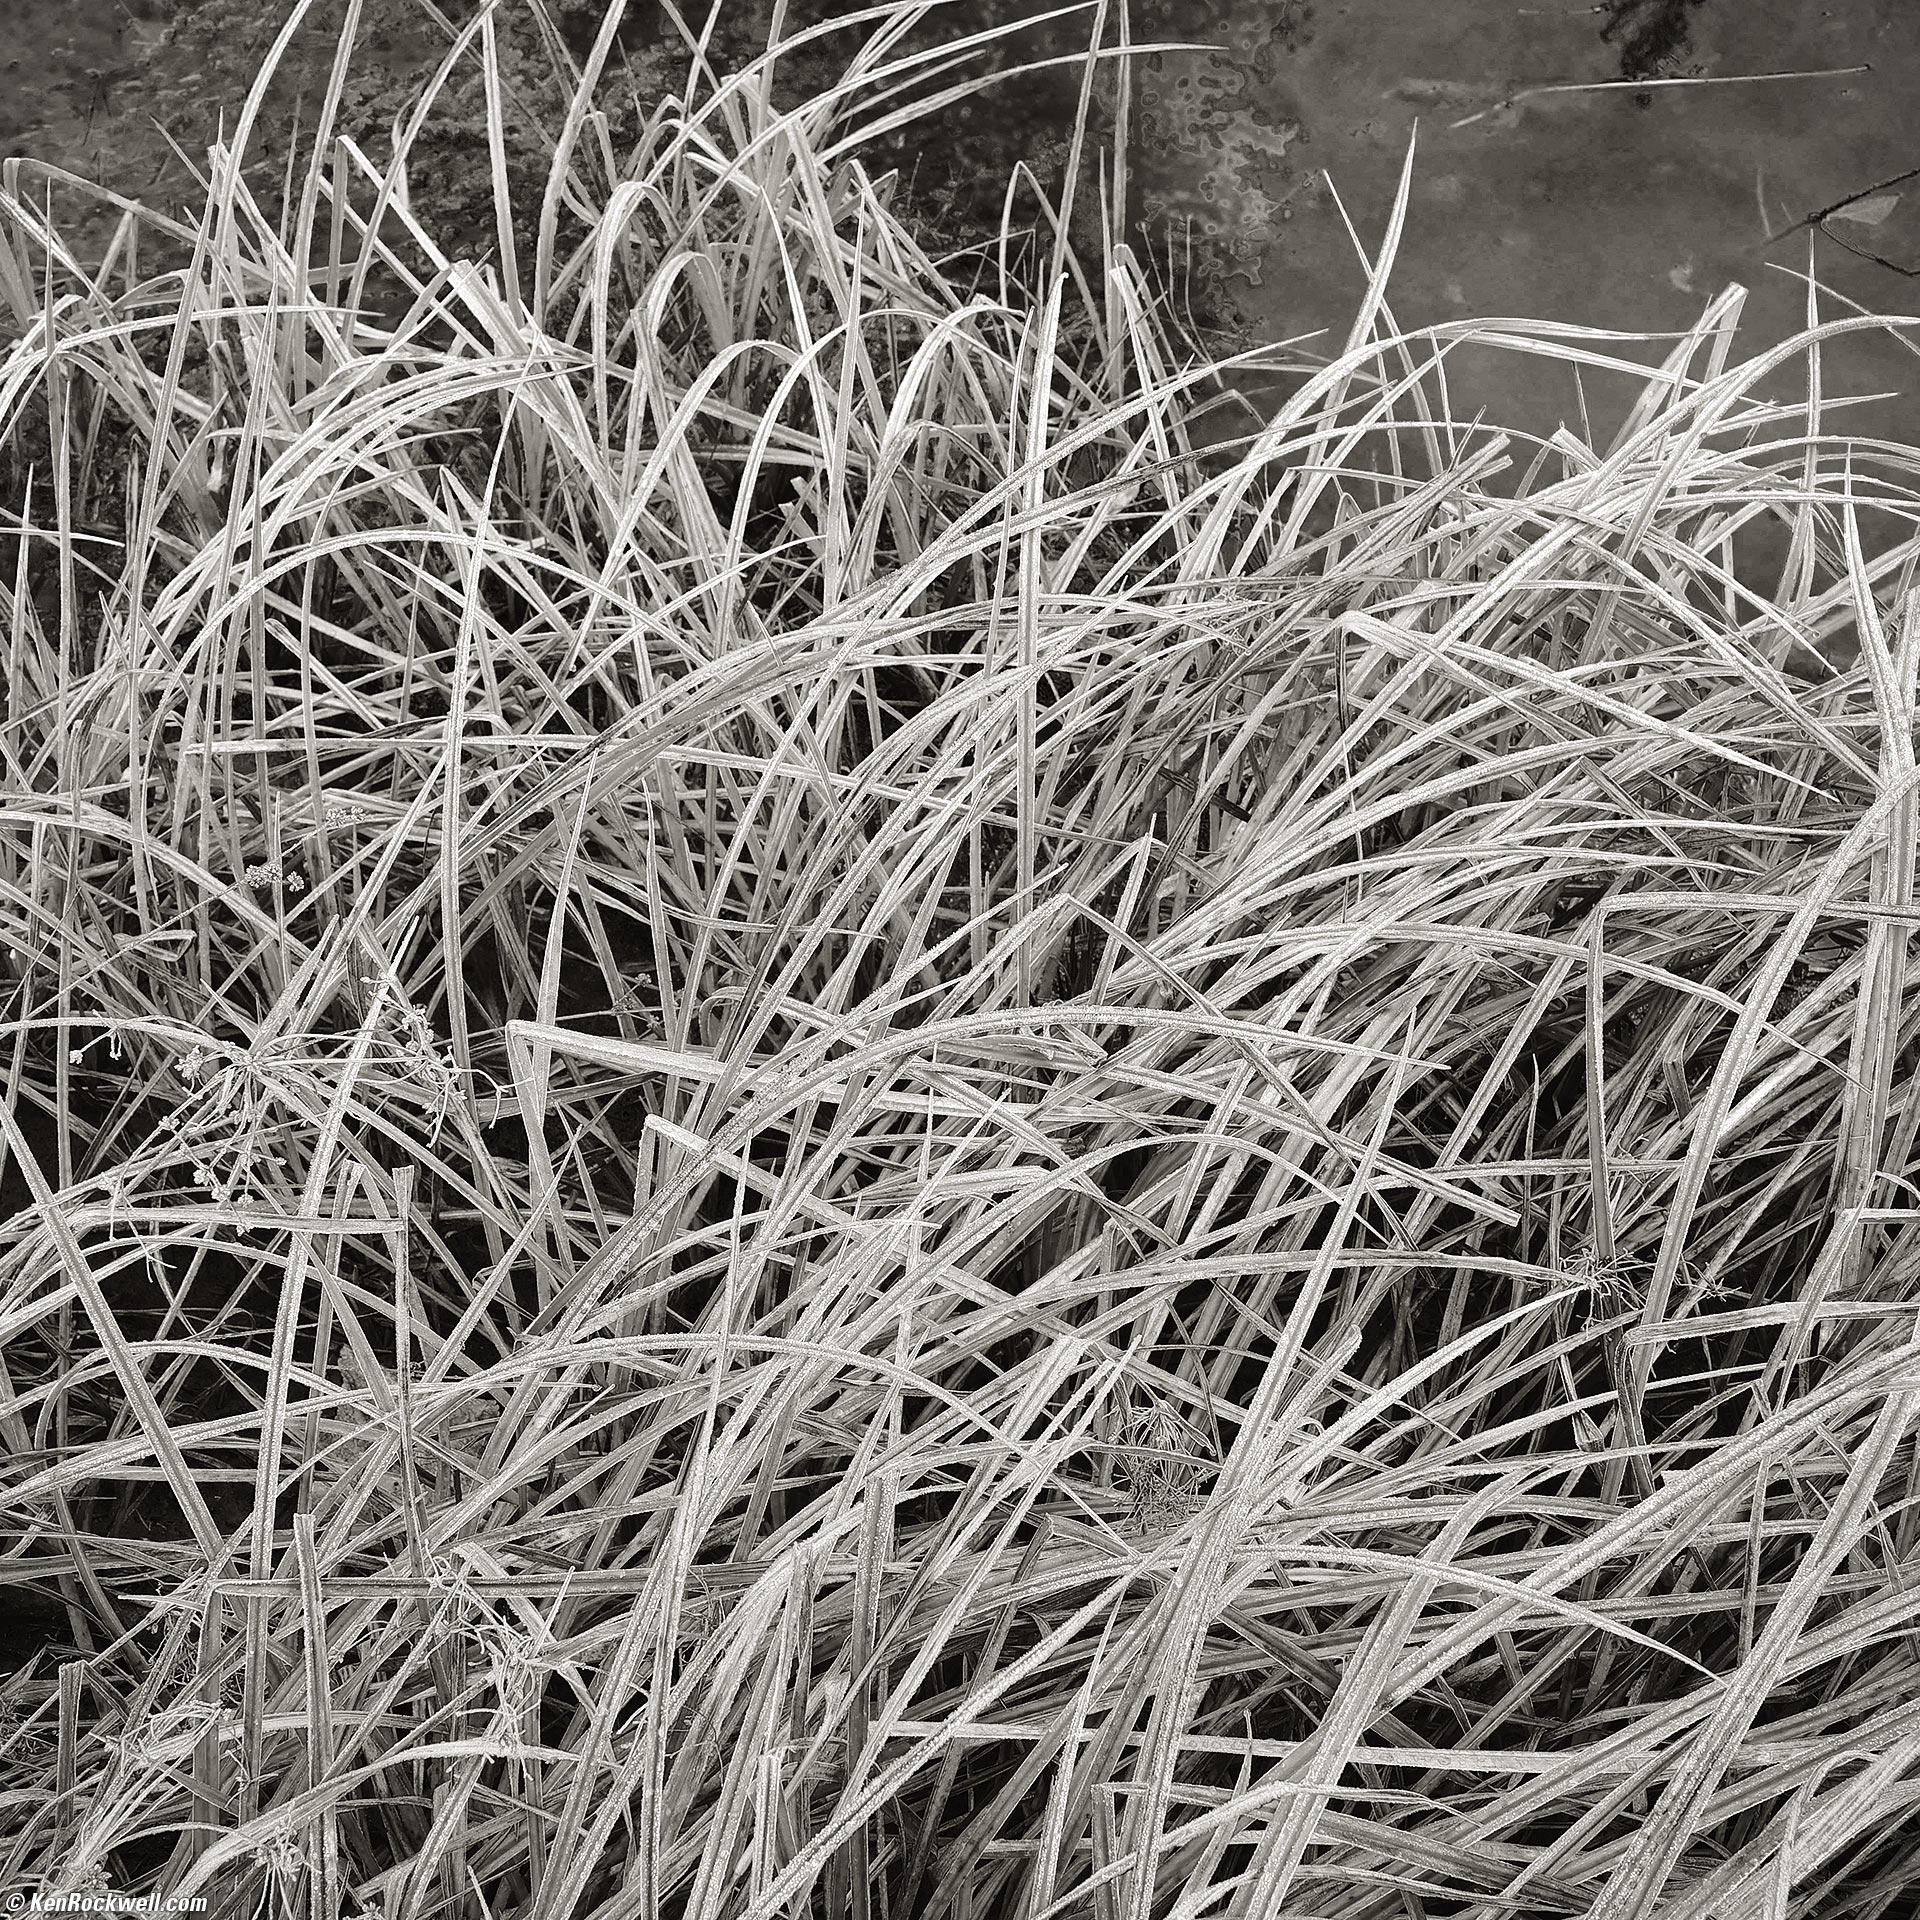
Grasses on the Banks of the Merced River, Yosemite National Park, California, 8:35 A.M. Canon EOS R6 in square-crop mode, RF 24-240mm IS USM at 35mm (equivalent to the normal ZEISS 80mm f/2.8 PLANAR lens on HASSELBLAD 6×6), f/11 hand-held at 1/10 at Auto ISO 320 (LV 8.7), split-toned print. More tech details. bigger or fit-to-screen.
I love my RF 24-240mm IS USM, which I often hand-hold with my Auto ISO Minimum Shutter Speed set to 1/10, at which I usually get ultrasharp results at low ISOs, no tripod needed.
I used the color channel mixer trick again in Photoshop CS6 (more details under my Proud Stone photograph on October 19th) which let me lighten the green grass so it stands out from the background. On HASSELBLAD 6×6 with B&W film (my favorite is Fuji ACROS 100 II) I'd use my Bay 50 or Bay 60 HASSELBLAD Green 58 filter to lighten the green. Obviously with film you have to previsualize what's happening and just know to use the green filter to lighten the green; you can't tweak it to taste later in Photoshop or get much of an idea looking through the viewfinder.
Back to what I actually did with this easy square handheld digital snap rather than dreaming about what a pain it is actually to haul my heavy HASSELBLAD system around the muddy woods in the freezing cold along with a nerdy tripod, after a good monochrome conversion I used Skylum Luminar Neo and its vignette tool, and then made a split-toned print.
Hiking back up to our cars, it was still so cold we had frost on some leaves. The iPhone is great for closeups:

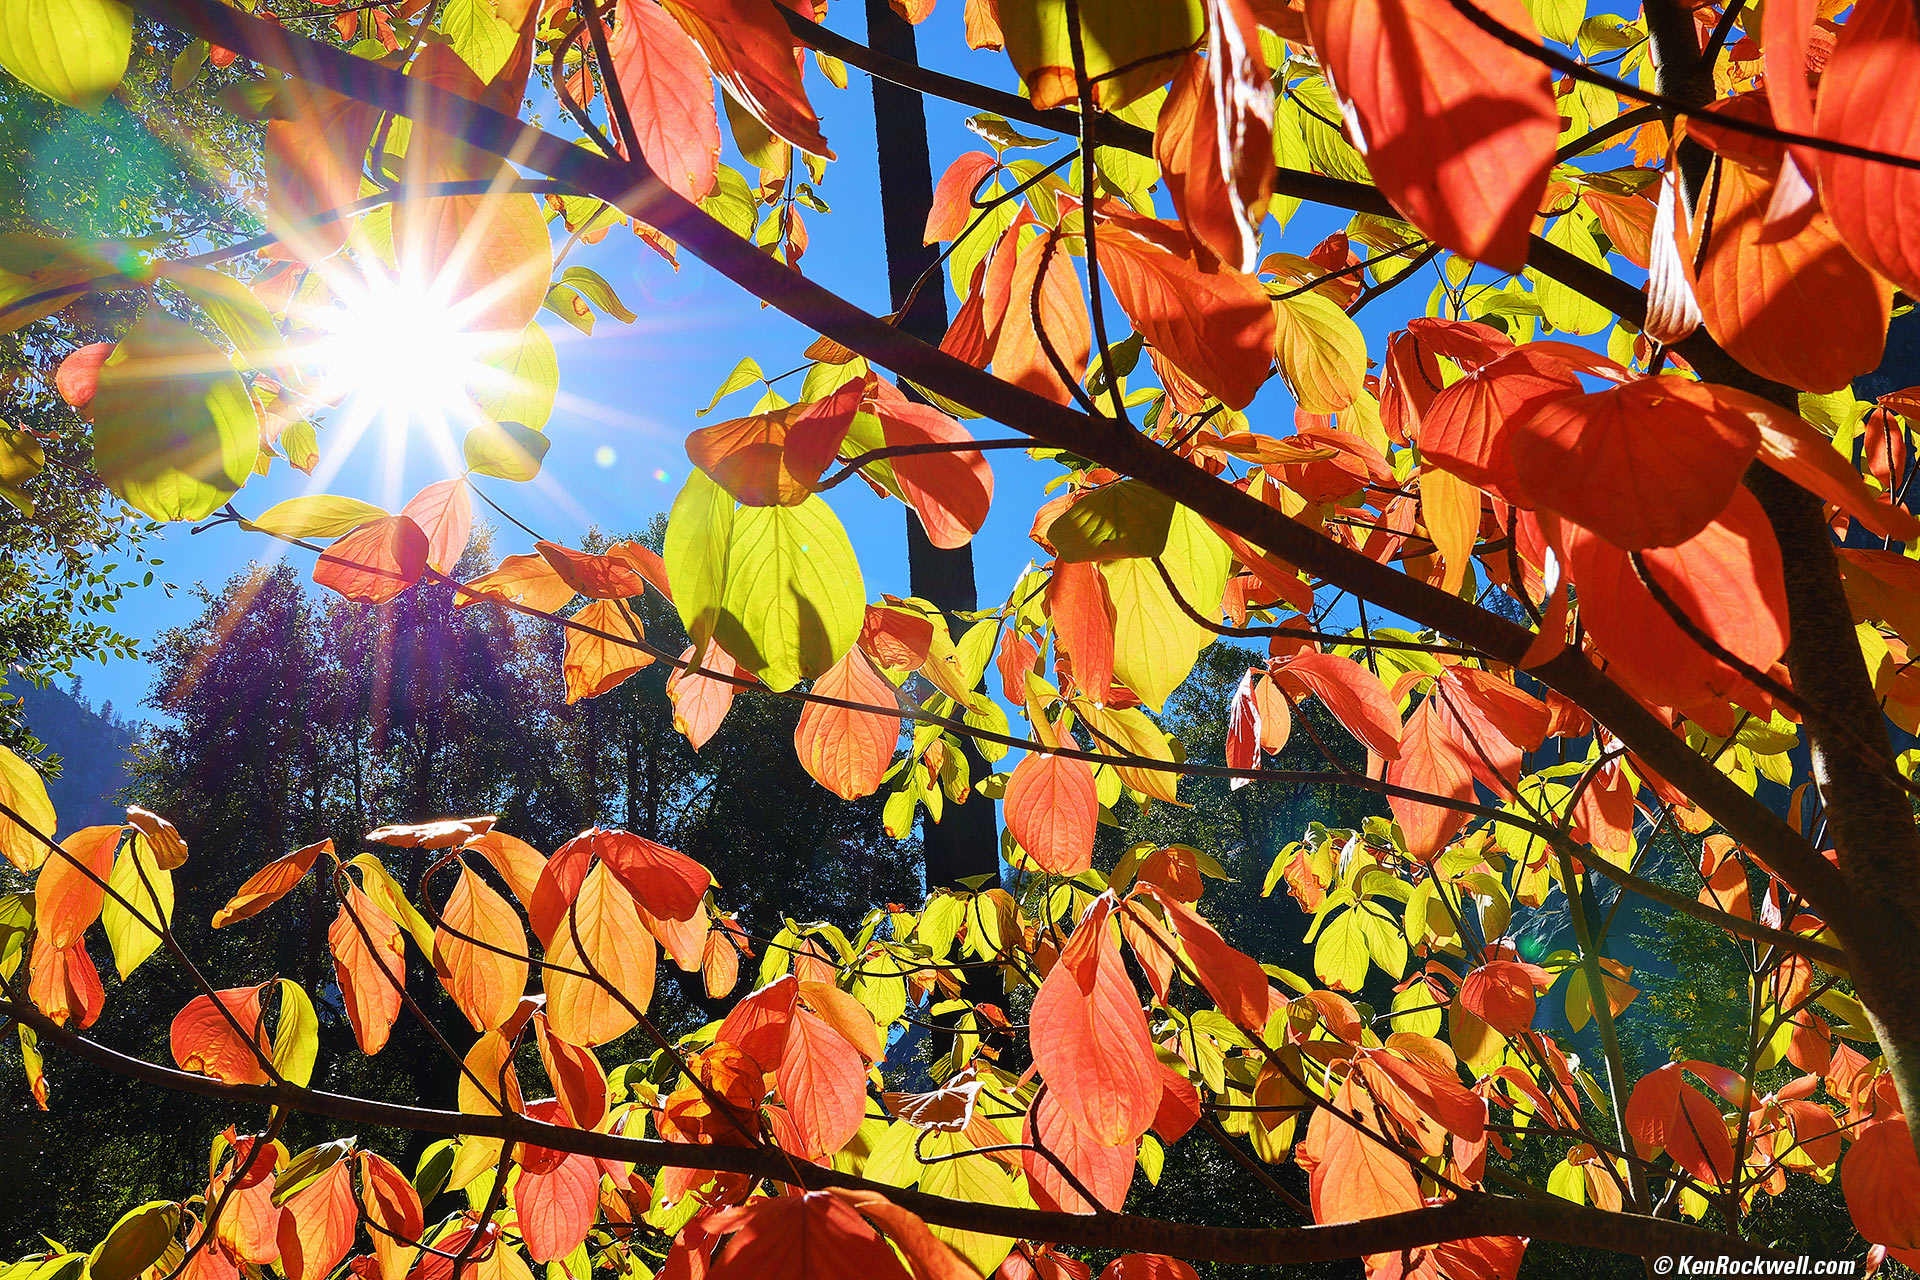
Frosty Green Leaf by the Banks of the Merced River, Yosemite National Park, California, 8:58 A.M. Apple iPhone 14 Pro Max camera system at its 1× setting (which magically cropped to a full-frame equivalent of 24mm from the 0.5× camera with its 2.2mm lens because only it can focus this close), f/2.2 at 1/99 at Auto ISO 200 (LV 7.9). More tech details. bigger or fit-to-screen.
The iPhone 14 Pro Max has essentially boundless macro ability. Just hold it up to anything, select your zoom level, and it just shoots regardless of how close you are. Bravo! I remember when lenses had "macro" ranges where you had to move slider switches just to swap to the macro mode. That was a pain!!
The iPhone plays tricks in the background to make the magic happen so we don't need to move any switches. Do to the physics of optics, shorter lenses focus much, much closer than longer lenses. No worries, even if you're set at 1×, 2× or 3× or longer and get closer than about 7"/18cm (the close-focus limit of the 1× and 2× cameras, or about 2'/80cm for the 3× camera), then the iPhone silently swaps to the 0.5× camera that can focus ultra-close (or swaps to the 1× camera for the 3× setting between about 2' to 7" or 80 to 18 cm) and crops the image to the zoom level you've chosen, and then interpolates (upsamples) it to the usual 12 MP (4,032 × 3,024 pixels) image size, and no one except some of us notice.
Upsampling from what was actually only a quarter of the pixels of the 0.5× camera (3 MP), the iPhone uses some brilliant tricks, like what looks like vectorizing the edges, so in this case we lose no sharpness on the edges of all the ice crystals. Its algorithms are doing a bang-up job vectorizing what it can so straight lines and edges stay ultra sharp, which works great on the frosty crystals here. The only way we really know what camera was used is when we see the actual optical focal length listed in Photo Mechanic.
In other words, Apple figured all this out for us and just did it, giving use an ultra-close image that's super sharp, all snapped while wearing gloves in the freezing dawn.
If you want to keep the full 48 MP resolution of the 1× camera, you can have your iPhone warn you that it's subbing the 0.5× camera if you set SETTINGS > CAMERA > MACRO CONTROL > ON, in which it will show a yellow circle with a flower in it to let you know it's cropping from the 0.5× camera in the 1× or 2× settings. It doesn't show when it crops from the 1× camera when you're too close in the 3× mode because the 1× camera has 48 MP so you're not really losing anything cropping from it to make 3×.
I worked this in Skylum Luminar Neo to emphasize the leaf. All the paragraphs above were covering what the iPhone does in the background all by itself.
We went back and checked out of our rooms, then saddled-up and headed over to hike around Happy Isles:
Backlit Leaves, Happy Isles, Yosemite National Park, California, 12:11 P.M. Canon EOS R6, RF 24-240mm IS USM at 35mm, f/22 at 1/50 at Auto ISO 100 (LV 14.6). More tech details. bigger or fit-to-screen.
I shot at f/22 in Av mode to get the sunstar.
I ran this through Perfectly Clear to make it even lighter and more brilliant.
We finally headed out of the park at 1:30 P.M. We touched base at the Cedar Lodge south of the park at 2:15 P.M., passed through Mariposa at 3 P.M., stopped in Lebec at 6:30 P.M., headed up the Grapevine and were breezing through downtown Los Angeles at 8:12 P.M.:
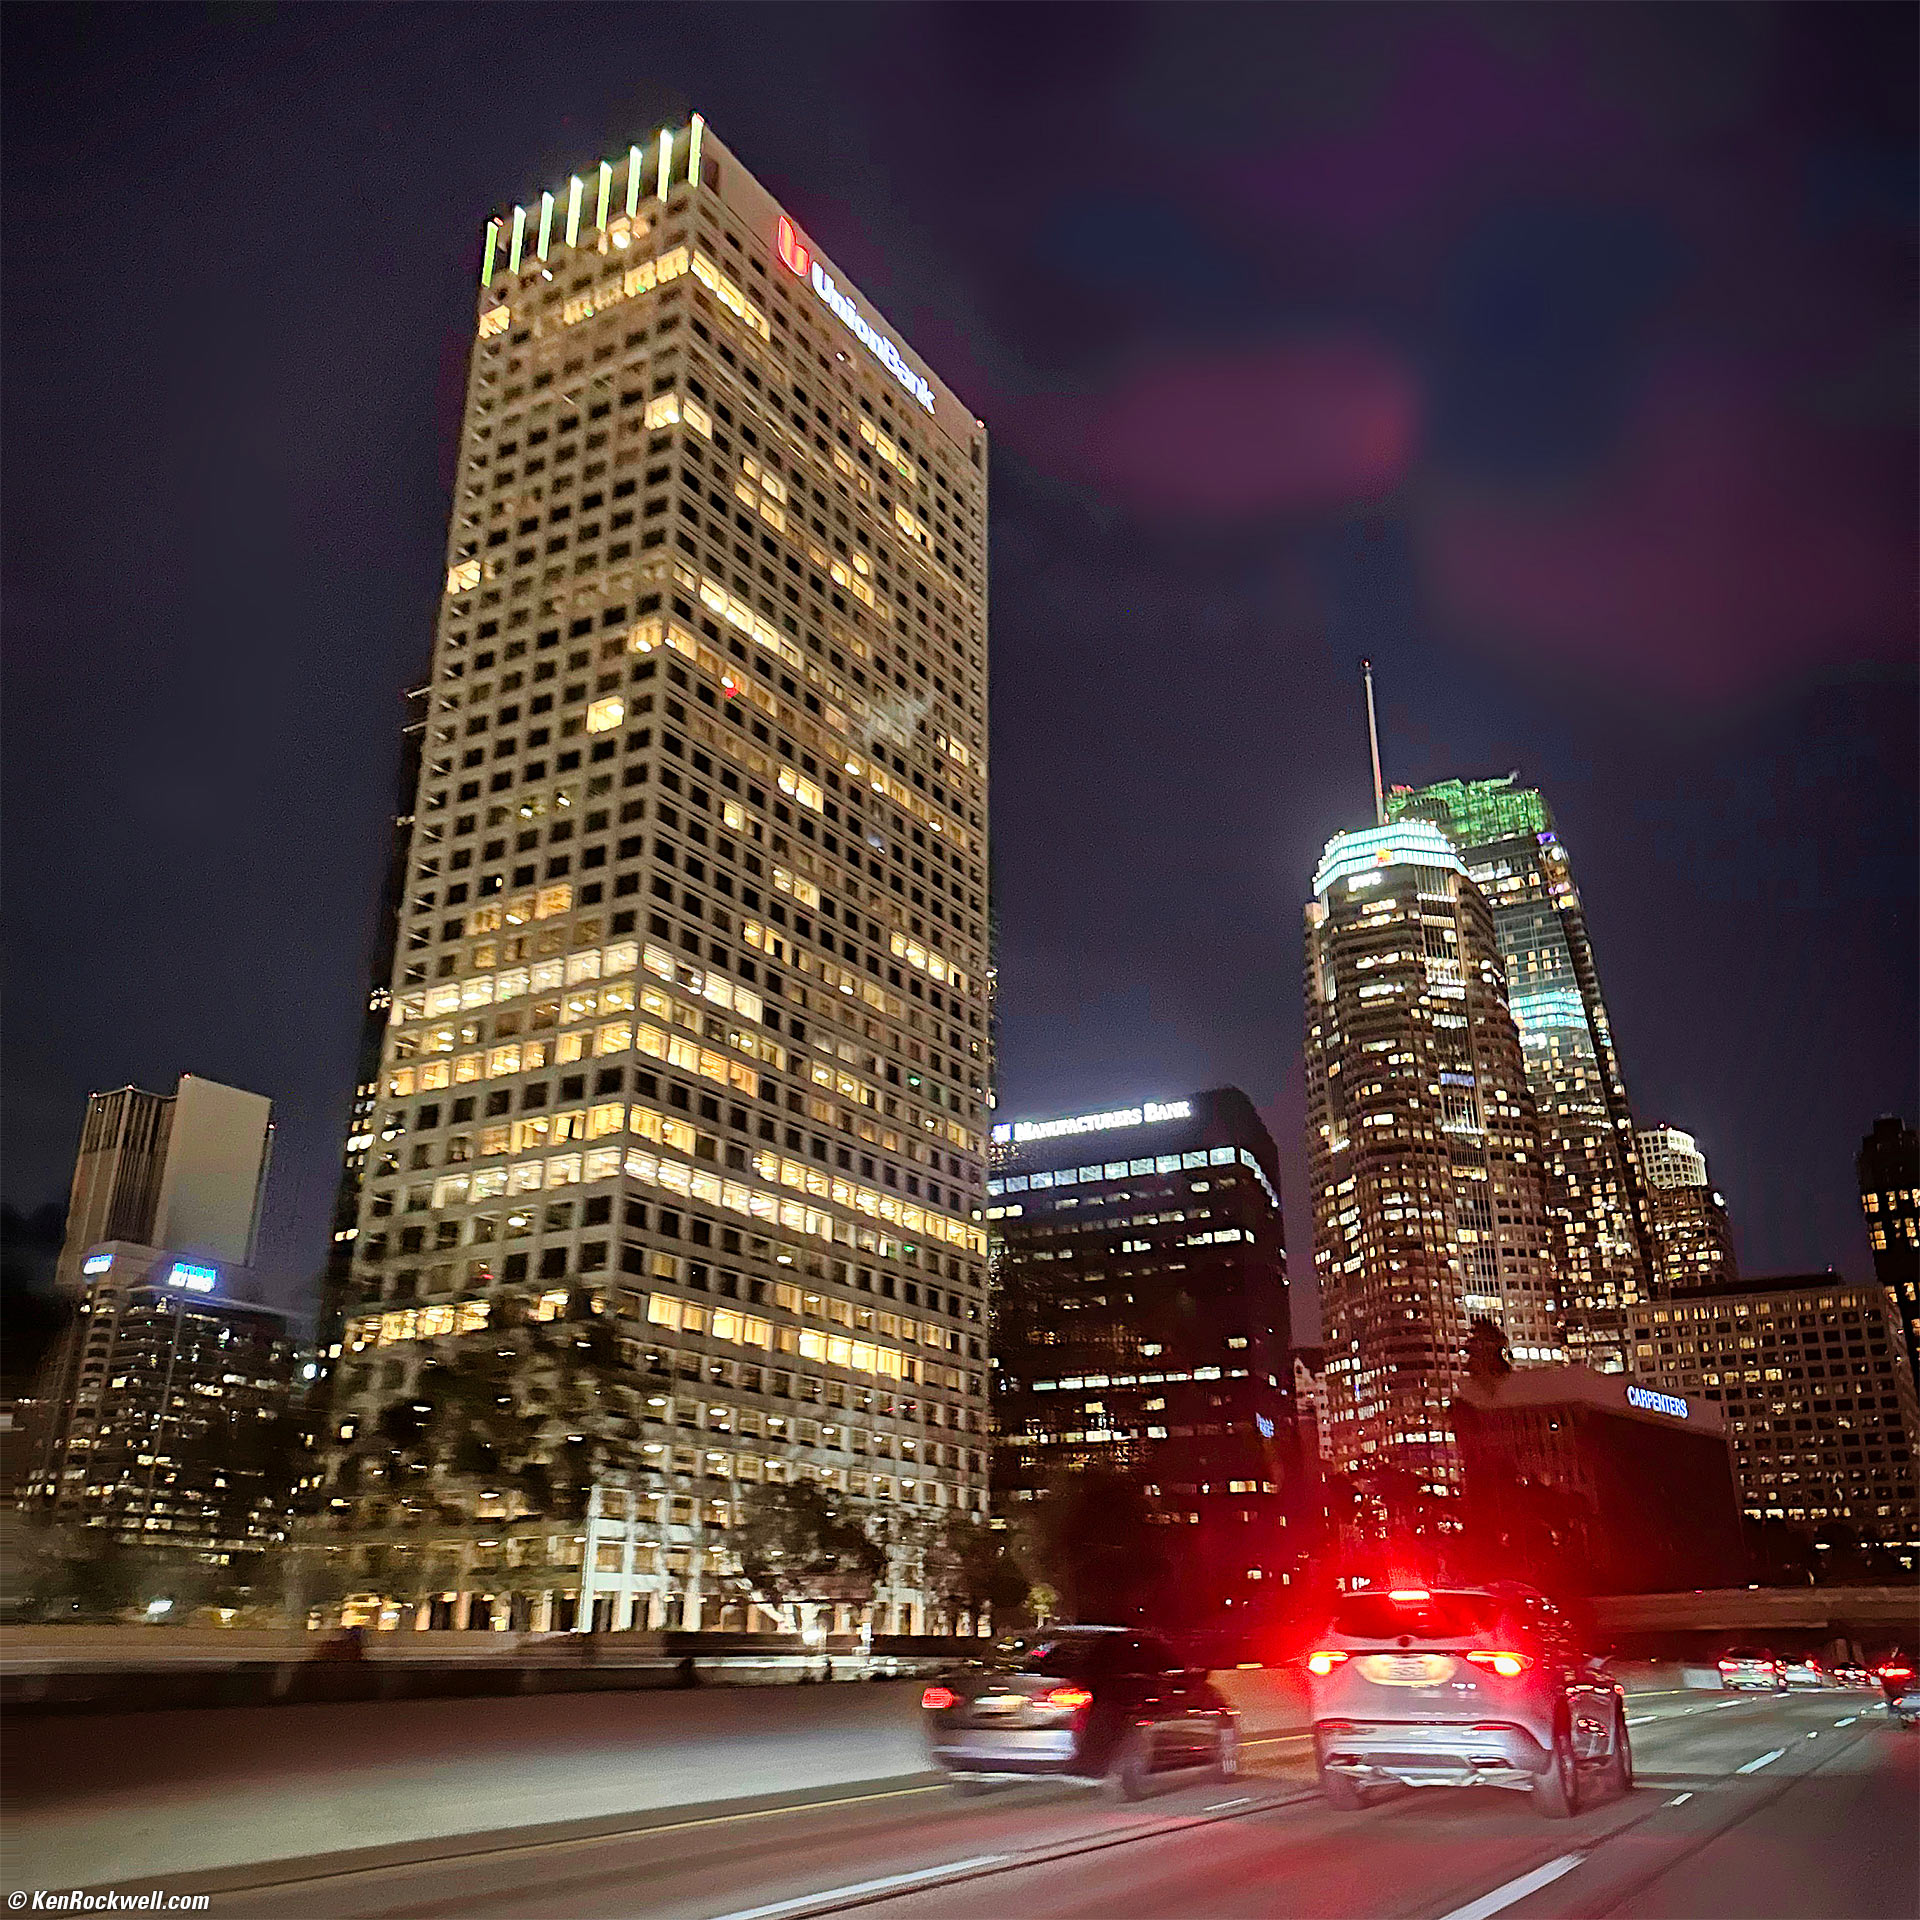
Downtown Los Angeles as Seen through the Tinted Windshield of a Moving Car on an Open Freeway, I-5 South Just past West 4th Street, 8:13 P.M. Apple iPhone 14 Pro Max 1× (6.9mm actual or 24mm eq.) camera, f/1.8 hand-held at 1/17 at Auto ISO 1,600 (LV 1.8). More tech details. bigger or fit-to-screen.
I worked this in Skylum Luminar Neo, not just for amplification, but also for its amazing Erase tool which let me get rid of reflections and the ghosts from the car taillights endemic to the iPhone.
I'm absolutely astounded by my iPhone. No matter how difficult or foolish are my attempts to shoot things that were previously unphotographable, like this hand-held shot out of a tinted car window at night on the freeway, the iPhone just gets the shot. Heck, most of our photos of things that held still with the first DSLRs 20 years ago were barely this sharp most of the time! (not to worry; Dave was driving.)
We got to Dave's house in LA at 8:26 P.M. We offloaded Dave's stuff and I headed home at 8:57 P.M , arriving at my place at 10:45 P.M., another very long day.
< < Back to top
© Ken Rockwell. All rights reserved. Tous droits réservés. Alle Rechte vorbehalten. Alla rättigheter förbehållna. Toate drepturile rezervate. Ken Rockwell® is a registered trademark.