Home Donate New Search Gallery Reviews How-To Books Links Workshops About Contact
Nikon
D7000 Guide:
Setup Menu (wrench icon)
© 2011 KenRockwell.com. All rights reserved.

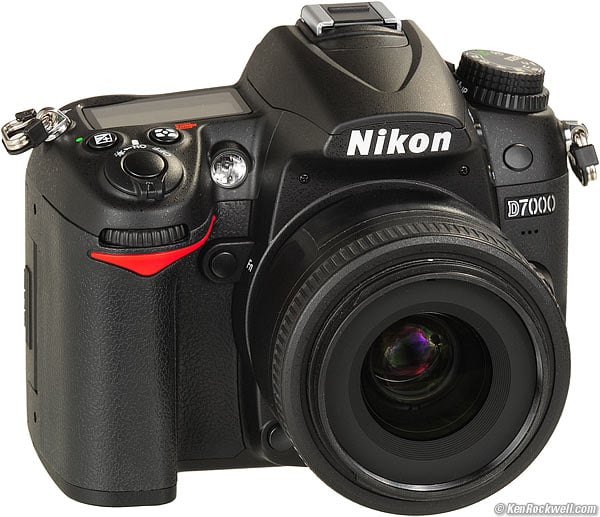
Nikon D7000 and 35mm f/1.8 DX. enlarge. The biggest source of support for this free website is when you use these links, especially these directly to the D7000 at Adorama (either body-only or with 18-105mm lens), the D7000 at Amazon (body-only or with 18-105mm lens), or Ritz (body-only or with 18-105mm lens) when you get yours. Thank you! Ken.
July 2011 Top of Nikon D7000 User's Guide Nikon D7000 Review
More Nikon Reviews Nikon Lens Reviews
Help me help you top
I support my growing family through this free website, as crazy as it might seem.
The biggest help is when you use any of these links to Adorama, Amazon, eBay, B&H, Ritz, Calumet, J&R and ScanCafe when you get anything, regardless of the country in which you live. It costs you nothing, and is this site's, and thus my family's, biggest source of support. These places have the best prices and service, which is why I've used them since before this website existed. I recommend them all personally.
If you find this page as helpful as a book you might have had to buy or a workshop you may have had to take, feel free to help me continue helping everyone.
If you've gotten your gear through one of my links or helped otherwise, you're family. It's great people like you who allow me to keep adding to this site full-time. Thanks!
If you haven't helped yet, please do, and consider helping me with a gift of $5.00.
As this page is copyrighted and formally registered, it is unlawful to make copies, especially in the form of printouts for personal use. If you wish to make a printout for personal use, you are granted one-time permission only if you PayPal me $5.00 per printout or part thereof. Thank you!
Thanks for reading!
Mr. & Mrs. Ken Rockwell, Ryan and Katie.

I use Adorama, Amazon, eBay, Ritz, Calumet, J&R and ScanCafe. I can't vouch for ads below.
|

Free Live Help (USA only) top
Want free live phone support?
In the USA, call (800) NIKON-UX, 24 hours a day, 365 days a year.
How to get to the SETUP Menu
Select the Set Up Menu by pressing MENU, moving to the left and then up or down to select the wrench icon. You'll then see SETUP MENU on the top of the LCD.
What it Sets
This sets the usual housekeeping items like languages, video formats, auto image rotation, the clock and file numbering.
What I Change
This menu contains the secret message mode I use to encode my © and contact information into every file shot with my D7000.
This is the hard way.
The easy way is to use the FORMAT buttons.
Save user settings
This programs the U1 and U2 positions on the top dial.
More at the U1 and U2 modes.
Reset user settings
This resets either of the U1 or U2 positions on the top dial.
More at the U1 and U2 modes.
I can't see why anyone would want to do this, unless you've bunged-up a setting so far that you just want to start again from scratch.
LCD Brightness top
I leave mine at 0; its always perfect.
Clean Image Sensor top
This lets you tell the D7000 to clean its own sensor, and if you want it to clean itself every time you turn it on or off.
Lock mirror up for cleaning
This lets you lock-up the mirror and open the shutter to let you try to clean the sensor yourself.
Don't do this; I send my cameras to Nikon if they ever need a real cleaning. I know people who have destroyed their own $5,000 cameras thinking some magic swabs or pads would let them save paying Nikon $50 to do it properly.
Video Mode top
This sets the analog video output's television format.
Use NTSC (525 lines, 59.94Hz) in the Americas and Japan, and PAL (625 lines, 50Hz) in Europe.
There is no SECAM setting.
This output will always look much worse on a TV or projector than images do on a computer or projected through a computer. Read Why Images Look Awful from the Video Output for more.
For high-quality video output, use the HDMI output.
HDMI top
Output Resolution allows you to fix the output at one resolution. Otherwise, it sets itself automatically by default.
Device Control allows some pieces of equipment to control one or another remotely.
Flicker Reduction top
When set properly to your local power frequency (60 Hz for US and Japan or 50 Hz for Europe), this helps reduce the flickering seen when shooting movies under crappy artificial lighting like fluorescent, mercury or sodium lighting.
You shouldn't need to touch this unless you're traveling.
Time Zone and Date top
This sets the date, time and time zones.
There is a nice map for finding time zones. Want to reset your D7000 for Fiji or Tonga? Just click. You can swap among time zones without having to reset the seconds, a boon for me who keeps his D7000 set to the exact second.
Language top
This sets English or other languages.
If a "friend" sets your D7000 to a foreign language, the menu option for "Language" is still marked "Language" even though every other menu option changes, so you can reset your D7000 back to normal.
Image Comment top
This lets you add a secret text message into every file. Mine is set to © KenRockwell.com with my address and phone number! You see this text looking at the EXIF data with software on a computer.
Sadly Nikon offers no real © symbol; you have to pretend and use (c) instead.
You set this by pressing:
MENU > WRENCH > Image Comment > Input Comment > (add your message like you did on 1970s video games) > OK. You must hit OK or it will forget everything you just did!
To edit or remove a character, select it or its location in the Input Comment screen by spinning the rear dial. Select a new character by hitting (+), or press the Trash button to delete it.
When you get your text message spelled out, go to Attach Comment and hit SET so a small checkmark shows. Now go up, select DONE, and hit OK. If you forget to check Attach it won't attach, and if you forget to select DONE and hit OK it will also forget everything you just did. Sorry, I don't write the firmware.
It's great having everything you shoot contain your contact information. It also allows you to prove ownership in a third-world country when catching a thief with your camera. Help the cop go through the menus and read your personal ID information.
This text is added in the file's EXIF data. It doesn't appear in the visible image. I insert my visible © notices with Photoshop.
You also can input more data as Copyright information.
Auto Image Rotation top
This sets a flag in vertical images which keys most, but not all, software to display the image vertically.
It does not actually rotate the images; it merely sets a flag. Someday the camera's firmware will work properly and rotate the image itself, but no camera does this yet.
I rotate the images themselves later in iView.
Auto Image Rotation helps me identify which of hundreds of images I shoot each day need rotation.
Auto Image Rotation is easy to fool if you're shooting directly up or down.Turn it off if you're photographing your shoes on your feet all day.
Image Dust Off ref photo top
This is used to take a picture of the dust on your sensor. If you pay Nikon another $130 for Nikon Capture software you can use this to erase the dust more easily from your images shot in raw.
You people know who you are. I don't do this!
Battery info top
This shows:
Battery Meter
The exact remaining capacity of your battery in percent.
Pic. Meter
How many pictures you've snapped on this charge.
Battery age
This shows the general health of your battery.
A new battery reads 0, an old battery reads 2, and after about 100,000 shots might read 4.
I've never seen this meter read any worse than 2, and that was on a D3 after over 50,000 shots on its battery.
Wireless Transmitter top
This sets some options for the WT-4A Wireless Transmitter.
Copyright information top
This sets some more data fields which are recorded as part of each file's EXIF data.
I cover how to input text at Image Comment.
Save/load settings top
Here we can save-out everything about our D7000 to a file on an SD card. Just select Save settings, and an NCSETUP7.BIN file is recorded to your card.
Here is the file that's recorded when I save my settings. (it's a file; it won't do anything in your browser.
To restore all the settings into your D7000, copy the file back onto an SD card, put the card in your D7000, and use the Load settings option.
You'd want to use this to backup all your settings if you loan your camera or send it in for repair. We tend to forget how long it takes us to get every setting to our tastes, and this lets us save and recall everything in the camera.
It also lets us share them with each other, but remember, we all have our own copyright information stored in our cameras, so using mine or anyone else's setup file will result in their information being in your camera and recorded in your files unless yo update it for yourself.
GPS top
This sets some options when used with the optional plug-in GPS receiver.
Virtual horizon top
Most of us get to this other ways, like our Function button, but if not, you can invoke this display at the menu option.
This doesn't set anything about the display, it merely calls it up.
Non-CPU lens data top
Here is where we code any manual-focus AI lens for perfect color Matrix metering, EXIF data and manual and Aperture-priority automatic exposure.
There are nine memories, so we can program nine lenses, or focal lengths if we're using zooms.
Select the memory number, and set the focal length and aperture.
Be sure to hit DONE and then OK after each change, otherwise, just like Simon says, the D7000 will ignore the changes.
I suggest setting your wide lenses to the smaller numbers, and going in order as focal length goes up. For zooms, if you really want the EXIF to show the correct focal length, program as many focal lengths as you like.
Select "Choose non-CPU lens number" for the Fn button and then you can select among these with one press while shooting. If you do this, the lens information is shown only on the top LCD, not through the finder unfortunately.
AF Fine Tune top
Don't touch this!
There is a very good reason that Nikon hid this at the bottom of the setup menu: most people will only make things worse by playing with this.
This option is only helpful for about one lens out of 20. Personally, if I get a lens that consistently focuses in the wrong place, I return it.
This fine-tuning adjustment allows you to shift the point of best focus slightly in front of or behind where it would be otherwise.
Warning 1
No AF system hits the same exact distance every time. If you want to screw with this, you have to make dozens of shots for every condition below and look at the average.
Warning 2
This is only one adjustment.
Every lens needs slightly different adjustment at every distance.
Be sure to check at many distances from near to far to find the best compromise.
Warning 3
This is only one adjustment.
Every lens needs slightly different adjustment for every zoom setting.
Be sure to check at many zoom settings and find the best compromise.
It's usually best to optimize this at the telephoto end.
Warning 4
This adjustment varies for every sample of lens and every sample of camera. That's why there is the ability to save different values for the same kind of lens!
All because someone gets a good result with one setting on his camera or with his lens doesn't mean that it will work on yours.
These settings are not transferable between cameras or different samples of the same lens.
Warning 5
Don't use slanted targets for testing.
With a slanted target, the very real difference in position between the indicated position of your AF sensor and its actual position will make your results false.
I use a stick stuck in my lawn. I focus on the stick, and look in the grass to see where focus hit.
Firmware Version top
This lets me confirm if my D7000 is up-to-date with Nikons' free firmware updates.
Mine, as I write this on 20 July 2011, my D7000 reads A 1.02, B 1.02 and L 1.002.
back to top of page back to top of Nikon D7000 User's Guide
MENUS
RETOUCH MENU < NEXT
Home Donate New Search Gallery Reviews How-To Books Links Workshops About Contact