Home Search Gallery How-To Books Links Workshops About Contact
|
Aerial
Photography 
INTRODUCTION
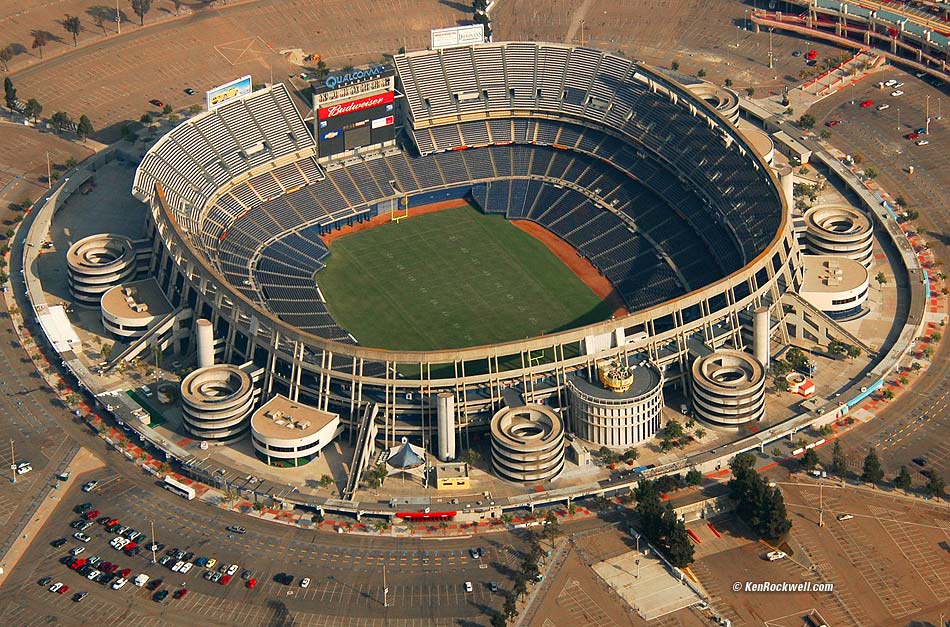
San Diego's Jack Murphy (Qualcomm) Stadium (click to enlarge)
My mom has been a pilot since long before I was born. We'd be up flying in her Cessna every weekend whether we liked it or not. Since I've been doing photography since being a little kid I was up photographing our home and my school even when I was in junior high school with a Minolta SR-T-102 and a Vivitar preset 200mm f/3.5 T-mount lens. You don't need fancy cameras to get great aerial shots. Even disposables are fine. You don't need a helicopter or fancy airplane. Any small plane will do. Small, low and slow is best. Thanks most recently to Frank Britton of San Diego's Airwatch Two. Frank was kind enough to get me up here in San Diego which reminded me that I needed to write this article!
AIRCRAFT and FLYING Planes and Helicopters You don't need a helicopter or fancy plane. An ordinary Cessna single engine, high wing plane is probably the most effective. My mom learned on a Piper Cub J-3; these are so slow and have doors that open so these are even better. Of course Piper Cubs are antiques today so you won't find them everywhere; they were just the cheap alternative back in the old days. You want windows that open. Slower planes are more likely to have this than your dad's corporate Gulfstream. I've never felt the need to pull off a door. I'm just fine shooting out an open window, and this way you don't get blown all over traveling to and from your target. I've also never cut a hole in the bottom of a perfectly good airplane. Shooting straight down is done for mapping and surveying, but makes boring photos. You can pull these sorts of shots off the internet if you just want to look in your neighbor's back yard. I prefer shots made at a more natural angle, which you get from shooting out a window.
Airplane Windows Avoid shooting through any windows. Windows are made of Plexiglas and, even if perfectly clean and polished, are not flat. With telephoto lenses they often will distort and make the image wavy as if you were looking through waves on an ocean. This is not much of a problem with wide lenses. Ideally just open the window. On many small planes people rig them to open all the way. On C-150/152s and C-172s the windows usually open half way. These
Cessna windows can be made to open fully in flight with the permission
of the owner and pilot by simply removing a small Philips head screw
at the front retaining bracket while on the ground. Then, when
in flight, first stow all papers and light weight items and open
the window holding on to the latch until fully open. A good pair
of ear-plugs is great to have with an open window. The wind will keep
the window propped open in flight.
Finding a Plane and Pilot This is easy. Pilots look for excuses to fly. They love it. We talk about "$100 hamburgers" because many flights are simply to fly to the next airport just for lunch. Most planes are flown because pilots love flying for its own sake. It's unlike many people who drive cars only because they have to. Therefore almost anyone with a plane can be coaxed to take you up. Cover the costs and you're probably good to go. Of course if you pay the pilot they need a commercial licence and their plane needs to meet the appropriate FAA FAR requirements for a rented or commercial aircraft, so look out if you're going to give money to a local pilot, not an instructor or commercial pilot. All the pilots I know have all these ratings so I can't tell you what happens with someone with just a Private Pilot license. Few people realize similar rules get involved even with cars: if someone takes money for driving they probably need a very complex commercial driver's license and extraordinarily expensive insurance. If you're not lucky enough to have friends or family who fly it's still easy. Go to any small airport and walk into an FBO. That's an office that has signs that say things like "Flying Lessons" or whatever. You'll find all sorts of pilots there. The easiest thing is find any instructor or service that offers flying lessons. Just tell them what you'd like to do and they'll most likely take you right up. I've forgotten the rates, but I think you're looking at about $100 an hour. Usually there's a charge for the plane rental and another to pay the instructor. Planes are rented either including fuel ("wet") or not. No big deal, just ask any instructor or the office that offers lessons and let them know what you want to do. Instructors and schools all have the right licenses to do this commercially, so you're all set.
Flight Patterns Pilots familiar with photographers know how to orbit around a fixed target and keep the plane banked over to give you a continuous shot. Your pilot just has to ask for clearance so he can fly circles around it.
PHOTO TECHNIQUE Basics Aerial photography has two technical issues. These are: 1.) Vibration. This comes from the airplane, its engine and air turbulence. Small planes bounce around a lot, unlike big boring jetliners. Fast lenses which are sharp at large apertures are a big help. 2.) Haze and any other obscuring phenomenon.
Conquering Vibration This is easy: use a fast shutter speed and always hand-hold your camera. Don't rest any part of it on the airplane. Keep every part of your arms elbows off any part of the plane. Ideally have your butt as your only point of contact. You can use very large apertures since there is no need for depth of field. Experiment to learn the largest aperture at which your lens is sharp and use that. Experiment and learn the highest ISO at which your digital camera makes clean images and use that. Once you've set ISO and f/stop use whatever fast shutter speed you get. The faster the better. If I use a shutter speed of 8x (eight times) the focal length I always get sharp results.
Gyro Stabilizers I've never used one. I'm too cheap. I use short shutter speeds in good light. You can rent or buy ones like the Kenyon Laboratories gyro. They help you make long exposures in crummy light. These are great for longer exposures with larger format cameras and in fading evening light. If you can get one go for it, but you don't need it in daylight with a modern digital SLR.
Vibration Reduction (VR) and Image Stabilization (IS) Lenses These are designed for stabilizing hand tremor while hand-holding. They aren't designed to deal with large amounts of wobble shooting from a moving airplane. Some are better than others. Some help, and others may simply go bananas and make things worse. Try your VR or IS lens with the stabilization both ON and OFF to see which works better. With a film camera you'll want to try both ways if you only are going on one flight. With digital you can see the results while you're flying and shoot accordingly. You may get different results at different zoom settings. Good luck; I prefer to shoot at 1/2,000 with a fast lens. I prefer an unstabilized f/2.8 lens over a slower f/5.6 lens with VR or IS. Often the f/2.8 lenses are sharper pro lenses compared to the less professional slower lenses. I cover more about lenses below.
Conquering Haze Wait for the best visibility. Pilots always know the visibility, measured in miles. Unlimited or 100 mile visibility is great. 5 mile visibility is crummy, and it gets a lot worse. Even on clear days visibility is rarely unlimited. You make do with what you're dealt and wait if it's too bad. Ways to help cut through haze are: 1.) Set your digital camera to it's highest contrast. Look at your histogram; you'll be surprised at how it tends to bunch up in the middle implying low contrast even if things look normal to you while flying. 2.) Develop you film for higher contrast. This also raises the speed of the film and allows faster shutter speeds. 3.) For black-and-white shoot through the reddest filter that gives you enough light for a fast enough shutter speed. Haze and clouds are progressively worse as one gets towards the blue end of the spectrum. That's why the sky is blue from the scattered blue light. 4.) If you really want to see forever then shoot infra-red film with the appropriate filter. Forget unmodified digital cameras for infra-red since they are so insensitive you'd need time exposures incompatible with stopping motion. Here's more on infra-red. Infra-red not only sees through haze, it also has high contrast ideal for punching through obscuring phenomenon. Unfortunately most IR film is slow, so again you're making compromises since you need fast shutter speeds. Use the widest aperture you can. 5.) After flying you can use Photoshop to increase contrast to cut through haze on film and from digital. The easy way is to use Auto Levels which will take the dull grays and expand them to blacks and whites. I prefer using the Levels command and manually moving the blacks and whites. This is all standard Photoshop technique. For instance, the black and white eyedroppers in the Levels command are vary handy for punching down dark grays to black and dull whites to pure white.
Filters UV and Haze filters don't work. Sorry. These were from the 1930s when B/W film would benefit from a UV or Haze filter with an uncoated lens. B/W film is sensitive to UV light and uncoated lenses would transmit it. Today's coated lenses don't transmit UV light and color film incorporates built-in UV filters. The only reason for clear UV and Haze filters is for physical lens protection. For B/W you always should use at least a yellow filter, which is much stronger than a UV or Haze filter. As mentioned above, use the reddest filter you can, or infrared if you can get short enough shutter speeds. I've not found polarizers very helpful. Look through one and see for yourself depending on the day's conditions and the angle at which you're shooting. As always you have a 2-stop light penalty with a polarizer, so be mindful that it may be difficult to get a fast enough shutter speed when using the polarizer. Only use a polarizer if you get more benefit from the polarizing action than the quality loss from the longer shutter speeds required from the light loss. Here's a whole page about filters.
Depth of Field This is easy! The Earth is flat for our purposes. You don't have to worry about depth of field. Unless you're buzzing the neighbors at 100 feet you are so far away from your subjects that any aperture is sufficient to get everything in focus. This is good because you'll want to shoot at the largest aperture you can to get short shutter speeds.
Focusing: Autofocus I prefer to use the "S" AF position on my Nikons. This focuses each shot perfectly, especially if I've changed a zoom setting. You may be rocketing along at 100 MPH, however your distance from the ground stays the same. I would only use the continuous "C" AF setting if I was photographing other planes in formation with me or if I was much closer to anything than I ought to be.
Focusing: Manual Focus Keep your manual focus lens at the infinity stop unless you're using a lens longer than 200 mm or are at less than 1,000 feet. This is presuming you're using a traditional manual focus lens or camera that has a mechanical stop at infinity. Most AF lenses focus past infinity and have to be focused with the AF system. It's a good idea to tape these lenses or cameras to the mechanical stop at the infinity setting so you don't knock it. Things get pretty busy photographing from inside a moving airplane. Also be sure to have checked that your camera really is focused at infinity when set there. You'll be at large apertures and in the unlikely event that something is misadjusted you'll see it.
Wind The wind will whack your camera all around if you let a telephoto lens poke out the window. This isn't a problem with shorter lenses since they don't poke out. It becomes a problem with long lenses because they poke out the window as you're sitting. You have to make a conscious effort to lean back away from the window to keep your lens inside.
Dropping Things The 100 MPH wind will rip any camera right out of your hands. Vibration will also unscrew your filters along with the wind blast. Ask any motorcyclist what it feels like to hit a bug on bare skin at 60 MPH. It hurts. Now imagine getting hit with someone else's filter dropped out of a plane at 120 MPH. It's similar to a rifle bullet. You must make absolutely certain that nothing flies out the window. In addition to being dangerous it can be a very serious federal offense. Federal Aviation Regulation (FAR) 91.15 reads: “No pilot in command of a civil aircraft may allow any object to be dropped from that aircraft in flight that creates a hazard to persons or property." It does permit dropping things if you've ensured that it's safe, which would mean you own all the property below and can be certain there's no one down there. Use a neck strap for your camera and make dead certain that all filters and eyepieces are very tight. Keep checking your filters since the vibration will loosen them as you shoot. Also be sure that nothing is loose in the cabin so nothing flies out from all the wind when you open the window. This is your responsibility. Please don't let things fall from your hand or fly out the window.
VR and IS You should already have read my section on VR and IS lenses above.
Speed and Apertures You want the fastest lens you can get. Professional f/2.8 zooms are perfect. Fixed-focal length lenses are also excellent, but less convenient. No depth of field is needed. Fast shutter speeds are. Shoot at the largest aperture at which your lens is sharp. You should have tested this before your flight, or see my lens reviews. For a professional f/2.8 zoom this usually means f/4 gives perfect results. For other lenses usually stopping them down two stops is ideal. That's the problem: an f/3.5 - 5.6 zoom may not be at its sharpest till f/8 or f/11, relegating you to a potentially dangerous longer shutter speed. This is why fast zooms are perfect. Everything on the ground will be in focus and expected to be sharp. It will be easy to see the difference between a great lens and a mediocre one. Avoid slow, inexpensive telephoto zooms. Increase your ISO to allow fast shutter speeds if you use them.
Focal Lengths Anything shorter than about a 35 mm lens on a 35 mm camera or a 24mm lens on a DSLR will include the plane's wing struts or landing gear. Expect this with a wider lens. If you want to photograph a certain object you'll want a long lens. I find an 80-200 mm f/2.8 zoom is ideal. Medium lenses are useful for overall views. The lens that came with your camera will be perfect. Lenses longer than 200 mm are tough to use since their slower speeds tend to require longer shutter speeds, and the longer focal length dictates even shorter shutter speeds. I get much better results with my 80 -200 2.8 than my 80 - 400 VR. The 80 - 200 is sharp even at f/2.8 allowing much faster shutter speeds than the lighter VR lens. I find VR feature of less use in an airplane than hand held on the ground. My 400 mm f/2.8 would be ideal optically since it can be shot at f/2.8 and it's so heavy it would stabilize itself against agitation. Unfortunately it's so big it's impractical to take in a plane and would be a serious hazard if it fell out of my hands. I have no idea how I would photograph with it and keep it entirely inside the plane out of the wind.
Shutter Speeds Use the fastest speed you can. Presuming you have good lenses the shutter speed is the biggest contributor to sharpness. I get great results at 1/1,000 second at 200 mm. Likewise 1/500 at 100 mm should be fine, and you'd need 1/2,000 at 400 mm.
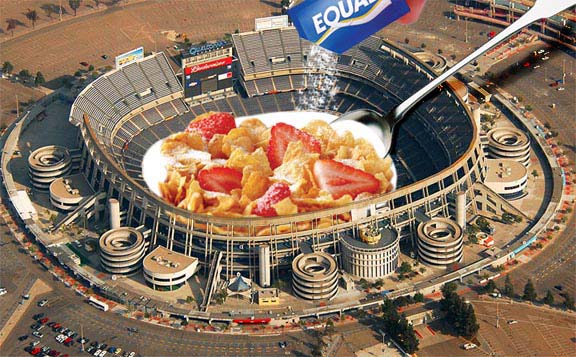
ART Jason Child did this with the photo above:
SUMMARY Have fun and happy flying! |