Home Donate New Search Gallery How-To Books Links Workshops About Contact
Nikon
D3000 User's Guide
© 2009 KenRockwell.com. All rights reserved.


Nikon D3000 and 18-55mm VR. enlarge. I'd get it at Adorama Ritz, Amazon or Calumet. Using these links to get yours is what helps me keep working on this site for free. Thanks! Ken.
September 2009 Page Index, D3000 User's Guide Nikon D3000 Review
More Nikon Reviews Nikon Lens Reviews
NEW: Nikon D3000 User's Guide iPhone and iPod App.
Help me help you top
I support my growing family through this free website, as crazy as it might seem.
If you find this as helpful as a book you might have had to buy or a workshop you may have had to take, feel free to help me continue helping everyone.
If you've gotten your gear through one of my links or helped otherwise, you're family. It's great people like you who allow me to keep adding to this site full-time. Thanks!
If you haven't helped yet, please do, and consider helping me with a gift of $5.00.
The biggest help is to use these links to Adorama, Amazon, Calumet, Ritz and J&R when you get your goodies. It costs you nothing and is a huge help. These places have the best prices and service, which is why I've used them since before this website existed. I recommend them all personally.
Thanks for reading!
I personally buy from Ritz, Adorama and Amazon. I can't vouch for any other ads.
|


Want free live phone support? In the USA, call (800) NIKON-UX, 24 hours a day, 365 days a year.
Looking for a specific control? Use my Search page. Be sure to mention the D3000 in your search.
This lengthy article will teach you to be an expert on the Nikon D3000's controls and menus. It also includes a lot of tips, tricks, and the settings I prefer to use.
To get great photos you still need to get yourself to the right place at the right time and point the camera in the right direction, which is a lot harder than mastering the D3000. Right out of the box at default settings, the D3000 does a great job all by itself. Making a great photo involves locations, timing, patience and a whole lot more. I cover this more important stuff here.
Below are the basics. Explicit details follow in later pages linked at the bottom.
Many other tricks are in the detail pages at the bottom, like inserting your copyright and contact info automatically into every file and RGB Histograms.
Camera Settings
I leave most settings at their defaults.
I shoot with the top mode dial in P, Program Exposure mode.
Many of these menu options are often deactivated in anything except the P, S, A and M modes.
My standard operating setting is only a few clicks different from the defaults.
Here is how I set up a D3000:
Format
I format cards every time I put one in my D3000, and every time I go shooting.
It completelty erases the card and formats it for perfect compatibility with the D3000. If you 've connected the card to a computer and don't reformat, you never know what might have been altered. You can get away without doing this, and it is a good idea for housekeeping.
You do this by pressing:
MENU > WRENCH > Format memory card > YES > OK.
Picture Control
This is where you set the look of your images. Do you want more or less color, or more or less contrast, or black-and-white? This is the place.
I use STANDARD with +2 for saturation. Play around and see what you prefer, I'm always changing my preferences.
For people, I like NEUTRAL and +1 saturation, and for crazy landscapes, you might like VIVID and +3 saturation.
To set this, use:
MENU > CAMERA > Set Picture Control.
You'll see a menu of Standard, Neutral, Vivid, etc.
You can alter ay one of these starting points by selecting them, and then clicking to the right. Now you can click up and down to select different parameters and left and right to change them. Be sure to click OK to save the setting.
You can save and recall these as well.
More at Picture Controls.
Image Quality
I use BASIC.
To set this, use:
MENU > CAMERA > Image quality > JPEG basic.
The default of JPEG Normal makes files that are bigger than they need to be. The pictures look the same, but take up more space on your memory card and in your computer.
Image Size
I use Large or Medium.
Large is the default, but unless you want to print everything at five feet (1.5m) wide, the medium setting also lets you make prints of any size (20x30" or 50x75cm is easy) and saves even more room on your computer and memory cards.
To set this, use:
MENU > CAMERA > Image size > Large (default) or Medium.
White Balance
I use AUTO.
I prefer a slightly warmer (more orange) image, so I set A2 (amber 2) by pressing:
MENU > White balance > Auto > clicking two clicks to the right to A2 > OK.
You can set any color offset you like. Simply move the controller around in this menu for any combination of amber/blue and green/magenta fine-tuning adjustments.
To make stronger changes, use a different WB setting like SHADE, as explained at White Balance.
ISO
I use Auto ISO.
Auto ISO increases the ISO automatically as it gets dark so I don't have to. It shoots at ISO 100 in good light, and at 1/15 of a second (or any speed you choose) it starts ramping up the ISO to a maximum of 1,600 (or any ISO you choose) as it gets darker. Only if it gets still darker will it let the shutter speed go below 1/15 at ISO 1,600, exactly as I'd do manually.
To set this, pres:
MENU > ISO sensitivity settings > Auto ISO sensitivity > ON.
I find that the default maximum of ISO 1,600 looks too grainy for me when the light gets dark, so I set the Max. sensitivity to 800 in the same menu.
Set the Min. shutter speed to 1/125 if you're photographing moving people and action, otherwise, 1/30 is good as set by default.
ADR genuinely makes pictures look better. It really does improve details in both shadows and highlights, all at the same time.
Sadly it works so slow in the D3000 that it takes three seconds per picture to process!
If you're shooting landscapes and interiors, turn this on, but for photos of people and action, it will slow you down so much that you may jam the D3000 temporarily and miss pictures.
It is off by default. You can set it by:
MENU > CAMERA > Active D-Lighting.
Release Mode
I use Continuous mode.
You set this at:
MENU > CAMERA > Release mode > Continuous > OK.
I get one shot with one press of the shutter, and if I hold the shutter button my D3000 shoots 3 frames per second. I do this in dim light so I can pick the sharpest image. For most shots of moving things I fire several rounds and pick the one with the best expressions and gestures. Of course I use a professional sorting tool on a 30" screen to make selecting files trivial.
This is also where you set the self timer or arm the remote.
Autofocus
Simply press the round rear dial to move the selected AF sensor around as you look through the finder.
I like the 3D mode, in which the D3000 magically moves the sensor around on its own to track the subject, if either it or you move.
You set this at:
MENU > CAMERA > AF area mode > 3D-tracking > OK.
Once set, you're all set for shooting anything from sports to still lifes, since the default AF-A mode magically optimizes the D3000 for everything. All you do is pick a sensor for starters and go.
Info Format
If you leave them at default (graphic), they look really screwy.
Auto Shooting Info
Turn this off. If you leave it on, the INFO screen keeps lighting up on the back of the D3000 just about all the time.
Lens Settings
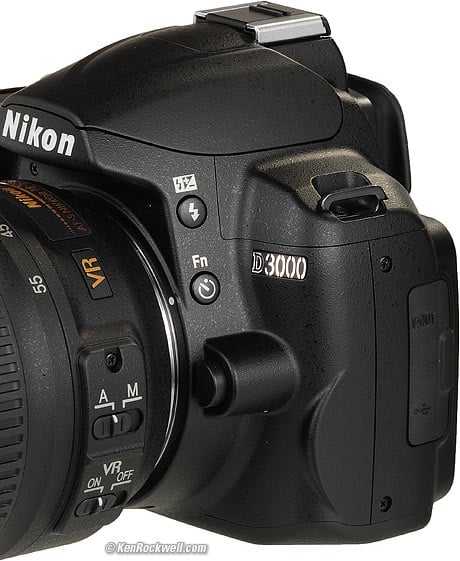
Nikon D3000 with 18-55mm VR lens.
Many lenses have no switches or settings. If so, don't worry.
If a lens has an "A - M" switch, like the included 18-55mm VR above, leave it at "A." To get manual focus with the included lens, move it to "M."
If the switch says "M/A - M " then use M/A. These lenses may be focused manually at any time in either position. As soon as you tap the shutter button in M/A you return to autofocus.
More advanced lenses, like the 18-200mm, 70-300mm VR and 18-135mm, and any lens with an M/A position, may be focused manually at any time without moving any switches. Leave them in their A or A/M positions.
Non-AF-S and non-AF-I lenses, like the new 10.5mm fisheye, won't autofocus at all.
The old 300mm f/4 AF has to be put in the M position to focus, and it only focuses manually.
Read your lens' manual, or in the USA ask Nikon 24/7/365 at (800) NIKON-UX.
Non-G lenses will have an aperture ring on the base of the lens where it's attached to the camera. Set this this ring to the smallest aperture (largest number), usually 22, if not 32 or 16. This number will be orange on autofocus lenses. There usually is a lock to keep this ring set there, since if it comes off that setting you'll get an error message from most cameras.
Details back to top
These are the basics. You've got 99% of what you need; go shoot and have fun!
Keep reading for explicit details.
KNOBS, BUTTONS and CONTROLS < NEXT
MENUS
Home Donate New Search Gallery How-To Books Links Workshops About Contact