Home Donate New Search Gallery Reviews How-To Books Links Workshops About Contact
Nikon
D3300 Guide
Shooting Menu (camera icon)
© 2014 KenRockwell.com. All rights reserved.

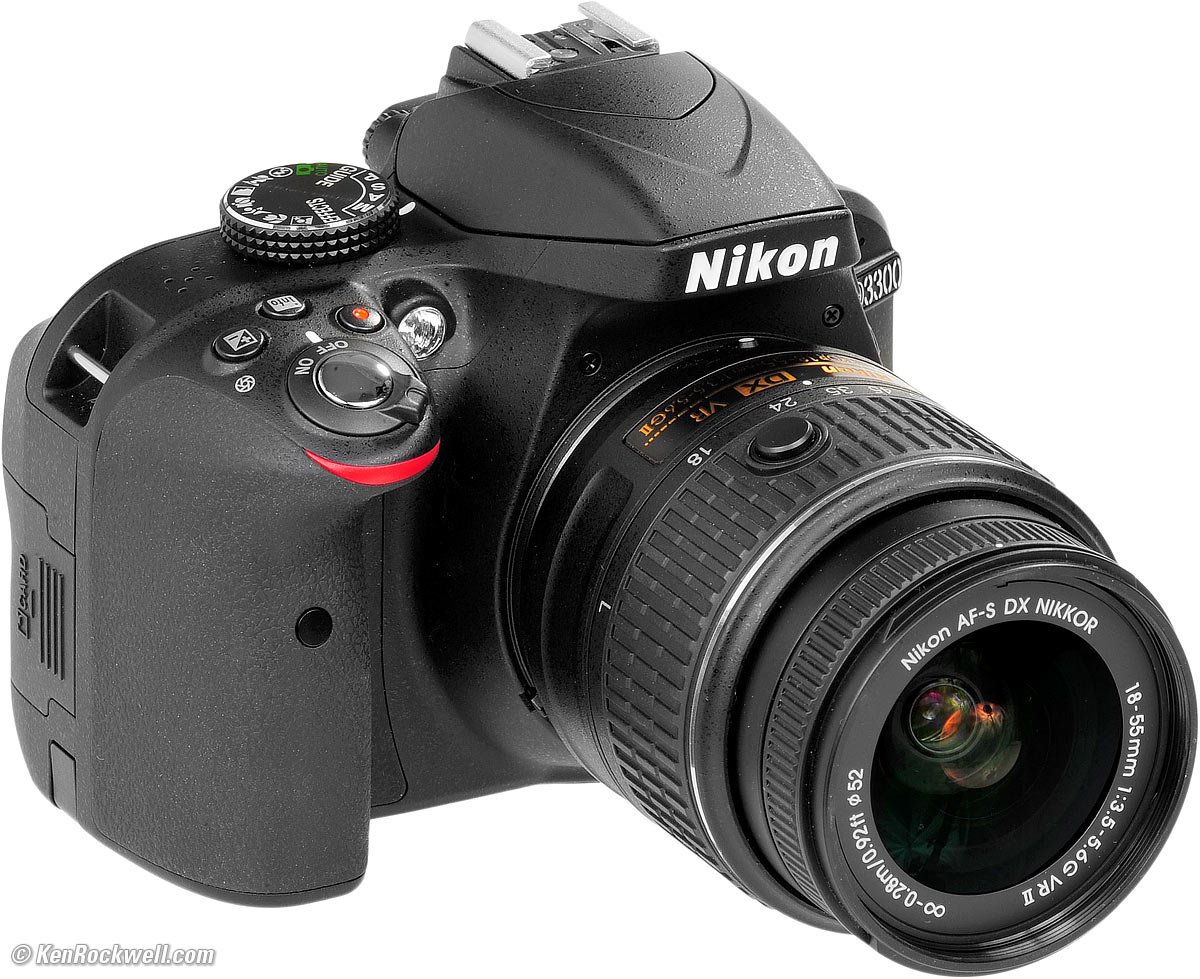
Nikon D3300 and included 18-55mm VR II. enlarge.
April 2014 Nikon D3300 Review Nikon Reviews Nikon Lens Reviews
How to Set and Use the D3300's Autofocus System
Help me help you top
I support my growing family through this website, as crazy as it might seem. My biggest source of support is when you use any of these links, especially this link directly to the D3300 at Adorama or directly to the D3300 at Amazon, when you get anything, regardless of the country in which you live. Thank you! Ken.
The biggest help is when you use any of these links when you get anything, regardless of the country in which you live. It costs you nothing, and is this site's, and thus my family's, biggest source of support. These places have the best prices and service, which is why I've used them since before this website existed. I recommend them all personally.
If you find this page as helpful as a book you might have had to buy or a workshop you may have had to take, feel free to help me continue helping everyone.
If you've gotten your gear through one of my links or helped otherwise, you're family. It's great people like you who allow me to keep adding to this site full-time. Thanks!
If you haven't helped yet, please do, and consider helping me with a gift of $5.00.
As this page is copyrighted and formally registered, it is unlawful to make copies, especially in the form of printouts for personal use. If you wish to make a printout for personal use, you are granted one-time permission only if you PayPal me $5.00 per printout or part thereof. Thank you!
Thanks for reading!

Adorama pays top dollar for your used gear.
|
Free Live Help (USA only)
Want free live phone support?
In the USA, call (800) NIKON-UX.
Many of these menu options are often deactivated in anything except the P, S, A and M modes.
How to get to the SHOOTING Menu
Press MENU, click left and then up and down to select the camera (shooting) menu. You'll see "SHOOTING MENU" on the top of the LCD monitor.
You also can change some of these settings on the INFO screen with the < i > button.
What it Sets
It sets everything having to do with what film used to do: ISO, resolution, saturation, noise and etc.
What I Change
I change a lot here. This is where I get the wild colors I love.
Reset shooting menu top
This resets everything below back to factory defaults, so play with these all you want without fear.
Image Quality top
Set this with MENU > SHOOTING (camera icon) > Image Quality, and you also can set this with the < i > button.
I use JPEG BASIC.
To set this, use:
MENU > CAMERA > Image quality > JPEG basic.
This selects the kind of file (raw, JPG or both), and the size of the JPG file (FINE, NORMAL or BASIC).
I always use JPG, never raw. (see JPG vs. Raw.)
BASIC JPG looks the same as NORMAL It also makes a file half the size of Normal, which speeds up everything and saves space on my hard drives and backup CDs.
I never use FINE; it looks the same as NORMAL and wastes space twice as much space again. Feel free to use any settings you like; that's why they're here, but JPEG Basic look the same as the others and takes up much less file space.
You can see examples from a D200 at D200 Quality Setting Examples.
Image Size top
Set this with MENU > SHOOTING (camera icon) > Image Size, and you also can set this with the < i > button.
I use Large for things I might need to make billboard-sized, and Small for normal photos of my family. Resolution of the D3300 is so good that even at Small I can get great 20 x 30" (50 x 75 cm) prints.
At Small, the D3300 still has far more resolution than Nikon's first D1 and D1H professional cameras whose images were often printed on two-page spreads in news magazines.
Large is the default, but unless you want to print everything mural size, the files take up too much space on the card and in your computer.
To set this, use:
MENU > CAMERA > Image size > Large, Medium or Small.
For Panoramas, your choices are Normal or Wide. I use Normal; the Wide setting doesn't work.
White Balance top
You also can set this with the < i > button.
I'm only explaining how to set these below. How to Set White Balance and White Balance Examples explain when and why you'd want to use these settings.
I use AUTO almost always. I change it only if I'm not getting what I want.
White Balance settings
Auto (A)
I use this all the time. I don't use the other settings below.
It makes its best guess for WB. It's usually very good.
Indoor tungsten can be too orange unless you have very bright tungsten light, in which case set Tungsten.
Florescent can be too green, but hey, florescent lights are awful. Try the preset settings below.
Incandescent (hanging light bulb icon that's easy to confuse with the sun icon)
This makes the picture very blue.
Use this only for deliberate Arctic freezing effects, or under conventional tungsten light bulbs.
Fluorescent (glowing tube icon)
Used to make crappy fluorescent light look less crappy.
These settings rarely work; I use the preset setting for better results.
Direct Sunlight (sun icon)
This is for direct frontal sunlight.
Use other settings for shadows or indirect sunlight.
Flash (lightning bolt)
I never use this. It's almost the same as direct sun.
I'm told it's really for studio strobes, since the Auto mode compensates magically for flash if you use it on-camera.
The reason to use this is if you use a different trim value for your strobes than you do for sunlight.
Cloudy (cloud)
Warmer (more orange) than the sunlight position. I use this in shade, too.
Shade (house casting a shadow)
Very warm (orange). Use this for sunset shots and deep shade, or to make fall colors more orange.
You can use this setting with a white or gray card to get perfect color matching.
I use this in bizarre artificial light that I wish to make look natural, or to get exact color with my studio strobes. An Expodisc makes this easier, but even without an Expodisc or white card I shoot off anything neutral, like a piece of paper, a napkin or a T-shirt.
Any light weird enough to need this setting won't care about small inaccuracies in the neutral reference.
To set this using the menus:
1.) Ensure your card or other neutral object is in the light representative of the light on the subject.
2.) Select PRE via the menu button
3.) Click to the right.
4.) Select Measure and click OK (or to the right). (The Use Photo option is a backwards bow to Canon's convoluted setting method. Canon Jihadists used to brag about this. It does the same thing, but requires twice as many steps. Ignore this option.)
5.) Select YES. PRE should be blinking both on the rear LCD as well as in the finder.
6.) Point your camera at the card or neutral colored thing and press the shutter.
7.) If the LCD says "data acquired" or the viewfinder flashes "Gd," you're set. Shoot away!
8.) If the display flashes "unable to acquire" or the viewfinder flashes "no Gd" then repeat from step 2.).
To set this much faster using the Fn button, if set to control WB:
1.) Press and hold Fn Button.
2.) Spin dial to select PRE.
3.) Release Fn Button.
4.) Press and hold Fn button until PRE flashes.
5.) Point your camera at the card or neutral colored thing and press the shutter.
6.) If the LCD says "data acquired" or the viewfinder flashes "Gd," you're set. Shoot away!
7.) If the display flashes "unable to acquire" or the viewfinder flashes "no Gd" then repeat from step 4.).
To fine-tune (trim, or make slightly warmer or cooler) each setting individually, after selecting it in the menu, click right to get to its trim setting. You'll see a colorful square on which you can move up, down, left and right to tweak the color in any direction you'd like.
You may adjust it to your choice of any mild tint along the amber/blue and green/magenta axes.
Set Picture Control top
and
Manage Picture Control
This is where you set the look of your image.
Setting this correctly is critical to getting the look you demand right out of the D3300.
It is so important that I have a complete page all about how to set and use Picture Controls.
I covered the settings I prefer to use on the first page of this guide.
Auto Distortion Control top
When set to ON, the D3300 automatically and subtly corrects geometric distortion (bending of straight lines) with most newer lenses.
The reason it's OFF by default is that it can lose a tiny bit of sharpness towards the sides from resampling the images, however the benefits of straighter lines are only apparent in a few photos where there are straight lines running close to the edges of the frame.
This only works with lenses for which the D3300 has internal data, meaning most modern DX and AF lenses, but of course not those so new that they were released after the firmware in your D3300.
Color Space top
Don't touch this.
Leave it at sRGB unless you want duller colors that don't match.
More at Adobe RGB.
Active D-Lighting (ADR) top
ADR (adaptive dynamic range) makes pictures look better by adding details in both shadows and highlights. It works great!
It is ON and set to AUTO by default, and I leave it there all the time.
You can change it by:
MENU > SHOOTING > Active D-Lighting.
Noise Reduction top
I leave it at ON.
I'd only set it OFF if I was making very long exposures and got tired of waiting for the D3300 to make duplicate dark-frame images after each shot.
It doesn't have much effect most of the time; it affects only the highest ISOs or longest exposures.
ISO sensitivity settings top
This is where we set the camera's sensitivity to light, and set how the camera may or may not change its sensitivity as the light varies.
To set all this, set MENU > SHOOTING (camera icon) > ISO sensitivity settings.
I always set Auto ISO, which lets the D3300 selects my ISO for me. Set this as MENU > SHOOTING (camera icon) > ISO sensitivity settings > Auto ISO sensitivity control > ON.
This is so important that I've already covered the specifics in detail on the first page of this guide.
You also can set the basic ISO with the < i > button.
Firmware Defect: Nikon's firmware doesn't cancel Auto ISO in manual exposure mode. This makes the D3300 change the ISO automatically and defeat the purpose of manual exposure. Remember to deactivate Auto ISO when using Manual exposure mode.
AF-area mode top
Here we can set how the D3300 uses its various autofocus sensors for both regular shooting as well as with Live View.
I explain all this at How to Use the Nikon D3300 AF system.
You also can set this with the < i > button.
Built-in AF-Assist illuminator top
This sets whether or not the little light in the D3300 comes on in the dark to help you focus.
I leave it ON.
I turn it OFF if it would annoy people.
Metering top
I explained these settings on the first page.
You also can set this with the < i > button.
Flash cntrl for built-in flash top
Leave this at TTL, its normal setting.
Use M (manual) only if you want the flash to fire at exactly the same power each time. I wouldn't use this unless I was using the built-in flash to trigger my studio strobes.
Movie settings top
This sets movie format (resolution and frame rate) as well as the audio gain.
It defaults to 1,920/60p and HIGH quality, which makes huge files. I set NORMAL quality, and 424 resolution. These files look essentially the same, with much smaller file size, unless you're really aiming for theatrical release.
Audio gain is AGC (auto gain control) by default.
Wind noise reduction is a low-cut filter.
Manual movie settings allows one to force the movies into manual exposure, instead of the default auto ISO and auto exposure.
back to top of page back to top of Nikon D3300 User's Guide
MENUS
SETUP MENU < NEXT
NEW: Ken Rockwell's Nikon D3300 Users Guide app.
Home Donate New Search Gallery Reviews How-To Books Links Workshops About Contact