Home Search Gallery How-To Books Links Workshops About Contact
Canon 30D Menus
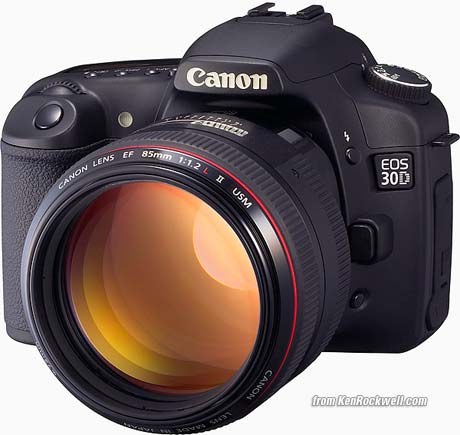
This one came from here. I'd also get it here and here. You can find kits with different lenses searching at those links, and it helps me keep adding to this site when you get yours from those links, too. MENUS Back to top of 30D Users Guide. Jump to Shooting Playback Wrench These are called up with the MENU button. The 30D needs to be awake to respond to the MENU button. Tap the shutter button if the 30D has fallen asleep, which it does after a minute idle. You'll see a bunch of things on the rear LCD. You move up and down by spinning the big rear dial. You can jump to the top of any of the three color-coded sections by pressing the JUMP button. The three sections of the menu are SHOOTING (a camera icon in red), PLAYBACK ( [>] icon, blue) and WRENCH (hammer and sickle icon, orange). SHOOTING MENU back to top. Quality: Here's where you select file type, image size, and JPG compression level. I use Large Normal, which is L with a stair-step icon. Default is Large Fine, which is next to it as L and a quarter-circle icon. Fine makes a file with the same resolution and number of pixels, but with twice the file size (half as many pictures per card) and with 1% better quality. L is an image 3,504 x 2,336 pixels. My friend Paul Renner uses a 20D and people pay him top dollar for prints many feet on a side at this resolution. M is a slightly smaller image size, 2,544 x 1,696 pixels. I use this to save file space if I'm shooting hundreds and hundreds of shots of sports or at a party. I can print these files at 12 x 18" (50 cm wide) and they still look great. S is a smaller image at 1,728 x 1,152 pixels. I use it only if I want a small shot to record a sign in front of a location for reference. Even then, this will print just lovely at 8x12" (30 cm wide). I don't use RAW. This makes huge files that must be processed later in your computer before you or anyone else can see them or do anything with them. The RAW + (...) settings record two files, a raw file (.CR2) and a JPG per your choice. More at my RAW vs. JPG page, and examples of how these look at my D200 File Format Examples page. Red Eye shines an annoying light into the face of your subjects. Bars light up in the finder and come together in about a second letting you know it's time to take the picture. Unlike Nikon, you can take the picture anytime you want. I never use this feature. I leave it at its default of OFF. It doesn't work well to reduce red eye and annoys your subjects. If red eye (people's eyes glowing red in flash pictures) is a problem, try getting closer or using a regular flash instead of the built-in. Beep. This is on by default, annoys everyone and screams AMATEUR!!! across every room and auditorium when others hear the idiotic noises. Please turn it to OFF. Shoot Without Card. I leave this on its default of OFF. If you set it to ON it will let you think you're taking pictures, even if you have no memory card! You could shoot an entire wedding and get nothing. Leave it set to OFF. AEB (Auto Exposure Bracketing): I leave this OFF (one dot). In the old days of film, less skilled photographers would guess and try several exposures for each shot, hoping to have at least one turn out. This is obsolete in digital, since you can see the exposure on the LCD monitor. Ansel Adams had stern words for photographers who had to resort to bracketing, even in the days of film. If set on the 30D, the 30D makes a normal shot, then a darker one followed by a lighter one. It blinks things in the finder to let you know this is going on. Be careful: if you set this by accident, only 1/3 of your photos will be correct, and the other 2/3 will be too light or too dark. The 30D remembers this even if it goes to sleep. If you do want to use this, it's easy to set: select it with the big dial, press SET to be able to change it, and spin the dial to select how far away the bracketed exposures will be. Be sure to press SET again to lock these settings, otherwise the 30D will ignore whatever you just set. Once set, it's easy to use. Select the continuous drive mode and hold down the shutter for three shots each time. I don't suggest the Single Frame mode for this. If you use it, you have to press the shutter three times for each bracketed series. If you release the shutter, the 30D will still make the next shot at an altered exposure. You can tweak this in Custom Function 09. WB SHIFT/BKT: This allows you change (shift) the white balance slightly, or bracket them (make several shots, each slightly different). Shift: This is what you do to make subtle color shifts to images. To do this, press MENU, spin the dial to select WB SHIFT/BKT, press SET to get into it, use the unmarked rear navigation button to set the color shift, and press SET to lock it in. Oddly the center push of the button won't get you back to 0; you have to click back over the hard way. (The 30D ignores you if you forget to press SET.) This shift is subtle, you have to look carefully to see it. If you set it away from 0, you'll see a small "WB =/-" on the top LCD to remind you. Bracket: Spin the big dial and you'll see three dots where before there was just one. Spin in one direction to get red/blue bracketing, and in the other direction for green/magenta. Shooting this way is easier than exposure bracketing, since the 30D automatically records three files, one for each exact WB, for each shot. This is because WB is calculated internally for each shot, unlike exposure. WB BKT records three frames from each shot automatically. Of course you also always need to press SET for these settings to take effect. You may shift the WB as in the above paragraph, and then bracket around it. Slick! The unslick part is that this WB offset takes effect for all other WB settings. To turn it off or on or change it you have to get into these menus. You can't save a different value for Daylight and another for Cloudy, as you can on Nikon. Nikons are better because they make changing this as simple as spinning the front dial while holding the WB button. Nikons are better because they store and recall the WB trim (shift) separately for each WB preset. Canons are better because they also allow altering the WB along the green/magenta axis, which Nikons don't. Personally I never use green/magenta bias anyway. Canon also provides more adjustment points, although I find Nikon's +/- 3 settings more than enough. I prefer the Nikons here. CUSTOM WB is how you set the 30D's white balance to a white or gray card or Expodisc. It's complicated, unlike Canon's compact cameras. To set the WB to a random reference, first make a shot of the entire frame filled by that reference, but do it in anything other than the Custom WB mode. The Custom WB mode is an icon of a little square in the middle of two ramps. Now press MENU, spin the big dial to CUSTOM WB, press SET (spin the dial again if you want to set the WB to an image other than the one you've just taken), press SET again to set the WB to that shot. You'll probably get a reminder now to set the WB (use the WB button) to Custom (square and two ramps). If you did this correctly, your next shots will have perfect color balance. COLOR TEMP lets you set the images to exactly your preference of warmth or coolness (amber or blue.) Press MENU, spin the dial to COLOR TEMP, press SET, spin the dial to your choice, and press SET to lock it in. You can't use this setting until you select [K] with the WB button. Canon makes this simple setting needlessly complex. Canon makes you do this because they combined the WB button with the AF button. Nikon does this correctly by having a dedicated WB button which lets you use the first dial for selecting AUTO, DAY, Custom, K or whatever, and the second dial to select the exact K value or shift the WB. I prefer Nikon here, which lets you do this directly without menus. COLOR SPACE allows you to use the default world-standard sRGB for accurate and vivid colors, or screw them up and get duller colors by selecting Adobe RGB. I explain this under color spaces. Just leave it at sRGB. Adobe RGB doesn't get any wider range of colors on any of the printers I've used (inkjet, giclée, lightjet or supergloss), but almost ensures that someplace along the line the colors will get screwed up and look too dull. Canon makes this much easier to set than Nikon. Unfortunately this is something that should be buried, since you shouldn't use it unless you really, really know what you're doing, and print everything yourself from start to finish. PICTURE STYLE settings are important. "Picture Style" is bad English for what should be called "critical artistic adjustments." This is where you set the critical "look" of your images. It's where you set Contrast, Sharpness, Saturation and even color shift (called color tone by Canon). Nikon hides these deeper in its menus than Canon does. Nikon calls the same thing "Optimize Image." There are nine memory banks, or sets, of "Picture Styles," of which five are locked and four are available for adjustment. The 20D only has six total, but the same number of adjustable ones. The 30D provides more presets, which I ignore. The 30D has five preset (locked) sets of parameters, named Standard, Portrait, Landscape, Neutral and Faithful. Those names don't mean very much. You can see what settings these use for contrast etc. when you look through them, which is better than Nikon, which makes it almost impossible to see what values are used for their color presets. No big deal, if you're wanting to set your own you probably don't care about the canned values. The next four are adjustable. One is B/W, called "monochrome," and the other three are color. Canon calls these three banks of color settings User Def. 1, 2 and 3. Monochrome is Black and White. You can change the contrast, sharpening, add a sepia effect or even simulate the effect of using a colored filter in front of the lens in B/W. B/W of course offers no saturation or skin tone (color tone) tweaks User Def. 1, 2 and 3 are where you store your own sets of color parameters. It's important to play with these to get the look you want. This is how I get bold color right out of my camera. To select or adjust one of these Picture Styles: Press MENU and spin the Big Dial to highlight Picture Style. Press SET. Spin the Big Dial to select one of them. Press SET to use it, or Press JUMP to adjust it. If you want to adjust the settings, spin the Big Dial to select what to adjust. If you choose a preset Picture Style first, you pull down all the settings from that fixed preset as a starting point for your own tweaks. Once you've spun to one of the parameters, like Contrast, press SET and spin to adjust it. Press MENU to lock in your selection. This last step is important. If, after making a change, you press anything other than MENU, your change will be ignored. Sorry! That drove me nuts until I figured it out. It's easier to do than to write about. When looking at the User Defined 1, 2 and 3 settings in the menu, they are blue if altered, or white if at defaults. Thank God you'll probably only need to set these once! I set mine all to defaults, except I set my User Def 1 to +2 for saturation, User Def 2 to +3 Saturation, and User Def 3 to +4 saturation. Trick: Once you have these set, you can set Custom Function 01 to let you select among these nine sets using a push of the SET button! I LOVE this- it makes it easy for me to select just how loud I want my colors for each shot. I wish my Nikons could do this. Now let me describe the individual settings: Contrast: I leave this in the middle. You can soften images by turning it down, or make them harsher by cranking it up. I prefer Nikons which have an AUTO mode which adjusts automatically to the subject. On Canons you need to set this up or down manually if you have an unusually contrasty or flat subject. It always looks fine to me left alone at 0. Sharpness is really how much extra sharpening is added. I leave at the default. The image can look harsh if set higher. Play around and see what you like, just remember it's not really sharpness, which if it was I'd crank it up, but artificial sharpening which is added later to the image. Too much looks bad. Saturation is the vividness of the color. The 30D is exceptional in that it allows much more saturation than other cameras. Set to the middle of the boost, or +2, it's the same as most cameras cranked to the max. It has two positions above that, which are loud and louder color. Try it yourself and see. I love this! Color Tone shifts skin tones. It seems to shift most other colors a little, too. Try it yourself and see if you like the effects. + makes skin tones yellower (yellows go greener) and - makes them redder (yellows go more magenta). - might mimic Fuji Velvia 50's wonderful warming of yellows and oranges. Try a - setting. You can check the settings by going to the main menu and going back into these. You also can check them by pressing the INFO button. It will report these settings cryptically as a string of four digits. Sorry, I don't make this stuff up. If one fine day Canon asks me for my input, these will be much easier to figure out. PLAYBACK MENU back to top. You get to the Playback menu by pressing MENU and spinning the big dial, or pressing MENU and then JUMP. The 30D needs to be awake to respond to the MENU button. Tap the shutter button if the 30D has fallen asleep, which it does after a minute idle. Protect allows you to prevent erasure of individual files. To do it, press MENU, get to Protect, and press SET. Now spin the dial to select the images you'd like to protect and press SET to protect or unprotect each image. Of course formatting the card erases everything, even if you've protected a file. Be careful! I only use this feature if I want to erase all the photos on a card except for a few. I protect them, then do ERASE ALL. I rarely do this. I copy all the files to my computer, back them up and format the card. I do my selections on my computer. Buy a bigger card if you have to, they're cheap today. Rotate lets you set the rotation flag manually for any image. It doesn't actually rotate the images, and different computer software may see these flags differently. I leave my files unrotated and rotate them for real in iView (Action > JPEG Rotate) later. Print Order is for selecting what and how you want pictures printed straight from the camera. It means you're ordering prints from within the camera! I don't do this - I prefer to sort and select my images on my computer. I've never seen a lab which works this way. I presume they're big in Japan, or that I haven't been paying attention. I suspect you're asking for trouble and losing files if you play around with all this in-camera on the memory card. Transfer Order is also related to ordering prints. I don't use this either. Auto Play plays a slide show on the tiny screen, or you can plug the 30D into a TV. Digital images look crummy played on TV. I never use this. Review Time is how long, or if, images play on the screen after they're taken. Set it to OFF if you don't want them to play automatically. Default is 2 seconds, which is too short. I set it to 8 seconds or Hold. AF Points lets you choose to display, during playback, the AF points that were used to make the picture. Histogram must be set to RGB. The Brightness (default) setting is useless, as are all single-channel histograms. This is a major reason to buy the 30D over the 20D. Read more at Histograms and Color Histograms. The Brightness setting can lead you to think you have a good exposure, when in fact you could have heinous overexposure, which would be obvious on the RGB histogram. The Brightness setting is only helpful for B/W photos, it's worse than useless in color. WRENCH MENU back to top. You get to the Wrench menu by pressing MENU and spinning the big dial, or pressing MENU and then JUMP. The 30D needs to be awake to respond to the MENU button. Tap the shutter button if the 30D has fallen asleep, which it does after a minute idle. Auto Power Off sets how long the 30D stays awake before going to sleep. I find the default of 1 minute is fine. The OFF setting is a double-negative, if you choose OFF for Auto Power Off, the 30D stays on until you turn it off or the battery dies. Auto Rotate adds flags to vertical images so they look vertical on most playback software. it doesn't actually rotate the images, and not all software will see the flags. I prefer to leave this off and rotate the images later in iView (Action > JPEG Rotate), unless I'm shooting a zillion images at a party. If you leave this on and the camera gets a few wrong, you can fix it in the playback menu's Rotate option. LCD Brightness changes the brightness of the LCD backlight. See more at LCD Comparisons. I usually leave this cranked all the way up, not at it's much dimmer default. Date/Time sets both. File Numbering lets new files made on a fresh card start off where the last file numbers left off. Leave this at its default of Continuous. Auto Reset is bad. If you use Auto Reset then each card or reformat will probably start at file IMG_0001.JPG again, which means over time you'll have a hundred files all called IMG_0001.JPG. This wreaks havoc later if you want to put them in the same folder or use them on the same web page. Beware, just leave this alone at Continuous. If you do, it will keep counting up until you get to file IMG_9999.JPG before it resets to IMG_0001.JPG. Language lets you set the 30D to Swedish. For fun, try setting it to Korean and see if you can get it back to English! Video System controls the TV output. Leave it at NTSC for the USA and Japan, and PAL in Europe. I never use the TV output. TV is much lower resolution and looks bad. Communication: I leave this at Print/PC. Unfortunately, no setting will make the 30D appear as an external hard drive, which most other brands like Casio and Nikon do. Because of this, you have to load software to get your images out of the camera, making it a pain if you travel and want to borrow a computer. Nikon and Casio cameras pop right up as external USB drives, making it trivial to transfer files to and from these cameras. The LAN(WFT-E1) setting is for use with the WFT-E1 Wireless File Transmitter. The WFT-E1 is a $999 gizmo and antenna that screws to your camera and attaches with a cable. It allows you to FTP your shots to your computer over Wi-Fi. Format is important. Formatting erases the card and lets it start fresh. I format my card every time I shoot anything. Frequent formatting prevents file errors and corruption. Want to lose files and have unreadable cards? Then just keep erasing images from the card and forget to reformat. Reformatting is good hygiene. I prefer my Nikon SLRs, which have a two-button way to do this without menus. I prefer the Nikons because they make this easy for something I do a couple of times a day. I reformat after every time I download and back up. Custom Functions are 18 more settings I cover at Canon 30D Custom Functions. Clear Settings resets almost everything I just explained. Clear All Camera Settings resets everything I just explained on the past few pages to their defaults. Clear All Custom Functions resets everything I'm about to explain at Canon 30D Custom Functions. I don't use these, because they reset everything without any intelligence. I prefer Nikon's green-button reset, because Nikons SLRs are smart enough to reset the tactical things like ISO, focus mode, WB, exposure compensations, flash modes, etc., that I change for every shot, but leave the strategic settings, like file numbering, timers, saturation and no beeping, alone. Resets are important, because every night I usually wind up my camera to ISO 1,600 and some screwy custom white balance, flash mode and exposure compensation, and every morning I need to set it all back to ISO 100 and normal. With the Canons I need to run down a long checklist of about a dozen things I may have messed with, because I can't use their reset because it resets too much, meaning I would have to go down an even longer checklist to reset the strategic items. Nikon's reset only resets what I need reset. I use it every time I shoot. It's not just for dummies! Sensor Clean is for locking up the mirror and cleaning the sensor. Don't try this at home! I've made about 60,000 shots on DSLRs and I've never cleaned a sensor, except with a blower bulb. I have met pros who have destroyed their $5,000 D2Xs because their sensor swab was defective. Don't let this happen to you. The only people who recommend trying this yourself are the people who want to sell you swabs. Firmware lets you check your revision number, and update it if you have a newer version on a CF card. PLUG My 30D User's Guide continues below. No one pays me anything to write this site. It's all here free for the reading (but not copying). If you find it as helpful as a book you might have had to buy or a workshop you may have had to take, feel free to help me share more. Thanks! Ken Back to top of page or top of 30D Users Guide. CUSTOM FUNCTIONS < NEXT |
Home Search Gallery How-To Books Links Workshops About Contact