Nikon D3400 User's Guide

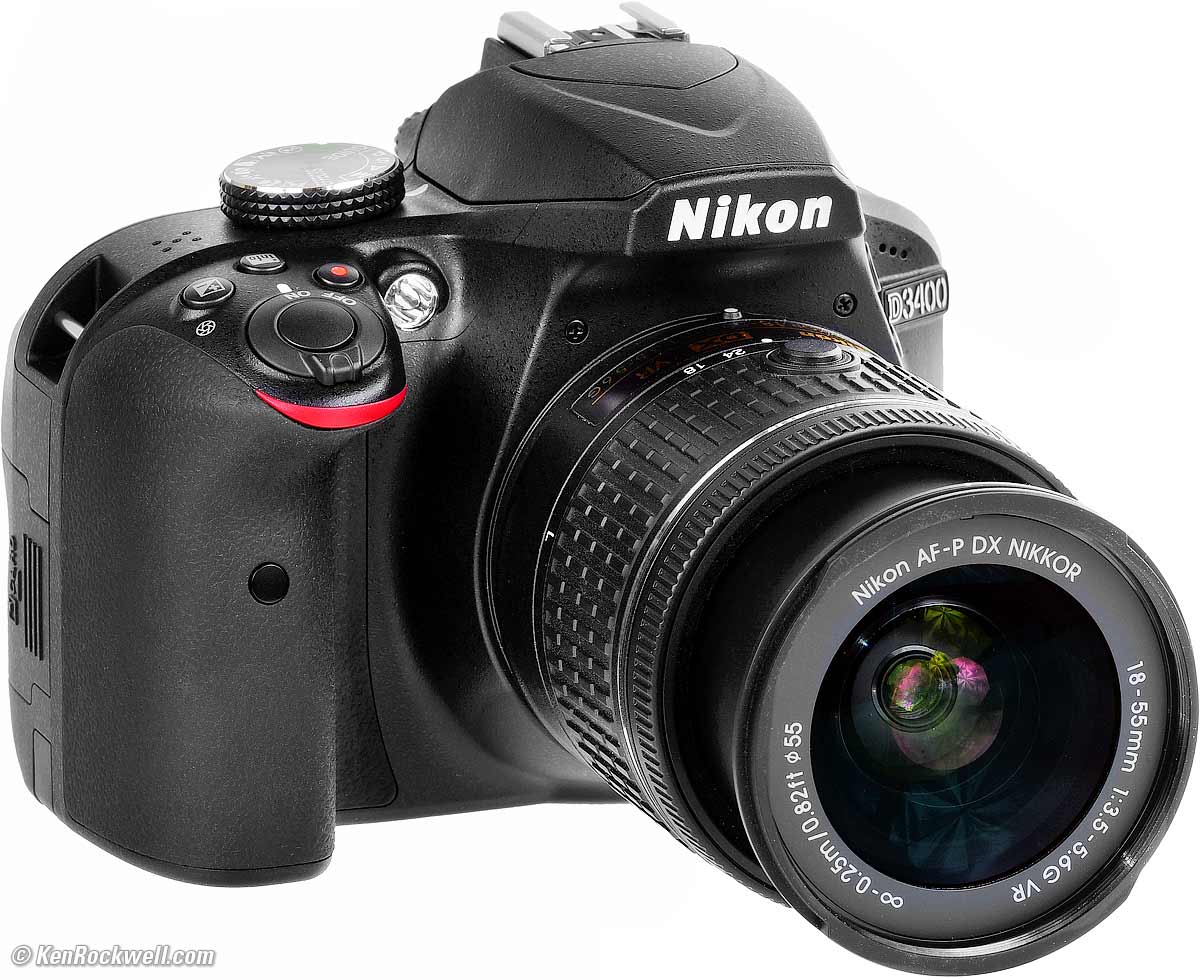
Nikon D3400 and included 18-55mm VR AF-P. bigger.
March 2017 Nikon D3400 Review Nikon Reviews Nikon Lens Reviews
How to Set and Use the D3400's Autofocus System
Ken Rockwell's Nikon D3300 Users Guide app. There's no D3400 app, but it's 95% the same camera.
Introduction top

I buy only from these approved sources. I can't vouch for ads below. |


Want free live phone support? In the USA, call (800) NIKON-UX.
Looking for a specific control? Use my Search page and mention the D3400.
This article will make you an expert with the Nikon D3400's controls and menus. It also includes a lot of tips, tricks, and the settings I prefer to use.
However, making great photos involves a lot more than knowing how to use your camera. You need to get yourself to the right place at the right time and point the camera in the right direction, which is a lot harder than simply mastering the D3400. Right out of the box at default settings, the D3400 does a great job all by itself. Making a great photo involves timing, FARTing and much more explained at How to Take Better Pictures.
For great pictures, you need to master the art underlying all this. To learn the art behind great photos, the best book ever written is Bruce Barnbaum's "The Art of Photography." If you read it, understand it and learn from it, you'll be able to take great pictures with any camera, but if you don't understand the critical art required, you'll only get good photos occasionally by chance. Be warned, it's a very tough book, but I find it to be the best if you're serious. More Books.
Below are the basics of how to use the Nikon D3400. Explicit details follow in later pages linked at the bottom.
Many other tricks are in the detail pages at the bottom, like:
How to insert your copyright and contact info automatically into every file
How to get RGB Histograms (what are RGB histograms)
How to set the self-timer duration and repeat
Camera Settings top
I leave most settings at their defaults.
I shoot with the top mode dial in P, Program Exposure mode.
Many of the menu options explained this guide are deactivated in anything except the P, S, A and M modes.
I never use the AUTO, EFFECTS, SCENE, or other fluff modes. I usually only use P mode.
My standard operating setting is only a few clicks different from the defaults.
Here is how I set up my D3400:
Format your card top
I format cards every time I put one in my D3400. It completely erases the memory card and formats it for perfect compatibility.
If you've connected the card to a computer and don't reformat, there is always the tiny, but real, possibility that there may have been something altered on your card.
Formatting essentially erases your card, so be sure you have all your pictures downloaded first. Formatting isn't mandatory, but it ensures that data and compatibility problems will only happen to other people, not to you.
To Format:
Press MENU > WRENCH > Format memory card > YES > OK.
If you're not familiar with how to do this in a menu system, here's a click-by-click explanation:
Press the MENU button on the back of your D3400.
Click left until the left-hand icons light up.
Click up or down to highlight the wrench icon (the SETUP MENU).
Press OK (or click right) to light-up the actual menu line items.
Click up or down to highlight "Format memory card."
Press OK (or click right) to get to a gray screen asking YES or NO.
Click up to YES.
Press OK.
This level of detail makes it seem even more complex, so I'm only going to give the simple directions for the rest of this guide. If you're a total beginner like most people, it's the same idea each time: you have to hit OK or click to the right each time to get it to go to the next selection.
Button & Playback Settings
To set the function of the Fn button and other controls, find them at MENU > SETUP (wrench icon) > Buttons.
You can activate and deactivate different playback screen options in MENU > Playback > Playback Display Options.
Image Quality top
I use BASIC JPG.
To set this, use:
MENU > CAMERA icon > Image quality > JPEG basic > OK.
The default of JPEG Normal wastes twice as much space in your computer, lets fewer photos fit on a memory card, and makes the data take twice as long to transfer or email.
Since the pictures look the same at BASIC, I use it so more pictures fit on my card, and more importantly, I don't clog up my computer and everything transfers, copies and sends twice as fast. FINE is twice as big again as NORMAL.
The D3400 can't make a bad image even at it's lowest setting. The NORMAL, FINE and NEF RAW modes are for people who don't mind fitting only 12 images on a card. The pictures really do look the same; try it and see if you're curious. I did, which is why I shoot JPG BASIC.
This also can be set at the INFO screen using the ( i ) button.
More details at the SHOOTING Menu.
Image Size top
I use LARGE (24MP) or MEDIUM (13MP) for landscapes, and SMALL (6MP) for family photos.
Large is the default, but unless you want to print everything twenty feet (6m) wide, the Small setting also lets you make prints of any size (20 x 30" or 50 x 75cm is easy) and saves even more room on your computer and memory cards.
I'm serious: even at the Small setting you've got 6 very sharp megapixels, which is more than enough to print at any size if your photo is in focus in the first place. I've sold photos to McDonald's with cameras set down to 4 MP — and McDonalds used those for billboards.
To set this, use:
MENU > CAMERA icon > Image size > Large, Medium or Small.
This also can be set at the INFO screen using the ( i ) button.
More details at the SHOOTING Menu.
White Balance top
I use AUTO, the default.
If you prefer a slightly warmer (more orange) image, set A2 (amber 2) by pressing:
MENU > CAMERA icon > White balance > Auto > clicking two clicks to the right to A2 > OK.
You can set any color offset you like. Simply move the controller around in this menu for any combination of amber/blue and green/magenta fine-tuning adjustments.
I explain all the White Balance settings under the SHOOTING Menu. See How to Set White Balance and White Balance Examples to learn when and why you'd want to use these settings.
The basic WB settings can also be set at the INFO screen using the ( i ) button.
More details at the SHOOTING Menu.
Picture Control top
This is where you set the look of your images. Do you want more or less vibrant colors, or more or less contrast, or maybe black-and-white? This is where you set it.
The D3400 has the same look with any given setting of the Picture Controls as every other Nikon since the D300, thank goodness. What looks good on one Nikon will look the same on other Nikons: these are all interchangeable between cameras.
To set these, press:
MENU > SHOOTING (camera icon) > Set Picture Control.
Click it and you'll see a menu of Standard, Neutral, Vivid, etc.
You can alter any one of these starting points by selecting them, and then clicking to the right. Now you can click up and down to select different parameters and left and right to change them. Be sure to click OK to save the setting.
You can save and recall these as well.
For People
I use STANDARD with
Sharpening set to 9 and
Saturation usually set to +1. 0 is natural, and +2 is even more vivid.
For Places and Things
I use VIVID with
Sharpening set to 9 and
Saturation set to +3.
Play around and see what you prefer. I'm always changing my preferences depending on the subject and the look I want. This is how I get award-winning images right out of my camera as JPGs with no other twiddling needed.
More at Picture Controls.
ISO top
ISO, pronounced "eye ess oh," sets the D3400's sensitivity to light. 100 is normal, and 6,400 or 12,800 is much more sensitive for very low light.
The D3400 can be set to adjust its ISO to the light conditions all by itself. I never set the actual ISO; I simply program Auto ISO to set this for me automatically.
Auto ISO increases the ISO automatically as it gets darker so I don't have to stop and set it myself. It shoots at ISO 100 in good light, and at 1/125 of a second (or at any speed you choose) it starts ramping up the ISO to a maximum of 12,800 (or any ISO you choose) as it gets darker. Only if it gets much darker will it let the shutter speed go below 1/125 at ISO 25,600, exactly as I'd do manually.
To set this, press:
MENU > CAMERA icon > ISO sensitivity settings > ISO sensitivity > 100 (This also can be set from the INFO screen) as well as in the SHOOTING MENU. This sets the minimum ISO used in good light.
and
MENU > CAMERA icon > ISO sensitivity settings > Auto ISO sensitivity control > ON.
Just below this, Maximum sensitivity and Minimum shutter speed to taste. I set ISO 25,600 as the maximum because the D3400 still looks great at ISO 25,600 if you need it. If you set a lower speed, the D3400 will start shooting at slower shutter speeds when it could have kept the speed up at a higher (and still clean) ISO.
I set the Minimum shutter speed depending on my lens and my subject.
For family, people, action and kids, I set it to 1/125. For sports you might want to set 1/250 or 1/500. This is the slowest shutter speed speed the D3400 will try to hold by increasing the ISO, and below which the D3400 will shoot at up to the highest ISO you've programmed.
For shots of still subjects, I set this to the slowest speed at which I can hand-hold sharply. For me, that's 1/8 with VR wide-angle lenses, and 1/30 for VR telephotos.
The D3400 is so advanced that there is an AUTO setting for the lowest shutter speed within the AUTO ISO mode!
In AUTO minimum speed, the D3400 sets the slowest shutter speed before the ISO starts increasing based on the lens' focal length setting. For instance, with a 35mm lens, the D3400 uses about 1/30, and with a 135mm lens, uses about 1/125.
More at the SHOOTING Menu.
Advance Modes & Self Timer top
You set these by holding the bearded rectangle button near the Trash button and then pressing the Multi Selector.
I use Continuous advance mode. This means that the D3400 takes one picture when I press the button, and if I keep the button held down, it keeps taking pictures at 5 frames per second.
This is also where you activate the self timer, Quiet mode or arm the wireless remote.
While you activate the Self Timer with the Advance Mode button, you select the self-timer delay at MENU > SETUP (wrench icon) > Self-timer.
The Self Timer resets after each shot. You can set it to shoot up to 9 frames each time all by itself, hoping you'll catch at least one shot with everyone's eyes open, but if you're doing repetitive landscape shots, you'll have to activate the Self Timer each time.
More details at the advance mode button.
VR & Autofocus top
There are no controls on the AFP lens. Instead you have to set these in the D3400's menu system.
See my separate Nikon D3400 Autofocus Settings page for all about how to set the AF system.
Info Display Format top
If you leave them at default ("graphic"), they look really screwy.
Auto Info Display top
If you leave Auto info display at its default of ON, the INFO screen keeps lighting up on the back of the D3400 just about all the time, even when you hold it to your eye!
Lens Settings top
See Nikon D3400 Autofocus Settings.
Lenses
The included 18-55mm VR AFP is all you need for just about anything.
If you need a telephoto to get closer for sports and stage, I use the 55-200mm VR II. The 55-300 VR gets even closer, but costs more and is bigger. The new 70-300mm VR AFP is the best, with nearly instant autofocus, but it's bigger and costs more. Avoid the non-VR 70-300; without stabilization it's nearly impossible to get sharp pictures.
Instead of the included 18-55mm lens, I often use my 35mm f/1.8 DX because it's tougher and better for use indoors without flash.
Ultrawide lenses are expensive. If I need to get wider than the included 18-55mm VR AFP, I use my Nikon 10-24mm DX. The Tokina 11-20mm is also very good.
Suggested Nikon DX lenses for the D3400.
More Nikon lens reviews and recommendations.
Flash
The built-in flash is excellent.
If you need something faster, the small but discontinued SB-400 is what I use. They're easy to get on eBay or at Amazon. You don't need bigger flashes unless you're trying to shoot sports at long distances and at high frame rates, which you probably aren't doing with a D3400.
If you must buy new, get the SB-500.
Movies top
To shoot movies, push the Live View button, and then tap the Red Dot Button to start and stop.
Change the image resolution and audio in Movie settings in the SHOOTING Menu
I shoot at the lowest 720p setting. It looks fine, and takes up less file and card space than the other settings. Use whichever you prefer.
Metering top
Meter selection is settable with the ( i ) button (bottom center adjustment on the LCD) or at MENU > SHOOTING > Metering.
This lets you select the long obsolete center-weighted or spot metering modes.
Center weighted dates from the 1960s, and spot from the 1980s.
Matrix, the default shown by four quarters lit inside the rectangle, works wonders. Use it. It's the only meter I ever use, which is why my exposures are always perfect. Use the older meters like SPOT or CENTER WEIGHT, and you'll almost never get good exposure.
Details top
These are the basics. You've got 99% of what you need; go shoot and have fun!
Keep reading for explicit details.
KNOBS, BUTTONS and CONTROLS < NEXT
MENUS
© Ken Rockwell. All rights reserved. Tous droits réservés. Alle Rechte vorbehalten.
Help Me Help You
I support my growing family through this website, as crazy as it might seem.
The biggest help is when you use any of these links when you get anything. It costs you nothing, and is this site's, and thus my family's, biggest source of support. These places always have the best prices and service, which is why I've used them since before this website existed. I recommend them all personally.
I got mine complete with lens at Adorama, also in red. You also can get it at B&H, also in red, at Amazon in all forms and at Crutchfield in all forms. It also comes as a kit with both the new 18-55mm VR AF-P and new 70-300mm DX AF-P lenses at Adorama and at B&H.
If you find this page as helpful as a book you might have had to buy or a workshop you may have had to take, feel free to help me continue helping everyone.
If you've gotten your gear through one of my links or helped otherwise, you're family. It's great people like you who allow me to keep adding to this site full-time. Thanks!
If you haven't helped yet, please do, and consider helping me with a gift of $5.00.
As this page is copyrighted and formally registered, it is unlawful to make copies, especially in the form of printouts for personal use. If you wish to make a printout for personal use, you are granted one-time permission only if you PayPal me $5.00 per printout or part thereof. There is no PDF or download; this is for if you want print from your browser window. Thank you!
Thanks for reading!
Mr. & Mrs. Ken Rockwell, Ryan and Katie.