Home Donate New Search Gallery How-To Books Links Workshops About Contact
Nikon
D40 User's Guide
© 2007 KenRockwell.com

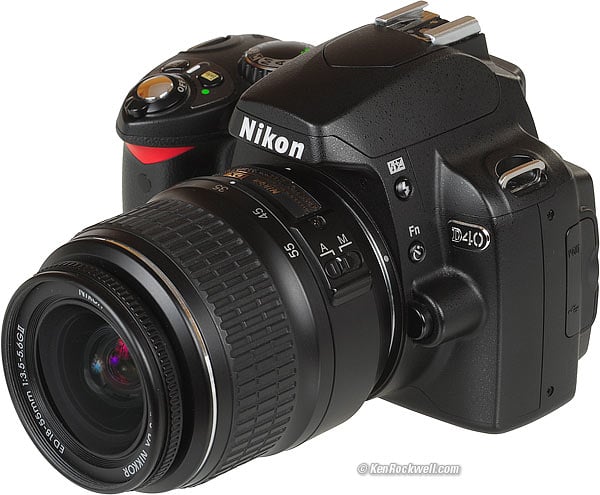
Nikon D40 with new 18-55mm lens. enlarge
I bought mine here. I'd have gotten it here or here, too.
NEW: Nikon D40 Guide iPod and iPhone App 08 July 2009
All Other Nikon Reviews Nikon Lens Reviews
Printable version of my D40 User's Guide ($5.00 donation per printed copy, thanks!)
PLUG
I support my growing family through this website.
If you find this as helpful as a book you might have had to buy or a workshop you may have had to take, please help me continue helping everyone.
If you've gotten your gear through one of my links or helped otherwise, you're family. It's great people like you who allow me to keep adding to this site full-time. Thanks!
If you haven't helped yet, please do, and consider helping me with a gift of $5.00. If you wish to use the PDF to print for yourself, please send me $5.00 per copy, a fraction of what you'd pay for other guides. (It's copyrighted and registered, thanks!)
It also helps me keep adding to this site when you get your goodies through these links to Adorama, Amazon, B&H, Ritz, and J&R. I use them and recommend them all personally.
Thanks for reading!
Ken
January 2007
I personally buy from Ritz, Adorama and Amazon. I can't vouch for any other ads.
|


Want free live phone support? In the USA, call (800) NIKON-UX, 24 hours a day, 365 days a year.
Looking for a specific control? Use my Search page. Be sure to mention the D40 in your search.
This lengthy article will teach you to be an expert on the Nikon D40's controls and menus. It also includes a lot of tips, tricks, and the settings I prefer to use.
To get great photos you still need to get yourself to the right place at the right time and point the camera in the right direction, which is a lot harder than mastering the D40. Right out of the box at default settings the D40 does a great job so long as you preset the exposure compensation to -0.7. Making a great photo involves locations, timing, patience and a whole lot more. I cover general photography issues here.
For more examples of why you'd want to change these settings and why, also see my Maui Photo Expedition page.
Here's Nikon USA's original manual if you've lost yours. It's not very helpful, which is why I wrote all this.
Below are the basics. Explicit details follow in later pages linked at the bottom.
Many tricks are in the pages below, like inserting your © and contact info automatically into every file, Secret RGB Histograms and Auto ISO.
BASICS:
CAMERA SETTINGS
I leave most settings at their defaults.
I shoot with the top mode dial in P, Program Exposure mode.
Many of these menu options are shown only after you select the FULL MENUS option in the Setup Menu and are often deactivated in anything except the P, S, A and M modes.
I reset everything every time I use my camera, much as a pilot uses a checklist before flight to prevent any switches from being in the wrong position. When I don't check first, I often have left my D40 in some screwy mode from shooting in the dark the night before.
Nikon has an easy reset feature. I use it every time! My standard operating setting is only a few clicks different from the defaults.
Quality
I use Large, JPG, BASIC.
I'm a data cheapskate. I prefer small files. For most people not shooting hundreds of throw-away images a day, feel free to leave it in NORMAL, the default. NORMAL makes files twice as large with a tiny bit less blockiness if you're looking closely at the files printed 3 feet (1m) wide. I prefer smaller files in exchange for almost invisible levels of blockiness.
See my D200 Quality Settings page for more explicit detail and examples of these settings on a D200. My D40 does about the same thing, but lacks the Optimize Quality JPG Compression mode I prefer on my D200, and its image sizes are one size smaller.
Exposure Compensation
I set my exposure compensation to -0.7 because my D40's metering firmware is defective, just like the D80's meter. It usually overexposes.
Set -0.7 by holding the +/- button near the shutter and turning the rear dial two clicks to the right.
Sadly we'll often have to adjust this depending on the subject. It's no big deal: just look at the image on the LCD and click it towards the left (+) to lighten the image, and to the right (-) to darken it for the next shot. This is why I prefer my D200, which has a superior meter because it rarely needs any fiddling.
Shutter Advance Mode
I use Continuous (the bearded rectangle). I get one shot with one press of the shutter, and if I hold the shutter button my D40 shoots 2.5 frames per second. I do this in dim light so I can pick the sharpest image. For most shots of moving things I fire several rounds and pick the one with the best expressions and gestures. Of course I use a professional sorting tool on a 30" screen to make selecting files trivial.
ISO
I use ISO 200 and Auto ISO.
Auto ISO increases the ISO automatically as it gets dark so I don't have to. It shoots at ISO 200 in good light, and at 1/15 of a second (or any speed you choose) it starts ramping up the ISO to a maximum of 1,600 (or any ISO you choose) as it gets darker. Only if it gets still darker will it let the shutter speed go below 1/15 at ISO 1,600, exactly as I'd do manually.
I explain how to set Auto ISO and select the shutter speed at which the ISO starts to increase and the maximum ISO to which it will increase in the Custom Setting 10.
I set Auto ISO to 1,600 max because the noise from the D40 at ISO 1,600 looks much better than blur. I set 1/15 because my Nikon 18-200mm and the kit 18-55mm lens gives great results down to 1/15. I adjust the lowest shutter speed setting in the AUTO ISO menu if I change conditions or lenses. Unlike film, my D40 looks great at high ISOs, so I use them anytime I need them.
More details on setting ISO at the ISO Menu.
WHITE BALANCE
I use AUTO and a clear UV filter to protect my lens. The D40 has a much warmer color balance than earlier cameras like the D70 so I don't need the 81A filter or the -3 trim. See examples of different settings here and details on my White Balance page. White balance is how you set the color balance, and color is critical. It's also personal preference. Use whatever looks right to you. My D40's LCD is very accurate. If it looks different in print or on your computer, your printer or computer are out of calibration.
Luckily AUTO works great most of the time. I look at my LCD, and if it's not right, I'll set it to whatever looks good. Usually that's the Direct Sun or Cloudy positions. These settings give much warmer results than earlier cameras. I rarely use the warmer Shade setting on my D40 while I used Shade often on my D1H and D70.
OPTIMIZE IMAGE
This is set in the Shooting Menu. I crave vivid color! I tweak my D40 to give color as vivid as I can get. If it went to 11 I'd use that, too.
I go to MENU > Shooting Menu (green camera icon) > Optimize Image > Custom.
Here's how I set each item under Custom:
Image Sharpening: Auto (default).
Tone Compensation (contrast): Auto (default). The D40 automatically adjusts its contrast and dynamic range to each and every shot. It works great.
Color Mode: IIIa (three-a, default). This gives brighter colors than the other modes. Color mode II is pronounced "two" and not to be confused with 11 (eleven). You don't want Mode II even if you could use it. Details are here.
Saturation: +, of course. This gives brighter colors than the default.
Hue: 0 (Default). Don't touch this! it will subtly mess around with your colors. Leave it at 0.
After setting this it's critical to save it by selecting " Done" and clicking to the right actively to select OK. If you forget to hit OK it won't remember all these settings!
Read more at Shooting Menu.
I use the default of AF-A. This mode automatically selects between the two older modes, AF-C and AF-S. These are explained under Focus Modes.
METERING
I use Matrix, the default. You set metering in Custom Setting 05 or with the <i> Button.
Seeing how poor the matrix meter has become in the D40 (it requires constantly varying levels of compensation) I intend to try center weighted metering. With my intimate knowledge of the Zone System, it might let me nail the correct exposures more quickly. That would be a big step backwards; center weighting went obsolete in the mid 1980s then the Matrix meter was invented.
See my Exposure page for details on getting perfect exposures.
LENS SETTINGS
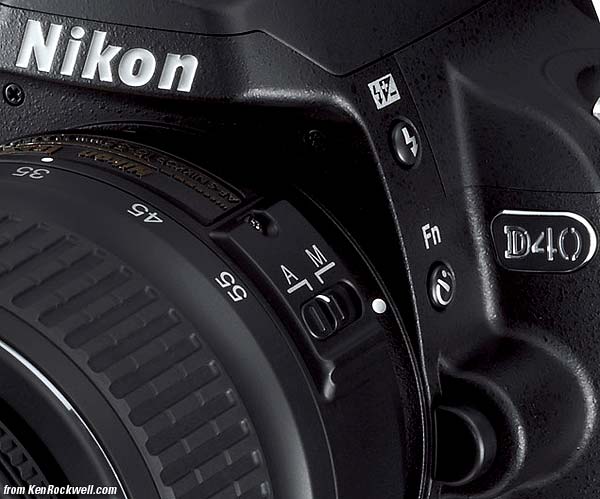
Nikon D40 with new 18-55mm lens.
Many lenses have no switches or settings. If so, don't worry.
If a lens has an "A - M" switch, like the included 18-55mm above, leave it at "A." To get manual focus with the included lens, move it to "M."
If the switch says "M/A - M " then use M/A. These lenses may be focused manually at any time in either position. As soon as you tap the shutter button in M/A you return to autofocus.
More advanced lenses, like the 18-200mm, 70-300mm VR and 18-135mm, and any lens with an M/A position, may be focused manually at any time without moving any switches. Leave them in their A or A/M positions.
Non-AF-S and non-AF-I lenses, like the new 10.5mm fisheye, won't autofocus at all.
The old 300mm f/4 AF has to be put in the M position to focus, and it only focuses manually.
Read your lens' manual, or in the USA ask Nikon 24/7/365 at (800) NIKON-UX.
Non-G lenses will have an aperture ring on the base of the lens where it's attached to the camera. Set this this ring to the smallest aperture (largest number), usually 22, if not 32 or 16. This number will be orange on autofocus lenses. There usually is a lock to keep this ring set there, since if it comes off that setting you'll get an error message from most cameras.
EXPLICIT DETAILS back to top
These were the basics. Keep reading for explicit details.
KNOBS, BUTTONS and CONTROLS < NEXT
MENUS
Home Donate New Search Gallery How-To Books Links Workshops About Contact