Home Donate New Search Gallery Reviews How-To Books Links Workshops About Contact
Yosemite and the Eastern Sierra
16 17 18 19 20 21 22 October 2014
These are snaps I made while helping lead the Yosemite Conservancy's Autumn Light 2014 photo tour and Dave Wyman's tour of Bodie, Mono Lake and the Eastern Sierra.
I'd just gotten back from New York, so I decided to carry as little as possible and just bring the right gear. I didn't bring my usual collect of weird film cameras; I just brought exactly what I needed as today's state-of-the-landscape art.
For nature and landscapes, the world's best right now is the Nikon D810 (more pixels) and Nikon D750 (more than enough pixels with less weight).
You only need two lenses: a 16-35mm zoom and a 28-300mm zoom. Fiddling with a bag full of lenses is for goofballs. Even better, bring a body for each and you won't even have to swap those two zooms.
I brought my Nikon 16-35mm VR on my D810, and I brought my Nikon 28-300mm VR on my D750 (I did swap them around sometimes just for fun). While some people miss photos while fumbling with all sorts of lenses, these two lenses cover everything I need. By bringing two bodies, I never had to change lenses: I simply grabbed one body or the other from around my neck.
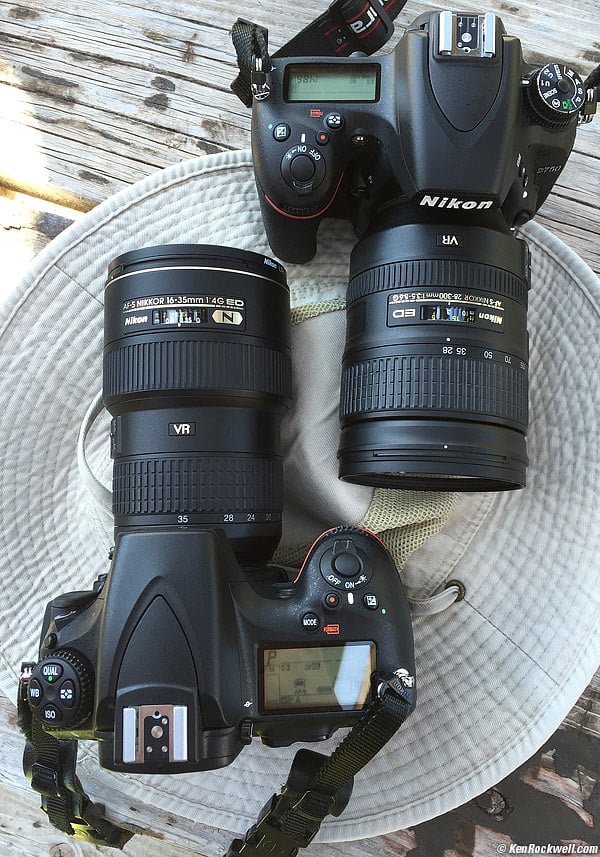
All anyone needs for landscapes: the Nikon D810 with Nikon 16-35mm VR and Nikon D750 with Nikon 28-300mm VR.
With these two cameras and lenses around my neck, I am prepared for everything, instantly.
I love my Canons, but Canon makes no lightweight 28-300mm lens. Nikon's brillaint 28-300mm VR makes the whole Nikon system rule when you're carrying your own gear in the field; this one lens does almost everything all by itself.
I also brought my Canon 5D Mark III, 16-35/4 L IS, 24-70/2.8 L II, 70-200/4 IS L and Canon EF 300mm f/2.8 L because I had just bought my 300/2.8 and wanted to play with it. I set my 5D Mk III to STANDARD Picture Style with +4 Saturation, I set its Auto white balance to A3 (amber) trim for warmer results, and shot in LARGE JPG NORMAL.
I jammed this all into my Think Tank Airport Commuter, which made it easy to haul three bodies and all the lenses, as well as my Nikon 50/1.4G, all just because they all fit in the new bag.
Don't ever carry a backpack on your back while shooting. A backpack is how you get too much gear from one place to the next, and then leave that backpack with your assistant or locked in your trunk while you walk around with just a body and lens or two.
I didn't need no stinking tripod either. I did bring one for a 30-second Milky Way shot one night, as well as it was handy to hold my Canon EF 300mm f/2.8 L while I was using the other cameras. I shoot my 300/2.8 hand-held, too. Tripods, bah! You only need them for shooting film or star trails or if you don't have VR or IS lenses, not for DSLRs with VR or IS lenses.
I set my D750 and D810 as I share in my setup files in the USAGE sections of each body's review. Each was set to VIVID Picture Control with +3 Saturation, and shot as BASIC JPGs.
I didn't bring a computer on my trip; I left it all at home so I could concentrate on photography. I did bring my iPhone 6 Plus which not only has a great camera as you'll see, it's so big that I also left my iPad at home. The new iPhone is so big and capable it replaced any need for a computer or iPad — and it's always in my pocket.
Yes, the only gear I needed for a week away was two bodies, two lenses and my iPhone. All the Canon fluff and the backpack was just for playing. The battery life on my DSLRs is so great that I probably could have shot all week without recharging; when you shoot with two bodies, you only make half as many shots on each.
Each camera was loaded with two cards: a large-capacity card in its second slot for safety backup, and a 4GB or 8 GB card in the first slot. Since I know how to shoot and prefer to shoot direct-to-JPG, I didn't fill up any cards, although I certainly had spares with me.
When I returned from the field, I imported all my shots from my two cards (one from each camera) as well as from my iPhone into my Mac Pro.
I cataloged what I shot in Phase One Media Pro so I could see what I had and pick out the best.
I dragged the good shots from Media Pro into Photoshop CS6 to add subtle but significant artistic input, and to format them for publication. I cropped carefully and often added deliberate vignetting to keep your eyes from wandering. Most shots were processed with the Athentech Perfectly Clear version 2 Photoshop plug-in which usually makes them look even better.
All my black-and-white works are split-toned prints.
16 October 2014, Thursday top
Today we traveled to Yosemite and met the group in the afternoon in front of the Lodge.
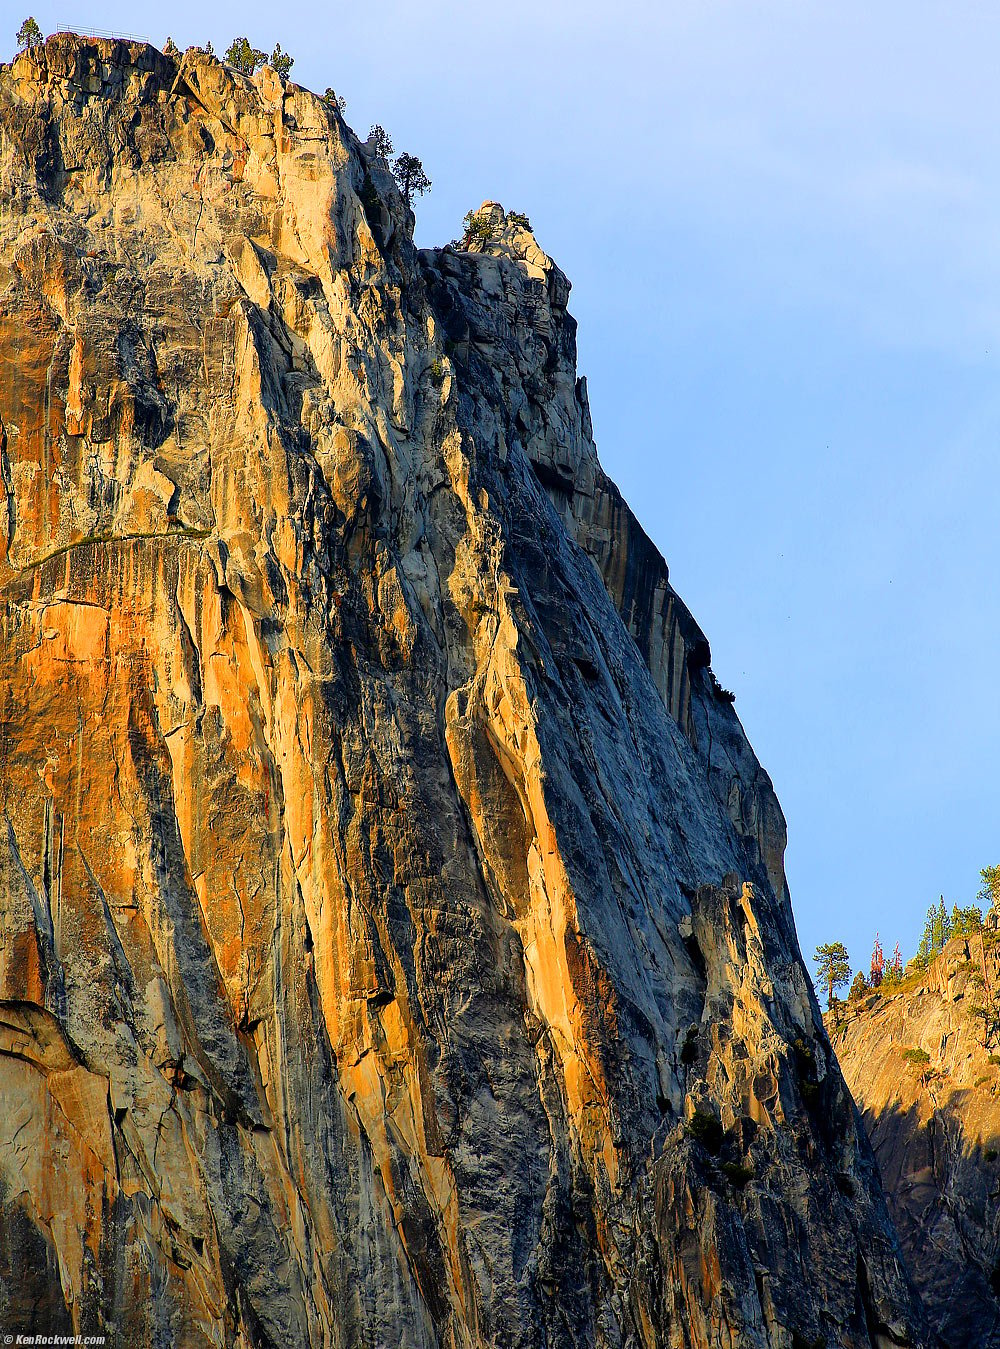
Last Light on Sheer Cliff, Yosemite, 5:16 PM. (Canon 5D Mark III, Canon EF 300mm f/2.8 L, f/5.6 at 1/250 hand-held at ISO 100, Athentech Perfectly Clear v2.)
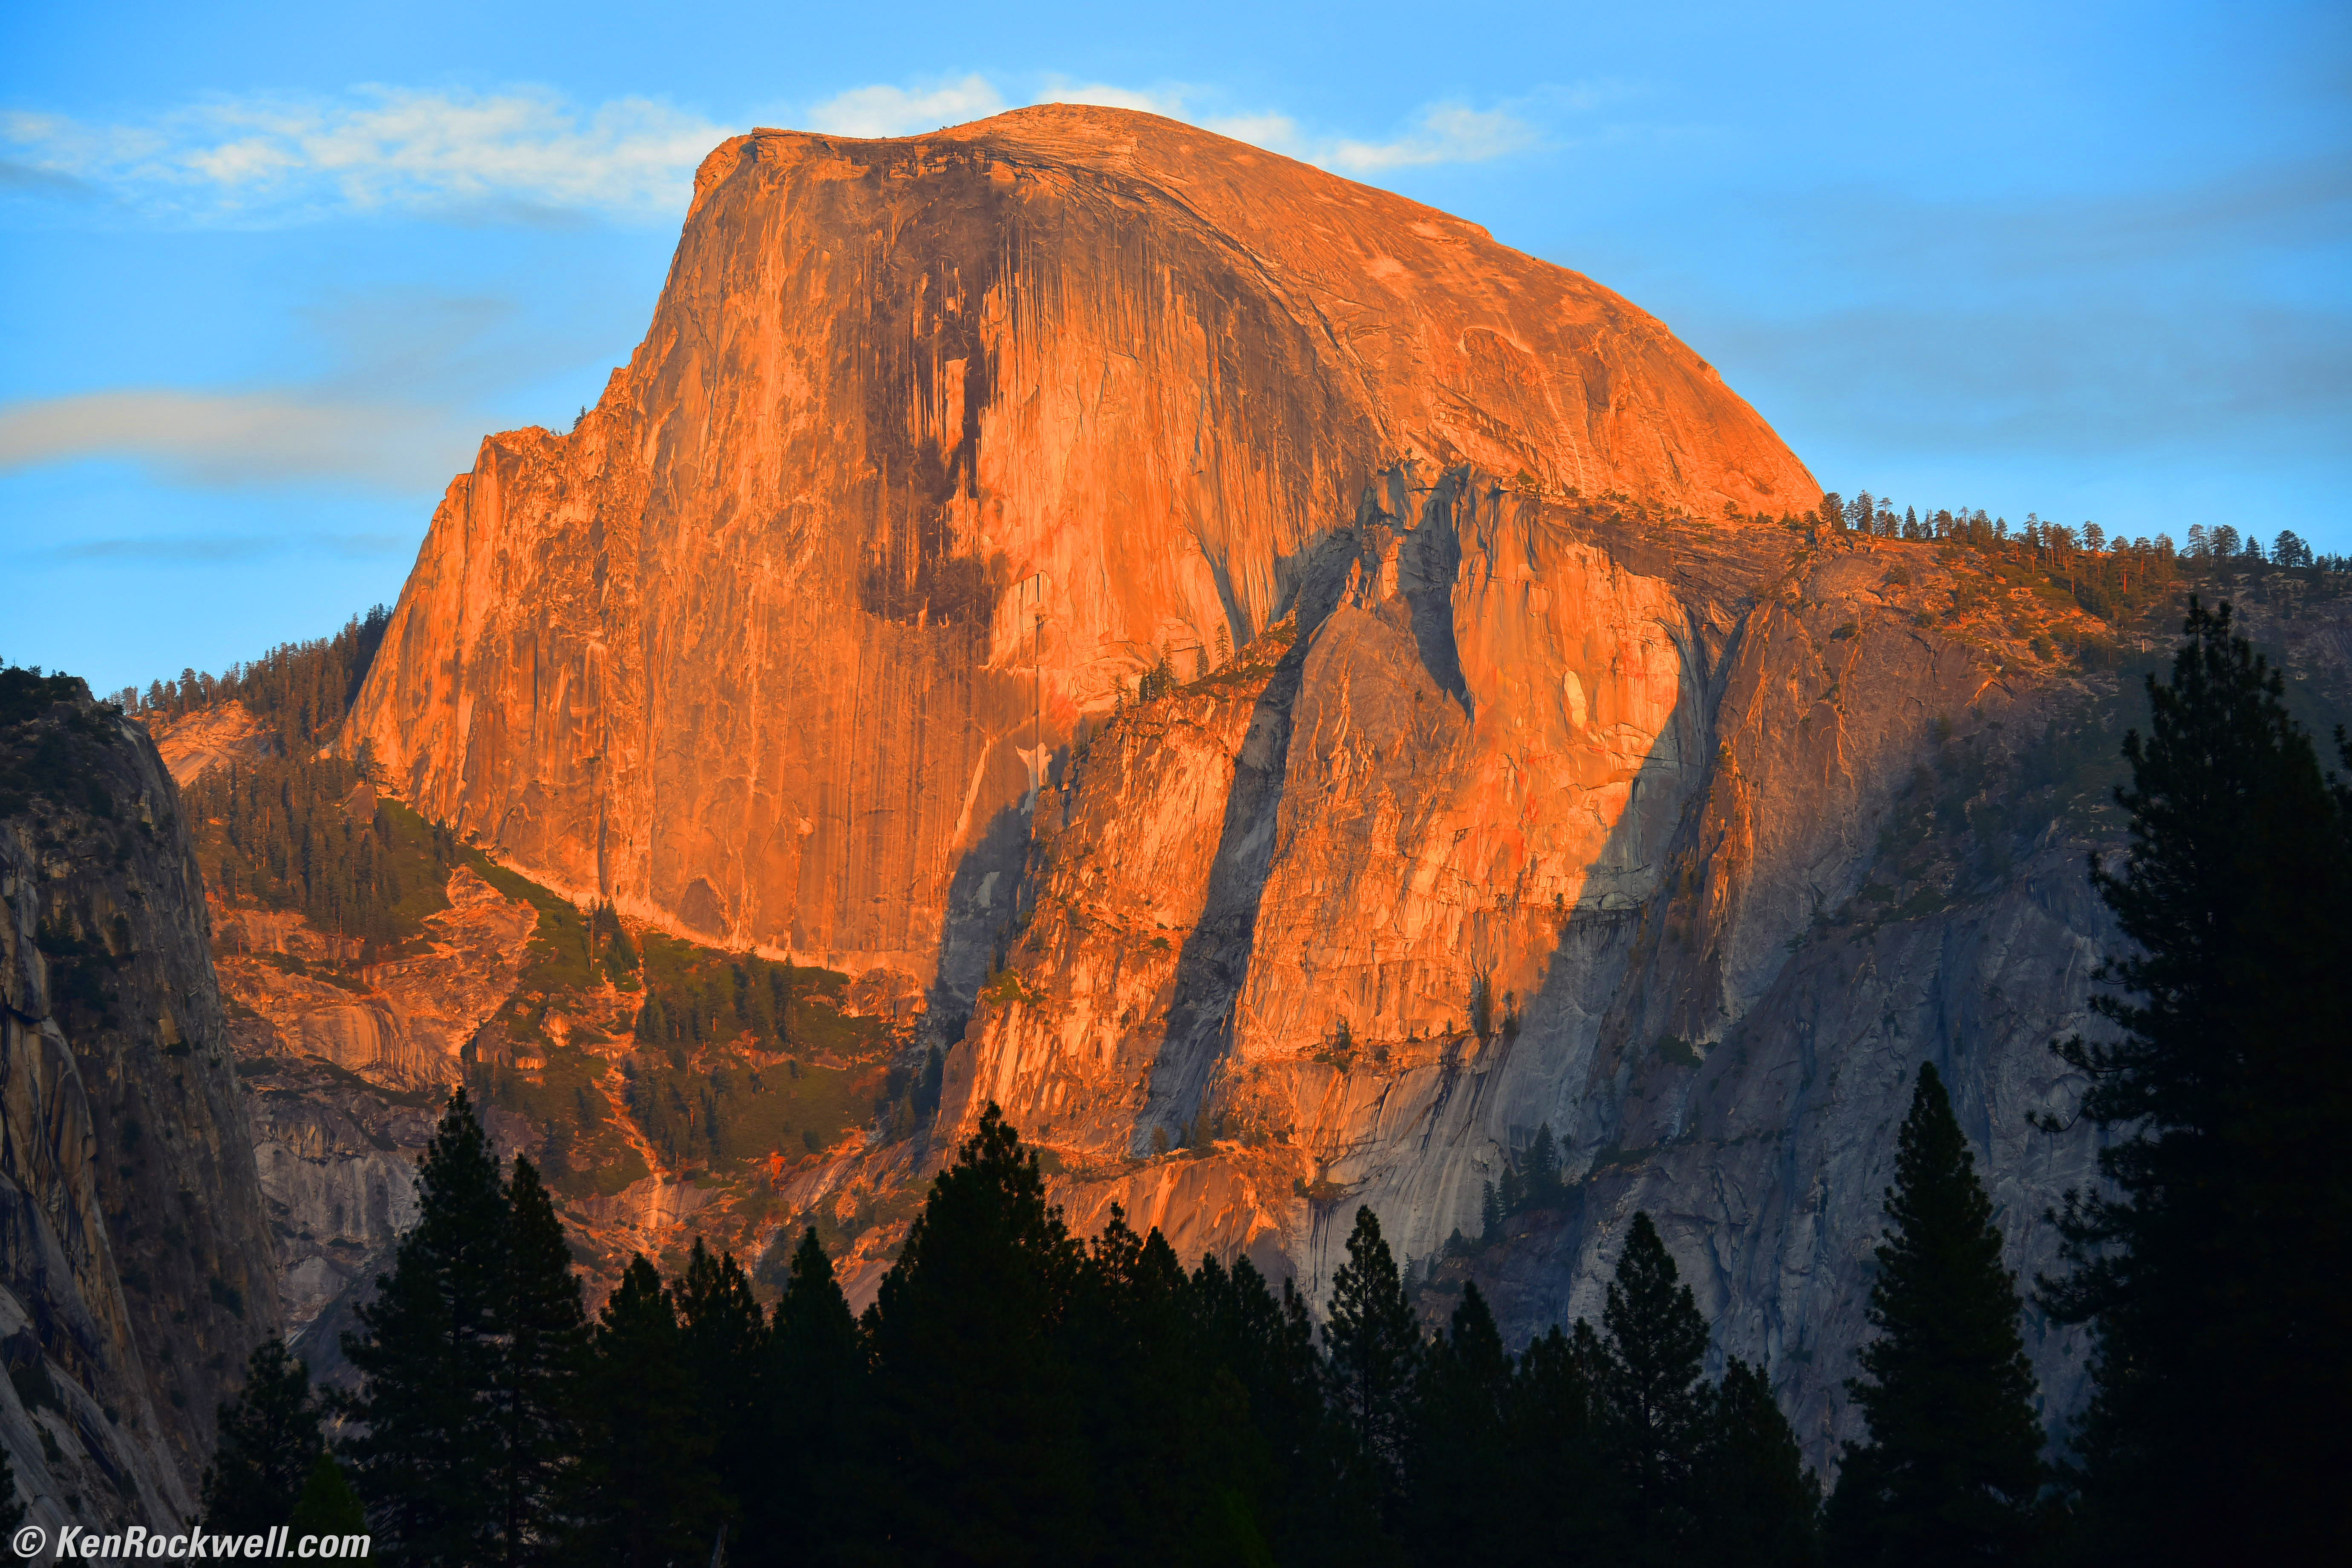
Last Light on Half Dome as Seen from Stoneman Meadow, Yosemite Valley, 6:10 PM. (Nikon D810, Nikon 28-300mm VR at 112mm, f/5.3 at 1/125 hand-held at Auto ISO 360, Athentech Perfectly Clear v2.) Full Resolution.
That's all for today. NEXT ->> 17 October 2014, Friday
Home Donate New Search Gallery Reviews How-To Books Links Workshops About Contact